ThatPainter is reader-supported. When you buy through links on our site, we may earn an affiliate commission. Learn More
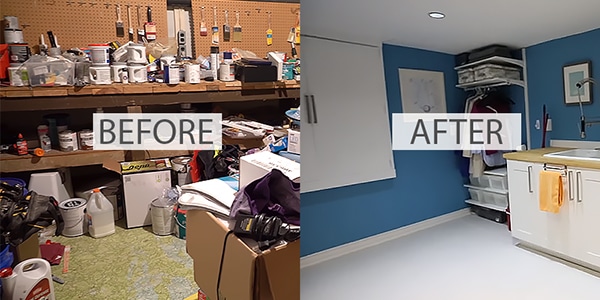
A few years ago, I bought my first home and promised myself I’d keep it in immaculate condition. For a while, I kept that promise. However, like many homeowners before me, I soon allowed my basement to be overrun with household discards, cobwebs, and mildew. Feel free to check out our review of the best paints for concrete basement and best mold and mildew resistant paints.
As an Amazon Associate I earn from qualifying purchases.
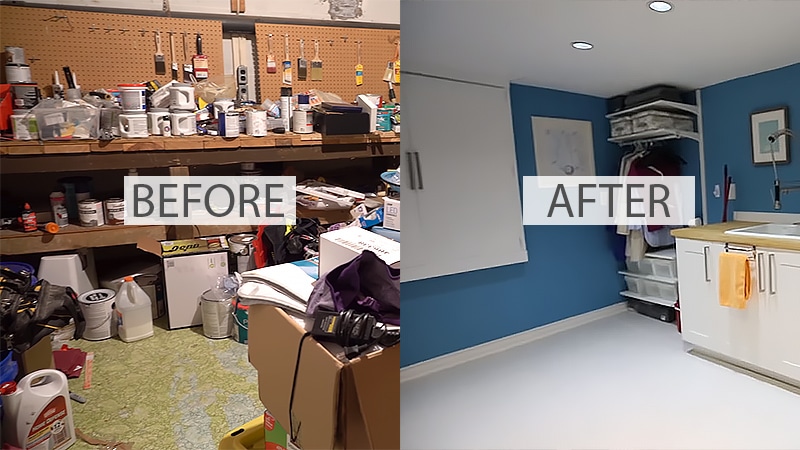
You see, my basement space was crude and unfinished. I could hardly appreciate my basement in its gray, perpetually moist state, even if it was the foundation of my dream house. At least, that was true until my family began to grow. The square footage that once seemed so ample was now shrinking before my eyes.
Quick wins for a faster PC:
Scan for outdated or missing drivers - takes under a minuteDriver Scan →Repair Windows errors before they cause bigger problemsFix Now →Fix the driver behind crashes, sound loss and screen glitchesFind Drivers →With no place to go but down, I began to look at the gaping subterranean storage space with open eyes.
#1 Best Overall
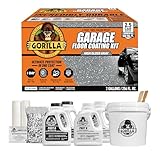 Gorilla Epoxy Garage Floor Coating Kit, 12 Pieces, 550 sq. ft. Coverage
- Ultimate Protection in One Coat: 2-part 100% solids epoxy delivers, incredibly durable, exceptional resistance to chemicals, abrasions, salt, oil, gas, and hot tire peel-up that is ideal for garages, basements, workshops, & more.
- High Gloss Finish: Achieve a showroom-quality finish that is crack resistant, peel proof, low VOC, while enhancing the appearance and performance.
- Covers up to 550 sq. ft.: Includes two gallons of premium material – enough for a thick, long-lasting coat on a standard 2.5-car garage floor.
- Drive on After 1 Day: Quick curing epoxy resin and hardener allows you to use your space 24 hours after application.
- 12 Pc DIY Kit: Epoxy resin, epoxy hardener, decorative gray blend flakes, concrete etch for proper surface prep, mixing buckets, stir sticks, roller covers, decorative and easy-to-follow pictured with printed instructions as well as how-to video guides for a seamless application.
In an attempted to frantically reclaim my basement, I employed some Marie Kono-esque ninja moves. Still, the grey slate of a floor was an unsightly beacon I just couldn’t overlook. That’s when it dawned on me. All that my basement floor needed was a fresh coat of paint.
[best_choice amz_url=”https://www.amazon.com/s?k=Rust-Oleum%20203008%20Basement%20Floor%20Kit&tag=thatpainter05-20″ img_url=”https://thatpainter.com/wp-content/uploads/2019/11/Rust-Oleum-203008-Basement-Floor-Kit-Review.jpg” best_name=”Rust-Oleum 203008 Basement Floor Kit” sub_name=”The Best Kit for Your Basement Floor” best_text=”The product covers reliably even the most damages surfaces. it can be used both for cement floors or for floors that have been painted previously.”]
After careful and considerable research, I painted my basement floor. Now, the once-coarse and unsightly gravel slab is smoother, lighter, and easier on the feet. Of course, my project was not without a few hiccups. The space I dreamed would become my man cave is now a free-for-all playspace for my rugrats.
Still, I couldn’t be happier with the results. Which is why I’ve brought you a step-by-step tutorial of how to paint a basement floor.
What You’ll Need to Follow this Tutorial:
- Contractor’s Broom
- Shop Vacuuum
- Degreaser
- Bucket and Mop
- Concrete Patch Kit
- Painter’s Tape
- Paint Brush
- Foam Roller
- Epoxy Paint Primer
- Epoxy Concrete Paint
How to Paint Your Basement Floor
Painting your basement floor is easy and affordable. The only potentially back-breaking labor involved is emptying the space of your belongings. Besides that, you will need an epoxy paint that is designed to adhere to cement surfaces. Cement floor epoxies are formulated to handle fluctuating temperatures and moist conditions.
What’s actually slowing this PC down?
Pick the symptom - the matching free tool is one click away.
1. Prepare the Basement
Check the Temperature
Most concrete epoxy manufacturers recommend painting in a room that is at least 50 degrees Fahrenheit. If you live in a cold climate, wait till spring or summer to paint! Epoxy over paint does not adhere or set well in cold temperatures.
What if I can’t wait?
Remove Items
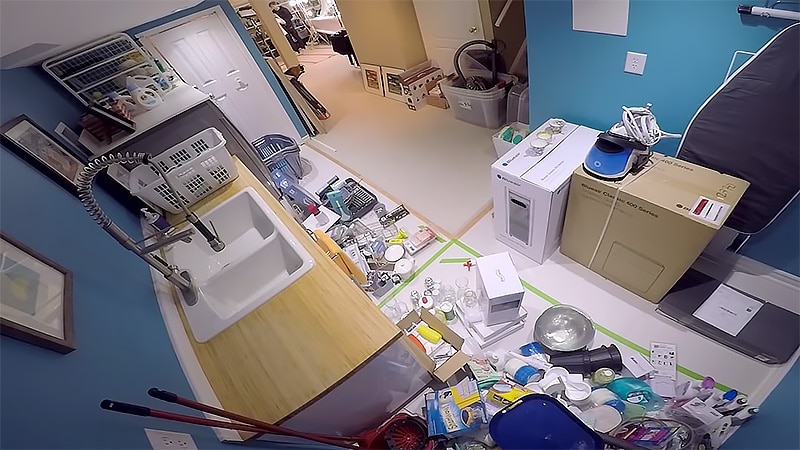
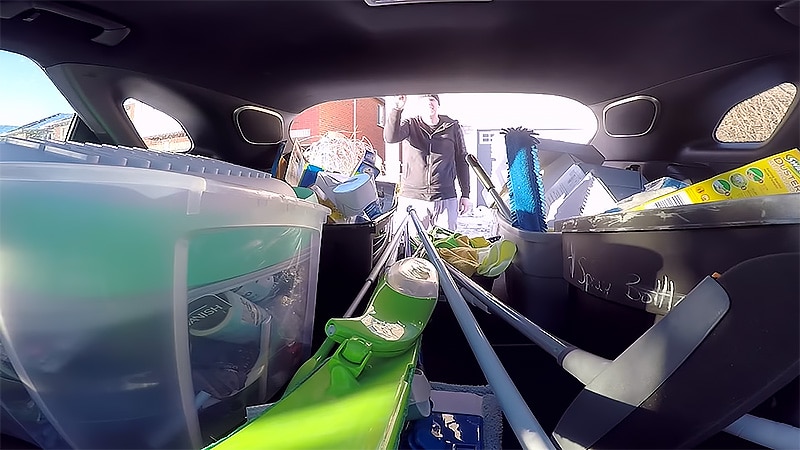
For me, this was the hardest part. You need to haul each and every piece of junk out of your basement before you can begin painting. This is a great time to host a tag sale or drop off some tax-deductible donations at your local thrift store. For me, this step required a commercial dumpster rental and several coffees.
There’s nothing particularly fun about decluttering a basement.
Rank #2
 Rust-Oleum RockSolid Garage Floor Coating Kit, Gray, 2.5 Car Kit
- HIGH GLOSS GRAY FINISH: Self-leveling polycuramine coating creates a durable, showroom-quality garage floor finish
- RESISTS CHEMICALS AND HOT TIRES: Excellent resistance to salt, oil, gasoline and other harsh chemicals
- COMPLETE KIT INCLUDED: Burst pouch coating, foam roller, decorative chips and concrete etch are included
- READY FOR VEHICLES IN 36 HOURS: Foot traffic ready in 8-10 hours; full vehicle traffic ready in 24-36 hours
- LOW ODOR, INDOOR APPLICATION: Formulated without VOC-containing solvent and offers a 7-day recoat window without sanding
However, it’s a good time to develop a new and improved organization technique. In my basement, a dozen or so Rubbermade totes were my saving grace.
Clean
Once you’ve successfully emptied your basement of belongings, pat yourself on the back and take a deep breath. You’re almost in the home stretch! Now, it’s time to deep clean that cruddy slab once and for all!
First off, use a contractor’s broom or powerful shop vacuum to eradicate any dust and debris from your floor. Let’s be honest; most basements (mine included) rarely see the head of a mop. You may need to spend a significant amount of time removing all of the dirt on your floor. Don’t skip this step! Loose sediment that is trapped underneath any epoxy floor is a ticking time bomb. If you allow significant foot traffic or changing temperatures, it will unravel all your hard work.
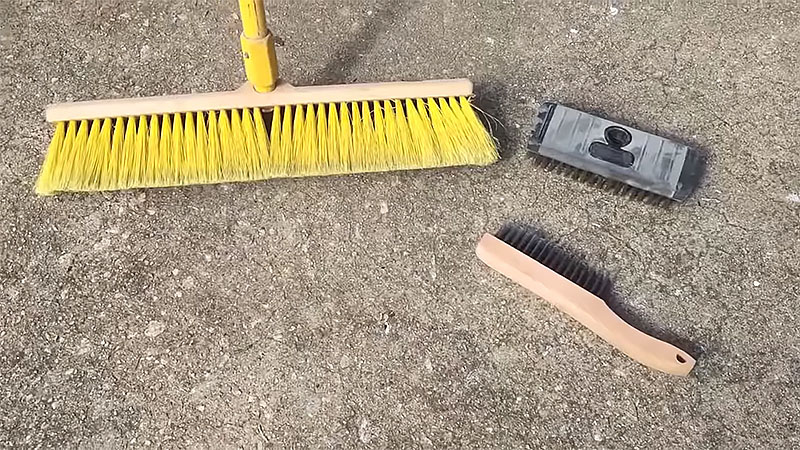
Fill your mop bucket with warm sudsy water. If your basement is anything like mine and has never once seen the head of a mop, you may need to do this more than a few times. Be patient. Your painted basement floor is worth the sweat and blood!
Use a powerful degreaser to eliminate any stubborn stains that can’t be budged with regular soap and water.
The Tool Desk
Outbyte Driver Updater FREEScan for outdated or missing drivers - takes under a minuteDriver Scan →Outbyte PC Repair FREERepair Windows errors before they cause bigger problemsFix Now →Special offer. See more information about Outbyte and uninstall instructions. Please review EULA and Privacy policy.
Now, allow the basement floor to dry for at least 24 hours. Remember, cement slabs are extremely porous. They may appear to be dry when water is actually lodged deep within their grooves. Consider using fans and/or dehumidifiers to speed up the process. A dry surface is imperative for the epoxy to properly adhere.
Rank #3
- 2-PART EPOXY COATING: Water-based epoxy kit finishes concrete garage floors in good, sound condition with a gloss, color-flecked finish
- READY FOR VEHICLES IN 3 DAYS: Light foot traffic ready in 12-16 hours, normal use in 24-48 hours, full vehicle traffic in 3 days
- COMPLETE KIT INCLUDED: Burst pouch coating, decorative chips and concrete etch are included for a full application
- EASY ROLLER APPLICATION: Apply with a synthetic nap roller in 4x4 foot sections and scatter chips onto the wet coating as you go
- OPTIONAL CLEAR TOPCOAT AVAILABLE: Pair with EpoxyShield Clear Finish Coating Kit for additional protection and shine
Check Your Concrete for Moisture
At this point, it’s a good idea to perform a moisture test. When I painted my basement, I used Wagner Electronics’ Plastic Sheet Method. All that you need to perform this test is a square of plastic sheeting and a few pieces of duct tape. Secure the plastic sheet to your basement floor using the tape and wait approximately 16 to 24 hours. Then, lift up the sheet. A dark spot is an indicator that moisture is present on your floor.
If this is the case, run a dehumidifier on the highest setting to successfully eradicate any latent moisture. Epoxy needs a dry surface to adhere properly.
Make Repairs
Did you spot any cracks or holes in the concrete when you were cleaning? If so, you’ll need to a concrete repair kit or cement patching compound at your local hardware store. Follow the manufacturer’s instructions to create a smooth, uniform surface. MrFixItDIY provides an easy to follow guide on fixing a crack in concrete.
You’ll also want to sand down and bumps on your cement floor. Basically, you want your basement floor to be as smooth as the Vienna Ice Dream after a fresh Zamboni run. In the least, you’ll want to eliminate any obvious inconsistencies before applying a fresh coat of paint.
Put Down Painter’s Tape
Howtopaintinfo provides a step-by-step guide on how to apply painters tape quickly and efficiently. While many DIY painters choose to skip this step, I cannot stress the importance of clean, uniform borders. Painter’s tape, such as ScottBlue, helpS you to prevent paint from getting where you don’t want it. It creates an undeniably more professional finished look.
A Fun Tip!
Painter’s tape can be used to create elaborate designs. While my wife didn’t approve of my life-sized Green Monster scoreboard floor, there are loads of spouse-approved design ideas for you to consider. Most painter’s tapes can be applied directly to freshly painted floors, making it easy for you to make your home interior creations a reality.
Rank #4

- 【Premium Construction】All metal parts in this self-leveling cement tool kit are crafted from high-quality stainless steel for excellent corrosion and rust resistance. Built for durability, they withstand moisture and cement exposure, ensuring long-lasting performance for leveling, smoothing, and finishing tasks in professional or DIY flooring projects.
- 【Heavy-Duty Scraper】TThe stainless steel scraper features a rotatable ergonomic handle for easy angle adjustment and precise leveling. Compatible with the adjustable extension poles, it offers better control and effortless reach for spreading self-leveling cement, epoxy coatings, or even moving water and slush. This versatile scraper helps achieve smooth, even results and is an essential tool for any flooring project.
- 【Adjustable Extension Poles】The epoxy floor kit includes four upgraded extendable poles that is adjustable with a length range of 32 to 63 inches for customizable reach. Compatible with the included scraper and rollers, the poles reduce strain from bending and kneeling, providing better control and comfort for self-leveling cement and epoxy floor applications.
- 【Double Spiked Rollers & Painter Rollers】This floor leveling tool kit includes spiked rollers (18.5" and 9") and painter rollers (9" and 4.3") for various flooring tasks. The spiked rollers, made of eco-friendly PE, are stable, easy to clean, and effectively remove air bubbles for a smooth finish on self-leveling cement and epoxy. The washable, reusable painter rollers ensure even coverage and efficient application.
- 【Upgraded Epoxy Spike Shoes】These upgraded epoxy spike shoes for epoxy flooring feature adjustable straps for a secure, customizable fit over most shoe.The reinforced base and integrated spikes ensure stability and safety when working on self-leveling cement, epoxy floors, or overlay projects. Designed to leave no trace, they prevent footprints from damaging your finish.
2. Apply an Epoxy Primer
It’s important to apply an epoxy-based primer before applying paint. The porous, gritty surface isn’t the most adhesive facade. Start at the wall farthest from the exit. You want to avoid having to step into a puddle of wet primer on your way out.
Free tools Windows power users keep installed
One-click scans. No signup required.
Pour a small amount of primer into a paint tray Use a paintbrush to work around tight corners and the base of the floor. A foam roller cannot be worked into small spaces. After this, use a long-handled paint roller to fill in the rest of the room. Once an even and uniform coat of primer has been applied, allow it to try for at least 24 hours.
3. Apply Epoxy
Now that you’ve finished the prep work, you can start to apply the paint. Pour some well-mixed epoxy into a paint tray.
Using a paintbrush, paint along the entire border of the basement floor.
The border should extend at least 12 inches. The thicker your initial border is the less likely you are to rub the edge of your paint roller along your basement walls.
Recommended Free Tools
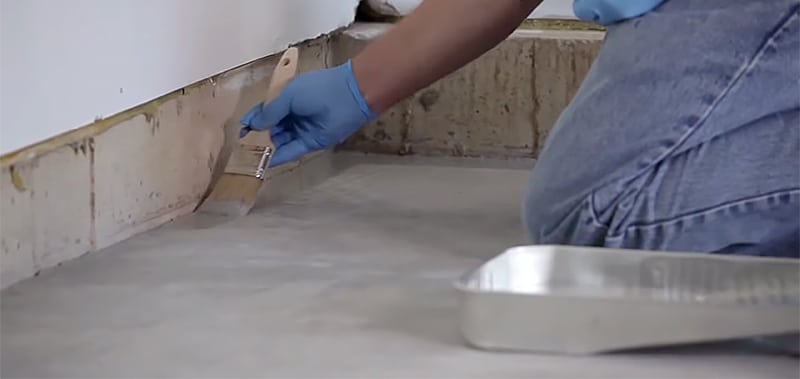
After you have applied the initial border, you can begin filling in the remaining portion of the floor. Just as you did with the epoxy-based primer, start at the wall farthest from your exit. There is absolutely no excuse for stepping in wet paint. This is messy, disruptive, and completely avoidable.
Best Value

- 2-PART EPOXY COATING: Water-based epoxy kit finishes concrete garage floors in good, sound condition with a gloss, color-flecked finish
- READY FOR VEHICLES IN 3 DAYS: Light foot traffic ready in 12-16 hours, normal use in 24-48 hours, full vehicle traffic in 3 days
- COMPLETE KIT INCLUDED: Burst pouch coating, decorative chips and concrete etch are included for a full application
- EASY ROLLER APPLICATION: Apply with a synthetic nap roller in 4x4 foot sections and scatter chips onto the wet coating as you go
- OPTIONAL CLEAR TOPCOAT AVAILABLE: Pair with EpoxyShield Clear Finish Coating Kit for additional protection and shine
At this stage, I found it easiest to pour epoxy into a paint tray, dribble into on the floor, and use a long-handled paint roller to spread it around. It’s important to work fast and clean up any blemishes along the way. Use long strokes to improve the overall aesthetic of your paint job. Epoxy provides a lovely finish to products; for that kind of finish, you must know how to use resin on wood. If you have wooden crafts, it will allow you to keep them for many years.
4. Let it Dry and Reapply
Once you have successfully applied your first coat of epoxy, you need to let it dry for at least 24 hours. Keep in mind that type of epoxy and the weather conditions around you may affect the overall drying time. Cured epoxy is hard and resilient. It should never feel tacky when prodded.
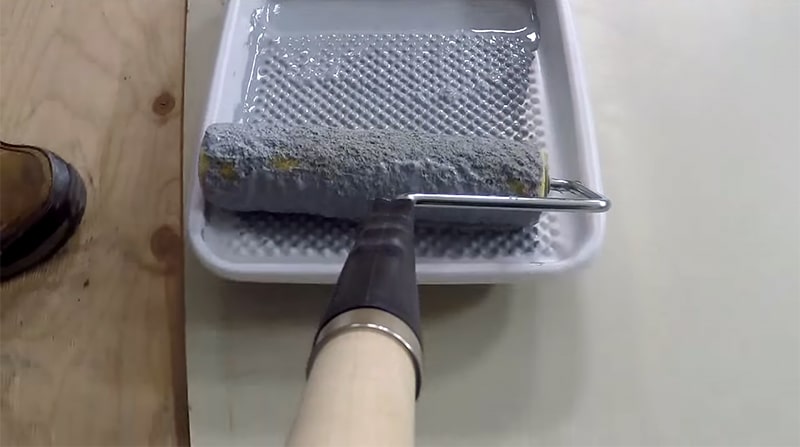
After your initial coat has dried completely, you can apply a second coat. Follow Step 3 exactly as you did before. Again, allow the surface to dry completely before applying a second coat. Remember, you must mix your epoxy thoroughly each time you use it.
The Benefits of Painting A Basement Floor
- Durability Epoxy paint can withstand the neverending humidity and temperature fluctuations in a basement. What’s more, it won’t peel or crack under pressure. It’s even easy to clean and resists most stains. With that said, the durability of your painted floor is strongly dependent on its ability to adhere to the surface of the concrete. For this to happen, your floor needs to be 100% clean and dry.
- Affordable The cost of installing a new basement floor is through the roof. You can easily save money and still get great results by applying an epoxy coating. There’s no need to hire a professional contractor. If you’ve held a paintbrush before, you’ve got this.
- It’s Quick Many home improvements are laborious and time-consuming. Painting a basement floor takes a few hours. If you time it right, you can allow your paint to set overnight and begin your next coat in the morning!
- Protection During the initial cleaning step, my wife and I uncovered a significant amount of mildew. We were discouraged to know that water was permeating the foundation of our home. However, since applying paint, we’ve yet to notice any mold or mildew. This is because epoxy creates a water-resistant barrier. If you ask me, just knowing my belongings are safe is enough to warrant my initial investment.
- Safety We were careful to select an epoxy paint with zero VOCs (volatile organic compounds). As such, we are comfortable with our children and pets playing and evening going barefoot on our epoxy flooring. The epoxy we chose is also slip-resistant. Therefore, it has dramatically improved the safety of our laundry room and workshop. On top of that, epoxy is smoother and more forgiving than cement. This means less scraped knees and cold feet. This is an improvement I rarely forget when I need to make my way to the furnace or electric breaker in the middle of the night.
Final Thoughts
If you’re wondering if all that hard work is worth it, the answer is yes! Before I painted my basement, the space was a subterranean wasteland. It was the place that old Halloween decorations and forgotten toys went to die. My kids use it as a play space. If I am lucky enough, I may even nail some private time with a friend and play a game of pool down there. Even my wife has taken a liking to space and requested that I paint the laundry room in the exact same manner.
Before painting our basement, we had significant mildew issues. Not to mention, our distaste for spending time in the space led to its rapid decline. Now, all of our basement belongings are mold-free and organized. If only we’d understood the value of our unused basement sooner!
[prod_block amz_url=”https://www.amazon.com/s?k=Rust-Oleum%20203008%20Basement%20Floor%20Kit&tag=thatpainter05-20″ img_url=”https://thatpainter.com/wp-content/uploads/2019/11/Rust-Oleum-203008-Basement-Floor-Kit-Review.jpg” prod_name=”Rust-Oleum 203008 Basement Floor Kit” prod_f1=”Easy to apply” prod_f2=”Low odor” prod_f3=”Non-toxic”]
In case you were wondering, I am not the savvy fixer-upper type. I have little to no knowledge about tools nor home repair. What’s more, I didn’t have a big budget to spend when it came time to improving my basement. Still, I managed to pull off an impressive home makeover in just three short days. I am willing to bet you can do it too!

The Tool Desk
Outbyte Driver Updater FREEFix the driver behind crashes, sound loss and screen glitchesFind Drivers →Outbyte PC Repair FREEClear out junk files and repair common Windows errorsFree Scan →Richard Jenkins is a 33-year-old Professional Painter that applies paint on the interior and exterior surfaces. Qualified in painting technology knowledge, physical fitness, stamina, teamwork, and attention to safety. Read More.
Quick Recap
Product prices and availability are accurate as of the date/time indicated and are subject to change. Any price and availability information displayed on Amazon at the time of purchase will apply.




