PC Slower Than It Used to Be?
What’s actually slowing this PC down?
Pick the symptom - the matching free tool is one click away.
A free scan shows the junk files, broken settings and background clutter dragging Windows down - then fixes them in one click.Free scan · Windows 10 & 11
Crashes, No Sound, or Screen Glitches?
Random freezes, missing sound and display glitches usually trace back to one bad driver. Find and replace yours safely.Free scan · under a minute
ThatPainter is reader-supported. When you buy through links on our site, we may earn an affiliate commission. Learn More
The best jack-o’-lanterns start before the first cut: choose a sound pumpkin, work on a stable surface, use controlled cuts, and light the finished design with a non-flammable light. These 22 pumpkin-carving hacks cover smarter preparation, cleaner designs, shallow etching, safer tools, creative scraps, no-carve alternatives, and more responsible cleanup.
Before you carve: a five-minute setup
- Choose a fresh, firm pumpkin with an intact stem, no soft spots, mold, bruises, holes, or open cuts. A flat bottom helps it stand securely. Lift it from underneath rather than carrying it by the stem.
- Carve as close to Halloween as practical. Once opened, a pumpkin loses moisture and becomes more vulnerable to mold and collapse, particularly in warm weather.
- Wash the exterior before cutting, then dry it. This reduces the chance of transferring surface bacteria into the flesh.
- Cover a flat, sturdy, clean, dry, well-lit work surface. Set out towels and separate bowls or trays for pulp and seeds.
- Make the adult-child roles clear. Adults should handle knives, saws, drills, and rotary tools. Children can draw the design, scoop with a spoon under supervision, or decorate an uncut pumpkin.
Illinois Extension, Penn State Extension, the American Academy of Orthopaedic Surgeons, and the U.S. Consumer Product Safety Commission all support versions of this preparation and safety approach.
As an Amazon Associate I earn from qualifying purchases.
22 pumpkin-carving hacks that make a real difference
1. Pick the pumpkin for carving, not just appearance
Look for a pumpkin that feels firm all over and has a sturdy, firmly attached stem. Avoid soft spots, mold, bruises, holes, and open cuts, since damaged areas can deteriorate faster after carving. A flat base is a practical bonus because it helps the pumpkin sit upright without wobbling.
Important: Never use the stem as a handle. Support the pumpkin from the bottom when moving it.
#1 Best Overall
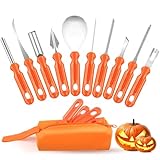
- 👻 Essential for Spooky Halloween Fun--Pumpkin carving remains a beloved Halloween staple, and our premium carving kit streamlines the craft with improved safety and convenience. Ditch risky household knives and craft intricate, eye‑catching Jack‑O'‑Lanterns with total ease.
- 🛠️ Complete 10‑in‑One Professional Carving Set--This all‑round 10‑piece toolkit suits novice crafters and seasoned carvers alike, containing a serrated pulp scooper, double‑sided saw, curved cutting saw, pumpkin drill, V‑groove chisel, arc etching tool and bent carving knife. Paired with a neatly stitched storage pouch fitted with heavy‑duty zippers, it keeps all tools sorted and well‑protected for seasonal reuse.
- ⚙️ Premium Stainless Steel, Exceptional Durability--Each carving implement is forged from sturdy stainless steel via high‑temperature reinforcement craft, delivering sharp cutting performance and outstanding wear resistance. Built to withstand repeated annual use for casual hobbyists and dedicated Halloween enthusiasts.
- ✋ Ergonomic Halloween‑Style Non‑Slip Grips--Boasting festive bright orange PP handles with anti‑slip texture, these tools ensure steady, comfy holding for detailed precision carving. Cut cleanly with minimal force to extend your tools’ service life.
- 🎁 Ideal Family‑Focused Halloween Gift--Spark warm family bonding and creative fun with this practical pumpkin carving kit, an impeccable seasonal gift choice for all ages. Crafted with safety prioritized; adult supervision is required for kids under 13 for secure carving activities.
2. Delay carving until a few days before Halloween
An intact pumpkin generally keeps better than a carved one. Cutting exposes moist interior surfaces and creates openings where decay can begin. Illinois Extension recommends carving only a few days before Halloween, and Minnesota Extension notes that warm conditions can cause carved jack-o’-lanterns to become moldy and collapse.
If you want to plan early, sketch the design, print the template, and gather your tools first. Save the actual cutting for closer to display night.
3. Wash the outside before opening the pumpkin
Wipe or wash the exterior with clean water before cutting, then dry it thoroughly. The point is simple: cleaning the surface first reduces the chance that dirt and surface bacteria will be dragged into the flesh by the knife.
Use a clean, sharp tool and keep the washed pumpkin on your covered work surface rather than on the floor.
4. Turn the work area into a cleanup station
Put newspaper, a reusable table covering, or a washable mat beneath the pumpkin. Keep one bowl for stringy pulp and another for seeds. Have towels nearby, and make sure the pumpkin cannot roll while you work.
Do these 3 things before closing this tab:
1Clear out junk files and repair common Windows errors2Scan for outdated or missing drivers - takes under a minute3Repair Windows errors before they cause bigger problemsA stable, dry, well-lit surface is preferable to carving in your lap. A rolling pumpkin can turn a controlled cut into a sudden slip.
5. Cut from the bottom when a removable lid is more trouble than it is worth
Instead of cutting a lid around the stem, some carvers make the opening underneath. The pumpkin can then sit over the light without repeatedly lifting and replacing a top section. Good Housekeeping also describes bottom cutting as a way to help reduce the chance of the sides caving inward.
Cut a manageable opening large enough to remove the pulp and position the light. The bottom must remain broad and stable enough for the pumpkin to stand securely.
6. Swap a large kitchen knife for a serrated pumpkin saw
A purpose-built pumpkin saw is designed for the short back-and-forth motion used through pumpkin walls. It can be easier to control than forcing a large, smooth kitchen knife through a curved surface.
Rank #2

- 【10 Professional Pumpkin Carving Kit】 The package includes Pumpkin scooper X 1, Small saw X 2, Pumpkin drill X 1, Etching tool X 1, Double-sided saw X 1, Carving Knife X 1, Small Knife X 1, Carving Tools X 2. The different specifications of craving kits will create interesting Halloween pumpkin designs. Tools can be neatly organized and stored in the sturdy zippered nylon carrying case after use.
- 【High-quality Stainless Steel】 10pcs carving set are made by premium stainless steel, thicker than normal carving tools, will not break. Non-slip handle design, easy to grip plastic handle make carving any pattern a breeze. The durable material ensure the tools can be re-used for many years.
- 【Safe & Easy to Use】 The easy-grip handle, and sharp & sturdy antirust blade of our pumpkin carving kit is designed specifically for carving your own Halloween jack-o-lantern pumpkins. Suitable for adults and children. Children use tools that require adult supervision. Not recommended for children under 7 years old.
- 【Carve Perfect Jack-O-Lanterns】 Our 10 pieces of pumpkin tools have different functions, so they can help you cut and create realistic 3D pumpkin details, such as hair, teeth, nose and eyes, to make the pumpkin character look expressive. Let your pumpkin lantern stand out from the crowd and play happily on this Halloween
- 【Have Fun with Family】 Halloween won’t be completed without carving pumpkins and jack-o'-lanterns! Creating a jack-o-lantern is a fun job, our pumpkin carving kit has 10pcs, can allow you to cooperate with your families and friends at the same time, enjoy the happy Halloween pumpkin carving time.
It is not risk-free: a carving saw is still sharp. An adult should use controlled pressure, keep the other hand out of the cutting path, and never rush or force the blade.
Before beginning, gather a pumpkin carving kit with a scoop, serrated saw, transfer tool, and detail tools if you do not already have them. A kit is convenient, but no particular brand or model should be assumed to be universally best or personally tested.
7. Scoop until the interior is smooth enough for the design
Remove the seeds and stringy pulp thoroughly, especially behind the areas you plan to cut or etch. A cleaner interior gives you more room for the light and makes it easier to see the wall thickness.
Do not scrape so aggressively that you weaken the pumpkin everywhere. The goal is a clean, workable interior with enough structure left to support the design.
Free tools Windows power users keep installed
One-click scans. No signup required.
8. Thin the wall behind the face, not necessarily the entire pumpkin
After scooping, scrape the inside of the wall behind the main design until it is thinner and more even. This can help light pass through cut and etched areas more consistently.
Work gradually. Check the outside frequently, because removing too much material can make a section fragile or cause it to break during cutting.
9. Transfer the stencil before making any cuts
Print a template, use a commercial stencil, or draw the design directly on the pumpkin. Tape or hold the pattern in place, then transfer its lines with a poking tool, marker, or other appropriate transfer method.
Marking first separates design decisions from cutting decisions. It also helps you preserve small connecting sections that keep eyes, teeth, letters, and other pieces attached.
The Tool Desk
Outbyte PC Repair FREEClear out junk files and repair common Windows errorsFree Scan →Outbyte Driver Updater FREEFix the driver behind crashes, sound loss and screen glitchesFind Drivers →Beginners who want repeatable shapes can use pumpkin carving stencils as an optional accessory rather than improvising every line.
10. Cut the largest openings first
Rough-cut the major sections before refining their edges. Large openings give you a clearer view of the interior and make it easier to judge how the smaller features relate to the whole face.
Once the main shapes are removed, return to the edges for small corrections. Avoid trying to make every curve perfect during the first pass; that often leads to unnecessary overcutting.
Rank #3

- Complete Halloween Pumpkin Carving Kit – Includes 4 safe and durable carving tools plus 12 stencil patterns to help you design spooky, silly, and creative jack-o’-lanterns for Halloween.
- Perfect for Halloween Decorations – Ideal for carving pumpkins for porches, parties, haunted houses, trick-or-treat night, and fall festivals; create glowing pumpkin decorations that set the mood.
- Fun for Kids & Adults – Family-friendly kit makes pumpkin carving safe, easy, and enjoyable; great Halloween activity for children, teens, and adults to enjoy together.
- Endless Carving & Decorating Ideas – Use included stencils or create your own designs for ghosts, witches, bats, monsters, and other classic Halloween icons; perfect for DIY Halloween décor.
- Must-Have Halloween Essential – Durable, reusable pumpkin carving tools ensure you’re ready for Halloween traditions year after year; the ultimate kit for jack-o’-lantern carving and decorating.
11. Etch the skin for a softer, gray-scale glow
Not every design element needs to be cut all the way through. For a softer illuminated effect, remove only the orange outer skin and leave the lighter inner wall intact. More light will pass through the thinned area without creating an open hole.
Use light pressure and shallow strokes. This technique is useful for fur, wrinkles, lettering, moon surfaces, shadows, and subtle gradients, but the final brightness will depend on the pumpkin wall, light source, and surrounding darkness.
12. Match the tool to the detail
Use the scoop or scraper for pulp, a serrated saw for larger cutouts, and a small etching or sculpting tool for fine surface work. Complete pumpkin kits may include several saws, sculpting tools, an etcher, a drill, and a scoop.
More tools do not automatically produce a better result. Choose the smallest tool that gives you control, and keep powered tools for appropriately experienced adult users.
13. Treat rotary carving tools as advanced equipment
A pumpkin-specific rotary tool can help with shallow etching and intricate patterns. Dremel’s pumpkin-tool guidance for the 2050-PMP and 7350-PMP covers accessory choice, speed adjustment, stencil use, and light-pressure skin removal.
Follow the manufacturer’s instructions, secure the pumpkin and work area, use suitable eye and hand protection, and practice on the back of the pumpkin before touching the visible design. Keep the tool moving with light pressure rather than digging into one spot.
14. Make controlled dots and borders with a drill
A drill can create evenly spaced polka dots, star fields, borders, or ventilation-like patterns. Mark the locations first so the spacing looks intentional.
This is an adult-only technique. Wear appropriate eye and hand protection, keep the pumpkin stable, and follow the drill and accessory manufacturer’s instructions. A small bit removes less material and is easier to control than starting with a large one.
15. Turn cut scraps into three-dimensional features
Do not automatically discard every piece removed from the shell. Scraps can become a tongue, ears, hair, a pipe, eyebrows, teeth, or other raised details. Test the pieces against the face before attaching or positioning them.
Do these 3 things before closing this tab:
1Repair Windows errors before they cause bigger problems2Scan for outdated or missing drivers - takes under a minute3Clear out junk files and repair common Windows errorsUse only sound, clean scraps. This works best as a creative add-on rather than a structural repair for a pumpkin that is already splitting.
Rank #4
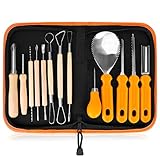
- 13-PIECE ALL-IN-ONE PROFESSIONAL SET: Dominate any pumpkin carving contest with 13 master-grade tools! This heavy-duty kit includes 6 double-sided stainless steel detail sculptors,2 sharp heavy duty stainless steel pumpkin scoop tool with scraper, 2 sturdy tooth saws, 2 precision hole punches, and 1 detail engraving pen. This kit has everything you need.
- PREMIUM STAINLESS STEEL & ERGONOMIC GRIP: Engineered for professional-grade performance year after year. Crafted from solid, high-tensile stainless steel, these tools are built to last without rusting, bending, snapping, or pitting. The ergonomically designed, non-slip handles provide maximum comfort, precision control, and confidence for intricate carving.
- SAFE & MEMORABLE FAMILY CRAFTING: Create unforgettable Halloween traditions with a fun activity the whole family can enjoy! With varying tool sizes and specialized blunt-edge designs for scooping and punching, there’s a perfectly safe task for everyone. Ditch the dangerous kitchen knives and enjoy a safer, smoother crafting experience.
- LUXURY WRISTLET STORAGE BAG INCLUDED: Keep your tools organized, protected, and highly portable. Our premium leather storage case features dedicated slots for each tool and a convenient wristlet strap. Whether you're heading to a neighborhood carving block party or helping with a school DIY project, you can carry your kit completely hands-free.
- 100% Service】We’re dedicated to enhance your carving experience. Our aim: 100% satisfied customers. However, if you’re not happy with your Pumpkin Carving Set, you can return it anytime. We’ll ask no questions.
16. Preview the design with the light before the final cleanup
Place the intended light inside while you are still refining the pumpkin. The glow can reveal thick sections, weak spots, uneven etching, or details that need a little more cleanup.
This is a practical preview technique, not a guarantee of a particular brightness level. Make small changes and check again instead of removing a large amount of wall at once.
17. Choose battery-operated or LED lighting instead of an open flame
Use a battery-operated candle, LED pumpkin light, glow stick, or tap light. CPSC and the American Academy of Orthopaedic Surgeons recommend non-flammable light sources for jack-o’-lanterns, and Penn State Extension lists battery-operated candles, glow sticks, and tap lights as options.
Recommended Free Tools
For a no-flame display, pair your carving tools with battery-operated pumpkin lights or LED tea lights. Choose a light that fits securely and does not require balancing loose parts inside the pumpkin.
18. Check battery compartments before children handle the decoration
Battery-operated does not mean hazard-free. A 2026 CPSC recall involved a pumpkin-carving kit whose accessible button-cell batteries posed a serious ingestion risk to children.
Use lighting with a properly closed and secured battery compartment. Keep loose batteries, especially button cells, away from children and pets, and inspect the light before placing it inside the pumpkin.
19. Keep the finished pumpkin cool and dry
Cool, dry storage can help extend the pumpkin’s useful display period. Temperature, humidity, insects, rain, and the pumpkin’s condition all affect how long it lasts, so outdoor display life varies substantially.
PC Slower Than It Used to Be?
A free scan shows the junk files, broken settings and background clutter dragging Windows down - then fixes them in one click.Free scan · Windows 10 & 11Outdated Drivers Are Slowing You Down
One free scan finds every outdated or missing driver and matches the right update for your exact hardware.Free scan · exact hardware matchKeep the pumpkin out of standing water and bring it indoors or under cover during especially warm, wet weather. Do not promise a fixed number of display days based on any single preservation method.
20. Consider preservation treatments cautiously—and understand the limits
Illinois Extension describes washing cut surfaces with a 20% bleach solution and coating cuts with petroleum jelly as methods that may slow deterioration. Neither method guarantees a specific lifespan.
Safety warning: Follow local chemical-safety instructions, use appropriate protection and ventilation, keep bleach away from children and pets, and never mix bleach with other cleaners. Do not feed bleach-treated pumpkins to animals. If you are unsure about handling the solution, skip this method and rely on cool, dry storage instead.
21. Skip the knife with a no-carve decorating design
For young children or anyone who wants to avoid sharp tools, decorate an intact pumpkin with paint, markers, stickers, glitter glue, or stencils. Crayola’s documented no-carve kit uses paint sticks, glitter glue, and stencils and is marketed for children ages five and up.
Best Value

- 【13 Professional Pumpkin Carving Kit】 The package includes 8 x double-sided sculpting tools, 2 x sharp sturdy tooth saws, 1 x heavy duty scooper, 1 x etching tool, 1 x drill. The different specifications of craving kits will create interesting Halloween pumpkin designs. Tools can be neatly organized and stored in the sturdy zippered nylon carrying case after use.
- 【High-quality Stainless Steel】 13pcs carving set are made by premium stainless steel, thicker than normal carving tools, will not break. Non-slip handle design, easy to grip plastic handle make carving any pattern a breeze. The durable material ensure the tools can be re-used for many years.
- 【Safe & Easy to Use】 The easy-grip handle, and sharp & sturdy antirust blade of our pumpkin carving kit is designed specifically for carving your own Halloween jack-o-lantern pumpkins. Suitable for adults and children. Children use tools that require adult supervision. Not recommended for children under 7 years old.
- 【Carve Perfect Jack-O-Lanterns】 Our 13 pieces of pumpkin tools have different functions, so they can help you cut and create realistic 3D pumpkin details, such as hair, teeth, nose and eyes, to make the pumpkin character look expressive. Let your pumpkin lantern stand out from the crowd and play happily on this Halloween
- 【Have Fun with Family】 Halloween won’t be complete without carving pumpkins and jack-o'-lanterns! Creating a jack-o-lantern is a fun job, our pumpkin carving kit has 13pcs, can allow you to cooperate with your families and friends at the same time, enjoy the happy Halloween pumpkin carving time.
Painted pumpkins are best displayed indoors because water-based products may run or wash off. Decorated pumpkins are not intended for consumption, so do not plan to eat the flesh after applying craft materials.
A no-carve pumpkin decorating kit can keep children involved without assigning them sharp-tool work. Check the product’s age guidance and supervise craft materials as you would any children’s activity.
22. Reuse the seeds and compost the remains
Separate the seeds from the stringy pulp, clean them, and roast them if the pumpkin and seeds are still suitable for food. Once the pumpkin begins decomposing, chop it into smaller pieces and add it to an appropriate compost system.
Disposal and composting rules vary by location. Never give bleach-treated pumpkins to animals, and do not put painted or chemically treated pieces into a compost stream intended for food-growing soil unless local guidance specifically allows it.
The Tool Desk
Outbyte PC Repair FREEClear out junk files and repair common Windows errorsFree Scan →Outbyte Driver Updater FREEFix the driver behind crashes, sound loss and screen glitchesFind Drivers →A quick safety and preservation checklist
- Adults: Handle knives, serrated saws, drills, and rotary tools. Children can draw, scoop with supervision, or decorate without carving.
- Workspace: Use a clean, dry, stable, flat, well-lit surface. Do not carve a loose pumpkin in your lap.
- Tools: Use controlled pressure and keep your free hand away from the cutting path. Powered tools require manufacturer-approved accessories and protective equipment.
- Lighting: Prefer enclosed battery-operated or LED lights, and secure battery compartments. Keep loose button-cell batteries away from children and pets.
- Preservation: Carve close to Halloween and store the pumpkin cool and dry. Bleach and petroleum jelly may slow deterioration, but neither guarantees a display time.
- Food and disposal: Keep craft products and bleach-treated pumpkins away from animals. Compost untreated remains where local rules permit.
For readers upgrading their interior cleanup and shallow-etching technique, pumpkin scraper and detail tools are a useful optional category; select tools based on the design and your experience rather than assuming a larger kit is safer or easier.
Frequently Asked Questions
How many days before Halloween should I carve a pumpkin?
Carve it only a few days before Halloween when possible. Once cut, the pumpkin loses moisture and becomes more vulnerable to mold and collapse, especially in warm weather. Exact display life varies with temperature, humidity, pests, and the pumpkin’s original condition.
Is it safer to cut the top or bottom of a pumpkin?
Either approach requires adult handling and a stable work surface. A bottom opening can let the pumpkin sit over its light and avoids repeatedly lifting a lid; the opening must be large enough for cleanup and the base must remain stable.
Can children carve pumpkins?
The CPSC recommends that adults handle pumpkin carving. Children can draw the design, scoop pulp with a spoon under supervision, or decorate an uncut pumpkin with paint, stickers, markers, or a no-carve kit.
Free tools Windows power users keep installed
One-click scans. No signup required.
Are battery-operated pumpkin lights completely safe?
They avoid the open-flame risk of candles but are not hazard-free. Use an enclosed light with a secured battery compartment, inspect it before use, and keep loose batteries—particularly button cells—away from children and pets.
The Bottom Line
For a better jack-o’-lantern, choose a firm pumpkin, clean and stabilize your workspace, use a serrated saw with adult control, transfer the design before cutting, and etch shallow areas instead of cutting every detail through. Finish with an enclosed LED or other non-flammable light, keep the pumpkin cool and dry, and choose no-carve decorating when children are involved.
Quick Recap

Product prices and availability are accurate as of the date/time indicated and are subject to change. Any price and availability information displayed on Amazon at the time of purchase will apply.




