Quick wins for a faster PC:
Recommended Free Tools
Repair Windows errors before they cause bigger problemsFix Now →Scan for outdated or missing drivers - takes under a minuteDriver Scan →
ThatPainter is reader-supported. When you buy through links on our site, we may earn an affiliate commission. Learn More
Make sand art by layering dry colored sand in a clear bottle, attaching sand to a surface with glue, or pouring plaster into a damp-sand impression. The bottle contains packed sand, glue holds the picture in place, and plaster forms a raised relief; choose the method based on the result you want and the materials you can safely handle.
For a bottle, keep the container dry and pour one color at a time. For a picture, you can either sprinkle dry sand onto wet glue or apply a premixed sand-and-glue paint. For a cast, shape damp sand, make an impression, and follow the plaster package directions.
Choose the right sand-art method
| Method | How the sand is held | Finished result | What it needs |
|---|---|---|---|
| Layered sand-art bottle | Packing and a secure cap | Color bands or patterns contained in a clear bottle | Dry colored sand, a dry clear container, and a funnel or pouring spout |
| Sand painting | Glue bonding sand to a support | A fixed, textured picture | Glue, sand, and paper, board, or another suitable support |
| Sand cast | Plaster hardening in a sand impression | A flat-backed relief with a textured raised face | Damp sand, a waterproof container, and plaster of Paris |
Choose a bottle for distinct color bands in a contained keepsake, a painting for a picture that stays on a surface, or a cast for a raised relief. These are different crafts: the bottle in these instructions is a dry layered project, not a sensory bottle containing liquid.
Crashes, No Sound, or Screen Glitches?
Random freezes, missing sound and display glitches usually trace back to one bad driver. Find and replace yours safely.Free scan · under a minutePC Slower Than It Used to Be?
A free scan shows the junk files, broken settings and background clutter dragging Windows down - then fixes them in one click.Free scan · Windows 10 & 11Before you start
Shared supplies
- Fine craft sand or pre-colored sand
- A tray, newspaper, or washable work surface
- Spoons, scoops, or small cups
- Paper towels
- A funnel or a paper cup shaped into a pouring spout
- Labels or markers for identifying colors
Pre-colored craft sand is convenient. If you color sand at home, let it dry completely before using it in a bottle or sprinkling it onto glue.
#1 Best Overall
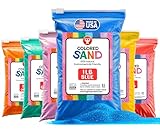
- RAINBOW OF FESTIVE COLORS: Add holiday cheer with your choice of red, green, white, and other vibrant sand colors like orange, blue, purple, pink, and more! Perfect for creating sand art projects, holiday decorations, and personalized DIY gifts
- BRING HOLIDAY CRAFTS TO LIFE: This ultra-fine colored sand lets kids, teens, and adults sprinkle their way to spectacular holiday-themed 3D masterpieces! Use it for DIY festive jar art, and other seasonal crafts
- AMAZING ALL-SEASONS SAND ART: Bright, sparkly, and flowy, this craft sand is ideal for creating beautiful, layered sand art in bottles, jars, or vases. Perfect for unique holiday gifts and striking table décor for parties
- KIDS ACTIVITY & SENSORY PLAY: Encourage kids to explore their creativity with festive sand projects! Great for Christmas-themed activities like crafting holiday scenes, sensory play, and rainy-day Christmas fun at home or in the classroom
- SAFE, NON-TOXIC HOLIDAY FUN: Our sand is CPSIA and ASTM F963-23 compliant and packaged in no-mess, easy-to-pour containers. Safe for ages 3+, this colored sand ensures a fun and worry-free crafting experience for the whole family
Work over a tray and pour carefully to keep sand and plaster contained. Follow product labels and supervise children according to their age and the materials being used. Keep small decorations away from young children.
1. Make a layered sand-art bottle
A layered bottle uses dry colored sand packed inside a clear container. Keep the bottle dry, add one color at a time, and close it securely when full.
Rank #2

- Package Includes:24 bottles of art sand in different colors,1.24 oz each.The colors are rich and bright,ideal for adults or children,to meet the needs of creative paintings
- Premium Quality:Our colored sand is uniform and fine,easy to flow,and won't clump and fade.You can paint beautiful sand paintings with canvas and glue or paint in various bottles with different colors of sand
- Kid-friendly:Our craft and terrarium sand is very suitable for children,the rich and bright colors can be matched with different possibilities,which helps to stimulate your child's imagination and creativity,cultivate children's hands-on ability,and reduce children's dependence on electronic products
- Multipurpose:Colored sand kit can be used for wedding decorations,ashtray sand, fish tanks,flower pots and succulent decorations,and can also be used as a crafting lesson material.Essential materials for DIY dynamic/sand table
- Great Gift:Craft sand is great for gifting to kids during the holidays,Christmas,Easter,birthdays,New Years or any other time,all DIY or craft lovers will love this creative set.Scenic sand is also suitable as a class reward
Materials
- A clean, completely dry clear bottle or jar
- Fine colored sand
- A funnel or paper cup shaped into a spout
- A spoon or small scoop
- A cap
How to layer the bottle
- Prepare the container. Wash it and let it dry completely.
- Set up the work area. Place the bottle, sand, and pouring tools on a tray.
- Position the funnel. Hold a funnel or paper-cup spout in the bottle opening.
- Pour one color. Add sand slowly. Straight, level pours make horizontal bands.
- Add the next colors. Pour each color separately. To make diagonal bands, tilt the bottle before pouring.
- Settle the sand gently. Tap the container lightly if needed. Avoid shaking, which can blur the boundaries.
- Fill and close. Fill close to the top and secure the cap.
The sand stays loose inside the bottle; packing and a secure cap hold the design. A highly detailed historic sand bottle is a specialized art form: the Smithsonian American Art Museum describes sand bottles as made “quite literally, a grain of sand at a time,” with grains pressed into place. A beginner craft bottle does not require that specialized technique.
Make different bottle patterns
- Horizontal stripes: Keep the bottle upright and pour each color evenly.
- Diagonal stripes: Tilt the bottle before pouring a color.
- Patterns: Pour slowly and experiment with the bottle angle. Test ideas in a small container first.
Fix bottle problems
| Problem | Likely cause | Fix |
|---|---|---|
| Colors mix while pouring | The pour is too fast or the bottle is being shaken | Pour more slowly and settle the sand gently. |
| The sand will not pour | The sand is damp or clumped | Spread it out and let it dry completely before reusing it. |
| The design shifts | The sand is not packed or contained securely | Fill closer to the top and secure the cap. |
2. Make a sand painting
A sand painting fixes sand to paper, board, or another support with glue. There are two approaches: mix sand into glue to make sand paint, or sprinkle dry sand onto glue already applied to the design. They are separate techniques, so choose one for your project.
Rank #3
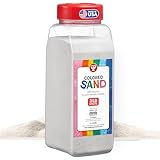
- RAINBOW OF FESTIVE COLORS: Add holiday cheer with your choice of red, green, white, and other vibrant sand colors like orange, blue, purple, pink, and more! Perfect for creating Christmas sand art, holiday decorations, and personalized DIY gifts
- BRING HOLIDAY CRAFTS TO LIFE: This ultra-fine colored sand lets kids, teens, and adults sprinkle their way to spectacular holiday-themed 3D masterpieces! Use it for DIY Christmas ornaments, festive jar art, and other seasonal crafts
- AMAZING CHRISTMAS SAND ART: Bright, sparkly, and flowy, this craft sand is ideal for creating beautiful, layered Christmas sand art in bottles, jars, or vases. Perfect for unique holiday gifts and striking table décor for Christmas parties
- KIDS ACTIVITY & SENSORY PLAY: Encourage kids to explore their creativity with festive sand projects! Great for Christmas-themed activities like crafting holiday scenes, sensory play, and rainy-day Christmas fun at home or in the classroom
- SAFE, NON-TOXIC HOLIDAY FUN: Our sand is CPSIA and ASTM F963-23 compliant and packaged in no-mess, easy-to-pour containers. Safe for ages 3+, this colored sand ensures a fun and worry-free crafting experience for the whole family this Christmas
Materials
- Paper, board, or another suitable support
- Colored sand
- White glue
- A squeeze bottle or palette wells for premixed sand paint, or a brush for the dry-sprinkle method
- A tray or scrap paper to catch excess sand
- A craft stick, modeling tool, or inexpensive brush for applying premixed sand paint
- A pencil for sketching
Sand painting with premixed sand paint
- Protect the work surface. Put the support on a tray or other protected surface.
- Sketch a simple design. Test the sand paint on scrap before working on the final picture.
- Mix a small batch. Add sand to glue in a squeeze bottle or mix small amounts in palette wells.
- Apply the mixture. Use a controlled amount on the support. Heavy application can cause paper or board to wrinkle or bow while wet.
- Let it dry undisturbed. BLICK Art Materials estimates 3–4 hours depending on how thickly the sand paint is applied; actual drying time can vary.
- Protect the finished work from water. BLICK advises that sealing or varnishing is not necessary or recommended for this technique.
Sand painting with dry sand and glue
- Sketch a design. Simple shapes with clear boundaries are easiest to manage.
- Apply glue to one area. Work on one section at a time.
- Sprinkle on one sand color. Hold the picture over a tray or scrap paper to catch excess.
- Tip off the excess. Return clean, unused sand to its container.
- Repeat for other sections. Let the glue dry undisturbed and follow its product directions.
Fix painting problems
| Problem | Likely cause | Fix |
|---|---|---|
| The support wrinkles or bows | Too much wet mixture was applied | Use less mixture or choose a more rigid support. |
| Sand spills into another area | Adjacent glue sections are wet | Work on one section at a time and keep the picture over a tray. |
| The picture is still wet | The application is thick or needs more drying time | Leave it undisturbed until dry; BLICK’s 3–4 hour estimate depends on application thickness. |
3. Make a sand cast with plaster
A sand cast is a plaster relief made from an impression in damp sand. The plaster hardens into the positive form, leaving a flat back and a textured raised face; this craft is not industrial metal casting.
Materials
- A waterproof plastic or metal tray or container
- Sand and water
- A shell, stone, stick, or other object for making an impression
- Plaster of Paris
- A mixing container and stirrer
How to make the cast
- Prepare the sand. Put sand in the waterproof container and add water until it is damp enough to hold its shape.
- Make an impression. Press an object into the sand or carve a design. If using an object as a mold, remove it carefully.
- Prepare the plaster. Follow the plaster package instructions. Do not substitute an improvised mixing ratio.
- Pour the plaster. Fill the impression and allow the plaster to harden according to the product directions.
- Remove the cast. Lift it carefully after it has hardened and brush away loose sand.
- Finish after drying. Let the cast dry before painting it.
Use supervision suited to the makers’ ages, follow the plaster label, and protect the work area. Do not wash plaster down a sink. An educational sand-casting guide recommends letting leftover plaster harden for disposal; follow the material label and local disposal guidance.
Rank #4
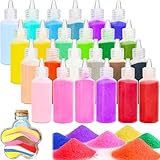
- 🎨 Complete Colored Sand Set Package includes 24 bottles of vibrant art sand, each 1.25oz, in 24 unique bright colors. The rich color selection offers endless possibilities for adult DIY crafts, creative décor, and artistic expression.
- 🌈 Rich and Versatile Colors Features 24 rainbow colors, ideal for blending and layering in home décor projects, sand art bottles, terrariums, or mindfulness art pieces. Perfect for adding a colorful and elegant touch to your creative designs.
- 🧴 Convenient and Easy to Use Each color comes in a leakproof plastic bottle with a secure cap. Simply open and cut the tip before use, then reseal when finished—clean, organized, and perfect for repeated crafting sessions.
- 🧘♀️ Relaxing and Mindful Crafting DIY colored sand is not just for decoration—it’s also a creative and calming activity for adults. The process of layering and designing with sand helps relieve stress, promote focus, and encourage mindful relaxation.
- 🏠 Perfect for Home Décor & Personalized Gifts Use the colored sand to create beautiful terrariums, wedding sand ceremonies, home décor pieces, or personalized handmade gifts. A great way for adults to explore creativity, decorate their space, and make meaningful keepsakes.
Fix casting problems
| Problem | Likely cause | Fix |
|---|---|---|
| The impression collapses | The sand is too dry or loose | Add water until the sand holds its shape, then make the impression again. |
| The cast breaks during removal | The plaster has not hardened enough | Wait longer and follow the package directions. |
| Plaster is left in the mixing container | The batch was not used promptly | Follow the product and disposal directions; do not rinse plaster into a sink. |
How to make colored sand at home
You can color light-colored sand with food coloring, but let it dry completely before using it. Homemade color may be less even than pre-colored craft sand.
- Divide the sand into separate containers.
- Add food coloring a little at a time and mix.
- Spread each color out to dry completely.
- Check that the sand is dry and free-flowing before using it.
Safety, supervision, and cleanup
- Use a tray. It catches spilled sand and makes cleanup easier.
- Keep materials contained. Pour carefully and follow product labels, especially for plaster.
- Supervise children. Match supervision to the child’s age and the materials in use.
- Keep plaster out of drains. Do not rinse leftover plaster into a sink; follow its label and local disposal guidance.
FAQ
How do you make sand art in a bottle?
Use a clean, fully dry clear bottle, a funnel or paper spout, and dry colored sand. Pour one color at a time, tap gently if needed, fill close to the top, and secure the cap.
Best Value

- RAINBOW OF FESTIVE COLORS: Add holiday cheer with your choice of red, green, white, and other vibrant sand colors like orange, blue, purple, pink, and more! Perfect for creating sand art projects, holiday decorations, and personalized DIY gifts
- BRING HOLIDAY CRAFTS TO LIFE: This ultra-fine colored sand lets kids, teens, and adults sprinkle their way to spectacular holiday-themed 3D masterpieces! Use it for DIY festive jar art, and other seasonal crafts
- AMAZING ALL SEASONS SAND ART: Bright, sparkly, and flowy, this craft sand is ideal for creating beautiful, layered sand art in bottles, jars, or vases. Perfect for unique holiday gifts and striking table décor for parties
- KIDS ACTIVITY & SENSORY PLAY: Encourage kids to explore their creativity with festive sand projects! Great for themed activities like crafting holiday scenes, sensory play, and rainy-day fun at home or in the classroom
- SAFE, NON-TOXIC HOLIDAY FUN: Our sand is CPSIA and ASTM F963-23 compliant and packaged in no-mess, easy-to-pour containers. Safe for ages 3+, this colored sand ensures a fun and worry-free crafting experience for the whole family
How do you make a sand painting?
Either mix sand into glue and apply the mixture to a support, or apply glue to a design and sprinkle dry sand over it. These are separate techniques. Let the work dry undisturbed; thick premixed applications may take longer.
How do you make a cast from a sand impression?
Dampen sand in a waterproof container until it holds an impression, press or carve a design, and pour in plaster prepared according to its package directions. Let it harden before removing the cast.
How long does sand paint take to dry?
BLICK Art Materials estimates 3–4 hours for its sand-paint technique, depending on how thickly it is applied. Follow the glue instructions and allow more time if the application is thick.
Should I seal a sand painting?
For the premixed sand-paint technique described by BLICK Art Materials, sealing or varnishing is not necessary or recommended. Protect the finished work from water.
Can I use a liquid sensory bottle instead?
Yes, but it is a different project from a dry layered sand-art bottle. Liquid sensory-bottle instructions may call for water, oil, or other materials, so follow directions designed for that variation rather than mixing them into the dry-bottle method.
Quick Recap

Product prices and availability are accurate as of the date/time indicated and are subject to change. Any price and availability information displayed on Amazon at the time of purchase will apply.




