The Tool Desk
Outbyte PC Repair FREERepair Windows errors before they cause bigger problemsFix Now →Outbyte Driver Updater FREEFix the driver behind crashes, sound loss and screen glitchesFind Drivers →
ThatPainter is reader-supported. When you buy through links on our site, we may earn an affiliate commission. Learn More
Blender can make a 2D image feel three-dimensional, but one photograph or illustration cannot reveal a subject’s true backside, hidden surfaces, scale, or exact depth. The right workflow depends on the result you need: use an image plane for a fast 3D card, depth displacement for shallow relief and parallax, or camera projection for convincing geometry from one controlled viewpoint.
These methods create useful approximations—not automatically complete, all-angle 3D models.
Which method should you use?
| What you need | Best method | What it creates | Main limitation |
|---|---|---|---|
| A still image, poster, cutout, or quick parallax shot | Image plane | A textured card in 3D space | The subject remains flat |
| A slow camera move or shallow relief | Depth-map displacement | An uneven surface with inferred depth | Edges and hidden areas can break |
| A building, room, landscape, or object viewed from one angle | Camera projection | Rough geometry carrying the source image | It works best from the projection camera |
| A rigged, printable, or all-angle model | Manual modeling, photogrammetry, or image-to-3D software | A more complete mesh | Requires additional data and cleanup |
For the steps below, menu names follow Blender 5.0-style terminology. Older tutorials may use File > Import > Images as Planes; current Blender documentation places the operator at 3D Viewport > Add > Image > Mesh Plane.
Before you begin: choose a suitable image
Use a reasonably high-resolution image with clear subject-background separation, limited motion blur, consistent lighting, and moderate perspective distortion. A source that resembles a near-orthographic or telephoto photograph is usually easier to work with than a strongly wide-angle image. Meshy’s image-to-3D guidance also warns that severe perspective distortion can affect proportions and recommends less distorted source images (official documentation).
#1 Best Overall
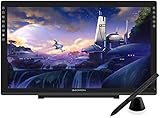
- Please kindly note that GAOMON PD2200 drawing tablet is not a standalone tablet, It must be connected to a laptop or computer to work.
- 【FOR ONLINE TEACHING & MEETING】You can use GAOMON PD2200 pen display tablet for online education and remote meeting. It works with most online meeting programs, like Zoom, and so on. 【FOR DIGITAL ART & CREATION】-- It's not only for beginner but also for professionalists in digital drawing, sketching, graphics design, 3D art work, animation, etc. 【FOR ANNOTATING AND SIGNATURE】--It is also broadly used in annotating and signing file in excel, word, pdf, ppt, etc.
- 【FULL GLASS STYLISH DESIGN】 It’s full glass design with 8 touch keys. No PVC frame on 3 sides.【HD FULL-LAMINATED SCREEN & 130% sRGB/92%NTSC】--Visually the parallax will be deduced to the lowest level. 【WITH AG-FILME PRE-APPLIED】--To protect the PD2200 drawing monitor during long shipping and to avoid bubble when applying film, we applied an anti-glare film in advance in our no dust factory. After you peel off the outside layer protective film, the real film remains on PD2200.
- 【8192 LEVELS PRESSURE & BATTERY-FREE PEN AP32】【TILT SUPPORT FUNCTION】--GAOMON PD2200 Drawing Display Tablet uses 8192 battery-free pen with tilt support function allow you to create your remarkable piece with superior control and stunning fluidity. [PEN HOLDER & PEN NIBS]-- 8 replacement nibs are put inside the pen holder. [8 TOUCH SHORTCUTS]--They are areavailable to customize in GAOMON driver.
- 【1000: 1 CONTRAST RATIO】--Enables more clear and vivid images effects. 【OTHER DISPLAY INFO】--Max Viewing Angle: 89°/89°(H)/89°/89°(V) (Typ.)(CR>10). Display Area: 476.64 x 268.11mm(18.8*10.6 inches). Resonse Time: 25MS. 【HOW TO UNSE OSD MENU】--Longe Press Menu Button for 6 seconds to active the OSD panel. You can adjust the color, brightness, etc here. 【HOW TO ADJUST COLOR】--Go to RGB-Color--Color Effect--Enter ''USER''--Then you can adjust the hue & saturation of RGBCYM here.
Depth workflows are easiest when foreground and background have smooth tonal separation. Reflections, cast shadows, transparent materials, smoke, hair, foliage, and heavy occlusion are ambiguous: a depth map may interpret them as solid geometry. Flat artwork may contain shading that looks like depth but was never intended to describe real form.
Method 1: Put the image on a 3D plane
This is the fastest and most reliable option. It produces a rectangular mesh that can be positioned, rotated, lit, rendered, and composited in a 3D scene. It does not create the photographed object’s geometry.
Steps
- Open Blender and delete the default cube if you do not need it.
- In the 3D Viewport, choose Add > Image > Mesh Plane.
- Select your image. Blender creates a plane with the image’s aspect ratio and applies an image texture and material setup; see the Mesh Plane documentation.
- Place the plane in front of the camera and keep its proportions intact.
- For artwork that should remain bright and unaffected by scene lighting, connect the image to an Emission shader. For ordinary objects, use the image as the material’s Base Color.
- To align the active camera to your current view, use Ctrl + Alt + Num0, assuming a numeric keypad or emulation is enabled.
- Add only a small camera move or rotation for parallax.
For a person, tree, vehicle, or other cutout, use a PNG with transparency. Check the image’s alpha channel and configure the material’s alpha or blend settings for your Blender version and render engine.
Rank #2
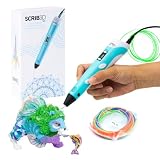
- [A GIFT FOR THE WHOLE FAMILY] Create, Draw, Doodle, and Build in 3D with this affordable yet high grade 3D pen. The new SCRIB3D P1 3D Pen helps improve spatial thinking, creativity and artistic skills. Great for quality family time and as a practical tool for making handmade gifts or decorations, or for everyday fixes around the home. The P1 Pen features a stepless speed function designed for optimal speed control no matter the task - whether slower intricate projects or faster infill work.
- [READY-TO-USE KIT] Includes 3 colors (30 feet) of PLA plastic to keep you Doodling for ages, as well as a power adapter, step-by-step manual, and a free stencil guide. Just plug in, heat it up and enjoy the fun of creating three-dimensional masterpieces. PLA is a versatile, easy-to-use printing plastic that is great for both first time and advanced users.
- [BEGINNER FRIENDLY] Plug the adapter into the back of the pen and choose your filament. The red light will turn on indicating warm up, this will take about 2-3 mins. Double click the forward button to start and feed the filament through the back of the pen. Once the filament has reached the nozzle of the pen, click forward to stop. Press and hold the forward button or double click for a continous flow. Once you have completed your design, press and hold the reverse button to retract filament.
- [MULTI-FUNCTIONAL] The SCRIB3D P1 Pen is temperature adjustable to accommodate multiple types of filament: PLA (160-210℃, 320-410°F) or ABS (210-235℃, 410-455°F). Unlike other 3D printing pens, the P1 has an easy-to-use stepless speed slider, designed for optimal speed adjustment. Perfect for any task, from slow & intricate projects to faster infill work.
- [SAFE & RISK FREE PURCHASE] The P1's ceramic nozzle and premium motor ensure safety and high performance without clogging. Equipped with 2 minute auto sleep function after 3D doodling stops, anti clogging features, and intititve controls ensure a seamless Doodling experience. 1 year guarantee and responsive customer service. Buy with 100% confidence. If there are any quality issues or you need getting started tips, please feel free to contact us and we'll be happy to help.
Layered-card parallax
Separate the subject into foreground, middle-ground, and background elements in an image editor. Import each transparent layer as a plane, offset the cards along the camera’s depth axis, and move the camera slowly. This creates a multiplane, paper-cutout effect while preserving the original painting or photograph.
Common problems
- Black image: Confirm that the correct image data-block is connected to Base Color or Emission.
- Stretched image: Recreate the plane with Mesh Plane or correct its dimensions to match the source aspect ratio.
- Opaque transparent areas: Check the alpha channel and material blend settings.
- Backward or invisible plane: Rotate or flip the plane and check backface visibility.
Method 2: Add depth with a displacement map
Displacement turns a flat plane into a shallow relief. Blender moves existing vertices according to a texture’s values; it does not infer clean topology, fill the backside, or supply physical measurements. The Displace modifier documentation describes the basic relationship as texture value minus midlevel, multiplied by strength.
What you need
- The original image for color.
- A grayscale depth map aligned pixel-for-pixel with it.
- A sufficiently subdivided mesh.
Steps
- Import the original image with Add > Image > Mesh Plane.
- Rename the object, such as
Portrait_Displaced. - Enter Edit Mode, press A, and choose Subdivide. Close-up shots need substantially more geometry than distant shots; a low-resolution plane cannot hold detailed displacement.
- Ensure the plane has a UV map covering the full image.
- Add a Displace modifier and create a new texture in its Texture field.
- In Texture Properties, load the grayscale depth map.
- Set the modifier’s coordinates to UV when the depth map follows the plane’s UVs.
- Start with Direction: Normal or the axis perpendicular to your plane. Set Strength very low and adjust Midlevel around the map’s midpoint.
- Shade Smooth and inspect the silhouette from the intended camera move.
- Keep the original image as the color texture, using the same UV layout.
A practical starting range is roughly 0.01–0.1 Blender units for a shallow relief, but this is not a physical depth measurement. Plane scale, camera distance, image resolution, and depth-map quality determine the useful value.
Rank #3
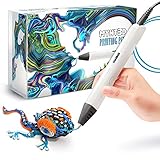
- Watch imagination come to life with the Professional 3D Pen
- Adjustable feed lets you regulate speed & flow for optimal control of material while you're drawing
- Temperature is adjustable in 1 degree increments from 140 to 230 C, for optimal fine-tuning
- Large, OLED display lets you monitor temperature of material to help you achieve a wide variety of effects
- Kit includes 3 colors of PLA plastic filament, A/C adapter and slim, ergonomic pen with 1 year limited warranty
Interpreting the depth map
White may represent nearer or farther regions depending on how the map was generated. If the relief is backwards, invert the map or use negative strength. Hard black-and-white boundaries produce ridges and spikes; smoothing the map or masking uncertain areas usually helps. Do not turn every wrinkle, hair strand, painted highlight, or image texture into geometry—many are color details rather than surface form.
Do these 3 things before closing this tab:
1Repair Windows errors before they cause bigger problems2Scan for outdated or missing drivers - takes under a minute3Clear out junk files and repair common Windows errorsDisplacement troubleshooting
- Nothing moves: Add subdivisions, confirm the modifier has a texture, and verify the UV coordinates.
- Spikes appear: Reduce strength, increase mesh resolution, smooth the depth map, and inspect pure black or white borders.
- Depth is inverted: Invert the map or use negative strength.
- Color and relief do not align: Confirm that the two images have matching dimensions, registration, and UVs.
- Edges collapse: Mask displacement near the border, extend the depth map, add a backing surface, or crop the camera.
- Texture swims: Use stable UV coordinates rather than generated coordinates.
Method 3: Project the image onto rough 3D geometry
Projection mapping is usually the strongest Blender-native approach when one hero camera matters. You build approximate walls, planes, corners, roofs, or object forms, then project the source image onto them. The geometry supplies occlusion and silhouette while the image supplies much of the visible detail.
This works especially well for architectural shots, rooms, streets, landscapes, matte-painting extensions, and stylized illustrations that can be separated into visible planes.
Rank #4
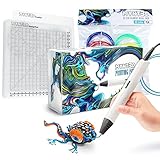
- Everything you need to create like a pro: bundle complete with PRO 3D Pen, PLA filament refills and DesignPad mat kit
- PRO 3D Pen: features stepless speed control for enhanced flow regulation, discrete temperature adjustability for upgraded material options and replaceable sealed nozzle design for clog free and long lasting operation
- PLA Filament Refills: Highest quality vacuum sealed PLA in colors blue, green, red, yellow, orange, pink, black, tan, brown and gold
- DesignPad: double sided silicone drawing surface with channels let you design and create perfect geometric shapes
- FreePad: custom formulated transparent drawing surface with ideal adhesion so you can trace your favorite patterns, drawings or create your own designs
Variant A: Project from View
- Block out geometry that matches the large forms in the image.
- Place and configure the camera so its resolution, aspect ratio, position, rotation, and lens match the source view.
- Select the receiving geometry and enter Edit Mode.
- Select the faces that should receive the image.
- Use U > Project from View. Enable camera bounds in the operator panel when appropriate.
- Connect the image to an Image Texture node in the material.
- Refine the geometry while checking the render from the matched camera.
Project from View projects selected faces onto the current view plane. Surfaces receding away from the camera can show stretching, so divide the scene into logical surfaces instead of forcing one image across everything.
Variant B: Use the UV Project modifier
- Create the rough geometry and a camera aligned to the source image.
- Add a UV Project modifier to the geometry.
- Set the camera as the projector object.
- Use an Image Texture node mapped to the UV map controlled by the modifier.
- Adjust the camera, projection scale, and geometry until the source image lines up.
The UV Project modifier behaves like a slide projector and supports perspective or orthographic camera projection. Geometry behind a perspective projector can map incorrectly, so isolate or subdivide those areas.
What’s actually slowing this PC down?
Pick the symptom - the matching free tool is one click away.
Projection troubleshooting
- Projection is offset: Match the camera before changing the model. Check aspect ratio, lens, location, and rotation.
- Side faces stretch: Split the geometry into separate surfaces or use additional projection passes.
- Seams appear: Paint or hide seams with set dressing, lighting, foliage, fog, or a second texture pass.
- Empty space appears during movement: Add backs, side walls, cards, foliage, or additional modeled forms.
How to make the result convincing
- Lock the final camera early. A projection setup can be excellent from one view and fail from another.
- Match the source lens. Unmatched perspective makes correct geometry look wrong.
- Keep camera movement shallow. The farther the camera travels, the more missing geometry becomes visible.
- Use real scene lighting and shadows. A plane’s painted shadows do not automatically respond like physical shadows.
- Use depth of field sparingly. It can hide minor errors, but it cannot replace missing form.
- Model only what affects the shot. Spend geometry on silhouettes, corners, occlusion, and foreground objects.
When Blender alone is not enough
If the result must work from arbitrary angles, be rigged, simulated, dimensionally accurate, or 3D printed, use manual modeling, photogrammetry from multiple photographs, or an image-to-3D service. A generated mesh is still an inference: inspect topology, textures, proportions, scale, licensing, and invented hidden surfaces before production.
Best Value

- 【4K UHD Clarity & Paper Feel】 Immerse yourself in stunning 4K UHD (3840x2160) detail on this 18.4-inch drawing tablet with screen. The fully laminated, anti-glare drawing display delivers a true paper feel surface, drastically reducing eye strain for comfortable, marathon creative sessions
- 【Pro Color: 99% sRGB & ΔE<1.5】 Achieve professional, true-to-life color. This digital art tablet covers 99% sRGB and 98% DCI-P3 gamuts, factory-calibrated to ΔE<1.5 accuracy. It reproduces 1.07 billion vibrant colors, ensuring your digital painting and designs are consistent from this reliable graphic tablet to final output
- 【16K Pressure battery-free Pen】 Elevate your artistry with the ultimate tool. The battery-free G-Pro Pen delivers 16,384 pressure levels for exquisite line control and a feather-light 2g activation force for effortless strokes. With ±60° tilt support, a 0.35mm retraction distance for pinpoint accuracy, and two customizable buttons, this art tablet offers a natural, responsive, and highly efficient drawing experience—no charging ever needed
- 【Ergonomic Stand & Easy Setup】 Get set up in minutes, just the way you like. This drawing tablet comes with a pre-attached adjustable stand (20°-80°) for perfect ergonomics, a removable on-screen pen holder for tidy stylus storage, and all necessary cables included (HDMI, USB-C to A, power adapter). For a super-clean desk, use a single USB-C to C cable (sold separately) with a compatible computer
- 【Wide Compatibility】 A versatile core tool for any workflow. Enjoy seamless plug-and-play with Windows 7+, macOS 10.13+, Ubuntu 20.04 LTS, and Android (USB 3.1 & DP 1.2). This drawing display delivers fully optimized pressure and performance in leading apps like Photoshop, Illustrator, and Clip Studio Paint, ensuring a smooth and professional-grade experience from start to finish
For an actual starting mesh, Meshy documents an Image to 3D workflow and a Blender bridge. Its documentation lists tested bridge versions including Blender 4.2.6, 5.0.1, 5.1.0, and 5.2.0, but compatibility and usage terms can change. Grease Pencil is another option for drawn artwork, layered illustration, and stylized 2D-in-3D animation; it is not a direct photograph-to-mesh converter (Blender’s Grease Pencil overview).
The practical answer
Choose the image plane when speed and image fidelity matter most. Choose displacement when you need shallow relief and controlled parallax. Choose camera projection when a fixed viewpoint, occlusion, and silhouette matter more than all-around geometry. None of these methods can recover everything hidden in one 2D image; they succeed by matching the 3D result to the shot you actually need.
Quick Recap

Product prices and availability are accurate as of the date/time indicated and are subject to change. Any price and availability information displayed on Amazon at the time of purchase will apply.
Free tools Windows power users keep installed
One-click scans. No signup required.




