Quick wins for a faster PC:
Windows Errors? Fix Them Before They Spread
Repair common Windows errors and clear accumulated junk for a smoother, more stable PC - no reinstall needed.Free scan · no reinstallCrashes, No Sound, or Screen Glitches?
Random freezes, missing sound and display glitches usually trace back to one bad driver. Find and replace yours safely.Free scan · under a minuteScan for outdated or missing drivers - takes under a minuteDriver Scan →Clear out junk files and repair common Windows errorsFree Scan →
ThatPainter is reader-supported. When you buy through links on our site, we may earn an affiliate commission. Learn More
The best way to repair broken plastic depends on the resin, the shape of the damage, and the stress the part must withstand. A clean break in rigid ABS may respond well to plastic-specific adhesive or solvent cement. A cracked polypropylene panel may need a true fusion weld, hot staples, or a backside splint. A bent, intact thermoplastic part may only need controlled heat.
Before choosing a product, identify the plastic and decide whether the repair is cosmetic, structural, flexible, watertight, heat-exposed, or safety-critical. There is no single universal plastic glue: polyethylene and polypropylene have low surface energy and resist many ordinary adhesives, while ABS, PVC, acrylic, nylon, and polycarbonate each behave differently. See 3M’s plastic-bonding guidance for the material-compatibility issue.
If you plan to paint the repaired part, make the repair mechanically sound first. Allow adhesive or filler to reach its full cure, sand the repair smooth without thinning the surrounding plastic, then use a primer and coating system intended for that type of plastic.
Choose the repair method before you reach for glue
Use this quick guide as a starting point. It is not a substitute for the repair product’s technical data sheet or the vehicle, appliance, or equipment manufacturer’s instructions.
#1 Best Overall
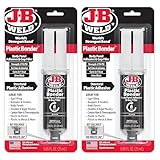
- Plasticbonder: Is A Quick-Set, 2 Part, Urethane Adhesive System That Provides Strong, Lasting Repairs And Works On Thermoset, Carbon Fiber Composites, Thermoplastics, Coated Metals, Concrete & More.
- Count On Us: For More Than 40 Years, Our Products Have Earned A Loyal Following From People Who Take Pride In Their Work. With Each Product We Innovate, We Continue To Provide The World'S Strongest Bond For Your Projects.
- Simple To Use: J-B Plasticbonder Has A 1:1 Mixing Ratio, Sets In 15 Minutes And Can Be Sanded After 30 Minutes. With A Tensile Strength Of 3770 Psi, Plasticbonder Cures To A Hard, Permanent Bond.
- Versatile And Dependable: Perfect For Indoor Or Outdoor Use, Epoxy & Adhesives, Plastic, Composite, Pvc, And More. Plastic Bonder Makes A Great Gap Filler And Dries Black In Color.
| Damage or application | First choice | Useful reinforcement | Do not rely on |
|---|---|---|---|
| Bent, intact, thin thermoplastic | Controlled heat and reshaping | A fixture or support while cooling | Direct flame or uncontrolled heat |
| Small, clean, close-fitting break | Plastic-specific instant adhesive | A small backside splint for extra strength | Ordinary superglue on PE or PP |
| Missing chunk, hole, or sizable gap | Two-part epoxy or flexible urethane | Fiberglass, mesh, or a plastic backside patch | Brittle adhesive on a flexible part |
| ABS or PVC crack | Material-specific solvent welding | A backside reinforcement where accessible | Random solvent on unidentified plastic |
| HDPE, LDPE, PP, TPO, or another weldable thermoplastic | Fusion welding with matching plastic | Hot staples or mesh | General-purpose glue alone |
| Broken tab, mounting boss, or flexible panel | Mechanical reinforcement plus compatible adhesive or weld | Hot staples, pinning, a splint, or a fabricated replacement tab | Adhesive-only repair under repeated load |
| Food container, fuel tank, pressure vessel, or safety component | Replacement or an explicitly approved professional repair | Follow the original manufacturer’s requirements | Generic household epoxy, glue, or weld |
There is no universal load rating for a plastic repair. The safe load depends on the resin, thickness, bond area, temperature, direction of force, vibration, and quality of preparation. Treat a repaired part as unproven until it has been tested gradually in the actual application—and do not use a DIY repair where failure could cause injury, fire, flooding, contamination, or loss of vehicle control.
1. Identify the plastic and the damage
Look for a molded resin marking
Check the back, underside, inside, or edge of the part for a molded abbreviation:
- ABS — common in housings, trim, and many rigid consumer parts.
- PP — polypropylene, often used for flexible or chemical-resistant parts.
- PE, HDPE, or LDPE — polyethylene.
- PVC or CPVC.
- PS — polystyrene.
- PC — polycarbonate.
- PA or nylon.
- POM, acetal, or Delrin.
- PUR, PU, or RIM — polyurethane-related materials.
A resin-identification triangle may contain one of these numbers:
What’s actually slowing this PC down?
Pick the symptom - the matching free tool is one click away.
| Code | Typical resin |
|---|---|
| 1 | PET or PETE |
| 2 | HDPE |
| 3 | PVC |
| 4 | LDPE |
| 5 | PP |
| 6 | PS |
| 7 | Other or mixed resin |
The number is only a resin-identification system, not an adhesive recommendation or a guarantee that the item is recyclable. ASTM describes what the Resin Identification Code means, and the EPA explains why the code does not necessarily mean an item is accepted for recycling.
Do not identify plastic solely by color, gloss, stiffness, or appearance. Grades, fillers, plasticizers, coatings, and manufacturing additives can change how a part bonds or welds. If no marking is available, test an inconspicuous area or a broken-off edge first. For welding, the most useful test is whether a proposed filler rod melts and blends with a clean section of the base material.
Distinguish thermoplastic from thermoset
Thermoplastics soften when heated and can sometimes be fusion-welded with compatible filler. ABS, PVC, PP, PE, polycarbonate, and nylon are examples, although each requires its own heat range and technique.
Thermosets do not melt back into a weldable liquid after curing. Thermoset polyurethane, for example, cannot receive a true nitrogen fusion weld. A specialized airless-welder repair acts more like brazing or hot-melt bonding. Polyvance explains the limitation of repairing thermoset polyurethane.
Do these 3 things before closing this tab:
1Scan for outdated or missing drivers - takes under a minute2Clear out junk files and repair common Windows errors3Fix the driver behind crashes, sound loss and screen glitchesClassify the damage
Before selecting a method, ask:
- Is the part merely bent, or is material actually cracked or missing?
- Is the break clean and tight-fitting, or is there a gap?
- Will the repaired area flex, vibrate, or act as a hinge?
- Will it see water, chemicals, sunlight, heat, pressure, fuel, or repeated impact?
- Is it holding a load, sealing a container, supporting a screw, or protecting someone?
- Does the repair need to be watertight, airtight, paintable, or cosmetically invisible?
Universal preparation for most plastic repairs
Preparation often matters more than the adhesive brand. Use these steps before bonding, filling, or welding:
- Make the part safe. Remove batteries and electrical power. Drain fluids and fuel. Do not work on a container that may still hold pressure, vapors, or flammable liquid.
- Wash away contamination. Remove dirt, grease, silicone, wax, polish, mold-release residue, and old adhesive. Use a cleaner compatible with the plastic and the repair product.
- Dry completely. Moisture and trapped solvent can weaken a bond or create bubbles.
- Test-fit the pieces. Confirm that the broken edges meet naturally before applying any product.
- Mark alignment points. Use a marker, masking tape, or a simple jig so the pieces cannot shift during assembly.
- Roughen glossy bonding areas. Where the product manufacturer recommends it, use approximately 120–200 grit abrasive. Extend the prepared area beyond the visible crack when applying a backside patch.
- Do not touch the prepared surfaces. Finger oils can undo careful cleaning.
- Open cracks when appropriate. A shallow V-groove gives weld material or filler more area to key into. A small stop-hole at each end can help prevent a crack from continuing, but only use that technique when the part’s geometry and repair product support it.
- Prevent movement. Tape, clamps, jigs, or a temporary support should hold the repair in alignment during curing or cooling.
- Test on scrap. Heat, solvent, and unfamiliar adhesives should first be tested on a cutoff or hidden area of the same material.
Loctite’s preparation guidance likewise emphasizes clean, dry surfaces, suitable abrasion, alignment, clamping, and full cure. Do not assume that a product’s surface set means it is ready for its working load.
1. Re-form a bent or warped thermoplastic with controlled heat
Best for: A bent tab, warped rim, deformed toy part, or misaligned thin thermoplastic piece that is still substantially intact.
Rank #2

- Dries clear: Our Gorilla Tough epoxy resin dries clear for a clean finish and incredibly durable hold; perfect for household and automotive repairs
- 5 minute epoxy: This epoxy resin kit in just one applicator has a 5 minute set time, plenty for repositioning and adjusting
- Gap filling: Gorilla resin epoxy also acts as a gap filler, filling voids and bonding uneven or vertical surfaces
- Water resistant: Our clear epoxy resin withstands moderate exposure to water for extra durability
- Easy-to-use syringe: Gorilla Epoxy has separate barrels of epoxy resin and hardener to keep the epoxy from hardening; the syringes dispense evenly and include a cap for multiple uses
Not for: A cracked or shattered part, a precision component, heat-sensitive electronics, an unknown plastic near wiring, or a load-bearing part whose strength has already been compromised.
Recommended Free Tools
How to do it
- Remove the part if possible and clean it.
- Apply heat gradually using hot water or a controllable heat source. For a small, thin part, nearly boiling water may soften some plastics, but it will not work on every resin.
- Check flexibility repeatedly. Do not assume a fixed heating time or temperature.
- Gently return the plastic to the desired shape. Do not force it past the point where it begins to whiten, buckle, or stretch.
- Hold it in position while it cools. Cold water may help set the corrected shape on a small part, provided the sudden temperature change will not damage the component.
- Check the fit and operation before reinstalling it.
This technique restores shape; it does not rebuild a fracture or replace missing material. Direct flame is a poor choice because it creates hot spots, scorching, distortion, and potentially hazardous fumes. The original Make overview describes hot-water reshaping for small pieces, but the technique should be treated as limited rather than universal.
2. Bond a clean, tight-fitting break with plastic-specific instant adhesive
Best for: Small, clean breaks with close-fitting surfaces and limited load, including some toys, trim pieces, decorative parts, and small rigid housings.
Use caution with: Flexible panels, hinges, repeatedly stressed tabs, water-exposed repairs, large gaps, and PE or PP.
How to do it
- Dry-fit the broken edges and confirm that they close without force.
- Clean and dry both surfaces.
- If the product is a plastic-bonding system with an activator, apply the activator exactly as directed. One Loctite system calls for applying activator to both surfaces and waiting about one minute.
- Apply a small amount of adhesive to the specified surface. More adhesive is not necessarily stronger.
- Align the pieces immediately and hold them firmly. Product directions may call for roughly 30–60 seconds of pressure.
- Leave the joint undisturbed for the complete specified cure. Some plastic-bonding systems can require up to 24 hours before full loading.
- Test the part gently before returning it to service.
Timing varies between products, so the label and technical data sheet control. A rigid cyanoacrylate bond is usually a poor match for a joint that repeatedly flexes or is loaded in peel. Increase the bond area or add a hidden splint when the joint will be stressed.
Ordinary cyanoacrylate is not a universal plastic adhesive. Polyethylene and polypropylene often need a specialty formulation, primer, or activator system designed for low-surface-energy plastics. 3M’s FAQ explains why PE and PP are difficult to bond, while Loctite’s instructions show the preparation and timing for one plastic-bonding system.
3. Use two-part epoxy or flexible urethane with a backside patch
Best for: Missing material, holes, gaps, cracked housings, broken screw bosses, mounting tabs, and repairs that need gap-filling or reinforcement.
Choose a rigid epoxy for a rigid part that will remain relatively stable. Choose a flexible or semi-rigid urethane when the original part flexes, such as a bumper cover or flexible panel. Automotive repair products are offered in rigid, semi-rigid, and flexible grades because a hard repair on a flexible substrate can crack or peel.
How to do it
- Remove loose fragments and contamination.
- Align the visible side and hold it with tape or a fixture.
- Roughen the hidden side and extend the prepared area beyond the crack.
- If the crack is likely to continue, drill a small hole at each end when appropriate for the product and part geometry.
- Place fiberglass cloth, mesh, a shaped plastic patch, or another suitable splint over the backside of the damage.
- Mix resin and hardener in the exact ratio specified. Do not guess or add extra hardener to speed curing.
- Wet the reinforcement completely and taper the repair material around its edges rather than leaving a sharp ridge.
- Clamp or support the part without squeezing all of the adhesive out of the joint.
- Allow the complete cure before sanding, drilling, painting, loading, or exposing the repair to water.
For example, Permatex’s plastic repair instructions call for roughening beyond the damage, stopping crack ends where appropriate, placing fiberglass over the repair, saturating it with mixed epoxy, and tapering the edges. Those dimensions and cure times apply to that product—not automatically to every epoxy.
Free tools Windows power users keep installed
One-click scans. No signup required.
Loctite Epoxy Plastic is marketed for materials including ABS, hard and soft plastics, PVC, and fiberglass, and its product information lists resistance to water, moisture, solvents, and impact. Its stated set time is roughly 20–25 minutes, but a set is not the same as full cure or working strength. Always follow the product’s own service-time instructions.
Epoxy can be too rigid for a part that bends repeatedly, and general epoxies may fail on PE or PP. If the first repair peels away, identify the plastic and switch to a specialty low-surface-energy adhesive, fusion welding, or mechanical reinforcement instead of simply applying more epoxy.
Rank #3

- J-B Weld Plasticweld: A Hand Mixable Two Part Epoxy Putty Stick That Is Formulated To Repair And Rebuild Various Plastic Compounds And Surfaces. J-B Weld Plasticweld Is Designed For Diy Plastic Repairs On Abs, Pvc & Cpvc Pipes And Plastics, Auto Bumpers And More! Plasticweld Is Certified By The Nsf And Is Safe For Contact With Potable Water
- Cure And Set Time: After Kneading The Two Part Formula Together By Hand, Plasticweld Takes 25 Minutes To Set And Cures In 3 Hours. J-B Weld Plasticweld Set And Cure Color Is Off White
- Product Features And Strength: J-B Weld Plasticweld Has Lap Shear Strength Of 600 Psi. Plasticweld Can Withstand Continuous Temperatures Up To 250Of (121Oc) And Intermittent Temperatures Up To 300Of (148Oc) When Fully Cured. Plasticweld Does Not Shrink And Can Be Molded, Shaped, Sanded, Drilled And Cut
- Applications: Abs, Pvc & Cpvc Pipes And Plastics, Auto Bumpers And Trim, Vinyl Surfaces And Siding, Marine Repairs & Fiberglass Parts, Plastic Water Tanks, And Plumbing
- Repair and rebuild any rigid and semi-flexible plastic including ABS, PVC and CPVC
4. Solvent-weld compatible plastics
Best for: Close-fitting cracks or joints in compatible materials such as ABS, PVC, and CPVC when the selected cement is made for that plastic.
Solvent welding is chemically different from gluing. The solvent softens the mating surfaces; pressure holds them together while the softened material fuses and the solvent evaporates. PE and PP generally cannot be solvent-welded with the solvents used for ABS or PVC. This solvent-welding guide from LOCTITE explains the difference and the material limitation.
The Tool Desk
Outbyte PC Repair FREEClear out junk files and repair common Windows errorsFree Scan →Outbyte Driver Updater FREEFix the driver behind crashes, sound loss and screen glitchesFind Drivers →How to do it
- Confirm the resin and select cement intended for it.
- Test the cement on scrap or an inconspicuous location.
- Make the joint clean and close-fitting. Solvent cement is not a good solution for a large missing section.
- Clean and dry the mating surfaces.
- Use primer only where the product requires it. For PVC and CPVC, primer is commonly specified; Oatey’s instructions specifically say not to use primer for ABS.
- Apply the cement as directed, usually to the mating surfaces.
- Assemble immediately while the surfaces are active.
- Hold the joint against movement. Oatey recommends holding assembled joints for at least 30 seconds for its pipe-cement procedure.
- Allow the full cure. Cure time changes with joint size, temperature, humidity, and product.
Solvent cement is not a shortcut for an unknown household plastic. It may craze, soften, stain, or destroy nearby surfaces. Work with ventilation, eye protection, suitable gloves, and the label’s flammability precautions. Never improvise an acetone mixture for an unidentified part.
For pipe work, do not test a solvent-welded joint with compressed air or gas. Use the applicable plumbing procedure and the cement manufacturer’s cure requirements before introducing pressure.
5. Fusion-weld thermoplastics with matching plastic
Best for: Weldable thermoplastics such as HDPE, LDPE, PP, TPO, ABS, PVC, polycarbonate, and nylon when the correct filler and controlled heat are available.
A true fusion weld melts the base plastic and a compatible filler together. The filler rod should match the base resin as closely as possible. This is especially important for PE, PP, and TPO, where many ordinary adhesives perform poorly.
Free tools Windows power users keep installed
One-click scans. No signup required.
How to do it
- Identify the base material and obtain matching welding rod, or cut a clean donor strip from the same plastic.
- Align the break and hold the cosmetic side with a fixture or, where appropriate, aluminum tape.
- Grind a V-groove along the crack. A professional plastic-welding procedure from Polyvance describes a groove generally no deeper than about half the material thickness.
- Weld the backside first when you can access it.
- Let the repair cool.
- Weld the front side with matching rod, keeping the heat moving.
- Make sure the rod and base actually melt and blend. A bead sitting on top of unmelted plastic is not a reliable fusion weld.
- Avoid scorching, bubbling, discoloring, or burning through the part.
- After cooling, grind or sand the repair. Add compatible filler only if needed for the final shape.
A dedicated hot-air or nitrogen plastic welder gives better control than an improvised soldering iron. A low-wattage soldering iron can sometimes help with a small, noncritical repair, but it may smear the surface, overheat the surrounding material, introduce contamination, or leave a weak joint. Practice on scrap first.
For a 3D-printed part, match the repair method to the filament. Acetone can be useful for some ABS applications, but it should not be generalized to PLA, PETG, PE, PP, or an unknown filament. Ultimaker’s material guide illustrates why chemical resistance varies between printed plastics. Friction welding with a rotary tool and a short piece of matching filament is another maker technique, but it is difficult to control and best reserved for practice or noncritical parts.
Thermoset polyurethane is the important exception: it cannot be repaired with a true fusion weld. A specialized hot-melt-style method may be suitable, but it is not the same as remelting and fusing the original resin.
6. Reinforce the break mechanically
Best for: Long cracks, flexible panels, broken mounting tabs, screw bosses, repeated vibration, or any location where adhesive alone would be loaded in peel.
Rank #4

- J-B WELD PLASTICBONDER (Tan): A quick setting and multipurpose two part urethane adhesive & gap filling system that provides a strong and lasting bond to many plastic surfaces. J-B Weld PlasticBonder is great for DIY plastic repairs, filling dents, bumper repairs and more! J-B Weld PlasticBonder now comes in a syringe allowing for an easy 1:1 mix ratio. The unique syringe has a re-sealable cap that prevents drying out and leaking, allowing for multiple uses!
- CURE AND SET TIME: After mixing the two part formula with the included mixing tray and stir stick, PlasticBonder takes 15 minutes to set and 30 hours to cure. J-B Weld PlasticBonder set and cure color is tan
- STRENGTH: J-B Weld PlasticBonder has tensile strength of 3770 PSI.
- SURFACE APPLICATIONS: Thermoset & Carbon Fiber Composites, Thermoplastics and Coated Metals, Plastic & PVC, Concrete, Ceramic & Tile, Fiberglass, and Aluminum.
- DO IT YOURSELF: Big or small, you can DIY it with J-B Weld. Our heavy duty epoxy and adhesives repair & restore it right the first time. J-B Weld delivers superior performance, quality, and results for the World’s Strongest Bond.
Mechanical reinforcement can include hot staples, compatible mesh, a backside plastic or metal splint, small screws and washers, rivets, or a newly fabricated plastic tab. The strongest practical repair often combines methods: use adhesive or a light weld to hold alignment, add mechanical reinforcement on the hidden side, then fill and finish the surface.
Hot-staple repair
- Work from the hidden side whenever possible.
- Align the crack and select a staple shape suited to the geometry. Different shapes are intended for flat repairs, outside corners, curves, and inside corners.
- Heat the staple with a hot-staple tool.
- Press it partway into the plastic without driving it through the visible face.
- Let the surrounding plastic cool and grip the staple.
- Cut off protruding wire and grind or cover the remaining metal.
- Finish the seam with a compatible plastic-repair adhesive, filler, or weld.
I-CAR describes hot-staple welding as melting a staple into the crack to join and reinforce the pieces. A hot staple is reinforcement, not automatically a watertight or cosmetic repair; the seam may still need a flexible adhesive, plastic weld, or filler.
Backside splint, patch, or replacement tab
- Make the visible side flush and align the original pieces.
- Cut a reinforcement strip that extends well beyond both sides of the break.
- Roughen and clean the hidden side.
- Bond or weld the strip across the break, using a material and adhesive compatible with the substrate.
- Round or taper the ends of the patch rather than creating sharp stress concentrations.
- For a broken tab or boss, rebuild the missing geometry only after the reinforcement is secure.
3M’s flexible backside-patch system is an example of reinforcing through-damaged plastic from behind. For tab repairs, 3M’s tab-repair procedure uses drilled pinning holes so the repair adhesive flows through and mechanically keys to itself. That procedure is product-specific, but the general principle—create a larger mechanical key and spread the load—is broadly useful.
Independent reader supportYour contribution helps us test, update, and keep practical guides available for everyone.How to prepare a repaired plastic part for painting
Repair and paint are separate jobs. A painted surface can hide a poor repair, but it cannot make a weak joint structurally sound.
What’s actually slowing this PC down?
Pick the symptom - the matching free tool is one click away.
- Wait for full cure or cooling. Do not sand or paint over an adhesive merely because it feels dry on the surface.
- Remove excess material. Trim ridges, cut staple ends flush, and sand cured filler without cutting deeply into the original plastic.
- Feather the edges. Gradually blend the repaired area into the surrounding surface. A sharp edge is easier to see and more likely to telegraph through the coating.
- Clean according to the coating system. Use a cleaner that will not attack the plastic or leave residue.
- Use a plastic-compatible primer or adhesion promoter when required. Follow the coating manufacturer’s instructions for the specific resin and repair material.
- Match flexibility. A rigid coating or filler over a part that flexes can crack even when the underlying repair is sound.
- Test first. Apply the complete primer and paint system to a hidden area or scrap when possible.
Freshly welded plastic may have a different texture and porosity from the surrounding surface. Epoxy, urethane, and plastic-weld filler may also accept paint differently. For a visible repair, finish the repair material first, then prime the entire part or a suitably large blended area so the sheen and color transition are consistent.
Troubleshooting failed plastic repairs
The adhesive peels off immediately
Common causes include the wrong resin—especially PP or PE—silicone, wax, oil, mold-release residue, an overly smooth surface, an adhesive that is too rigid for the part, movement during cure, or a joint loaded in peel.
- Remove the failed adhesive mechanically.
- Identify the plastic rather than applying another random product.
- Re-clean, dry, and roughen the surface as directed.
- Increase the bond area.
- Choose a specialty low-surface-energy adhesive, solvent cement, fusion weld, or mechanical reinforcement as appropriate.
- Add a hidden patch or splint if the part is under repeated load.
3M identifies PE and PP as low-surface-energy plastics that may require specialty chemistry, primer, or surface treatment.
The epoxy remains soft or tacky
Likely causes are an incorrect resin-to-hardener ratio, incomplete mixing, a cold workpiece or environment, moisture, contamination, expired material, or poor storage. Do not add extra hardener as a guess. Follow the specified ratio and curing temperature; Loctite’s epoxy troubleshooting guidance notes that cold conditions can slow or stall curing.
The weld looks melted but breaks easily
The filler may not match the base resin, the base was not actually melted into the rod, the part may have been overheated and degraded, the groove may be too shallow, or only the visible side may have been welded. Expose clean base material, use matching filler, practice the heat and travel speed on scrap, and weld both sides where the geometry permits.
The crack keeps spreading
Stop using the part. Enlarge the repair area, add backside reinforcement, and consider a small stop-hole at each crack end where appropriate. Some plastic-repair procedures specifically call for drilling the ends of cracks before applying reinforcement. Do not drill blindly through a sealed housing, pressure boundary, or part containing wiring.
Best Value

- J-B Weld Clearweld: A Clear, Quick Setting And Multipurpose Two Part Epoxy That Provides A Strong And Lasting Bond On Surfaces Including Metal, Tile, Most Plastics, Ceramic, Glass, Wood And More. J-B Weld Clearweld Comes In A Syringe Allowing For An Easy 1:1 Mix Ratio. The Unique Syringe Has A Re-Sealable Cap That Prevents Drying Out And Leaking, Allowing For Multiple Uses
- Cure And Set Time: After Mixing The Two Part Formula With The Included Mixing Tray And Stir Stick, Clearweld Takes 5 Minutes To Set And 1 Hour To Cure. J-B Weld Clearweld Set And Cure Color Is Clear
- Strength: J-B Weld Clearweld Has Tensile Strength Of 3900 Psi
- Surface Applications: Metal, Most Plastics, Pvc, Wood, Concrete, Ceramic & Tile, Fiberglass And Glass
The plastic discolors, bubbles, or burns during heating
Stop immediately. Lower the heat, increase travel speed, improve ventilation, and verify the resin. Overheating can degrade the material and weaken the weld. PVC is particularly sensitive to inappropriate heat, and Polyvance’s welding guidance warns that excessive temperature can compromise the repair or scorch the plastic.
Safety boundaries: when replacement is the better repair
Control heat and fumes
Heated plastic and solvent vapors can irritate or injure the eyes and respiratory system. The UK Health and Safety Executive warns about plastic fumes and recommends controlling exposure with local exhaust ventilation.
Quick wins for a faster PC:
Clear out junk files and repair common Windows errorsFree Scan →Fix the driver behind crashes, sound loss and screen glitchesFind Drivers →- Work outdoors or use effective local exhaust ventilation.
- Keep the fume plume away from your face.
- Wear eye protection and heat-resistant gloves.
- Stop before plastic burns or chars.
- Keep solvent cement and other flammable products away from ignition sources.
- Never heat a container that may contain fuel, solvent, pressurized contents, or trapped vapors.
Do not improvise repairs on food-contact items
A cured product is not automatically food-safe. Food-contact authorization depends on the specific substance, manufacturer, intended use, and conditions of use. The FDA explains food-contact requirements and its regulatory-status guidance.
For drinking bottles, cooking utensils, baby items, microwave containers, and food-storage vessels, replacement is generally safer unless the repair product and the intended use are explicitly authorized.
Replace or obtain an approved repair for critical parts
Do not rely on generic glue, epoxy, solvent cement, or welding for fuel tanks, fuel-system parts, gas lines, pressure vessels, hot pressurized radiator tanks, brake or steering components, restraints, helmets, critical electrical insulation, or any part whose failure could cause serious harm. Permatex explicitly excludes plastic fuel tanks from one of its plastic-tank repair products.
Vehicle bumper repairs need additional caution. Bumper fascia repairs near parking sensors or advanced driver-assistance-system hardware can affect sensor operation. OEM instructions override general repair techniques; for example, one Ford collision-repair position prohibits certain hot-staple, plastic-weld, filler, and substrate repairs on specified ADAS-equipped bumper fascias. Check the exact vehicle and repair position before working on a painted bumper.
Make the repair last
- Identify the resin instead of treating every plastic as the same.
- Use the largest practical bond or reinforcement area.
- Keep adhesive joints in shear rather than peel whenever possible.
- Match the repair’s flexibility to the original part.
- Use matching plastic for fusion welding.
- Weld or reinforce the hidden side whenever access allows.
- Respect the complete cure time, not just the initial set.
- Protect the repair from heat, chemicals, water, and loads until it has been tested.
- Test progressively under the real direction of force.
- Replace the part when the consequences of failure are unacceptable.
Frequently Asked Questions
Can ordinary superglue repair any type of plastic?
No. Cyanoacrylate can work on some clean, close-fitting, low-stress joints, but it is not a universal plastic adhesive. Polyethylene and polypropylene often require a specialty adhesive, primer, or activator system. Flexible or heavily loaded parts usually need reinforcement or a different repair method.
What is the best way to repair polypropylene or polyethylene?
For a durable repair, start with a true fusion weld using matching PP or PE filler, or use a specialty adhesive specifically rated for that low-surface-energy plastic. Add hot staples, mesh, or a backside splint when the area flexes or carries a load. General-purpose epoxy and ordinary superglue commonly peel away.
Can I use acetone to weld broken plastic?
Only when the plastic and repair process are specifically compatible. Acetone is associated with some ABS repair applications, but it should not be generalized to PLA, PETG, PE, PP, or unidentified plastic. Test on scrap, provide ventilation, and keep the solvent away from ignition sources.
Can a repaired plastic part be painted?
Usually, yes, after the repair has fully cured or cooled. Sand and feather the repair, clean it with a compatible product, and use a primer and paint system intended for the plastic and repair material. A coating can improve appearance, but it cannot make an unsafe structural repair safe.
The Tool Desk
Outbyte Driver Updater FREEFix the driver behind crashes, sound loss and screen glitchesFind Drivers →Outbyte PC Repair FREERepair Windows errors before they cause bigger problemsFix Now →The Bottom Line
Start with the plastic, not the glue. Reshape an intact bent thermoplastic with controlled heat, use plastic-specific instant adhesive for a small tight break, choose epoxy or flexible urethane for gaps and missing material, solvent-weld compatible ABS or PVC, fusion-weld PE or PP with matching plastic, and reinforce stressed cracks with hot staples, mesh, or a splint.
For a painted finish, let the repair fully cure, feather the surface, and use a compatible primer and coating system. For fuel, food-contact, pressure, safety, or ADAS-related parts, replacement or an approved professional repair is the safer choice.
Quick Recap

Product prices and availability are accurate as of the date/time indicated and are subject to change. Any price and availability information displayed on Amazon at the time of purchase will apply.




