The Tool Desk
Outbyte Driver Updater FREEScan for outdated or missing drivers - takes under a minuteDriver Scan →Outbyte PC Repair FREERepair Windows errors before they cause bigger problemsFix Now →ThatPainter is reader-supported. When you buy through links on our site, we may earn an affiliate commission. Learn More
There are 51 ideas here, but the most important choice comes first: hard-boiled eggs are for short-term food-safe displays, blown-out shells are for fragile keepsakes, and craft eggs are best for paint, glue, glitter, messy techniques, and reuse. Use the selector to match a design to your skill level, cleanup tolerance, and safety needs.
Choose the egg first: use a hard-boiled egg for a short-lived edible display, a blown-out egg for a fragile keepsake, or a wood, plastic, foam, ceramic, cotton, papier-mâché, or paper egg for reusable décor. Then choose a technique that fits your time, mess tolerance, and skill level. The 51 ideas below cover quick children’s projects, food-safe dyeing, painting, paper and fabric, statement centerpieces, and traditional Ukrainian pysanky.
Choose the right egg before you decorate
| Egg type | Best for | Important trade-off |
|---|---|---|
| Hard-boiled | Traditional dyeing, quick family projects, short-term edible displays | Must stay refrigerated; it is not a year-to-year keepsake |
| Blown-out | Detailed painting, ornaments, elaborate keepsakes, pysanky practice | Fragile, and the raw contents require careful handling and prompt refrigeration |
| Craft egg | Paint, glue, glitter, hot glue, messy techniques, toddlers, reusable décor | Usually display-only, even when the finish is labeled “non-toxic” |
Martha Stewart’s 51-idea collection uses hard-boiled or blown-out eggs, while Good Housekeeping’s broader collection also uses wooden, foam, faux, and papier-mâché forms. A craft egg is often the better choice for a painting project: it will not spoil, is easier to hold while wet, and can return to your Easter décor next year.
The food-safety line: edible versus display-only
Potentially edible: a hard-boiled egg decorated only with food-safe dye and decorations specifically intended for food contact.
Display-only: any egg touched by acrylic or craft paint, glue, Mod Podge, permanent marker or Sharpie, glitter, metallic leaf, spray paint, temporary tattoos, hot glue, shaving cream, chemical pysanky dye, or another craft product. “Non-toxic” does not mean edible.
Never eat an egg that has been hidden, hunted, handled extensively, or played with. FDA guidance says to hard-boil eggs before coloring and warns that contamination on the shell can transfer to the edible portion after hiding or playing. Keep hard-boiled eggs refrigerated at 40°F/4°C or below, and use them within one week. Refrigerate the contents of blown-out raw eggs and use them within two to four days. See the FDA egg-safety guidance and USDA Easter and shell-egg guidance.
Quick wins for a faster PC:
Scan for outdated or missing drivers - takes under a minuteDriver Scan →Repair Windows errors before they cause bigger problemsFix Now →For a party or hunt, make two clearly separate batches: a food-safe batch for eating and a craft-egg batch for decorating, hiding, and reusing. If an egg is accidentally decorated with paint, glue, ink, glitter, or craft dye, discard it rather than trying to wash the surface clean.
At-a-glance selector
| If you want… | Start with… |
|---|---|
| The safest project for very young children | Sticker Eggs, Washi-Tape Eggs, simple Polka-Dot Eggs, or a wooden egg |
| A potentially edible design | Basic food-dye color blocking, Two-Tone Eggs, Striped Eggs, or food-safe Naturally Dyed Eggs |
| Low mess | Ribbon-Tied, Sticker, Washi-Tape, pre-painted wooden, or marker-decorated craft eggs |
| A dramatic centerpiece | Silk Dyed, Shibori-Style, Marbleized, Foiled, Galaxy, Terrazzo, or Luster Splatterware Eggs |
| A reusable display | Wooden, plastic, foam, ceramic, papier-mâché, Thread-Wrapped, or Floral Basket Eggs |
| A traditional advanced craft | Pysanky, Sashiko-Style, Temari, Pierced Creamware, or Family-Tree Eggs |
| A painting-led project | Color-Block Painted Wooden, Typography, Nature-Themed Artwork, Chalkboard, or Pointillism Eggs |
Time, mess, and reuse ratings in the cards are practical planning estimates. Soaking and drying depend on the surface, humidity, dye strength, and number of coats.
51 Easter egg decorating ideas
Each card identifies a suitable base, materials, a reproducible process, approximate time, and the safety boundary. “Edible only with food-safe materials” means the concept can be adapted for a hard-boiled egg, but the specific craft version described is not automatically edible.
Quick and kid-friendly
1. Silk Dyed Eggs
Look: intricate printed patterns transferred from fabric. Base: hard-boiled eggs. Materials: genuine 100% silk ties or fabric, white cloth, elastics, vinegar, and a glass or enamel pot. How: Wrap the printed side tightly against the egg, cover it with white cloth, secure both layers, submerge, add three tablespoons of vinegar, boil, then simmer for 20 minutes. Cool before unwrapping. Plan: 20–30 minutes active; 30–45 minutes including simmering and cooling; advanced beginner; medium mess; not reusable as an edible egg. Safety: display-only—the transfer method makes these hard-boiled eggs inedible. Follow the silk-tie method.
Free tools Windows power users keep installed
One-click scans. No signup required.
2. Ribbon-Tied Easter Eggs
Look: a simple gift-wrapped finish. Base: wood, plastic, foam, or blown-out eggs. Materials: narrow ribbon, scissors, craft glue, and optional beads or a tiny bow. How: Start at one end, glue the ribbon in a tight spiral or in vertical bands, let each section set, then finish with a bow. Plan: 10–15 minutes active; dry 30–60 minutes; beginner; low mess; reusable with a craft egg. Safety: display-only if glue or craft ribbon is used.
3. Shibori-Style Eggs
Look: indigo-like folds, bands, and resist marks. Base: hard-boiled for food-safe dye, or wood/blown-out for display. Materials: blue dye, elastics, string, cloth strips, and a drying rack. How: Wrap, bind, or pleat the egg to create resist areas, dye it, remove the bindings, and dry completely. Plan: 15 minutes active; soak/dry 30–90 minutes; beginner; medium mess; reusable only on a craft egg. Safety: edible only if the dye and all materials are food-safe; otherwise display-only.
4. Temari Eggs
Look: geometric embroidered bands inspired by Japanese temari balls. Base: foam or papier-mâché egg. Materials: embroidery floss, pins, a needle, ruler, and optional metallic thread. How: Mark the egg’s poles and equator, divide it into even sections, wrap guide lines, then stitch repeated bands over the guides. Plan: 30–60 minutes active; no drying; intermediate; low mess; reusable. Safety: display-only; supervise children around pins and needles.
5. Sashiko-Style Eggs
Look: orderly white running-stitch geometry on blue. Base: foam, wood, or papier-mâché. Materials: blue paint or fabric covering, white embroidery floss, needle, and a pencil. How: Create a repeating grid or wave pattern, then stitch short, even lines. Keep the design simplified on the curved surface. Plan: 30–60 minutes active; paint dry 30–60 minutes; intermediate; low mess; reusable. Safety: display-only. Call it “Sashiko-style” rather than presenting a simplified craft as traditional Sashiko.
Recommended Free Tools
6. Terrazzo Eggs
Look: a pale ground scattered with colorful stone-like chips. Base: wooden or ceramic craft eggs. Materials: primer, matte paint, several accent paints, fine brush, and optional sealer. How: Paint the ground color, let it dry, then add irregular short rectangles, triangles, and flecks in three or four colors. Seal only after all layers are dry. Plan: 15–25 minutes active; dry 1–2 hours; beginner; low-medium mess; reusable. Safety: display-only.
7. Kintsugi Eggs
Look: intentional “repaired” cracks picked out in metallic lines. Base: ceramic or wooden egg; use a pre-cracked ceramic form only with adult supervision. Materials: gold paint or metallic leaf, fine brush, and craft adhesive if needed. How: Paint a clean base, sketch branching crack lines, then fill them with gold. A safer beginner version paints faux cracks rather than breaking an egg. Plan: 20 minutes active; dry 1–2 hours; intermediate; low mess; reusable. Safety: display-only; metallic leaf and glue are not food-safe.
8. Découpaged Wrapping-Paper Eggs
Look: bold gift-wrap patterns molded around the egg. Base: papier-mâché, wood, or blown-out shell. Materials: thin wrapping paper, decoupage medium, brush, and scissors. How: Tear or cut small pieces, brush on medium, overlap pieces around the egg, smooth wrinkles from the center outward, and add a final coat. Plan: 20–30 minutes active; dry 1–2 hours; beginner; medium mess; reusable. Safety: display-only.
Rank #2
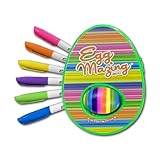
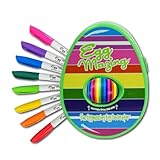
- Patented Spinning Magic: Get egg-cited about the EggMazing patented motorized spinner that rotates your egg while you simply hold a marker against it, creating spirals, stripes, and multi-color swirls no hand could replicate; the battery-powered consistent spin does the work for you, and each design dries in a few seconds, so kids move from egg to egg without waiting
- Dye-Free and Mess-Free Fun: The EggMazing Mini uses markers instead of liquid dyes for a mess-free, self-contained decorating experience; all 6 included markers are third-party tested non-toxic, so parents can breathe easy while kids color egg after egg with zero liquid mess involved
- The Whole Family Can Join In: Designed for ages 3 and up, this is a true multigenerational activity where grandparents, parents, and kids all take turns creating their own unique designs together; perfect for Easter mornings, birthday party craft stations, and family DIY art nights; every egg turns out one-of-a-kind, so there is no wrong way to have fun
- Trusted Safety Credentials: The EggMazing Mini is third-party tested to ASTM F963 toy safety standards, giving parents confidence when decorating eggs for any occasion; compact and stores easily between holidays and travels well for classroom craft days, spring celebrations, or holiday decoration sessions year-round
- Everything in the Box: Each set includes 1 Mini EggMazing Spinner and 6 colorful non-toxic markers, so you are ready to start spinning right away; requires 3 AA batteries (not included); the compact size fits perfectly in an Easter basket or gift bag, making it an egg-cellent gift for birthdays, Easter, or any occasion that calls for creative fun
9. Whirled Eggs
Look: playful crayon or marker swirls. Base: hard-boiled for a food-safe crayon-resist adaptation, or craft eggs for markers and paint. Materials: wax crayons, food dye, or craft markers. How: Draw lines, spirals, dots, or names on a dry shell, then dip it in dye; waxed areas resist the color. For a display egg, add opaque painted swirls instead. Plan: 10 minutes active; dry 20–30 minutes; beginner; low mess; reusable on craft eggs. Safety: edible only with food-safe crayons and dye; marker versions are display-only.
10. Giftable Surprise Eggs
Look: decorated eggs that open to reveal a note or tiny surprise. Base: plastic fillable eggs or two-part papier-mâché eggs. Materials: paint, stickers, ribbon, paper notes, and age-appropriate non-food prizes. How: Decorate the two halves separately, let them dry, place the surprise inside, and snap or tie closed. Plan: 15–25 minutes active; dry 30–60 minutes; beginner; low mess; highly reusable. Safety: display-only; avoid small parts for children under three.
11. Royal Copenhagen Eggs
Look: blue-and-white porcelain-style botanical decoration. Base: ceramic, wooden, or papier-mâché egg. Materials: white base paint, fine blue brush, pencil, and optional clear sealer. How: Paint white, sketch foliage or floral sprays, then build the design with thin blue outlines and restrained shading. Plan: 25–40 minutes active; dry 1–2 hours; intermediate; low mess; reusable. Safety: display-only.
12. Jasperware Eggs
Look: a single matte pastel ground with raised white classical motifs. Base: ceramic or wood. Materials: matte paint, white dimensional paint or air-dry clay, stencil or small botanical cutter, and sealer. How: Paint the ground, add a few raised silhouettes or cameo-like shapes, let them cure, and seal. Plan: 30–45 minutes active; dry overnight; intermediate; medium mess; reusable. Safety: display-only.
13. Liberty of London Eggs
Look: tiny densely patterned florals with a fabric-shop feel. Base: wood, foam, or papier-mâché. Materials: small floral fabric scraps or paper, decoupage medium, brush, and scissors. How: Cut narrow wedges or use torn pieces, wrap the curved surface in overlapping sections, smooth down, and seal. Plan: 20–30 minutes active; dry 1–2 hours; beginner; medium mess; reusable. Safety: display-only.
The Tool Desk
Outbyte Driver Updater FREEScan for outdated or missing drivers - takes under a minuteDriver Scan →Outbyte PC Repair FREEClear out junk files and repair common Windows errorsFree Scan →14. Polka-Dot Eggs
Look: cheerful dots in one color family or a full rainbow. Base: hard-boiled or craft egg. Materials: food-safe dye and edible decorating tools for an edible batch, or paint and a dotting tool for craft eggs. How: Apply dots with a cotton swab, the end of a brush, or a dotting tool; vary scale for a more designed result. Plan: 10 minutes active; dry 20–40 minutes; beginner; low mess; reusable on craft eggs. Safety: edible only with food-safe materials.
15. Paper-Doily Eggs
Look: lace-like white overlays and vintage texture. Base: wood, papier-mâché, or blown-out egg. Materials: paper doily, scissors, decoupage medium, soft brush, and optional pastel paint. How: Cut the doily into small sections, brush medium onto the egg, lay down the lace, smooth gently, and coat over it. Plan: 15–25 minutes active; dry 1–2 hours; beginner; medium mess; reusable. Safety: display-only.
16. Luster Splatterware Eggs
Look: glossy, metallic flecks over a colored ground. Base: ceramic or wooden egg. Materials: base paint, metallic paint, stiff brush, and sealer. How: Paint the ground and let it dry. Load a stiff brush with thinned metallic paint and flick it across the surface, protecting the work area from overspray. Plan: 15 minutes active; dry 1–2 hours; beginner; high mess; reusable. Safety: display-only; wear eye protection if flicking paint and keep it away from food.
17. Two-Tone Eggs
Look: clean halves, diagonal divisions, or a dipped color over a pale base. Base: hard-boiled or craft egg. Materials: two food-safe dye baths for edible eggs, or painter’s tape and paint for craft eggs. How: Dip one section for several seconds to about one minute, dry, then dip the remaining section in a second color. For a crisp painted line, mask only a completely dry surface. The American Egg Board color-block method uses two cups of water, two tablespoons of vinegar, and shallow dye baths. Plan: 10–15 minutes active; dry 20–40 minutes; beginner; low mess; reusable on craft eggs. Safety: edible only with food-safe materials.
18. Dot and Stripe Stamped Eggs
Look: repeat-pattern eggs made from simple marks. Base: hard-boiled or wooden egg. Materials: food-safe stamp tools and dye or edible color for an edible version, or craft paint and foam stamps. How: Test the stamp on paper, then repeat dots, bars, rings, or tiny crosses around the egg, rotating it as sections dry. Plan: 15–20 minutes active; dry 30–60 minutes; beginner; low-medium mess; reusable on craft eggs. Safety: edible only if every color and tool is food-safe.
19. Family-Tree Eggs
Look: branches, names, initials, or birth-year leaves. Base: wood, ceramic, or papier-mâché. Materials: pencil, fine brushes or paint pens, metallic accent, and sealer. How: Sketch a branching composition, paint the trunk, add names or initials along the branches, and finish with leaves, dates, or tiny symbols. Plan: 30–60 minutes active; dry 1–2 hours; intermediate; low mess; reusable. Safety: display-only.
Classic dye and resist
20. Naturally Dyed Eggs
Look: soft, earthy, sometimes surprising plant-based color. Base: hard-boiled for a food-safe batch, or blown-out/craft eggs for display. Materials: red cabbage, turmeric, onion skins, beets, strong coffee, water, vinegar if appropriate, and separate dye containers. How: Prepare the dye, strain it, soak clean dry eggs, and extend the soak for deeper color. Tested examples from Martha Stewart include turmeric boiled for 30 minutes for deep gold, onion skins boiled for 30 minutes for sienna, coffee boiled for 30 minutes for dark brown, beets cold-soaked for 30 minutes for light pink, red cabbage cold-soaked for 30 minutes for light blue, and red cabbage soaked overnight for royal blue. Results vary with shell color, temperature, ingredient, and porosity; red cabbage can make blue rather than red. See the natural-dye guide. Plan: 20–40 minutes active; 30 minutes to overnight soaking; beginner; medium mess; reusable only on craft eggs. Safety: potentially edible only when the whole process uses food-safe ingredients and handling.
21. Café-au-Lait-Bowl Eggs
Look: warm cream, tan, and brown eggs with a handmade café palette. Base: hard-boiled or craft eggs. Materials: coffee, diluted food dye, cream and brown paints for craft eggs, and shallow bowls. How: Build a range from pale cream to espresso brown, then layer dips or paint imperfect bands and stains. Plan: 10–20 minutes active; dry 30–60 minutes; beginner; low-medium mess; reusable on craft eggs. Safety: edible only with food-safe dyes and no craft finish.
22. Shaving-Cream-Dyed Eggs
Look: soft marbling with cloudy color transitions. Base: hollow craft eggs or blown-out shells. Materials: shaving cream, two shades of food coloring, shallow containers, tongs, and paper towels. How: Fill a container with shaving cream, swirl in the colors, submerge the egg for 15–20 minutes, remove with tongs, and wipe it clean. Treat the result as display-only unless every material is explicitly food-safe; the documented method uses shaving cream. Plan: 10–15 minutes active; 15–20 minutes setting plus drying; beginner; high mess; reusable on craft eggs. Follow the shaving-cream method.
23. Color-Block Painted Wooden Eggs
Look: crisp architectural blocks in contrasting colors. Base: wooden eggs. Materials: primer, acrylic paint, painter’s tape, fine brush, and sealer. How: Prime, mark bands or diagonals, paint light coats, allow each section to dry, remove tape, and touch up the edges. Plan: 20–30 minutes active; dry 1–2 hours; beginner; low mess; reusable. Safety: display-only. For edible hard-boiled eggs, use the food-dye method instead.
Rank #3

- With 9 different colors of dye, this kit is perfect for making eggs of every imaginable shade and hue. Also includes a PAAS Magic Crayon to help you make complex and customized designs!
- FUN STYLING: Each decorating kit contains all the appropriate dye tablets, stickers, dippers, egg arounds and egg stands that come with that decorating style! No two eggs have to look the same!
- SAFE: All dye tablets are food safe and proudly made in the USA!
- PARTY FRIENDLY: For a group of children, a classroom or a family that loves to be creative! With this variety of kits there's something for everyone
- 100 YEARS: Be part of a tradition that goes back over 100 years! Great for families!
24. Dyed Wooden Easter Eggs
Look: solid or layered color with the grain showing through. Base: unfinished wooden eggs. Materials: wood dye or thinned paint, cloth, gloves, and a water-based sealer. How: Sand rough spots, wipe on thin color, remove excess, let it dry, and add another coat for depth. Plan: 10–20 minutes active; dry 1–2 hours; beginner; low mess; reusable. Safety: display-only; use ventilation appropriate to the product.
25. Pierced Creamware Easter Eggs
Look: pale ceramic eggs with delicate perforated or cut-out motifs. Base: ceramic or air-dry-clay egg. Materials: ceramic egg, hand drill or piercing tool, pencil, fine sandpaper, and paint if desired. How: Draw a simple motif, pierce or drill slowly, smooth every edge, and keep the pattern sparse so the shell remains strong. Plan: 45–90 minutes active; paint dry 1–2 hours; advanced; medium dust/mess; reusable. Safety: display-only; adult-only tools and eye protection.
26. Gingham Easter Eggs
Look: woven-looking checks in two or three values of one hue. Base: wooden, plastic, or papier-mâché egg. Materials: base paint, two darker paints, fine flat brush, ruler, and sealer. How: Paint the light ground, add vertical bands, then horizontal bands; overlap them with a darker value to create the check intersections. Plan: 25–40 minutes active; dry 1–2 hours; intermediate; low mess; reusable. Safety: display-only.
27. Puffy-Paint Eggs
Look: raised dots, squiggles, names, and tactile outlines. Base: wood, foam, or plastic. Materials: dimensional fabric paint or puffy paint, pencil, and drying tray. How: Sketch a simple pattern, squeeze continuous lines or dots, and leave the egg untouched until the raised paint has fully cured. Plan: 10–20 minutes active; dry overnight; beginner; medium mess; reusable. Safety: display-only; keep uncured paint away from children and pets.
28. Speckled Eggs
Look: robin’s-egg flecks over a colored or natural ground. Base: hard-boiled or craft egg. Materials: food-safe dye for an edible version, or paint, a stiff brush, and a contrasting color. How: Create and dry the base, load a stiff brush with diluted accent color, and flick small specks from a short distance. Plan: 10 minutes active; dry 30–60 minutes; beginner; medium mess; reusable on craft eggs. Safety: edible only with food-safe materials.
29. Washi-Tape Eggs
Look: graphic stripes, crosses, checks, and color blocks without wet paint. Base: plastic, wood, foam, or a completely dry hard-boiled egg for food-safe tape intended for food contact. Materials: washi tape, scissors, and optional ribbon. How: Dry the surface, cut tape into short strips, press from the center outward, and burnish every edge. Plan: 10–15 minutes active; no drying; beginner; very low mess; reusable on craft eggs. Safety: display-only unless the tape is specifically food-safe; ordinary craft washi tape is not.
30. Cherry-Blossom Eggs
Look: delicate branches with pink blossoms against blue, cream, or black. Base: wood, ceramic, or papier-mâché. Materials: base paint, brown and pink paints, fine brush, dotting tool, and sealer. How: Paint a quiet ground, draw branching lines that follow the egg’s curve, then place five-petal blossoms and tiny buds at the tips. Plan: 25–40 minutes active; dry 1–2 hours; intermediate; low mess; reusable. Safety: display-only.
31. Galaxy Eggs
Look: deep space with nebula clouds and stars. Base: wood, foam, or papier-mâché. Materials: black, navy, violet, and white acrylic paint, sponge, toothbrush, and sealer. How: Paint a dark ground, sponge translucent color clouds, soften transitions, then flick white stars and add a few larger points. Plan: 20–30 minutes active; dry 1–2 hours; beginner; medium-high mess; reusable. Safety: display-only.
32. Typography Eggs
Look: eggs that carry names, greetings, jokes, or one bold word. Base: smooth wooden or ceramic eggs. Materials: pencil, fine paintbrush or paint marker, ruler, and sealer. How: Lightly place the lettering first, rotate the egg as you work, and use short lines rather than trying to write across the entire curve in one stroke. Plan: 20–40 minutes active; dry 1–2 hours; intermediate; low mess; reusable. Safety: display-only with paint markers; choose edible writing colors only for food-safe eggs.
33. Stick-On Gold Eggs
Look: polished gold dots, bands, leaves, or abstract fragments. Base: craft egg or dry blown-out shell. Materials: metallic stickers or gold leaf, tweezers, burnishing tool, and optional sealer. How: Apply the largest pieces first, smooth outward, and fill gaps with small fragments. Plan: 10–20 minutes active; no drying unless sealed; beginner; low mess; reusable. Safety: display-only.
What’s actually slowing this PC down?
Pick the symptom - the matching free tool is one click away.
34. Cheeky Chicken Eggs
Look: simple egg animals with faces, wings, combs, or feet. Base: plastic, foam, or wooden egg. Materials: paint, paper or felt, googly eyes, glue, and optional pipe cleaners. How: Paint the body, add a beak and comb, then draw or glue on eyes and wings. Make the features oversized for small children. Plan: 15–25 minutes active; dry 30–60 minutes; beginner; low-medium mess; reusable. Safety: display-only; avoid small detachable pieces for children under three.
35. Marbleized Eggs
Look: veined, swirling color with a polished stone effect. Base: hard-boiled or craft egg. Materials: base dye, second shallow dye bath, olive oil, fork, gloves, and paper towels. How: Dye and dry the egg first. Make a second bath about half an inch deep, add one tablespoon of olive oil, drag a fork through the surface to form curlicues, roll the egg through once, pat it dry, and let it dry completely. The source method is dramatic but messy and unpredictable. Plan: 15–20 minutes active; 30–60 minutes drying; beginner; high mess; reusable on craft eggs. Safety: potentially edible only when every dye and material is food-safe.
Nature-inspired and botanical
36. Glittered Eggs
Look: full sparkle, dipped ends, or scattered glitter. Base: plastic, foam, wood, or papier-mâché. Materials: craft adhesive, cosmetic- or craft-grade glitter, tray, and sealer. How: Brush on a thin section of adhesive, sprinkle or roll in glitter over a tray, tap off excess, and repeat in sections. Plan: 15–25 minutes active; dry 1–2 hours; beginner; high mess; reusable. Safety: display-only; glitter and glue are not food-safe.
37. Coloring-Book Eggs
Look: black outlined motifs filled with bright color. Base: white ceramic, wood, or papier-mâché egg. Materials: pencil, fine black paint or marker, colored paint pens or acrylics, and sealer. How: Draw repeating flowers, animals, or abstract panels, outline them, then color each section like a three-dimensional coloring page. Plan: 30–60 minutes active; dry 1–2 hours; beginner-intermediate; low mess; reusable. Safety: display-only.
Outdated Drivers Are Slowing You Down
One free scan finds every outdated or missing driver and matches the right update for your exact hardware.Free scan · exact hardware matchPC Slower Than It Used to Be?
A free scan shows the junk files, broken settings and background clutter dragging Windows down - then fixes them in one click.Free scan · Windows 10 & 1138. Foiled Eggs
Look: reflective metallic patches or a fully gilded shell. Base: wood, ceramic, or papier-mâché. Materials: adhesive size, metal leaf or foil, soft brush, burnishing cloth, and sealer. How: Paint the base, apply size to selected areas, wait until tacky according to the product directions, lay on foil, brush away loose pieces, and seal if compatible. Plan: 25–45 minutes active; dry 1–2 hours; intermediate; medium mess; reusable. Safety: display-only.
Rank #4

- Egg-citing Spin Art: Place an egg on the officially licensed Peeps Bunny motorized spinner, touch 1 of the 8 vibrant markers to the spinning surface, and watch one-of-a-kind spirals, stripes, dots, and swirl patterns appear in seconds; layer colors while the egg spins to blend shades into totally unique designs. No dye tablets to dissolve, no vinegar smells, no stained countertops - just pure marker-on-egg spin art powered by our patented spinning mechanism
- Kid-Friendly, Parent-Approved: Every marker in this kit is non-toxic and quick-drying, confirmed by third-party lab testing per ASTM D-4236 and certified with the ACMI AP (Approved Product) Seal; quick-drying ink means less smearing and transfer during decorating so kids can handle their creations sooner. The full kit meets ASTM F963 toy safety standards with a Children's Product Certificate on file, making it confidently recommended for ages 3 and up
- Fun for Every Age: Grandparents, parents, and toddlers all get their own turn at the spinner, comparing swirls and laughing over which pattern came out wildest. Ages 3 and up means the whole family joins in; bring it to birthday parties, spring celebrations, classroom craft nights, or any gathering where a creative activity is welcome. It makes a genuinely egg-cellent Easter basket gift or holiday present for kids and grown-ups alike
- Easy Setup, Works With Eggs You Have: Place a large or extra-large hard boiled egg on the self-contained spinner unit and you are ready to go; the compact design sits neatly on a kitchen table or craft room surface without taking over the space. This egg decorating spinner works best with large or extra-large hard boiled eggs, wooden eggs, and EggMazing branded eggs - grab what you have at home and start spinning right away
- Complete Kit Contents: Every Eggmazing Peeps Bunny Easter egg decorating kit includes 1 motorized Peeps Bunny spinner and 8 colorful non-toxic markers (orange, yellow, green, blue, purple, and pink shades for a full rainbow of designs). Note: requires 3 AA batteries (not included) and eggs (not included) to get spinning - this kit is an egg-cellent gift ready right out of the box
39. Nature-Themed Artwork Eggs
Look: leaves, mushrooms, insects, birds, shells, or tiny landscapes. Base: smooth wood, ceramic, or papier-mâché. Materials: pencil, fine brushes, opaque and transparent paints, and sealer. How: Pick one visual world instead of mixing every motif; map the largest shapes first, then add veins, scales, feathers, or texture. Plan: 30–90 minutes active; dry 1–2 hours; intermediate; low-medium mess; reusable. Safety: display-only.
40. Découpage Napkin Eggs
Look: almost painted-on floral or illustrated imagery. Base: wood, foam, papier-mâché, or blown-out shell. Materials: patterned paper napkin, decoupage medium, soft brush, and scissors. How: Separate the printed top ply, tear small pieces, lay them on a thin coat of medium, smooth with a nearly dry brush, and seal with another thin coat. Plan: 20–30 minutes active; dry 1–2 hours; beginner; medium mess; reusable. Safety: display-only.
41. Chalkboard Eggs
Look: matte black eggs with changeable white messages and drawings. Base: wood, ceramic, or plastic. Materials: chalkboard paint, primer, chalk or chalk markers, and optional sealer. How: Prime if needed, apply two thin coats of chalkboard paint, allow it to cure fully, then draw names, menus, flowers, or jokes. Plan: 15–25 minutes active; cure overnight; beginner; low mess; reusable if left unsealed. Safety: display-only.
Do these 3 things before closing this tab:
1Clear out junk files and repair common Windows errors2Scan for outdated or missing drivers - takes under a minute3Repair Windows errors before they cause bigger problems42. Sticker Eggs
Look: instant pattern from dots, stars, letters, animals, or floral stickers. Base: plastic, wood, foam, or dry hard-boiled egg. Materials: stickers, tweezers, and optional ribbon or craft sealer. How: Dry the egg completely, apply large stickers first, press down the edges, and finish with smaller accents. Plan: 5–10 minutes active; no drying; beginner; very low mess; reusable on craft eggs. Safety: display-only unless decorations are explicitly food-safe; supervise small stickers.
Keepsake and advanced techniques
43. Pysanky
Look: layered geometric and symbolic designs revealed by removing wax. Base: preferably a blown-out egg for a keepsake. Materials: kistka, beeswax, dyes arranged from light to dark, candle or controlled wax-removal heat, pencil, and drying stand. How: Draw a design, cover the areas that should remain light with wax, dip into the next color, wax the areas to preserve, and continue from light to dark. Remove the wax gradually at the end to reveal the pattern. Plan: 1–4 hours active; several hours to overnight between dye stages; advanced; medium mess; reusable. Safety: display-only when craft or chemical dyes are used; hot tools and heat require adult control. Pysanky are not simply painted or dotted eggs: they are part of the Ukrainian tradition and art of egg decoration, which UNESCO added to its Representative List of the Intangible Cultural Heritage of Humanity in December 2024. See UNESCO’s listing, the Ukrainian Ministry of Culture, and Martha Stewart’s pysanky guide.
44. Pointillism Eggs
Look: images and gradients built entirely from dots. Base: wood, ceramic, or papier-mâché. Materials: fine dotting tools, several values of paint, pencil, and sealer. How: Block in the silhouette lightly, place larger dark dots in shadow areas, and use smaller, lighter dots toward highlights. Rotate often to keep the image readable around the curve. Plan: 30–90 minutes active; dry 1–2 hours; intermediate; low mess; reusable. Safety: display-only.
45. Floral Basket Eggs
Look: an egg transformed into a tiny flower-filled basket or floral arrangement. Base: foam, plastic, or papier-mâché. Materials: paint, artificial flowers or paper flowers, twine, craft glue, and a small basket or nest. How: Paint the egg or basket, arrange flowers around the top or base, glue only after the composition works, and add leaves or a tag. Plan: 25–45 minutes active; dry 1–2 hours; intermediate; medium mess; reusable. Safety: display-only; keep loose parts away from small children.
Quick wins for a faster PC:
Repair Windows errors before they cause bigger problemsFix Now →Scan for outdated or missing drivers - takes under a minuteDriver Scan →Clear out junk files and repair common Windows errorsFree Scan →46. Thread-Wrapped Eggs
Look: tactile ombré stripes or a smooth yarn-covered surface. Base: foam or plastic egg. Materials: embroidery floss, yarn or sewing thread, craft glue, brush, and scissors. How: Brush glue onto a small area, wind thread tightly in parallel rows, keep the tension even, and change color at planned bands. Plan: 30–60 minutes active; dry 1–2 hours; beginner-intermediate; low-medium mess; reusable. Safety: display-only.
47. Gnome Eggs
Look: tiny gnome characters with pointed hats and beards. Base: wooden, foam, or plastic egg. Materials: paint, felt, yarn, glue, and fine brush. How: Paint the body, glue on a felt hat and yarn beard, then add a nose and simple facial details. Plan: 20–30 minutes active; dry 30–60 minutes; beginner; low-medium mess; reusable. Safety: display-only; supervise yarn, glue, and small parts.
48. Striped Eggs
Look: vertical, horizontal, diagonal, or irregular hand-painted bands. Base: hard-boiled or craft egg. Materials: food-safe dye for edible eggs, or paint and painter’s tape for craft eggs. How: Plan the stripe direction, apply the lightest color first, let it dry, then mask or paint successive bands. Uneven hand-painted stripes can look more charming than mechanically perfect ones. Plan: 10–25 minutes active; dry 30–90 minutes; beginner; low-medium mess; reusable on craft eggs. Safety: edible only with food-safe materials.
49. Scrambled Lines and Letters Eggs
Look: energetic abstract marks, tangled lines, and scattered typography. Base: white wood, ceramic, or papier-mâché. Materials: pencil, fine paintbrushes or paint pens, two to four colors, and sealer. How: Draw continuous looping lines first, add letters or fragments second, and repeat only a few colors so the surface stays intentional rather than muddy. Plan: 15–30 minutes active; dry 1–2 hours; beginner-intermediate; low mess; reusable. Safety: display-only with craft markers and paint.
What’s actually slowing this PC down?
Pick the symptom - the matching free tool is one click away.
50. Ink-Dyed Eggs
Look: translucent washes, bleeding edges, and saturated ink pools. Base: ceramic, wood, plastic, or blown-out shell. Materials: craft ink, droppers, gloves, absorbent paper, and sealer. How: Apply small drops, tilt the egg to let color travel, blot excess, and layer only after the first wash dries. Plan: 15–25 minutes active; dry 1–2 hours; intermediate; high mess; reusable. Safety: display-only; ink is not automatically food-safe.
51. Tie-Dye Eggs
Look: quick, soft-edged bands of several colors. Base: hard-boiled or craft egg. Materials: paper towel, food coloring, rubber band, spray bottle, and a solution of one teaspoon vinegar per cup of water. How: Place drops of color on the paper towel, mist it with the vinegar solution, wrap it around the egg, secure it, wait 30 seconds, and unwrap. Different paper-towel perforations create different textures. Dry before handling. See the tie-dye method. Plan: 10 minutes active; 30–60 minutes drying; beginner; medium mess; reusable on craft eggs. Safety: potentially edible only when using food-safe dye and clean food-contact materials.
Core techniques worth mastering
Basic food-dye color blocking
- Hard-boil the eggs, cool them, and dry the shells completely.
- Prepare shallow dye baths. A source-specific color-block setup uses two cups of water, two tablespoons of vinegar, and dye baths about half an inch deep.
- Dip one section for several seconds to about one minute, remove it, and dry it before changing the angle or color.
- Repeat with the remaining sections. Use separate utensils and keep the edible batch away from craft supplies.
Commercial food dye is generally the most predictable route to bright color. Brown, duck, quail, goose, and other shells will not match white shells. See the American Egg Board method.
Natural dyeing
Use red cabbage, turmeric, onion skins, beets, or strong coffee as a pantry-based palette. Boiling the dye ingredients generally gives a stronger bath; cold soaking gives lighter, softer color. Strain before adding eggs. Natural does not mean automatically edible, risk-free, or color-consistent: the shell, water, temperature, ingredient concentration, and soak time all matter. The tested natural-dye chart is a useful starting point, not a guarantee for every kitchen.
Free tools Windows power users keep installed
One-click scans. No signup required.
Best Value
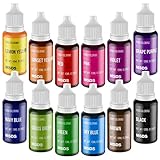
- VIVID COLORS FOR CAKE DECORATING - Comes with 12 virbant color highly concentrated edible food coloring in a wide range of bright vivid colors. Includes: Lemon Yellow, Sunset Yellow, Grass Green, Violet, Grape Purple, Navy Blue, Sky Blue, Red, Brown, Pink, Green and Black. (each color is 0.35 fl.oz). You just need a little bit coloring to get the bright color you want. Colors could be mixed together to create new shades
- FOOD GRADE INGREDIENTS & NO TASTE - Made from safe ingredients, this food grade liquid food coloring set totally meets American food standards, odorless and tasteless, won't alter the taste or texture of any recipe. What's more, it's dairy-free, nut-free, sugar-free and gluten-free, vegetarians can also eat with confidence
- EASY to USE - Highly concentrated liquid food color, with upgraded drop mouth and squeeze bottle design, makes it easy to control your drops and enables accurate mixing. The dosage is controllable, customize your exclusive color. Buy the 12 bottles food coloring with different colors, you will love the homemade baking and crafting experience with this food dye set
- GREAT COLORING EFFECT & STABILITY: Produced by this food coloring set, the food will be bright , and the color will not change when heated and frozen. It can keep the color soft and bright for a long time, and will not evaporate with the water. Use simple colors to make gorgeous food, say goodbye to the dullness of baking
- WIDE APPLICATION - This coloring set can be widely used on cake decoration, frosting, icing, fondant, batter, cookie dough etc; also perfect for Easter eggs, slime, soap, bath bombs and other craft making. This edible coloring set is very suitable for you to decorate your desserts on Valentine's Day, Anniversaries, Birthday, Easter Day, Christmas, Halloween and Thanksgiving Day. Great decorating DIY kit for both beginners and professionals
Oil marbleizing
- Make and dry a base-colored egg.
- Prepare a second shallow dye bath about half an inch deep.
- Add one tablespoon of olive oil and drag a fork through the surface to make curlicues.
- Roll the egg through once, pat it dry, and leave it untouched until the surface is fully dry.
Use a tray or washable table covering: this is one of the highest-mess dye methods. The oil prevents even contact, so each egg is unique. The marbleizing instructions are source-specific.
Paper-towel tie-dye
Drop food coloring onto a paper towel, mist with one teaspoon of vinegar per cup of water, wrap the towel around the egg, secure it with a rubber band, wait 30 seconds, and unwrap. Dry it in an egg carton or foil nest. The paper towel’s perforations and folds change the pattern, so test one egg before making a full set.
Silk transfer
Use genuine 100% silk with a printed pattern; polyester will not transfer the same way. Wrap the printed side against the egg, cover it with white cloth, secure it, and simmer with vinegar as described in the silk card. Because the materials and heat-transfer process are not an edible decoration, label the finished eggs for display only.
Blowing out an egg safely
- Choose an uncracked refrigerated raw egg.
- Wash the shell in hot water and follow USDA’s sanitizing guidance.
- Pierce both ends, widen one hole slightly, break the yolk with a straightened paper clip, and expel the contents with a bulb syringe.
- Rinse the shell, dry it completely, and refrigerate the contents. Use them within two to four days.
Wear gloves if you have broken skin, clean the work area, and do not blow by mouth. A hollow shell can float in a dye bath; a temporary weight or a sealed baggie can help keep it submerged. The blow-out instructions and USDA guidance cover different parts of the process.
Decoupage without wrinkles
Use thin paper or the printed top ply of a napkin. Tear pieces rather than trying to wrap one large rectangle around the curve. Brush on a thin coat of medium, place the paper, smooth from the center outward with a soft nearly dry brush, and add a final thin coat only after the first layer has settled. Decoupage eggs are display-only.
Traditional pysanky
Pysanky uses wax as a resist, not paint as the final surface. The artist writes wax lines, dips the egg through progressively darker colors, rewaxes the areas to preserve, and removes the wax at the end. Work from light to dark, make every resist line continuous, and use controlled heat to remove wax. Never hold the egg directly over an open flame. A simple dotted egg may be beautiful, but it is not automatically pysanky; reserve the term for this Ukrainian wax-resist tradition.
Troubleshooting: when the finish goes wrong
| Problem | Likely cause | Recovery |
|---|---|---|
| Dye looks pale | Short soak, weak bath, brown shell, or naturally subtle pigment | Use a deeper bath or longer soak; dry between layers. Do not expect natural dyes to behave like commercial dye. |
| Colors turn muddy | Too many overlapping colors or an overworked marble surface | Use fewer colors, clean the bath, and make one deliberate pass through oil or shaving cream. |
| Tape or stickers lift | Damp, oily, rough, or highly textured surface | Dry the egg fully, press edges firmly, and use a smoother craft egg. |
| Paint drips | Coat is too thick or the egg was rotated too soon | Apply several light coats, rest the egg in a carton or foil nest, and dry one side before turning. |
| Shell breaks | Too much pressure, a thin shell, or an unsuitable base | Switch to wood, plastic, foam, ceramic, or papier-mâché for elaborate projects. |
| Blown-out egg floats | Air remains inside the shell | Temporarily weigh it down or use a sealed baggie while dyeing; keep the shell dry afterward. |
| Pysanky wax smears | Incomplete resist lines, excess heat, or working out of color order | Work light to dark, keep lines closed, and remove wax gradually with controlled heat. |
| A craft-decorated egg is mistaken for food | Mixed edible and craft batches | Discard it. Do not try to wash off paint, glue, ink, glitter, or craft dye. |
Display, drying, and storage
Dye adheres best to a clean, dry shell. Keep wet eggs from rolling in an egg carton, muffin tin, skewer stand, foil nest, or small cup. Let one layer dry before adding tape, paint, lettering, or a second dye bath.
For a table, group eggs in a shallow nest of moss or paper, place them in a bowl with contrasting foliage, or hang blown-out and craft eggs from branches with ribbon. Keep hard-boiled eggs refrigerated at 40°F/4°C or below, never freeze them, and use them within one week. Eggs hidden for a hunt should be discarded afterward, regardless of the dye used. Wood, plastic, foam, ceramic, cotton, papier-mâché, and paper eggs are the practical choice for decorations that need to survive the season.
Quick wins for a faster PC:
Fix the driver behind crashes, sound loss and screen glitchesFind Drivers →Clear out junk files and repair common Windows errorsFree Scan →Scan for outdated or missing drivers - takes under a minuteDriver Scan →Our simplest recommendation
For an edible family activity, use hard-boiled eggs, food-safe dye, two-tone blocks, dots, or stripes. For a child-friendly craft table, use plastic or wooden eggs with stickers, washi tape, puffy paint, or animal faces. For a centerpiece, choose silk transfer, marbleizing, galaxy paint, foil, or thread. For a long-term keepsake, use a craft egg or blown-out shell—and for pysanky, learn the Ukrainian wax-resist tradition rather than treating it as ordinary painted decoration.
These ideas synthesize the 51-design collection from Martha Stewart, additional craft formats from Good Housekeeping, food-safe color-block guidance from the American Egg Board, and food-safety guidance from the FDA and USDA FSIS.
Frequently Asked Questions
Can decorated Easter eggs be eaten?
A hard-boiled egg may be eaten only when it was decorated with materials specifically intended for food contact and kept refrigerated. Eggs made with paint, glue, Mod Podge, markers, glitter, metallic leaf, shaving cream, hot glue, or craft dyes are display-only. Never eat eggs that were hidden or handled during a hunt.
How long do decorated hard-boiled eggs last?
Keep hard-boiled eggs refrigerated at 40°F/4°C or below and use them within one week. Do not eat eggs that have been hidden or played with, even if they were colored with food-safe dye.
What is the safest option for toddlers?
Use plastic, foam, or wooden eggs with stickers, washi tape, crayons, or simple paint. Avoid hot glue, hot dye, sharp tools, drills, solvents, open flames, and small detachable parts.
What is the difference between pysanky and painted eggs?
Pysanky are Ukrainian wax-resist eggs: the artist writes wax lines, dyes the egg from light to dark, rewaxes areas to preserve them, and removes the wax at the end. A generic painted, dotted, or marbled egg is not automatically pysanky.
The Bottom Line
The best Easter egg design depends on the base: hard-boiled eggs for short-term food-safe decorating, blown-out shells for fragile keepsakes, and craft eggs for paint, glue, glitter, messy techniques, and reuse. Keep every craft-material egg out of the food batch—and discard eggs after an egg hunt.
Quick Recap

Product prices and availability are accurate as of the date/time indicated and are subject to change. Any price and availability information displayed on Amazon at the time of purchase will apply.
Do these 3 things before closing this tab:
1Scan for outdated or missing drivers - takes under a minute2Clear out junk files and repair common Windows errors3Fix the driver behind crashes, sound loss and screen glitches



