PC Slower Than It Used to Be?
Outbyte PC Repair · freeA free scan shows the junk files, broken settings and background clutter dragging Windows down - then fixes them in one click.
Run a Free PC Scan →ThatPainter is reader-supported. When you buy through links on our site, we may earn an affiliate commission. Learn More
Intarsia works best as a precision workflow, not as a race to cut out a picture. Choose wood for contrast, grain, thickness, and workability; cut pattern-defined parts accurately; clean and test-fit the edges; shape the pieces into deliberate relief; then assemble and finish the composition.
Successful intarsia depends less on cutting a picture out of wood than on controlling a sequence of small decisions: choose contrasting wood, prepare an accurate pattern, cut parts squarely, shape them into different heights, fit them without forcing, and finish the assembly so the relief remains visible. If the cutting is inaccurate, sanding alone will not rescue the joints; if every piece is left flat, even a gap-free assembly will look flat.
What makes intarsia different from ordinary scroll-saw work?
Intarsia is a wood picture assembled from separate pieces. Each piece contributes more than color: its grain, thickness, edge profile, height, and surface contour help describe the subject. A light wood may become a highlight, a darker piece a recess or outline, and a carefully sanded edge may suggest a rounded cheek, feather, leaf, or fold.
That makes intarsia a precision workflow rather than simply a method of cutting out a pattern:
#1 Best Overall

- Cr-V 60 Steel Blades: Each chisel in this set is meticulously crafted from Cr-V 60 chromium-vanadium steel, and heat-treated for enhanced durability, with a hardness range of 56-61 HRC. This ensures that the blades stay sharp and durable for long-lasting use, providing precise and clean cuts every time.
- Corrosion Resistance & Sharpness Carving Chisel Kits With repeated use, the blades maintain their sharpness, making them ideal for woodworking, carving, and other detailed tasks in both dry and humid conditions .
- Big Size Comfortable and Solid Handle The handles are designed to resemble walnut wood, offering both an aesthetically pleasing look and a comfortable grip. Made with precision craftsmanship, these handles are sturdy and provide a comfortable holding, making them perfect for extended use."
- Good Connection Between Handle and Blade The chisel blades are tightly connected to the handles using an advanced internal and external fixation design, ensuring they remain firmly in place during use. This design minimizes the risk of loosening or detachment.
- Professionals 12-Piece Carving Chisel Set for Carving This wood carving tool set includes 12 chisels with varying sizes and shapes, including: 4 Pcs Straight Curved Gouge: (6mm)1/4Inch, (10mm)3/8Inch, (16mm)5/8Inch, (25mm)1Inch; 2pcs Straight Flat Chisel: (6mm)1/4Inch, (13mm)1/2Inch; 2Pcs V-Straight Chisel: (14mm)9/16Inch, (16mm)5/8Inch 1pc Spoon Gouge: (18mm)3/4Inch; 1pc Bent Flat Gouge: (19mm)3/4Inch; 1pc Bent Curved Gouge: (12mm)1/2Inch; 1pc Skew Chisel: (12mm)1/2 Inch The set is designed for both professional carvers and hobbyists, allowing for a wide range of carving and sculpting tasks.
- Plan the color, grain, and dimensional hierarchy.
- Prepare accurate pattern sections and suitable stock.
- Cut each part with the correct blade and a square table.
- Clean the edges and test-fit the parts.
- Shape and sand the pieces to create relief.
- Prepare the backs, glue the composition, and add a backer if the design calls for one.
- Apply a finish that clarifies the wood and shaping instead of concealing defects.
1. Plan the image before choosing wood
Begin with the pattern’s color breaks and dimensional priorities, not with whichever boards happen to be in the shop. Sort the design into broad visual groups—light, medium, medium-dark, and dark—and then decide where grain direction and relief will help explain the subject.
There is no single mandatory species for intarsia. A useful choice must balance four factors:
- Color and contrast: Adjacent pieces need enough difference to remain legible after finishing.
- Grain direction: Grain can follow the length of a leaf, the curve of a feather, or the direction of fur. A conflicting grain may make a carefully shaped part look visually wrong.
- Thickness: Different thicknesses can help establish a dimensional hierarchy, although thickness must still leave enough material for safe cutting and shaping.
- Hardness and workability: Very hard stock, soft stock, and mixed assemblies behave differently under a scroll-saw blade and abrasive.
Lay sample boards beside the pattern before cutting. Look at them under the lighting in which the finished piece will be displayed; a dramatic contrast on the workbench can become subtler under a clear finish. Also mark grain direction on the back of each blank. This simple step prevents a carefully cut part from being installed in an unintended orientation.
What’s actually slowing this PC down?
Pick the symptom - the matching free tool is one click away.
2. Make the pattern and stock manageable
Accuracy begins before the saw is switched on. Use multiple pattern copies when possible: one can remain intact as a reference, while others can be cut into sections or attached to individual blanks. Consistent pattern placement is more reliable than repeatedly estimating where a line belongs.
For a tight joint, decide in advance how the blade will relate to the line. With a suitable blade, beginners should generally aim to cut along the center of the pattern line. A larger blade may require moving slightly toward the outside of the line, while experienced makers may deliberately preserve a portion of the line. Avoid routinely cutting over the line with the intention of sanding back to it; that makes it difficult to maintain square mating edges.
Rough-cut large boards first
Do not try to maneuver a full-size board around a small scroll-saw table when the design can be divided into hand-size sections. Rough-cut grouped areas before detailed work. Smaller workpieces are easier to control, easier to see around, and less likely to catch or twist during a turn.
When a part contains an enclosed opening, drill the access hole before sawing the interior. Plan the order of cuts so the final cut releases the piece cleanly from the surrounding block. This reduces awkward handling and helps preserve the stock around the part.
Outdated Drivers Are Slowing You Down
One free scan finds every outdated or missing driver and matches the right update for your exact hardware.Free scan · exact hardware matchWindows Errors? Fix Them Before They Spread
Repair common Windows errors and clear accumulated junk for a smoother, more stable PC - no reinstall needed.Free scan · no reinstall3. Set up the scroll saw for accurate fit
A square table is fundamental. Tension the blade correctly for the saw, then verify the table-to-blade relationship rather than assuming the factory setting is still accurate. A useful check is to cut a gentle curve in scrap and inspect the edge with a small square. A curved cut makes a lean in the blade easier to see than a short straight cut.
Rank #2

- 【ULTRA-HARD 60CRV STEEL BLADES 】Stop struggling with dull tools. Our 12-piece wood carving chisels Kit are forged from premium 60CRV Chrome Vanadium Steel, reaching a professional hardness . These blades maintain a razor-sharp edge significantly longer than standard carbon steel, ensuring precision in every relief carving, figurine, or house sign project.
- 【PREMIUM IMPORTED ASH WOOD HANDLES】Designed for comfort and longevity. Each Carving Chisels features a handle made from imported Ash Wood . This ergonomic grip prevents cracking, absorbs shock, and provides a powerful, steady hold for long carving projects—outperforming cheap pine or plastic alternatives.
- 【12 VERSATILE SHAPES FOR EVERY PROJECT】From 20mm semi-circle gouges to 6mm triangular tools, this comprehensive kit includes everything you need: Gouges, Straight Chisels, V-Parting Tools, Skew Chisels, Flat Chisels, and Deep Bowl Gouges. Perfect for wood, soapstone, clay, and more—ideal for detailed carving, shaping, and finishing.
- 【HEAVY-DUTY PORTABLE CANVAS CASE】Keep your tools organized and protected with our included 400D cotton canvas storage bag (46x27cm). The bag design features secure slots for tools, offering excellent abrasion resistance and softness for easy transport to your workshop or class.
- 【THE PERFECT GIFT FOR CRAFTSMEN】Tackle a wide range of wood working projects—— reliefs, figurines, house signs, cartoon characters, bowls, and spoons. Perfect for both professional woodworkers and beginner-friendly crafting, this set makes a thoughtful gift for any DIY enthusiast.
Choose the blade for the wood and cut
Blade size is a starting point, not a universal rule. Guidance for common intarsia work describes a no. 5 reverse skip-tooth blade as a useful starting point for many softwoods and hardwoods up to about 1 inch thick, with a more aggressive no. 7 used for stock up to roughly 1¾ inches. Smaller blades suit intricate interior cuts, while larger blades can be more appropriate for very hard wood or thicker stock.
Those figures do not override the saw manufacturer’s guidance or the behavior of your particular blade. Test a short cut in offcut material and evaluate control, edge quality, burning, and the ability to follow the line. Keeping several sizes of scroll saw blades available is more useful than trying to make one blade handle every species and thickness.
Reverse-tooth and reverse-skip configurations can reduce underside splintering because they cut on both the upstroke and downstroke. They do not make the underside automatically perfect. Inspect the bottom of every part; a remaining splinter or raised chip can prevent the piece from sitting flat and can make a joint appear inaccurately cut.
Recommended Free Tools
Replace a blade before it becomes a problem
A dull blade may still cut, but it encourages extra pressure, wandering, rough edges, burning, and out-of-square cuts. A practical rule from intarsia guidance is to change the blade when you first wonder whether it is getting dull. Forcing it through expensive stock often costs more than replacing it.
Use speed as a control variable
Published guidance varies: one source gives approximately 60–70 percent of maximum speed as a general starting point, while another describes working around 80 percent on a variable-speed saw. The difference is a reason to test, not a contradiction to hide. Choose the speed that allows the blade to cut cleanly while you steer accurately through the specific wood.
Feed slowly enough that the blade does the cutting. Excessive forward pressure can flex the blade, roughen the edge, and leave the mating surface out of square. Keep the workpiece flat on the table, hold it down securely, and reposition your hands before a tight curve or turn. A useful beginner cue is: the blade is doing the cutting; your hands are steering the wood.
If the line begins to get away from you, do not twist the stock to rescue the cut. Stop, back out if the cut permits it, reposition the workpiece, and continue with the piece supported flat.
4. Make fit the priority
Before judging a joint, clean both edges and inspect the underside. Tear-out, fuzz, and splinters change the way a part sits on the table and can create a false gap. Remove loose material carefully, then check whether the table is square and whether the blade was appropriate for the thickness and curve.
For tight joints, diagnose the cut before reaching for sandpaper. Check these in order:
Rank #3

- 【SHARP CR-V 60 STEEL BLADES】Our wood carving kit blade is crafted from tough vanadium steel chromium alloy, quenched to a hardness of C60. It then undergoes two months of manual polishing, resulting in excellent sharpness and remarkable durability.
- 【EXQUISITE CRAFTSMANSHIP】All handles of the wood chisel sets are made from premium white ash, strong and resistant to warping. Its octagonal hardwood handle prevents rolling and ensures a balanced, comfortable grip. Chamfered end enhances stability during work, while the polished surface enhances moisture resistance and durability, maintaining a secure connection with the blade for demanding tasks.
- 【SHOCK-ABSORBING NYLON HAMMER】Our wood carving kit includes hammer,the hammer head is crafted from wear-resistant and corrosion-resistant nylon, capable of absorbing impact recoil, effectively transferring force to tools without causing damage.Its ergonomic wooden handle prevents fatigue during extended use. Built with durable 304 stainless steel joints and a round nut at the end for high reliability and durability.
- 【START ANY PROJECT】This wood chisel sets has 12 versatile chisels, a wooden mallet, and a 400D canvas storage pouch, all for achieving impeccable craftsmanship. Start various beginner woodworking projects: reliefs, figurines, house signs, cartoon characters, bowls, and spoons.
- 【SERVICE FIRST】We offers a 3-year factory warranty on the wood carving tools. If there is any problem with the wood carving tools set within 3 years, we offer free return and exchange service. If you have any questions about our wood chisels for woodworking, please don't hesitate to contact us immediately, we are here for you 24 hours a day.
- Blade squareness: Did the blade lean, causing the edge to be angled?
- Pattern-line position: Did you cut in the center of the line, preserve too much line, or cross it?
- Feed pressure: Did pushing too hard bend or deflect the blade?
- Underside condition: Is a splinter holding one part above the other?
- Blade sharpness: Did a dull blade force you to steer or push abnormally?
Do not sand aggressively to compensate for a major cutting error. Sanding is excellent for refining a contour and creating relief, but removing large amounts from a mating edge can destroy the pattern’s geometry and make neighboring parts fit worse.
5. Shape gradually to create three-dimensional relief
Cutting creates the outline; shaping creates the image. After the parts are cut and dry-fitted, decide where the high points, slopes, recesses, and crisp transitions should be. The goal is not to round every piece uniformly. The goal is to remove material in a way that makes the subject readable.
Free tools Windows power users keep installed
One-click scans. No signup required.
For example, a rounded form may need a broad high area that fades into lower edges. A recessed feature may need a controlled hollow rather than a deep groove. A narrow detail may need to remain relatively crisp beside a larger, softer contour. The correct profile depends on the pattern and subject, so no single contour recipe applies to every project.
Use the right shaping tool for the area
- Powered sanding: Useful for broad contours and repeated shaping when you can keep the tool under control.
- Sanding drums: Helpful for removing material in selected curves and recesses.
- Sanding mops: Useful for flexible surface shaping and some rounded transitions.
- Hand sanding: Best for tiny recesses, narrow transitions, fragile tips, and final refinement.
Work in stages. Remove a little material, return the part to the pattern, compare it with neighboring pieces, and then continue. Marking the intended high point or centerline on the back can help you avoid flattening the feature that gives the part its form.
Detail sanding tools, including sanding drums, sanding mops, and fine abrasives, are particularly useful here, but they should increase control—not encourage you to remove material faster than you can evaluate the shape.
Use sanding shims selectively
Sanding shims can hold several related pieces as a unit during selected operations. This can help maintain a shared curve or transition, but it is only a workflow aid. Check every part individually before final assembly so one slightly proud or tilted piece does not transfer an error to the whole group.
Do these 3 things before closing this tab:
1Fix the driver behind crashes, sound loss and screen glitches2Repair Windows errors before they cause bigger problems3Scan for outdated or missing drivers - takes under a minute6. Prepare the backs before glue-up
Shaped tops are only half the assembly problem. The backs and joining surfaces must allow the composition to sit properly on the work surface or backer board. Remove glue ridges, raised fibers, and high spots before applying adhesive.
One documented back-preparation example starts with 80-grit abrasive to remove thicker glue spots and follows with 150-grit to finish-sand the back. Treat that as an example rather than a compulsory grit schedule: the appropriate progression depends on how much material must be removed and the condition of the surface.
Rank #4

- Specifications - 12 pcs wood carving chisel with an easy carrying leather bag. Enough variety of the tips in different 12 sizes-deep gouge, medium gouge, shallow gouge, narrow straight chisel, wide straight chisel, rounded chisel, 4 angled knives / chisels, parting tool, pinpoint tool. Our full size durable woodworking sets would be helpful tools in your happy wood carving time.
- It's already sharpened, and can sharpened it again as you need.
- Durable Handle - These chisel handles are made of durable wood with a stainless steel hoop on the top to tighten it. The handle can bear impact, easy for you to hand the chisel, which would be a great helper in your woodworking time.
- Widely Usage - Our woodworking tools kits great for beginners whether it's kids or adults, we know that wood carving is not just a hobby, but a passion that can last a lifetime, with our tools to use in kinds of wood carving and woodwork.
- Ideal Gift - Our full size wood carving tools set is suitable as a gift for your friends and relatives who love woodworking projects. It's widely used and durable. Could be a gift for birthday, Father's Day, Christmas, etc. it's the ideal gift for professional craftsmen, DIY enthusiasts, and artists
Dry-assemble the complete design before gluing. Confirm the orientation of grain, the position of highlights and dark sections, and the fit of the outside boundary. Take a reference photograph if the layout is complex. Glue in a sequence that keeps parts aligned and avoids trapping a piece that should have been installed earlier.
7. Decide whether the design needs a backer
A backer board can support the composition and provide a clean finished boundary, but it is not automatically required for every intarsia design. The choice depends on the pattern, the intended display method, the thickness of the parts, and whether the reverse side will be visible.
Quick wins for a faster PC:
Clear out junk files and repair common Windows errorsFree Scan →Fix the driver behind crashes, sound loss and screen glitchesFind Drivers →Repair Windows errors before they cause bigger problemsFix Now →If the design calls for a backer, make sure the rear surfaces sit cleanly before assembly. If the back is visible, give it the same level of planning as the front: remove glue squeeze-out, avoid leaving sharp or unstable projections, and choose a finish appropriate to its role.
8. Finish for clarity, not camouflage
Finishing should strengthen the visual plan. A clear or tinted finish can deepen contrast, emphasize grain, and make the relief easier to read. Staining, overlays, laminations, wood burning, and carved texture can extend the design when the pattern calls for them.
There is no universal best finish for all intarsia. Consider:
- the species and how it reacts to color;
- whether the piece will be handled or displayed;
- the sheen that best reveals the relief;
- whether a tinted finish will obscure natural differences between woods; and
- whether the finish could pool in recesses or emphasize sanding scratches.
Do not use finish to disguise poor fit, glue residue, or uneven sanding. Inspect the dry assembly under raking light first. That light can reveal proud edges, scratches, and gaps that ordinary overhead lighting hides.
The Tool Desk
Outbyte PC Repair FREEClear out junk files and repair common Windows errorsFree Scan →Outbyte Driver Updater FREEScan for outdated or missing drivers - takes under a minuteDriver Scan →Common intarsia problems and precise fixes
| Problem | Likely causes | What to do |
|---|---|---|
| Gaps between parts | Angled blade, incorrect line placement, feed pressure, or underside splinters | Clean the edges, verify the table, inspect the bottom, and improve the cut before widening or narrowing the joint with sandpaper. |
| Ragged underside | Blade configuration, dull blade, unsupported fibers, or forcing the cut | Try an appropriate reverse-tooth or reverse-skip blade, slow the feed, inspect often, and remove loose splinters before fitting. |
| Parts are no longer square | Table not square, blade deflection, or excessive pressure | Recheck the table and blade, reduce feed pressure, and do not rely on sanding to correct a substantial angle. |
| The finished piece looks flat | Parts were left at one height or shaped without a clear relief plan | Return to the shaping stage and establish deliberate high points, slopes, recesses, and edge transitions. |
| Burning or rough sanding | Unsuitable speed, dull abrasive, excessive pressure, or an uncontrolled tool | Test on scrap, adjust one variable at a time, and switch to hand sanding for small or fragile areas. |
| The first project feels overwhelming | Too many small parts or an unclear progression of techniques | Choose a manageable pattern with a clear sequence and graduated skill-building projects. |
A practical starter checklist
- Accurate pattern copies or a reliable pattern-transfer method
- A scroll saw with a square table and correctly tensioned blade
- Several sharp blade sizes suited to different cuts and materials
- Contrasting wood blanks selected for color, grain, thickness, and workability
- Sandpaper and detail-shaping tools, including hand abrasives for small areas
- Wood glue and, when required by the design, a backer board
- A project-appropriate stain or finish
- Eye protection, dust control, and safe operating practices
For machine-specific precautions, follow the scroll-saw manufacturer’s instructions. Eye protection and dust control are sensible baseline practices, but blade-changing, guarding, tensioning, and operating procedures vary by machine.
Choosing a first intarsia pattern
A beginner-friendly pattern should have a manageable number of pieces, clear color breaks, and shapes that can be understood without extreme detail. A design that progresses from broad contours to a few smaller features teaches more than a crowded image that demands tiny cuts immediately.
Best Value
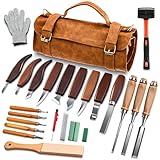
- 18+ Only - Age Verification Required 25-PREMIUM WOOD CARVING TOOLS FOR EVERY PROJECT:This comprehensive wood carving kit includes 3 chisels, 8 whittling knives, 5 detail knives, 1 scriber, 1 hammer, 1 marking knife, 1 large sharpening stone, polishing paste, a leather strop, and safety gloves. Perfect for wood carving, spoon carving, stone carving, and detailed craftwork, it meets all your artistic needs whether you're a beginner or a professional.
- DURABLE LEATHER STORAGE ROLL WITH PORTABILITY:Comes with a high-quality leather tool roll bag featuring double-layer storage, a handheld strap, and a shoulder strap. It keeps all Wood Whittling Kit organized, protected, and easy to carry—ideal for woodworking on the go or storing safely at home.
- SHARP & DURABLE BLADES FOR SMOOTH CARVING:Each wood carving knife and chisel is made of corrosion-resistant stainless steel reinforced with Mo.V alloy. Pre-sharpened and assembled with air-pressure technology, they resist deformation, stay sharp longer, and ensure clean cuts in wood carving blocks and other soft materials.
- COMFORTABLE & SAFE TO USE: The Wood Carving Knife equiped with ergonomic walnut handles are varnished for a non-slip grip that reduces hand fatigue. The upgraded leather strop includes a handle and table mount hole for secure sharpening. Safety gloves are also included—making this Whittling Kit safe and user-friendly for beginners.
- PERFECT GIFT FOR CRAFT ENTHUSIASTS :An excellent Wood Whittling Kit for men, women, and craft lovers. Great for holidays like Christmas, birthdays, or Thanksgiving. It encourages creativity and makes for a meaningful hobby—whether for whittling, carving stencils, or DIY woodworking projects.
Look for a pattern whose dimensional logic is visible: the instructions or reference image should make it reasonably clear which parts are raised, recessed, rounded, or left crisp. Pattern and instructional books dedicated to intarsia can be useful when they explain not only the outline but also the cutting, sanding, shaping, assembly, and finishing sequence.
Where to spend money first
If you already own a suitable scroll saw, spend first on consumables that directly affect accuracy: sharp blades in more than one size, appropriate abrasives, and sound wood blanks. A large assortment of specialty tools cannot compensate for a dull blade or badly prepared stock.
After that, invest in learning material or patterns that show shaping decisions rather than only finished photographs. For makers who want structured projects, intarsia pattern books and instructional books are a more relevant purchase than generic woodworking references. Specialist woodworking suppliers may also be useful sources for intarsia wood blanks and sanding supplies, provided the specific stock is appropriate for the pattern.
Final quality-control pass
- Place every part against the pattern and confirm its orientation.
- Check joints with the underside free of splinters and glue ridges.
- View the dry assembly from the front, side, and under raking light.
- Confirm that the relief has a clear hierarchy rather than random bumps.
- Inspect the perimeter for gaps and inconsistent height.
- Remove sanding dust before finishing, especially from recesses and glue lines.
- Apply the selected finish to a scrap or test piece when the wood combination is unfamiliar.
The most reliable intarsia improvement is usually not a more complicated pattern or a faster tool. It is better control at the point where the defect begins: a square table, a sharp blade, a clean underside, a slower feed, or a more deliberate shaping plan.
Frequently Asked Questions
What scroll-saw blade should I use for intarsia?
There is no single best blade for every intarsia project. A no. 5 reverse skip-tooth blade is a commonly cited starting point for many softwoods and hardwoods up to about 1 inch thick, while a no. 7 may suit stock up to roughly 13⁄4 inches. Smaller blades are useful for intricate cuts and larger blades may be better for very hard wood. Test scrap and change a dull blade promptly.
What speed should I use when cutting intarsia?
Cutting speed depends on the wood, blade, thickness, and saw. Published guidance ranges from about 60–70 percent to around 80 percent on a variable-speed saw. Use scrap to find the setting that gives clean cutting and accurate steering without forcing the workpiece.
Free tools Windows power users keep installed
One-click scans. No signup required.
How do I fix gaps between intarsia pieces?
Do not begin by sanding the gap. First check that the table is square, the blade is not dull or deflecting, the pattern line was positioned correctly, and splinters are not lifting the underside. Sanding should refine a correctly cut joint, not replace accurate sawing.
How do I make an intarsia project look three-dimensional?
The three-dimensional effect comes from shaping individual parts into different high points, slopes, recesses, and edge transitions. Shape gradually with powered or hand tools, compare parts with the pattern and neighbors, and avoid rounding every piece uniformly.
The Bottom Line
Keep the sequence intact: plan the wood and relief, cut accurately, clean and test-fit every joint, shape gradually, prepare the backs, and finish only after the form is working. In intarsia, precision at the saw makes every later stage easier.
Quick Recap





