Do these 3 things before closing this tab:
1Scan for outdated or missing drivers - takes under a minute2Clear out junk files and repair common Windows errors3Fix the driver behind crashes, sound loss and screen glitches
ThatPainter is reader-supported. When you buy through links on our site, we may earn an affiliate commission. Learn More
You can turn a suitable photograph or drawing into a printable scroll-saw pattern, but not by tracing it and cutting immediately. The dependable workflow is to simplify the image, convert or redraw it as editable contours, repair the design for structural strength, set its finished dimensions, and verify the printed scale.
The reliable way to turn a photo or drawing into a scroll-saw pattern is to treat it as a design conversion, not a one-click filter. Start with a clear image, simplify it into bold shapes or editable contours, repair the design so every retained section is structurally connected, set the finished size, and print a measured pattern for transfer to the wood.
Automatic tracing can save time, but it cannot decide which details will survive in wood, which bridges are strong enough, or which enclosed areas should remain attached. The final pattern needs human editing before you cut.
Free tools Windows power users keep installed
One-click scans. No signup required.
Choose an image that can become a pattern
The best source is usually a photograph or drawing with a recognizable subject, readable edges, and enough contrast to separate important forms. Clean silhouettes, ink drawings, logos, uncluttered pet portraits, and high-contrast people portraits are easier starting points than dark, busy, low-contrast photographs.
#1 Best Overall
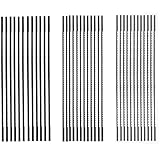
- 5 Inch Plain End Scroll Saw Blade Set
- Includes: (12 Pack) with 28 teeth per inch, (12 Pack) with 12 teeth per inch, (12 Pack) 10 teeth per inch
- FOXBC scroll blades are designed for the professional craftsman who needs sharp, long lasting blades.
- Scroll Saw Blade are precision sharpened for easy cutting of fine, intricate shapes.
- Offered in a variety of TPI and widths, these blades are recommended for cutting most woods, plastics and non ferrous metals.
A photograph records continuous tones, reflections, texture, hair, shadows, and background detail. A scroll-saw pattern has to reduce that information to cut lines, retained shapes, waste areas, and supporting bridges. Before opening tracing software, decide what kind of project you are making:
- Silhouette: one strong outer contour with little or no interior detail.
- Line-art portrait: an outer contour plus a limited number of interior lines.
- Fretwork: connected openings cut through a single piece, with no accidental loose islands.
- Intarsia-style design: separate sections that will be cut, shaped, and assembled.
- Layered project: several simplified pieces stacked to create depth or tonal contrast.
This choice determines how aggressively you simplify the image. A silhouette can tolerate a dramatic reduction in detail. A portrait may need a few carefully chosen divisions for the eyes, hair, clothing, or facial outline, but it generally becomes weaker when every photographic shadow is converted into a thin line.
Prepare the photograph or drawing before tracing
- Crop tightly. Remove unused background and distractions. Give the subject enough surrounding space for a border if the finished piece needs one.
- Increase separation. Adjust brightness and contrast so the major forms are easier to distinguish. A tracing tool works more predictably when the subject is not merging into its background.
- Remove insignificant detail. Texture, tiny highlights, background foliage, fabric grain, and random photographic noise rarely improve a cut pattern.
- Mark the important features. For a portrait, identify the outer head and shoulders, hair mass, eyes, nose or muzzle, mouth, clothing edge, and any distinctive feature. You will not necessarily retain all of them.
- Choose a visual language. Decide whether dark regions represent waste, retained wood, painted areas, or separate pieces. Do not leave that interpretation ambiguous in the final file.
Inkscape’s bitmap-tracing documentation specifically treats tracing as a way to turn a raster image into editable paths, not as a method for producing a perfectly faithful copy. That limitation is useful to keep in mind: the trace is raw material for a pattern, not the finished pattern.
Convert the image into editable paths in Inkscape
Inkscape is a good choice when you want editable vector contours rather than a fixed raster image. The basic workflow is:
- Open Inkscape and import the photograph or drawing.
- Select the image.
- Choose Path → Trace Bitmap.
- Adjust the tracing mode and preview until the major forms are represented without excessive noise.
- Apply the trace, then move the new path away from the original image so you can compare them.
- Keep the original raster image on a separate, locked layer for reference.
The exact tracing settings depend on the source. A dark silhouette against a bright background is usually straightforward. A line drawing may need a mode that emphasizes its strokes. A detailed color photograph may produce many disconnected fragments, which is often a sign that the source needs more preparation rather than more aggressive tracing.
Clean the trace instead of trusting it
Zoom in and inspect the result. Delete isolated specks, duplicate contours, tiny loops, and fragments created by texture or compression. Simplify excessive nodes where the outline has become unnecessarily jagged. Use the node tool to smooth important curves, and redraw distinctive features manually when the automatic result is unconvincing.
For a clean drawing, manual redrawing can be faster than repairing an automatic trace. Use the original as a visual guide and create deliberate lines with the Bezier or pen tool. Fewer intentional curves are generally more useful than hundreds of noisy points.
Rank #2
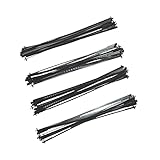
- The product is Easy installation and easy handling, easy to use and highly durable
- Scroll Saw Blade for precise sawing of hard/soft wood, plastic, copper and other soft metals
- Made from corrosion-resistant SK5 Japanese carbon steel for increased strength and longevity
- For machines that require 5in. pin end blades.
- Perfect Replacement For WEN 3921 3922, Dremel, TACKLIFE, Shop Fox, SKIL, Rikon, Sears Craftsman, Penn State, Delta, Ryobi SC165VS and all 15in. and 16in
For portraits, preserve only features that will still read after the image is reduced to wood, cut lines, and light-and-dark regions. A convincing portrait pattern may depend on the shape of the hair, the outer face, the eye placement, the nose or muzzle, and the edge of a collar more than on dozens of small facial marks.
Make the design structurally cuttable
A clean-looking vector drawing is not automatically a usable scroll-saw pattern. Before printing, inspect the design as a piece of wood rather than as an illustration.
Check bridges and connections
In a fretwork design, every retained region must connect to the surrounding material unless it is intentionally a separate piece. A thin visual line may not provide a sufficiently strong bridge, particularly in a small project, fragile wood, or a design with many entry holes.
Thicken narrow bridges where necessary. There is no universal minimum bridge width that works for every wood species, blade, stock thickness, project scale, and cutting technique, so test the design at its actual finished size. If a bridge looks delicate on screen, it deserves particular scrutiny rather than a confident assumption that it will survive.
Do these 3 things before closing this tab:
1Clear out junk files and repair common Windows errors2Scan for outdated or missing drivers - takes under a minute3Repair Windows errors before they cause bigger problemsFind accidental islands
Look for enclosed areas that would fall out when their surrounding waste is removed. These may be intentional in an intarsia or layered assembly, but they are a problem in a one-piece fretwork pattern unless you have planned a separate part or a supporting connection.
Use a simple color system while editing:
- Black or dark: cut lines or waste, according to the convention stated on the pattern.
- White or light: retained wood or openings, again according to the chosen convention.
- Accent colors: optional labels for separate parts, drill holes, or assembly layers.
Then add a small key if another person will use the file.
Remove details that will not cut cleanly
At the intended size, eliminate tiny holes, fragile slivers, closely spaced parallel lines, and sharp corners that have no meaningful visual purpose. If tonal separation is needed, use a small number of bold shapes instead of a dense mesh of narrow pieces.
Rank #3
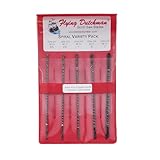
- Flying Dutchman scroll saw blades are 5" long and pinless.
- Milled blades, which makes a sharper cutting edge.
- Manufactured in Germany with top-grade high-quality hardened steel.
- These are top quality spiral blades which allows for cutting in any direction without rotating your project.
- The Flying Dutchman Spiral Five Dozen Pinless Scroll Saw Blade Variety Pack includes one dozen of each of the following sizes: #3/0, #2/0, #1, #3, and #7.
Plan blade-entry holes before exporting. Interior cutouts normally need a hole large enough for the selected blade and a position that lets the blade enter without weakening an important bridge. Mark those holes clearly on the pattern, but do not confuse a drill-hole mark with a finished design line.
What’s actually slowing this PC down?
Pick the symptom - the matching free tool is one click away.
Scale the pattern before printing
Do not resize the image casually in a print dialog and assume the result is correct. Set the finished width or height in the design or pattern-printing software, lock the aspect ratio, and confirm the resulting dimension before printing.
Rapid Resizer is an optional tool for this production stage. Its documented features include resizing designs by dimensions, working in multiple measurement units, and tiling a full-size design across several pages for assembly. It also offers a Picture Stencil Maker that can turn a photograph into a line-drawing or stencil-style starting design. That output still needs the same cleanup and structural review as an Inkscape trace.
The two tools solve different problems:
| Need | Better fit | Why |
|---|---|---|
| Edit contours, remove fragments, and redraw features | Inkscape | It creates editable paths from a raster image. |
| Create a photo-based stencil starting point | Rapid Resizer Picture Stencil Maker | It is designed to turn an image into a simplified line or stencil starting point. |
| Set an exact finished dimension | Rapid Resizer or a vector-layout workflow | The design can be resized by a stated measurement rather than guessed on paper. |
| Print a large design over multiple sheets | Rapid Resizer | Its full-size output can be tiled and assembled. |
Add a scale reference to the file if the pattern will be shared. A ruler segment, square, or clearly labeled finished dimension helps the next user detect an incorrect print setting.
Print a test before committing wood
- Print a small section containing a ruler, square, or known dimension.
- Measure the printed reference with a physical ruler.
- Check that the measured result matches the intended scale.
- Print the full pattern only after the test passes.
- For tiled output, trim and assemble the sheets using the registration marks or overlapping edges.
Also inspect the assembled paper for mismatched seams, missing lines, clipped margins, and a changed aspect ratio. Save the editable source file separately from the print-ready PDF or image. The source file makes it possible to alter a bridge, remove a detail, or produce a different finished size later.
Recommended Free Tools
Transfer the printed pattern to the blank
The appropriate transfer method depends on the wood, finish, adhesive, whether the pattern is disposable or reusable, and whether the surface must remain pristine. A common instructional workflow uses a glued paper pattern together with transfer paper. Transfer paper is best treated as a category of accessory rather than as a universally compatible product: verify that the particular paper and adhesive can be removed or covered appropriately for your project.
A practical one-off workflow is:
- Prepare and flatten the blank.
- Position the scaled pattern and align it with the grain and the intended finished edges.
- Attach or transfer the pattern using the method appropriate to the project.
- Mark the entry holes for interior cuts.
- Confirm that every planned cut is accessible and that no important bridge has been weakened by a hole or edge cut.
- Cut the pattern, keeping the blade on the intended side of the line according to the design’s convention.
For reusable patterns, retain the editable file and export a clean, dimensioned PDF. A reusable file should identify the finished size, material or assembly assumptions where relevant, cut-line conventions, and any pieces that are intentionally separate.
Rank #4
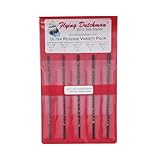
- Flying Dutchman scroll saw blades are 5" long and pinless.
- Milled blades, which makes a sharper cutting edge.
- Manufactured in Germany with top-grade high-quality hardened steel.
- Ultra Reverse pinless blades are our top selling scroll saw blade. They have a unique design where every third tooth is reversed to prevent splintering on the underside of the project. They also have an aggressively fast cut, while at the same time being a smooth cut.
- The Flying Dutchman Ultra Reverse Five Dozen Pinless Scroll Saw Blade Variety Pack comes with one dozen of each of the following sizes: #2/0, #1, #3, #5, and #7.
A useful reference for portrait patterns
If your main goal is converting photographs of people or pets into scroll-saw portraits, Scroll Saw Portraits, Second Edition by Gary Browning is a particularly relevant physical reference. Fox Chapel Publishing describes it as a step-by-step book that uses a computer or photocopier to convert photographs into scroll-saw patterns. It is listed as a 112-page paperback/softback and is aimed at portrait subjects including loved ones, pets, and celebrities.
The value of a dedicated reference is not a promise that its approach removes design judgment. Rather, it gives the reader a focused example of how photographic information can be reduced into a portrait intended for scroll-saw work.
Copyright and permission
Before converting an image, consider who owns the photograph, drawing, logo, or character. Personal use, publication, gifts, commissions, and commercial sale can involve different permissions. A celebrity image may also raise publicity or licensing concerns. Do not assume that finding an image online makes it available for pattern publication or sale. Use your own work, obtain permission, or choose an image with terms that clearly allow the intended use.
Troubleshooting common failures
The trace is covered in specks
The source probably contains too much texture, compression noise, or low-contrast detail. Simplify and increase contrast before tracing, then delete the remaining fragments manually. Do not compensate by turning every speck into a cut.
The portrait looks like a random collection of shapes
Reduce the number of interior divisions and restore the strongest recognizable contours. Prioritize the silhouette, hair or head shape, eye placement, and one or two defining features. More lines do not necessarily produce more likeness.
Pieces fall out during cutting
Inspect the pattern for accidental islands and weak bridges. Reconnect the region, convert it into an intentionally separate piece, or redesign the assembly. Increase bridge thickness at the actual finished scale rather than only enlarging the on-screen view.
PC Slower Than It Used to Be?
A free scan shows the junk files, broken settings and background clutter dragging Windows down - then fixes them in one click.Free scan · Windows 10 & 11Outdated Drivers Are Slowing You Down
One free scan finds every outdated or missing driver and matches the right update for your exact hardware.Free scan · exact hardware matchThe printed pattern is the wrong size
Check the document dimensions, print scaling options, page tiling settings, and the test ruler. A print dialog set to “fit to page” or another automatic scale can change the finished size. Measure before cutting.
The design is too difficult for the chosen stock
Simplify the detail, enlarge the project, choose a more suitable material, or redesign it as a layered or segmented piece. A pattern that works at one size may become fragile when reduced.
Best Value
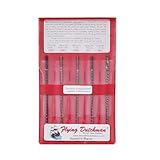
- Flying Dutchman scroll saw blades are 5" long and pinless.
- Milled blades, which makes a sharper cutting edge.
- Manufactured in Germany with top-grade high-quality hardened steel.
- The Flying Dutchman Five Dozen Pinless Scroll Saw Blade Variety Pack comes with five different styles of blades to try and compare.
- Includes one dozen of each: UR5, SR5, PS5, P5, and NS3 blades in a handy, reusable pouch.
Final pre-cut checklist
- The subject remains recognizable in simplified form.
- The background does not create unnecessary cuts.
- Every enclosed area has been checked for accidental islands.
- Bridges are deliberately sized for the actual project, not merely the screen view.
- Tiny holes, slivers, and noisy lines have been removed.
- Interior blade-entry holes are marked and do not compromise the design.
- The finished width or height is stated and the aspect ratio is locked.
- A printed scale test has been measured with a ruler.
- Tiled pages align correctly before transfer.
- You have permission to use the source image for the intended purpose.
The most defensible promise of this workflow is modest but useful: a suitable photograph or drawing can become a printable scroll-saw pattern when you simplify it, convert or redraw its contours, repair its structure, scale it accurately, and verify the paper before cutting. Software accelerates the mechanical steps; the quality of the finished pattern comes from the editing decisions.
Frequently Asked Questions
What kind of photo works best for a scroll-saw pattern?
A photo with a clear subject and strong contrast is usually easiest. Clean silhouettes, ink drawings, logos, and uncluttered portraits tend to work better than low-contrast photographs full of texture and background detail.
Quick wins for a faster PC:
Repair Windows errors before they cause bigger problemsFix Now →Fix the driver behind crashes, sound loss and screen glitchesFind Drivers →Clear out junk files and repair common Windows errorsFree Scan →Can software automatically create a ready-to-cut scroll-saw pattern?
No. Automatic tracing produces editable contours or a simplified starting design, but it does not decide whether bridges are strong enough, whether islands will fall out, or which details will cut cleanly. Inspect and edit the result before printing.
Is Inkscape or Rapid Resizer better for making patterns?
Use Inkscape when you need to edit and redraw vector paths. Use Rapid Resizer when exact dimensioning, full-size enlargement, tiled printing, or a photo-to-stencil starting point is the main requirement. They can be used as complementary tools.
How do I make sure the printed pattern is the right size?
Print a ruler, square, or other known reference at the same settings as the pattern, then measure it with a physical ruler. Do not rely on the print dialog’s preview or assume that fit-to-page preserved the intended size.
The Bottom Line
Bottom line: Use tracing software to create a starting point, not a finished cutting file. The essential work is simplifying the image, strengthening bridges, eliminating islands and fragile detail, checking the finished scale, and test-printing before transferring the pattern to wood.
The Tool Desk
Outbyte Driver Updater FREEFix the driver behind crashes, sound loss and screen glitchesFind Drivers →Outbyte PC Repair FREERepair Windows errors before they cause bigger problemsFix Now →Quick Recap

Product prices and availability are accurate as of the date/time indicated and are subject to change. Any price and availability information displayed on Amazon at the time of purchase will apply.




