ThatPainter is reader-supported. When you buy through links on our site, we may earn an affiliate commission. Learn More
The easiest way to make a mosaic garden project is to decorate a pre-made concrete stepping stone. It has a rigid, outdoor-suitable base, does not require casting concrete, and gives a beginner a manageable surface for arranging ceramic, porcelain, glass, stone, or selected recycled pieces. Plan the design dry, bond the tesserae with an exterior-rated setting material, let it cure fully, then pack the joints with grout rated for the project’s moisture and freeze exposure.
The easiest way to make a mosaic garden project is to decorate a pre-made concrete stepping stone. It has a rigid, outdoor-suitable base, does not require casting concrete, and gives a beginner a manageable surface for arranging ceramic, porcelain, glass, stone, or selected recycled pieces. Plan the design dry, bond the tesserae with an exterior-rated setting material, let it cure fully, then pack the joints with grout rated for the project’s moisture and freeze exposure.
That same method can be adapted to terracotta pots, planters, benches, tables, wall panels, fences, fountains, and garden-tool handles. The important decision is not the pattern; it is matching the base, tesserae, adhesive, grout, and final location so the mosaic can tolerate movement, water, weather, and—where applicable—foot traffic.
The Tool Desk
Outbyte Driver Updater FREEScan for outdated or missing drivers - takes under a minuteDriver Scan →Outbyte PC Repair FREEClear out junk files and repair common Windows errorsFree Scan →#1 Best Overall

- Perfect for all your mosaic creation needs, Mosaic Glue takes your indoor and outdoor projects to the next level. Its no-string, non runny formula is designed to bond all types of mosaic tiles: ceramic, glass, plastic, wood, to various surfaces including glass, wood and more.
- Durability you can trust! Our glue is weather and water resistant, providing a reliable bond that's non-toxic and safe for use. Plus, with its quick dry time of an hour and a cure time of 24 hours, your creative pursuits won't keep you waiting!
- We bring you a non-toxic, non-flammable solution that never gets brittle, maintains flexibility, and comes without any unpleasant odors.
- A waterproof, washable, shock-resistant mosaic adhesive that dries clear, allowing your artistic vision to shine through while securing your tiles firmly. Plus, featuring UVA protection, it ensures durability for external projects exposed to the sun.
- Helpful Hint: For long-lasting results, make sure to let your mosaic project cure for at least 24 hours. The processing time will be worth it when you see the final, striking piece!
Garden mosaic project ideas
| Project | Why it works | Important limitation |
|---|---|---|
| Concrete stepping stone | Rigid, inexpensive, already shaped, and suitable for a first project | Must be stable and safe for walking; decorative tile alone does not make a stone slip-resistant |
| Terracotta pot or planter | Porous surface with an attractive curve; works well with ceramic shards, glass, and small stones | Keep tesserae and grout away from drainage holes; heavily curved areas need careful layout |
| Bench or table accent | Offers more room for a graphic design or border | The furniture must be rigid and structurally sound; a mosaic cannot repair flexing or rotten material |
| Wall, fence, or mural panel | Creates a permanent focal point without foot-traffic concerns | Vertical installation requires secure bonding and planning for movement and water |
| Fountain accent | Adds color and reflection to a water feature | Continuously wet or submerged areas require more demanding adhesive and grout selection |
| Garden-tool handle or small ornament | Good for a small decorative detail | Use only where sharp edges and loose pieces cannot injure people or animals |
Outdoor mosaics can use ceramic tile, porcelain, glass, stone, beads, buttons, mirrors, china, pottery, and other recycled materials. Found materials are a good way to make a one-of-a-kind design, but every piece should be evaluated for water absorption, sunlight exposure, frost, unknown coatings, and sharp edges.
The best beginner project: a mosaic concrete stepping stone
Choose a pre-made concrete stepping stone rather than starting with a flexible board or trying to cast a complicated shape. A simple round or square stone is enough for a sunburst, flower, leaf, geometric pattern, radial design, or short piece of lettering.
Materials and tools
- A rigid outdoor base, such as a pre-made concrete stepping stone, cured concrete panel, masonry surface, terracotta pot, ceramic planter, or stable outdoor furniture surface.
- Exterior-suitable ceramic, porcelain, glass mosaic tile, stone, or carefully selected recycled tesserae.
- Paper, pencil, ruler, chalk, a full-size template, contact paper, or low-tack tape for planning and transferring the design.
- An exterior-rated cement-based adhesive or thin-set selected for both the substrate and tesserae. A different product may be needed for glass, plastic, or metal.
- Water- and frost-resistant outdoor grout, or an epoxy or other system specifically approved for the exposure.
- Tile nippers for small ceramic or mosaic pieces. Use a glass-cutting tool and technique appropriate to the specific glass rather than assuming ordinary nippers are suitable.
- A small trowel or palette knife, rubber grout float, sponge, buckets, mixing tool, and cleaning cloths.
- Safety glasses or goggles, gloves, closed-toe shoes, and suitable dust controls for powdered cement products.
- Optional manufacturer-approved grout sealer and penetrating sealer for porous natural stone.
For a project that needs occasional cutting, mosaic tile nippers are the most directly useful specialized tool. They are intended for small mosaic pieces, but they do not replace the correct glass-cutting equipment, eye protection, or a test cut.
How to make a mosaic garden project
1. Match the project to its exposure
Before buying materials, decide exactly what the finished piece will experience:
Windows Errors? Fix Them Before They Spread
Repair common Windows errors and clear accumulated junk for a smoother, more stable PC - no reinstall needed.Free scan · no reinstallCrashes, No Sound, or Screen Glitches?
Random freezes, missing sound and display glitches usually trace back to one bad driver. Find and replace yours safely.Free scan · under a minute- Decorative and sheltered: A wall ornament or covered pot may have less severe exposure than a path stone.
- Rain and outdoor weather: The base, adhesive, and grout should all be rated for exterior use.
- Freezing temperatures: Choose materials specifically rated for water and freeze-thaw exposure. Water that enters porous materials and freezes can contribute to damage.
- Splashed or continuously wet: A fountain needs a more demanding system than a dry garden ornament.
- Submerged: Use only products whose technical documentation explicitly permits submerged use. Some ready-to-use grouts are not intended for continuous submersion.
- Foot traffic: The complete assembly—tile, adhesive, grout, substrate, and installation—must be appropriate for walking. A wall-only tile or glossy decorative piece is not automatically safe on a path.
Do not choose a product simply because its package says “mosaic.” Check the technical documentation for exterior use, the substrate, wet areas, frost resistance, joint width, and traffic suitability. Glass deserves particular care: its low porosity can make bonding more difficult, and exterior installations must accommodate thermal expansion and contraction.
2. Prepare a stable base
The base must be solid, clean, dry, stable, and strong enough to carry the weight of the tesserae and setting materials. Remove grease, dirt, loose paint, dust, and deteriorated material. A smooth surface is helpful, but the adhesive still needs a compatible surface to grip.
Do not mosaic directly over rotten, warped, cracked, or flexible wood. Ordinary wood can move with changes in moisture and temperature, causing tiles and grout to fail. If a bench or table flexes when you press on it, repair or replace the substrate first. A mosaic layer is a finish, not a structural repair.
For a terracotta pot or planter, keep the drainage hole completely open. Avoid creating a thick ridge of adhesive or grout inside the hole, and make sure the pot is sound before decorating it. Curved sections are easier to cover when the pieces are small and the pattern is not overly dense.
Free tools Windows power users keep installed
One-click scans. No signup required.
3. Plan the design dry
Draw the surface at full size on paper, or arrange the pieces directly on a protected work surface. Sort the tesserae by color, material, and size. A limited palette and one clear focal motif usually produce a more successful beginner project than a design with too many unrelated colors.
Rank #2
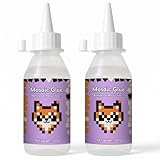
- Specially Designed For Mosaics: Mosaic glue firmly bonds mosaic tiles to any base material, forming a permanent impact-resistant bond to prevent peeling and cracking
- Waterproof & Weather Resistant: Mosaic tile glue is durable after bonding and can effectively resist rain, moisture and outdoor environment. UV resistant, ensuring durability even in outdoor projects under direct sunlight
- Fast dry & Transparent: Mosaic glue clear surface dries in just 2 hours and fully cures within 24 hours. The mosaic adhesive is invisible and non-yellowing after drying, preserving the vibrant colors of your work without leaving any residue
- Safe & Odorless: No irritating odor, non-toxic and safe to use. Simply apply the mosaic glue to the surface, stick it to the intended location, and wait for it to dry. Note: The curing time of mosaic adhesive is affected by temperature
- Great For Mosaics And Art Projects: Mosaic glue perfectly meets all your mosaic creation needs, and is ideal for making exquisite crafts, DIY wall art, and home decoration projects that require a variety of materials to be compatible
Try one of these simple layouts:
- Sunburst: Place a central circle or small motif, then radiate narrow pieces outward.
- Flower or leaf: Use larger pieces for the outline and smaller pieces to fill the shape.
- Geometric border: Establish the border first, then fill the center with a repeated pattern.
- Radial pattern: Divide a round stone into segments and repeat a color sequence.
- Lettering: Keep letters large, simple, and widely spaced; tiny lettering is difficult to grout cleanly.
Leave deliberate, consistent joints between pieces rather than packing them edge to edge. The joints are part of the design and give grout room to lock the tesserae together. For a stepping-stone transfer method, gaps of approximately 1/8 to 1/2 inch are commonly used, but the correct joint depends on the tile size, grout, and manufacturer’s instructions.
4. Use contact paper when alignment matters
A contact-paper transfer can make a flat stepping stone easier to arrange:
- Draw the design on a paper template.
- Place the tesserae face-up on the template, leaving the planned joints.
- Press contact paper over the arranged pieces so they stay in position.
- Turn or lift the held design as appropriate for the adhesive method.
- Spread adhesive on the prepared stone.
- Transfer the arrangement onto the adhesive and press the pieces into place.
- Allow the adhesive to set before removing the contact paper and grouting.
Work in manageable sections if the design is large. Contact paper is most useful on a relatively flat surface; it is less forgiving on a deeply curved pot or a rough wall.
5. Cut only the pieces that need it
Use whole tesserae wherever possible. Cut pieces only to follow an outside edge, complete a curve, or close an intentional gap. Tile nippers work well for many small ceramic mosaic pieces. Glass requires tools and handling appropriate to its type, and some pieces may be better replaced with a different size than forced into a dangerous cut.
Orient cut edges away from places where hands, bare feet, children, or animals may touch them. Wear eye protection whenever cutting, nipping, grinding, or handling pieces that could fragment. If a cutting or grinding operation creates a substantial facial-impact hazard, use a face shield over primary safety glasses or goggles; a face shield is supplementary protection, not a substitute for eye protection.
6. Apply compatible adhesive or setting mortar
Use the product’s technical data sheet as the authority for mixing, open time, coverage, cure, and substrate compatibility. For ceramic or concrete bases, an exterior-rated cement-based adhesive may be appropriate when the manufacturer specifies it. Plastic or metal surfaces may require a different exterior tile adhesive or preparation system.
Glass is less porous than many ceramic materials, so it can be harder to bond. A white specialty mortar is often selected for translucent glass because it can help preserve the appearance of the glass and reduce dark adhesive showing through. The adhesive still has to be compatible with the glass, substrate, outdoor exposure, and anticipated movement. Some glass or metal mosaics may call for a high-performance epoxy- or urethane-based system.
Spread only as much adhesive as you can cover before it begins to skin over. Press each tessera firmly into the setting material, but do not force so much adhesive upward that every joint becomes blocked. Remove adhesive from the face of the pieces and from joints where it would prevent grout from reaching the intended depth.
Ordinary PVA craft glue is water-soluble and is an indoor-oriented choice. An initial bond that feels strong in a dry room does not prove that the glue will withstand rain, frost, or repeated wetting. Choose an exterior mosaic adhesive based on the actual base, tesserae, and exposure—not on the word “mosaic” alone.
Rank #3

- CREATE BUILD BOND Weldbond is a versatile strong glue that bonds a wide range of materials including wood, ceramic, glass, tile, pottery, porcelain, fabric and carpet. Whether you are working on DIY crafts, mosaic art or wood repair, this multi-surface adhesive gives you a secure, long-lasting hold from one bottle instead of a shelf full of single-job glues.*Does not bond Metal with Ceramic
- THE MOSAICS GLUE: Weldbond Multi Surface glue works perfectly on mosaics, pottery, tiles and porcelain for your crafts; Clean both faces, apply a thin coat, press together and let it set, and it dries clear so the join does not show on a glazed or light surface; It is a bonding adhesive rather than an instant glue, so a repair needs to sit undisturbed while it sets.
- NON-TOXIC SAFE FOR EVERYONE: No solvents and no harsh fumes, so it earns a place at the kitchen table, in the classroom or in a small studio with the windows shut. Each bottle of clear multi-purpose adhesive, enough for a full panel of mosaics or a season of repairs around the house.
- DRIES CRYSTAL CLEAR: The white glue turns invisible as it sets, so seams vanish on glass, acrylic, porcelain and light-toned wood. No yellowing, no cloudy halo around the joint, nothing to sand back or paint over. The finished bond is water resistant, so both indoor pieces and covered outdoor work hold their shape season after season.
- EASY TO USE ON WOOD, INDOOR OR OUTDOOR: The heavy-duty formula holds its shape and the precision tip lays a neat bead instead of flooding the piece. It dries in about 20 minutes with no clamping, then sands and paints like the wood around it. Need it thinner for porous work? Add a little water and brush it on as a primer or sealer.
7. Let the adhesive cure completely
Do not grout as soon as the pieces stop sliding. Wait for the cure time specified by the adhesive manufacturer. For a small stepping-stone project, allowing the adhesive to dry overnight can be a cautious practice, but the product label and technical data sheet control the actual waiting period.
Keep the piece protected from rain, freezing, contamination, vibration, and movement while it cures. A tile that shifts beneath the grout can create weak spots and uneven joints.
8. Mix and apply outdoor grout
For many decorative outdoor projects, a cementitious grout rated for exterior and freeze-thaw exposure is the accessible default. Mix powdered grout with the specified amount of liquid until it reaches the manufacturer’s recommended consistency. Adding extra water can weaken the grout, increase shrinkage, and contribute to cracking or color variation.
Use a rubber float or suitable tool to force grout into every joint. Hold the float at an angle and work across the pattern so the joints fill rather than merely receive a surface smear. Remove excess grout from the tile faces before it hardens.
Joint width affects grout selection. Unsanded grout is generally used for narrower joints, while sanded grout is commonly used at joints around 1/8 inch or wider, subject to the tile manufacturer’s approval. Sanded grout can scratch some glass, polished tile, or delicate surfaces, so test it on a spare piece first. If in doubt, follow the tile and grout manufacturers’ compatibility guidance.
For a fountain or continuously wet feature, cement-based or epoxy-based grout may be appropriate depending on the system and exposure. Do not assume that a ready-to-use grout is suitable for submersion. A frost-resistant outdoor mosaic grout is a useful search starting point, but the final choice must still be checked against the manufacturer’s documentation.
Quick wins for a faster PC:
Repair Windows errors before they cause bigger problemsFix Now →Scan for outdated or missing drivers - takes under a minuteDriver Scan →9. Clean the surface and seal only when appropriate
When the grout has firmed but is not fully hard, wipe diagonally across the mosaic with a damp sponge. Rinse frequently and use clean water so you do not spread grout film back over the surface. Avoid flooding the joints or pulling fresh grout out of them.
After the grout has cured, remove haze only with a cleaner compatible with the tile and grout. Do not use an acidic cleaner unless the product manufacturers specifically allow it; acids can damage some stone, grout, metals, and cement-based surfaces.
Sealing is not a universal waterproofing solution. Glass itself may not require sealing, while porous natural stone generally should be sealed before grouting and again afterward according to the stone and sealer instructions. Grout sealer may help reduce staining, but it does not automatically make a project frost-proof, slip-resistant, waterproof, or safe for continuous submersion.
Rank #4

- Specially Designed For Mosaics: Mosaic glue firmly bonds mosaic tiles to any base material, forming a permanent impact-resistant bond to prevent peeling and cracking
- Waterproof & Weather Resistant: Mosaic tile glue is durable after bonding and can effectively resist rain, moisture and outdoor environment. UV resistant, ensuring durability even in outdoor projects under direct sunlight
- Fast dry & Transparent: Mosaic glue clear surface dries in just 2 hours and fully cures within 24 hours. The mosaic adhesive is invisible and non-yellowing after drying, preserving the vibrant colors of your work without leaving any residue
- Safe & Odorless: No irritating odor, non-toxic and safe to use. Simply apply the mosaic glue to the surface, stick it to the intended location, and wait for it to dry. Note: The curing time of mosaic adhesive is affected by temperature
- Great For Mosaics And Art Projects: Mosaic glue perfectly meets all your mosaic creation needs, and is ideal for making exquisite crafts, DIY wall art, and home decoration projects that require a variety of materials to be compatible
Choosing glass, ceramic, stone, and recycled materials
| Material | Advantages | Questions to ask before using it outdoors |
|---|---|---|
| Ceramic | Easy to find, available in many colors, and often approachable for beginners | Is it rated for the intended exterior and freeze exposure? Are cut edges safe? |
| Porcelain | Dense and durable when the specific product is suitable for the application | Is it appropriate for the base, adhesive, grout, and any foot traffic? |
| Glass | Reflects light and offers intense color and translucency | Can the adhesive bond to its low-porosity surface? Is it exterior- or frost-suitable? Could sanded grout scratch it? |
| Natural stone | Adds texture and an earthy appearance | Is it porous, and does it need pre-sealing? Will its surface become slippery or stain? |
| Recycled china or pottery | Creates a personal, irregular design and reuses materials | Are the pieces sound, weather-tolerant, and free from sharp exposed edges? |
| Mirrors, beads, and buttons | Provide unusual highlights and reflective details | Will the material fade, corrode, absorb water, or detach in the chosen location? |
If you buy a glass mosaic tile assortment, verify that the specific pieces—not merely the category—are suitable for exterior exposure. “Glass mosaic” does not automatically mean frost-rated, floor-rated, or suitable for a continuously wet installation.
Do these 3 things before closing this tab:
1Fix the driver behind crashes, sound loss and screen glitches2Repair Windows errors before they cause bigger problems3Scan for outdated or missing drivers - takes under a minuteAdapting the method to pots, furniture, walls, and fountains
Terracotta pots and planters
Clean and dry the pot, then test the layout around its curve. Use smaller pieces and leave more breathing room where the surface bends sharply. Keep the drainage opening clear and avoid covering the inside rim if it will interfere with watering or handling. Because terracotta is porous, confirm that the adhesive system is suitable for that substrate and exposure.
Benches and tables
Use a bench or table only if its top is rigid, sound, and adequately supported. A broad design can look excellent on a tabletop, but flexing is a major failure risk. Account for the added weight and for water collecting at edges. Do not describe the finished surface as suitable for food preparation or heavy outdoor use unless the complete installation system supports that use.
Walls, fences, and mural panels
The direct method places pieces on the final wall or fence. It is useful when the surface is already prepared and the design needs to follow the site. The indirect method builds the mosaic elsewhere—often indoors—and later mounts it in position. Indirect construction is useful for a large or complex panel because it allows more comfortable, controlled work, but the finished panel must still be securely mounted to a compatible surface.
Vertical work should be divided into sections that can be placed before the adhesive skins over. Protect the top edge and consider how rainwater will move across the installation rather than allowing water to sit behind or above the mosaic.
Recommended Free Tools
Fountains and submerged features
Water features deserve a separate specification rather than a casual upgrade from a dry garden project. Select tile, adhesive, grout, sealants, and substrate as a coordinated system approved for splashing or submersion. Test the materials on a small sample, allow the complete system to cure, and follow the water-feature manufacturer’s instructions before putting it into service.
Independent reader supportYour contribution helps us test, update, and keep practical guides available for everyone.Safety checklist
- Wear safety glasses or goggles with appropriate side protection when cutting, nipping, grinding, or handling breakable tile and glass.
- Use a face shield over primary eye protection when the operation creates a significant facial-impact risk.
- Wear gloves and closed-toe shoes when handling sharp tesserae and cement products, while maintaining enough tool control to work safely.
- Mix powdered cement products outdoors or with appropriate ventilation and dust controls. Follow the product safety data sheet; do not improvise respirator selection.
- Keep children and pets away from loose glass, uncured adhesive, wet grout, and cement dust.
- For a child-friendly project, use pre-cut, non-sharp pieces and provide close adult supervision.
- Do not leave sharp cut edges exposed where bare feet, hands, children, or animals may contact them.
ANSI-rated safety glasses belong in the core materials budget, not in an optional-accessories category. Choose protection that matches the cutting and mixing hazards, and use a face shield as additional protection when needed.
Making a mosaic stepping stone safe to place
Before placing a stepping stone, check it in daylight and from several angles. No tile should rock, protrude dangerously, or have an exposed sharp edge. Set the stone level on a firm, stable surface so it does not wobble under load.
Do not assume a glossy or decorative tile is safe for walking. Slip resistance depends on the finished surface and the conditions underfoot; a product intended only for walls is not automatically suitable for foot traffic. If the path needs to accommodate a wheelchair, stroller, or other mobility aid, maintain a firm, smooth, accessible route. A preferred accessible garden path is often planned at approximately five feet wide, although site standards and local requirements may differ.
Best Value
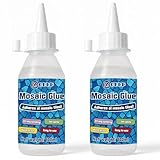
- Mosaic Glue: Formulated specifically for mosaics and craft projects, this versatile mosaic art adhesive is suitable for bonding glass, tile, beads, and ceramic, making it an ideal choice for mosaics and other detailed DIY craft projects
- Waterproof and Weatherproof: Our mosaic adhesive is extremely durable and waterproof, making it suitable for garden decoration, patio tiles, or any project exposed to the elements
- Quick Drying Clear Coating: The mosaic glue non-drip gel texture ensures precise adhesion to the applied location. Our mosaic glue surface takes 2 hours to dry and 24 hours to fully cure. After drying, the coating is crystal clear, perfectly preserving the beauty and details of the artwork
- Wide Range of Uses: Mosaic glue is great for art craft projects, home decoration and garden, can make beautiful picture frames, wall hangings, plaques and more
- Precise Application: Our mosaic glue enjoys a smooth application experience without stringing or dripping. This glue will not stick to the application, making handwork cleaner, faster and more precise
Troubleshooting common mosaic failures
Tiles pop off
The base may have been dirty, damp, flexible, or incompatible. Other causes include an indoor adhesive, insufficient coverage, movement before cure, or exposure beyond the product’s rating. Remove loose pieces, inspect the substrate, and test the complete replacement system on a small sample before rebuilding a large section.
Glass looks dull or the adhesive shows through
Transparent or translucent glass can reveal the adhesive or grout color. Residue may also remain on the face. A bright white specialty mortar is often considered for glass, but the adhesive must still be compatible with the substrate and exposure. Clean carefully after the grout firms and test the full color combination before committing to the project.
Grout cracks
Possible causes include too much mixing water, substrate movement, inadequate cure, unsuitable joint dimensions, poor coverage, or exposure beyond the grout’s rating. More sealer will not correct a moving or incorrectly built assembly. Reassess the base, joint width, adhesive, grout, and cure conditions.
The surface is scratched
Sanded grout can scratch some glass, polished tile, or delicate finishes. Test the grout on a spare piece before applying it to the project. For narrow joints, an unsanded grout may be appropriate if the tile and grout manufacturers approve the combination.
Windows Errors? Fix Them Before They Spread
Repair common Windows errors and clear accumulated junk for a smoother, more stable PC - no reinstall needed.Free scan · no reinstallCrashes, No Sound, or Screen Glitches?
Random freezes, missing sound and display glitches usually trace back to one bad driver. Find and replace yours safely.Free scan · under a minuteThe mosaic deteriorates outdoors
Look for moisture-sensitive found materials, an indoor adhesive, non-frost-resistant grout, an unstable base, blocked drainage, or movement from thermal and moisture changes. A durable repair means rebuilding the assembly around an exterior-rated substrate, compatible tesserae, adhesive, and grout—not simply applying another coat of sealer.
A practical decision guide
- First project and mostly dry location: Start with a pre-made concrete stepping stone, ceramic tesserae, an exterior-rated cement-based adhesive, and outdoor grout.
- Curved planter: Use smaller pieces, keep the drainage hole open, and select an adhesive compatible with terracotta.
- Bright, reflective design: Consider glass, but test the adhesive, grout color, cleaning method, and outdoor rating first.
- Walking surface: Verify the complete system’s suitability for traffic and slip conditions; do not rely on decorative appearance alone.
- Freezing climate: Require exterior and frost suitability for the base, tesserae, adhesive, and grout.
- Fountain or submerged feature: Use only a system explicitly approved for the water exposure and allow the complete installation to cure as directed.
- Large mural: Consider indirect construction if you need to work indoors, then plan the mounting method before assembling the panel.
Final maintenance
Inspect an outdoor mosaic at the beginning and end of the wet or freezing season. Look for loose tesserae, cracked joints, standing water, blocked drainage, sharp edges, and movement in the base. Clean gently with a compatible non-acidic cleaner. Repair small failures before water can enter behind multiple pieces, but first identify why the failure occurred so the same incompatible materials or movement do not cause another failure.
Frequently Asked Questions
What is the easiest mosaic garden project for a beginner?
A pre-made concrete stepping stone is usually the best beginner base because it is rigid, already shaped, and intended for outdoor use. It also provides a small, manageable surface for a radial pattern, flower, leaf, geometric design, or lettering.
Can I use regular craft glue for an outdoor mosaic?
Ordinary PVA craft glue is generally water-soluble and intended for indoor use. For an outdoor mosaic, choose an adhesive rated for the specific substrate, tesserae, and exposure. Glass, plastic, metal, and concrete may require different products.
What kind of grout should I use outside?
Use grout that is explicitly rated for exterior and freeze-thaw exposure. For continuously wet or submerged projects, use only a cement-based or epoxy-based grout whose technical documentation approves that exposure.
Does an outdoor mosaic need to be sealed?
Sometimes. Glass itself may not need sealing, while porous natural stone generally should be sealed according to the stone and sealer instructions. Grout sealer can help with staining, but it does not automatically make a mosaic waterproof, frost-proof, slip-resistant, or suitable for submersion.
Can people walk on a mosaic stepping stone?
Yes, but verify the complete installation. The tile, adhesive, grout, substrate, and placement must all be suitable for walking, and the finished surface must not create an unacceptable slip or sharp-edge hazard. Decorative wall tile is not automatically floor-rated.
The Bottom Line
For a reliable first mosaic garden project, use a rigid concrete stepping stone, plan the pattern with consistent joints, choose an exterior-rated adhesive and frost-suitable grout, and let every layer cure fully. Treat glass, fountains, freezing weather, and foot traffic as specification problems—not details to solve with extra glue or sealer.
Free tools Windows power users keep installed
One-click scans. No signup required.
Quick Recap

Product prices and availability are accurate as of the date/time indicated and are subject to change. Any price and availability information displayed on Amazon at the time of purchase will apply.




