Recommended Free Tools
Outdated Drivers Are Slowing You Down
Free scan · exact hardware match
PC Slower Than It Used to Be?
Free scan · Windows 10 & 11
Crashes, No Sound, or Screen Glitches?
Free scan · under a minute
ThatPainter is reader-supported. When you buy through links on our site, we may earn an affiliate commission. Learn More
Ben Akrin’s Gondola PlottyBot is a documented DIY wall-mounted pen plotter. A Raspberry Pi Zero W controls two stepper motors, GT2 belts, and a servo-mounted pen gondola. Instead of moving a carriage across a tabletop, the gondola hangs between motors at the top of a vertical drawing surface. Changing the two belt lengths positions the pen.
The design saves desk space and can be scaled to different drawing surfaces, but it is not a turnkey machine. Accuracy depends on rigid motor mounts, correct belt tension, counterweights, careful centering, and a compatible pen. The original files and instructions remain available on Akrin’s project page; because the software image is historical, treat the build as an archival open-hardware project and verify compatibility before committing to parts.
Outdated Drivers Are Slowing You Down
One free scan finds every outdated or missing driver and matches the right update for your exact hardware.Free scan · exact hardware matchWindows Errors? Fix Them Before They Spread
Repair common Windows errors and clear accumulated junk for a smoother, more stable PC - no reinstall needed.Free scan · no reinstallHow the gondola mechanism works
Two stepper motors are mounted apart near the top edge of the paper or wall. Each motor drives a GT2 pulley and belt. The free belt ends support a central 3D-printed gondola carrying the pen and a small servo. The Raspberry Pi converts drawing coordinates into the belt movements needed to place the gondola. The servo switches between pen-up and pen-down positions.
#1 Best Overall

- The kit XY axis travel of this kit is 297×210mm, the same size as A4 paper. It is equipped with 42 step motor and MG90 servo.The recommended speed is 5000mm/minute.
- This kit uses the open source Arduino system, and can be used to write and draw on paper materials with related software. This kit requires the customer to assemble the test itself.
- This kit Support laser head expansion, provide firmware and source code.
- This kit has burned grbl0.9 version of writing and drawing firmware. Please burn the laser firmware yourself
- This kit is about 3kg, and the package size is 56 × 25 × 8cm
The belts should be cut roughly to the diagonal of the intended drawing area, with extra length for routing and adjustment. Counterweights on the free belt ends, together with weight in or on the gondola, keep the belts straight and press the pen toward the surface. The required weighting changes with span, wall friction, paper flatness, and gondola mass.
This is polargraph-style geometry: the machine does not have conventional X and Y rails. Errors in either belt length, motor spacing, or starting position affect the entire drawing, especially near the corners.
Why build it vertically?
A tabletop XY plotter consumes a defined rectangle of desk space. Gondola PlottyBot uses a wall, board, or other vertical plane instead, leaving the floor and workbench clear. The documentation presents the software as capable of different deployment sizes, even “arbitrary” sizes in principle. In practice, longer belts amplify sag, stretch, alignment errors, wire drag, and motor-torque demands. Edge positions are less reliable than the central working area, so the software provides a reserve margin; a comment on the project page describes an approximately 20% default, but that figure is not a versioned specification.
Quick wins for a faster PC:
Clear out junk files and repair common Windows errorsFree Scan →Scan for outdated or missing drivers - takes under a minuteDriver Scan →Parts, printed components, and tools
| Category | Documented requirements |
|---|---|
| Electronics | Raspberry Pi Zero W, 12 V input, 5 V regulator, two stepper motors, two stepper drivers, one servo, wiring, connectors, heat-shrink, and driver heatsinks. |
| Printed parts | Logic box and cover, two motor holders, gondola, and belt loopers. STL filename suffixes indicate print quantities. |
| Mechanical hardware | GT2 belts and pulleys, M3 × 8 bolts and washers, M4 × 20 thumb screw, M4 hex nut, PG7 and PG9 cable glands, and zip ties. |
| Tools and consumables | Soldering iron, glue gun or Sugru, Allen keys, needle-nose pliers, voltmeter, cordless drill, 22-AWG wire, heat-shrink tubing, and a Dupont connector kit. |
The structural pieces are printable, but the machine still requires purchased motors, drivers, belts, fasteners, power hardware, wiring, and a suitable pen. The project page supplies STL files, a circuit diagram, a SketchUp model, and a Raspberry Pi image.
Rank #2

- Includes Raspberry Pi 4 4GB Model B with 1.5GHz 64-bit quad-core CPU (4GB RAM)
- Includes Pre-Loaded 32GB EVO+ Micro SD Card (Class 10), USB MicroSD Card Reader
- CanaKit Premium High-Gloss Raspberry Pi 4 Case with Integrated Fan Mount, CanaKit Low Noise Bearing System Fan
- CanaKit 3.5A USB-C Raspberry Pi 4 Power Supply (US Plug) with Noise Filter, Set of Heat Sinks, Display Cable - 6 foot (Supports up to 4K60p)
- CanaKit USB-C PiSwitch (On/Off Power Switch for Raspberry Pi 4)
Power and the original GPIO map
The documented design feeds 12 V into a regulator and uses its 5 V output for the Pi. Measure the regulator output with a voltmeter before connecting the computer; confirm polarity, disconnect power while changing wiring, and insulate every solder joint and exposed conductor. Do not assume a generic regulator or GPIO power adapter is safe. An incorrect connection can destroy the Pi or a motor driver.
The original physical-pin assignments are:
- Left motor: enable pin 37/GPIO 26; step pin 35/GPIO 19; direction pin 33/GPIO 13.
- Right motor: enable pin 40/GPIO 21; step pin 38/GPIO 20; direction pin 36/GPIO 16.
- Servo: ground pin 9; 5 V pin 4; signal pin 16/GPIO 23.
These are the project’s documented assignments, not universal wiring rules. Check the exact driver boards, logic levels, and software revision before reproducing them.
Software and browser control
Akrin distributes a preconfigured SD-card image intended to be written with Raspberry Pi Imager. The guide warns that first boot can take about 10–15 minutes while packages install on the Pi Zero W. Historically, the image creates a Wi-Fi network named PlottyBot, with password 1234567890, and identifies the interface at http://plottybot.local or http://10.0.0.5.
Do these 3 things before closing this tab:
1Clear out junk files and repair common Windows errors2Scan for outdated or missing drivers - takes under a minute3Repair Windows errors before they cause bigger problemsThose names, credentials, and addresses are historical defaults, not a promise that the old image works unchanged with current Raspberry Pi OS, hardware, browsers, or package repositories. Change default credentials, keep the device on an isolated network, and do not expose it to the internet without reviewing and updating the software.
Rank #3
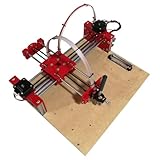
- The XY axis stroke of this kit is 210 × 148mm is the same size as A5 paper
- Recommended running speed of 3000mm per minute
- This kit adopts the open-source Arduino system
- GRBL0.9 writing firmware has been burned and can run candle0.9 software
- This kit is about 3kg, and the package size is 38 × 31 × 7cm
The browser interface provides plot preview, play, pause, stop, mechanical tests, pen-up and pen-down controls, and execution of the project’s simpler Plotter-code format. It also accepts G-code, can convert G-code, normalize artwork to the drawing area, aggregate pen strokes, and support network-based live drawing. The author suggests Inkscape for SVG-to-G-code workflows, while noting that conversion can be complicated. “Internet-enabled” should be understood as a capability of the documented setup, not as evidence of a maintained cloud service or modern security model.
Build and deployment sequence
- Print and inspect the logic box, motor holders, gondola, and belt loopers.
- Assemble and test the 12-to-5 V regulator before attaching the Pi.
- Build separate wire bundles for the motors and servo; add strain relief, heat-shrink, and connectors.
- Install the left motor, right motor, drivers, heatsinks, and Pi connections.
- Fit the servo and pen holder, then close the logic box.
- Mount the motors to a rigid 2×4 or equivalent support fixed to the wall or board.
- Route the belts around the pulleys and gondola, leaving enough adjustment length.
- Add counterweights until the belts remain straight and the gondola rests against the surface.
- Place the pen tip exactly at the intended center, measure the distance between motor centers, and enter that value in calibration.
- Test pen movement and each motor before attempting a full drawing.
Do not overtighten screws into printed plastic. A motor mount that shifts under load invalidates calibration.
Calibration and staged testing
The machine assumes its initial position is centered when powered on. If the gondola is even slightly off-center, later coordinates will be displaced. Measure motor-center spacing accurately rather than relying on nominal dimensions, and recheck it after the mounts are loaded.
What’s actually slowing this PC down?
Pick the symptom - the matching free tool is one click away.
Use this commissioning checklist:
- Verify regulated output voltage and polarity.
- Boot the Pi with the mechanical system disconnected or unloaded where practical.
- Wait through the possible 10–15 minute first boot and confirm the PlottyBot network.
- Open the local interface and run pen-up and pen-down tests.
- Test the left motor, then the right motor, checking direction and smoothness.
- Confirm the gondola sits flush with the drawing surface in the down position.
- Center the gondola and enter measured motor spacing.
- Run a small square, crosshair, or other simple calibration pattern.
- Only then run a complex or long plot.
The guide’s left-motor test moves through approximately one-eighth, one-quarter, one-half, and one full turn before returning. Stop if it fails. The interface label “Test Bottom Stepper Motor” is inherited from the tabletop machine and may actually refer to the left motor.
Rank #4
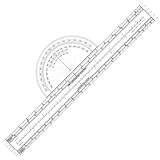
- Package Includes: You will receive a durability, wear-resistant pen plotter for precise measurements
- Aviation Navigation Tool: This 30 cm (11.81 in) aviation plotter is designed for flight planning and route plotting, providing precise scale measurements
- Transparent Construction: This fixed plotter for pilots is made of plastic and features a printed scale, clearly displaying the underlying chart and map during use
- Efficient Flight Planning Design: The rotating plotter for pilots allows for quick route measurement and bearing calculations. The standardized scale allows for direct reading of nautical miles and statute miles, facilitating pre-flight preparation
- Applications: This efficient plotting tool for pilots is suitable for pilots performing basic navigation tasks, flight instructors, and aviation enthusiasts
Pen choice is a major limitation
The gondola applies relatively little downward force and holds the pen at about a 45-degree angle. As a result, pens that work on the tabletop PlottyBot may fail here. Akrin recommends pens that start flowing with minimal pressure, particularly gel pens, and names the Pilot Precise V5 as a favorite. That is the creator’s practical preference, not a controlled comparison.
If lines are faint or intermittent, try a free-flowing fine-point gel pen, a flatter and smoother surface, correct servo travel, and lower plotting speed if available. Check that cables or counterweights are not pulling the gondola away from the paper.
Common failures and fixes
Pi will not boot or Wi-Fi is missing
Allow the documented first-boot period, then check regulated 5 V output, polarity, SD-card imaging, card condition, and Pi damage. The historical image may also be incompatible with newer hardware or network expectations. Re-image the card only after confirming power.
The web interface cannot be reached
Join the historical PlottyBot network and try http://plottybot.local, then http://10.0.0.5. Neither address is guaranteed on a modernized installation.
Best Value

- 5 sets of code: Python (compatible with 2&3), C, Java, Scratch and Processing (Scratch and Processing code provide graphical interfaces)
- Detailed tutorial: Can be downloaded (in English, 962-page in total) or viewed online (original in English, can be translated into other languages by browsers) (The tutorial link can be found on the product box, no paper tutorial)
- 128 projects from simple to complex: Provides step-by-step guide with electronics and components knowledge, each project has schematics, wiring diagrams, complete code and detailed explanations
- 223 items in total: This ultimate kit includes the most commonly used electronic components, modules, sensors, wires and other compatible items
- Compatible models: Raspberry Pi 5 / 500 / 400 / 4B / 3B+ / 3B / 3A+ / 2B / 1B+ / 1A+ / Zero 2 W / Zero W / Zero (NOT included in this kit)
A motor does not move
Check driver power, common ground, enable/step/direction wiring, connector orientation, continuity through long cable runs, solder joints, and heatsinks. Test one motor at a time. Do not assume the interface’s “Bottom” label identifies the physical motor you expect.
Shapes are distorted or misplaced
Recenter the gondola, remeasure motor spacing, inspect belt lengths and tension, secure moving mounts, rebalance counterweights, and keep artwork inside the reliable software margin. Confirm that the gondola remains flush with the wall.
Substituted motors fail
28BYJ-48 motors are not drop-in replacements. Changing motors requires new steps-per-distance calibration, driver wiring, mounts, and torque assumptions. A later project discussion warns that these geared motors were not robust enough for large drawings and eventually failed under that workload.
Windows Errors? Fix Them Before They Spread
Repair common Windows errors and clear accumulated junk for a smoother, more stable PC - no reinstall needed.Free scan · no reinstallOutdated Drivers Are Slowing You Down
One free scan finds every outdated or missing driver and matches the right update for your exact hardware.Free scan · exact hardware matchShould you build Gondola PlottyBot?
Choose it for an educational, open-ended machine with a very small footprint, a Raspberry Pi controller, browser operation, printable structure, and room for custom plotting software. It is especially interesting for wall-sized experiments, handwriting-style line art, SVG-derived paths, and unattended plots.
Choose another route if you need guaranteed current software support, high edge accuracy, fast or quiet operation, strong pen pressure, arbitrary pen compatibility, or a simple weekend build. Commercial plotters and conventional XY machines are easier to commission; other polargraph designs may offer newer electronics or documentation. None should be assumed compatible with this historical software without testing.
Bottom line: Gondola PlottyBot is a genuine, buildable maker project rather than a product kit. Its vertical geometry is clever and space-efficient, but the same belts and gravity that make it distinctive create the project’s hardest problems. Plan for electrical verification, mechanical calibration, pen experimentation, and software maintenance before starting.
Quick Recap

Product prices and availability are accurate as of the date/time indicated and are subject to change. Any price and availability information displayed on Amazon at the time of purchase will apply.
Recommended Free Tools




