Outdated Drivers Are Slowing You Down
One free scan finds every outdated or missing driver and matches the right update for your exact hardware.Free scan · exact hardware matchWindows Errors? Fix Them Before They Spread
Repair common Windows errors and clear accumulated junk for a smoother, more stable PC - no reinstall needed.Free scan · no reinstallThatPainter is reader-supported. When you buy through links on our site, we may earn an affiliate commission. Learn More
Full bleed means artwork reaches the edge of the finished, trimmed page. To avoid a white sliver when the sheet is cut, the artwork must extend beyond the trim line into an extra area called the bleed. The amount varies by printer and product; 0.125 inch (1/8 inch, about 3 mm) on each side is common, but the printer’s template is the rule to follow.
What full bleed looks like
Imagine a photograph filling a page. In a full-bleed design, it continues past the line where the page will be cut, so the finished photograph runs right to the edge. The extra image is trimmed away. A design that stops at the trim line is not safely full bleed: a small shift during cutting can expose an unprinted white strip.
If artwork ends well inside the trim line, leaving a deliberate white border, that is a no-bleed layout. That may be exactly the intended design; not every print project needs full bleed.
What’s actually slowing this PC down?
Pick the symptom - the matching free tool is one click away.
#1 Best Overall

- User-Friendly Portable Photo Printer for iPhone, Android & PC - Get beautiful and colourful memories with Liene 4x6 photo printer! After opening the entire package, you can find one cartridge + 20 sheets of photo paper (placed inside the machine packaging), as well as an additional box containing 80 sheets of photo paper (which includes two cartridges + 80 sheets of photo paper). Full package includes smartphone photo printer, Liene 4x6 photo printer papers (100 sheets), 3 colour cartridges, and fully sealed cassette to prevent dust. Minimalist and magnetic design for compact storage.
- Superior Quality 4x6 Photo Printer - Print photos like no other thanks to the thermal-dye sublimation tech adopted by the picture printer for iphone. The dyes deeply penetrate the paper for vibrant photo printing, and the laminated surface is resistant to water, scratches, fingerprints and fading. Clean the print head promptly if smudges are observed on printed photos during operation. Get Liene photo printers now for yourself and your loved ones, print your happy moments together and keep your love forever!
- Wi-Fi Photo Printer for Smartphone - The built-in hotspot of the photo printer makes it easy to print pictures from your phone, avoiding outside interference with a fast and stable connection. No other networks required! Simply connect your device to the independent instant photo printer 4x6 hotspot.
- Multiple Device Compatibility - Liene phone printer provides instant photo printing for up to 5 simultaneous connections. Share with family and friends or print from your different devices. No additional cables or Bluetooth required when printing photos with this picture printer. Note: Ensure the ink cartridge clicks into place before printing.
- Customize your Printing with the Liene App - Customize your photos with our specialized App! You can add a Square border, insert filters, enhance the contrast and brightness, check printing status, and more. You can even print your ID and Visa photos from home with this photo printer for iphone 4x6 prints.
Bleed, trim, and safe area
- Finished size: The final physical dimensions after trimming, such as 6 × 9 inches.
- Trim line: The intended cut boundary that produces the finished size.
- Bleed: Extra artwork outside the trim line, which is removed during finishing. It is not a margin on the finished page.
- Bleed edge: The outer edge of the extra artwork; backgrounds and edge-reaching images should reach it.
- Safe area: The interior zone where important content should remain clear of trimming. Keep text, logos, faces, barcodes, page numbers, and essential details inside it.
- Crop marks: Marks that indicate trim boundaries. Include them only when the printer asks for them.
- Slug: Space outside the bleed for production notes or marks; it is not part of the finished design.
Bleed and safe area do opposite jobs: bleed gives the cutter expendable artwork, while the safe area protects content that must remain. Avery explains the cut, safety, and bleed areas in its bleed and safe-area guide; Adobe distinguishes bleed from slug in its print bleed documentation.
How much bleed should you add?
Start with the print provider’s specification or template. Adobe describes 0.125 inch as a typical industry bleed, not a universal requirement. Some products call for 0.25 inch per side or another product-specific amount. Covers, labels, packaging, large-format work, and jobs involving folds or binding may have additional requirements.
For equal bleed on all sides, calculate the supplied page size this way:
Supplied width = finished width + left bleed + right bleed
Supplied height = finished height + top bleed + bottom bleed
Rank #2

- Epson printing system is designed to be used exclusively with Epson Genuine Cartridges. Use of non-genuine ink could cause damage not covered under the printer’s ltd. wnty.
- Beautiful borderless photos - easily print high-quality 4"x6" & 5"x7" Photos
- Ultra compact design - lightweight, portable printer saves space
- Total Wireless solution - Print from iPad, iPhone, tablets and smartphones
- Photo Print speed: 4" X 6" Borderless photo in as fast as 36 Sec (default mode: Color photo in default mode on Premium photo paper glossy measured from start of paper feed. Actual Print times will vary based on system configuration, software, and page complexity)
With 0.125 inch on each side, add 0.25 inch to the total width and 0.25 inch to the total height—not 0.25 inch to each edge.
| Finished size | Supplied size with 0.125-inch bleed on each side |
|---|---|
| 6 × 9 in | 6.25 × 9.25 in |
| 5 × 8 in | 5.25 × 8.25 in |
| 8.5 × 11 in | 8.75 × 11.25 in |
| A4 (210 × 297 mm) | 216 × 303 mm with 3 mm on each side |
For example, Lulu specifies a 6 × 9-inch full-bleed book page as a 6.25 × 9.25-inch PDF page in its full-bleed guidance. Use that as an example for that workflow, not as a specification for every printer.
What should extend into the bleed?
Extend background colors, photographs, illustrations, textures, and decorative shapes that are meant to reach the edge. Continue the image or color all the way to the bleed edge; merely touching the trim line is not enough. Blurb’s bleed examples show the distinction between the estimated trim and the outer bleed edge.
Keep essential content out of the bleed. A small trim shift can cut into anything near the edge. Thin borders are especially unforgiving: even if they survive, uneven trimming can make them look lopsided. Use the provider’s safe-area guidance rather than treating the trim line as a safe boundary.
The Tool Desk
Outbyte Driver Updater FREEFix the driver behind crashes, sound loss and screen glitchesFind Drivers →Outbyte PC Repair FREEClear out junk files and repair common Windows errorsFree Scan →Rank #3
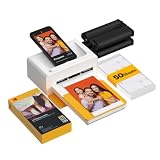
- Dock Photo Printer: The KODAK Dock Plus is a home photo printer that produces high-quality 4x6” prints directly from compatible smartphones. Featuring an integrated docking station, users can place their phone on the printer for better connection while simultaneously charging the device during printing.
- Genuine 4PASS dye sublimation printing: Each photo is produced in three color layers and finished with a clear protective lamination layer. In approximately 55 seconds, you receive a smooth, detailed print designed to resist fingerprints, water, and fading for long-lasting quality.
- Easy to Use: Print photos quickly without complicated setup or technical steps. Simply power on, connect wireless bluetooth, and start printing within seconds. The Dock Plus is built for straightforward operation, making it ideal for first time users and everyday photo printing.
- Home Printing Station: Designed for stable desktop use, this dock photo printer connects to a power outlet for consistent performance and larger 4x6” prints. Ideal for home printing, photo albums, framing, family events, and everyday picture printing.
- KODAK Photo Printer APP: Featuring integrated Bluetooth connectivity, this portable printer connects to compatible iOS and Android devices through the KODAK Photo Printer app. Edit, crop, and customize your photos before printing for creative results.
Prepare a full-bleed print file
- Confirm the finished dimensions. Use the final trimmed size, not the paper sheet size.
- Get the exact production requirements. Check the printer’s product template for bleed, safe area, file dimensions, color settings, PDF standard, marks, and any binding or finishing allowances.
- Set up the supplied document size. Add the required bleed around the finished page, or set the bleed in your layout software as directed by the printer.
- Extend edge-reaching artwork. Check every intended full-bleed edge; a single short edge can leave a white strip.
- Protect important content. Keep text, faces, logos, barcodes, and other critical details within the safe area.
- Check linked images and fonts. Missing links, low-resolution images, or substituted fonts can cause problems unrelated to bleed but still spoil the print.
- Export to the provider’s requested PDF settings. Do not assume that one preset or PDF/X version suits every printer.
- Inspect the exported PDF. Verify its page dimensions, orientation, page order, artwork at the bleed edge, safe placement of critical content, and whether marks are included only if requested.
- Proof important physical work. A PDF cannot show exactly how trimming, folding, binding, or creep will affect the finished piece.
In Adobe InDesign
- Open File > Document Setup and enter the bleed values specified by the print provider.
- Extend objects that reach the finished edge to the bleed guides.
- Run Window > Output > Preflight and address relevant errors, such as missing links or low-resolution images.
- Choose File > Export, select Adobe PDF (Print), and use the preset or PDF/X version the printer requests.
- In Marks and Bleeds, select Use Document Bleed Settings. Add crop marks or other printer’s marks only if requested.
- Check color and output settings against the provider’s instructions, export, and inspect the resulting PDF.
See Adobe’s guides to setting bleed and slug, producing print-ready PDFs, and PDF export options. A 300 ppi image resolution is a common target for close-viewed commercial print, but it is not a universal rule: viewing distance, image type, and the printer’s process matter. Likewise, use the printer’s specified color profile rather than assuming that generic CMYK conversion ensures accurate color.
Books, covers, and spreads need extra care
Full bleed applies to the page or component that needs edge-to-edge artwork, not automatically to an entire book. A book can have a full-bleed cover and white-margin interior, full-bleed illustrations on selected pages, or no full bleed at all.
Build covers from the printer’s exact template. A cover file may combine the back cover, spine, front cover, outer bleed, and sometimes hinge or wrap zones. Spine width depends on the book’s specifications; do not calculate a cover from trim size alone.
Binding also affects artwork. In a saddle-stitched booklet, inner pages can shift through creep as folded sheets are nested. Perfect-bound books have a spine and gutter that can affect cover alignment. A photograph crossing a two-page spread may lose detail in the gutter or shift during production. Keep faces and text away from the fold or gutter unless the printer supports the intended crossover. Do not export printer spreads unless the printer specifically requests them; many workflows want reader-order pages instead.
Outdated Drivers Are Slowing You Down
One free scan finds every outdated or missing driver and matches the right update for your exact hardware.Free scan · exact hardware matchPC Slower Than It Used to Be?
A free scan shows the junk files, broken settings and background clutter dragging Windows down - then fixes them in one click.Free scan · Windows 10 & 11Rank #4
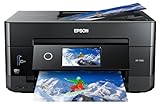
- CLEAR AND VIBRANT PRINT QUALITY ― All-in-one inkjet color printer produces sharp text for eye-catching documents and impressive color photos and graphics; Your next print job will be vivid and bright with this photo printer
- PRINTER FOR HOME USE ― Designed to increase your productivity at home, this wireless color printer features a 30 page auto document feeder (ADF), auto 2-sided print, copy, and scan, multiple media feeds, and print quality you can count on
- CREATIVITY MADE EASY ― Epson color printer provides creative versatility, allowing you to print photos and documents on specialty paper¹ and DVDs; You can even print bright and crisp borderless photos up to 8 X 10 in
- SIMPLE FUNCTIONALITY ― Convenient features make printing, scanning, and copying a snap; Use the large, intuitive 4.3 in touchscreen to view, edit and print photos directly from USB or SD card slot²
- CONVENIENT WIRELESS PRINTER ― Ultimate wireless plus ethernet; Easily print photos and documents directly from your tablet or smartphone³; Includes Wi-Fi direct for network-free printing⁴
For one documented example, Lulu’s cited global-distribution workflow calls for critical text to be at least 0.5 inch from the finished-page edge. Other products and providers may use different safety margins. Its instructions also say not to include crop or registration marks in the interior PDF for that workflow.
Independent reader supportYour contribution helps us test, update, and keep practical guides available for everyone.Full bleed is not the same as borderless printing
Full bleed describes the layout and finishing result: artwork reaches the edge after trimming. Most conventional printers cannot print ink to the physical edge of a sheet, so commercial production commonly prints on a larger sheet and cuts it to size. Adobe notes that a larger paper size may be needed to accommodate bleed and marks in its paper-size guidance.
Borderless printing is a device capability, often found on home photo printers. The printer may enlarge or crop the image to cover the sheet, and alignment may not match commercial trimming. Selecting “borderless” in a printer dialog does not add missing bleed to a file. The file still needs the artwork area the product’s process requires.
Why white edges appear—and how to fix them
A white strip appears after trimming
Check whether the artwork stopped at the trim line, the document was built at finished size without bleed, the background failed to reach one edge, or an upload system added blank area because the file lacked bleed. Lulu notes that its system may add missing bleed as white space when it cannot create new artwork, which can result in white edges after trimming.
Best Value

- From America's most trusted printer brand, the HP Envy Photo 7975 is a premium multi-purpose home printer with everything families need to learn, work, and create. Loaded with features to print high-quality photos, homework, office docs and everything else. It's also AI-enabled to intuitively adapt to your workflow, with wireless and security features that keep your multifunction printer up to date and secure.
- PERFECT FOR HOME - The HP Envy Photo 7975 is great for printing documents, high-quality true-to-screen borderless photos, creative projects and more. Print speeds up to 10 pages per minute color, 15 pages per minute black.
- PERFECTLY FORMATTED PRINTS WITH HP AI - Print web pages and emails with precision-no wasted pages or awkward layouts; HP AI easily removes unwanted content, so your prints are just the way you want.
- KEY FEATURES - Print, copy, scan, automatic 2-sided printing, advanced photo features, separate photo tray, auto document feeder, mobile and wireless printing.
- EFFORTLESS PRINTING - Smoothly navigate printing with a large intuitive printer color touchscreen.
Check the provider’s required bleed and the PDF’s actual page dimensions, extend the background to the bleed edge, and export again using the correct settings. Inspect the PDF before uploading; if the printed piece matters, review a physical proof.
The upload portal reports missing bleed
The file may be the finished trim size, an edge may have no artwork, the wrong template may be in use, or the export may have omitted document bleed. The required amount may also differ from the one you chose. Compare the PDF with the specific product template. Avoid blindly scaling the whole PDF: that can change text size, alignment, and—in a cover—spine width.
Text or important artwork is cut off
Bleed is expendable; the safe area is not. Move critical content inward and check the correct template and binding format. Do not solve a crop warning by shrinking the whole design unless the provider’s instructions call for that adjustment.
Crop marks cause rejection
Crop marks are not mandatory on every full-bleed PDF. Some commercial printers request them; some print-on-demand portals want a clean file without them. Follow the output instructions for that exact job.
The file says “full bleed” but the result still has a white edge
A setting may define the bleed area without extending the image into it. Confirm that the artwork itself reaches the outer bleed boundary, that the PDF dimensions match the template, and that the export retained the bleed. Blurb’s BookWright instructions likewise emphasize extending the image to the bleed edge.
Do you need full bleed?
- Use it if a photograph, background, illustration, or other design element must meet the finished edge, and the printer supports that finishing.
- Skip it if a white or colored border is intentional, content sits inside a frame, or the project is an ordinary office print that will not be trimmed.
- Check the template first for books, covers, labels, packaging, folded work, and any product with special finishing. A generic bleed value cannot account for every product.
Full bleed can create a clean edge-to-edge appearance and reduce the chance of white slivers from small trim shifts. It does not guarantee perfect alignment, and it requires more careful file setup. Some full-bleed jobs may use more ink or affect cost, but that depends on the product, coverage, materials, finishing, quantity, and printer.
Quick Recap
Final preflight checklist
- Finished dimensions and supplied PDF dimensions match the correct product template.
- The bleed value is the one specified by the provider.
- Every edge-reaching background or image reaches the bleed edge.
- Text, faces, logos, barcodes, and other essential content stay in the safe area.
- Page order, orientation, links, fonts, and image quality have been checked.
- Color profile and PDF standard follow the provider’s requirements.
- Crop marks are included or omitted as instructed.
- A proof has been reviewed for jobs where trimming, binding, or folding could change the result.

Product prices and availability are accurate as of the date/time indicated and are subject to change. Any price and availability information displayed on Amazon at the time of purchase will apply.

