Quick wins for a faster PC:
Fix the driver behind crashes, sound loss and screen glitchesFind Drivers →Clear out junk files and repair common Windows errorsFree Scan →Scan for outdated or missing drivers - takes under a minuteDriver Scan →ThatPainter is reader-supported. When you buy through links on our site, we may earn an affiliate commission. Learn More
You can repaint sound kitchen cabinets yourself, but a durable finish depends on preparation, compatible primer and paint, careful application, and enough drying time before reassembly. These ten steps form a practical sequence for a DIY project; they are not a universal manufacturer protocol. If cabinets are badly damaged, peeling extensively, or have a difficult specialty finish, a cabinet refinisher may be the safer choice.
Before you start: decide whether the cabinets are suitable
Inspect doors, drawer fronts and cabinet boxes for swelling, delamination, loose veneer, failing paint or water damage. Identify the substrate—solid wood, wood veneer, laminate, previously painted material, or stained and clear-coated wood—because primer and topcoat compatibility changes with the surface. Behr recommends weighing cabinet condition, desired finish and the time commitment before choosing DIY over professional work (Behr’s cabinet guide).
Do not assume an ordinary wall paint will withstand cabinet handling. Choose a coating labeled for cabinets, doors or trim, then read its current technical data sheet for approved substrates, preparation, application method, sheen, recoat interval and cure requirements.
#1 Best Overall
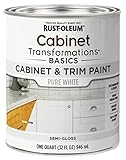
- CABINET TRANSFORMATION: Refresh outdated cabinets, vanities, furniture and trim with rich Pure White color and a smooth semi-gloss finish
- DURABLE PERFORMANCE: Easy-to-clean finish resists dirt and grime while standing up to household chemicals
- SMOOTH APPLICATION: Outstanding flow and leveling help create a beautiful finish with brush, roller, pad applicator or airless sprayer
- FAST PROJECT COMPLETION: Dries to touch in 30 minutes, recoats in 2 hours and is ready for normal use after 24 hours
- INTERIOR CABINET COATING: Ideal for kitchens, bathrooms, laundry rooms and other interior cabinet and trim applications
Supplies for the project
- Cabinet-, door- or trim-rated enamel
- Primer compatible with the substrate and chosen topcoat
- Degreaser or cleaner, plus clean water if the label requires rinsing
- Sandpaper or sanding sponge, filler and a putty knife
- Painter’s tape, drop cloths and masking materials
- Angled brush, mini roller and the correct roller cover
- Screwdriver, labels or marker, rags and damp cloths
- Optional sprayer, only if you can control masking, ventilation and overspray
1. Empty and label every opening
Remove contents from the cabinets. Number each door and drawer and mark the corresponding opening with removable tape or a diagram. Numbering prevents a common reassembly problem: a door that technically fits but no longer aligns with its original hinges.
2. Remove doors, drawers and hardware
Take off doors, drawer fronts where practical, hinges, pulls and knobs. Put screws and hardware from each opening in a labeled bag. Painting separately exposes edges and prevents paint from binding hinges or filling screw holes. Both Sherwin-Williams and Benjamin Moore recommend removing doors and hardware before painting.
3. Protect the room and create a drying area
Cover counters and floors, mask walls and appliances, and keep pathways clear. Set up a level, dust-free work surface where doors and drawers can remain undisturbed. A temperature-controlled, separated area is particularly useful for drying removed pieces; Sherwin-Williams describes this type of setup in its cabinet guide. Follow the coating label for temperature, humidity and ventilation limits.
Rank #2

- Includes 30 featured and newest released color card. Sprayed on color to see our colors in your homes lighting for more accurate color choices.
- ALL-IN-ONE Paint - NO Sanding, NO Priming, NO Top Coat Required, Low Luster, Velvet Sheen Finish
- Interior/Exterior - Paint your whole house - Ideal for hard surfaces including walls, doors, cabinets, counters, furniture, metal, glass, ceramics and floor and wall tile
- Durable yet stretches to paint smooth fabrics, vinyl and leather
- Results cannot be guaranteed. Digital screens may not show color accurately. Product search "ALL-IN-ONE PAINT by Heirloom Traditions, Color Confidence Card", for an accurate color choice.
4. Degrease thoroughly and let everything dry
Clean every surface that will receive paint, including edges and the areas around handles. Kitchen grease can be invisible while still preventing adhesion. As Behr puts it, “Dirt, grease, dust, moisture, or glossy residue can all interfere with adhesion.” Rinse when the cleaner’s label requires it, then allow the substrate to dry completely. Sherwin-Williams similarly warns that surfaces must be clean, dry and dull for reliable adhesion (official guide).
The Tool Desk
Outbyte Driver Updater FREEScan for outdated or missing drivers - takes under a minuteDriver Scan →Outbyte PC Repair FREERepair Windows errors before they cause bigger problemsFix Now →5. Repair defects and prepare the existing finish
Fill unwanted holes, dents and open joints with a suitable filler; let it harden and smooth the repair. Remove loose or flaking coating rather than burying it under primer. Preparation depends on the existing finish:
- Glossy paint or clear coat: scuff-sand or use a compatible deglosser as directed.
- Sound, clean, paintable coating: some Sherwin-Williams systems allow an adhesion test that may show sanding is unnecessary.
- Stained or bleeding wood: plan for a primer intended to block stains or tannin where the product instructions call for it.
Published grit ranges are system-specific. Benjamin Moore generally cites 100–150 grit for dulling glossy finishes, while Behr lists 150–220 grit for its project supplies. Use the grit and method specified for your selected system, remove all dust and let surfaces dry.
Rank #3

- Ultra-White Brilliance: Experience the transformative power of Titanium Infusion, an ultra-white hue inspired by the artist’s palette – perfect for a modern, timeless look.
- One-Day Transformation: Redefine your kitchen cabinets in a single day with our brush-and-roll application - no professional help needed.
- All-Inclusive Kit: Each package covers 100 square feet, ideal for the typical kitchen, and includes all the necessary tools for a flawless finish.
- Eco-Friendly & Safe: Enjoy the peace of mind with our low-VOC, water-based formula, ensuring a safer painting experience.
- Effortless Transformation: No stripping or priming required; our paint adheres beautifully to wood, laminate, and metal cabinets with minimal preparation.
6. Prime for the substrate and topcoat
Apply a bonding primer to slick surfaces when the system calls for one; use a stain-blocking primer where dark color, tannin or bleed-through is a concern. Primer advice differs by product. For example, Benjamin Moore cautions against lacquer-based primer with its Advance paint, while Sherwin-Williams describes an alkyd primer for a stated stained-and-clear-coated scenario. Do not mix brands or technologies casually: verify compatibility on the label or technical data sheet, and test adhesion in a hidden area when directed. Sherwin-Williams provides additional product-specific guidance in its application FAQ.
7. Smooth the primer and remove dust
Allow primer to dry for the interval on its label. If the system calls for sanding, sand lightly to remove nibs and roughness—Benjamin Moore’s cited sequence uses light 220-grit sanding after primer. Do not sand a primer simply because another brand’s guide says to; follow your chosen system. Vacuum or wipe away residue with a clean, slightly damp cloth and let the surface dry before topcoating.
8. Apply the first cabinet-enamel coat
Use a cabinet-, door- or trim-rated coating approved for your substrate. Manufacturer examples include Sherwin-Williams Emerald Urethane Trim Enamel, Benjamin Moore Advance and Behr Premium Cabinet, Door & Trim Enamel. These are examples from their manufacturers’ instructions, not an independent ranking.
Rank #4
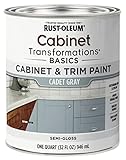
- CABINET TRANSFORMATION: Refresh outdated cabinets, vanities, furniture and trim with rich Cadet Gray color and a smooth semi-gloss finish
- DURABLE PERFORMANCE: Easy-to-clean finish resists dirt and grime while standing up to household chemicals
- SMOOTH APPLICATION: Outstanding flow and leveling help create a beautiful finish with brush, roller, pad applicator or airless sprayer
- FAST PROJECT COMPLETION: Dries to touch in 30 minutes, recoats in 2 hours and is ready for normal use after 24 hours
- INTERIOR CABINET COATING: Ideal for kitchens, bathrooms, laundry rooms and other interior cabinet and trim applications
For brush-and-roller application, brush recessed profiles and corners, then roll broad flat areas with a suitable mini roller. Apply a thin, even film, keep a wet edge and avoid repeatedly brushing paint that has begun to set. A sprayer can produce a smooth finish but requires substantially more masking and overspray control; it is optional, not a shortcut.
Independent reader supportYour contribution helps us test, update, and keep practical guides available for everyone.9. Recoat according to the product schedule
Inspect the first coat in good light after the stated recoat interval. Lightly smooth defects only if the product instructions permit it, remove dust, and apply the next coat with the same technique. Coat count, sheen, block resistance and recoat time vary by product, color and conditions; the label controls. Do not close doors or stack parts while the film is still soft.
10. Allow the finish to dry and cure before reassembly
Dry-to-touch is not the same as ready for hardware or daily kitchen use. Follow the exact product’s dry, recoat and cure instructions. In the cited examples, Sherwin-Williams advises 24–48 hours between enamel coats and another 24–48 hours before reinstalling hardware. Benjamin Moore recommends at least 24 hours before reassembly and says two or three days is better. Those schedules differ, so use the longer interval when the label, temperature or humidity requires it.
Recommended Free Tools
Best Value

- Includes 30 featured and newest released color card. Sprayed on color to see our colors in your homes lighting for more accurate color choices.
- ALL-IN-ONE Paint - NO Sanding, NO Priming, NO Top Coat Required, Low Luster, Velvet Sheen Finish
- Interior/Exterior - Paint your whole house - Ideal for hard surfaces including walls, doors, cabinets, counters, furniture, metal, glass, ceramics and floor and wall tile
- Durable yet stretches to paint smooth fabrics, vinyl and leather
- Results cannot be guaranteed. Digital screens may not show color accurately. Product search "ALL-IN-ONE PAINT by Heirloom Traditions, Color Confidence Card", for an accurate color choice.
Reinstall hinges, pulls, doors and drawers gently, using the original labels. Avoid forcing parts together or tightening hardware against a soft film; premature handling can cause sticking, fingerprints and chipped edges.
Choosing between common cabinet-painting approaches
| Decision | What to compare | Why it matters |
|---|---|---|
| Existing surface | Wood, veneer, laminate, painted, stained or clear-coated | Determines adhesion preparation and primer compatibility. |
| Primer | Bonding versus stain-blocking; approved topcoat pairing | The wrong primer can cause poor adhesion, bleed-through or incompatibility. |
| Application | Brush and mini roller versus sprayer | Roller/brush needs less setup; spraying demands extensive masking and overspray control. |
| Finish schedule | Coat count, recoat interval, dry time and cure time | Controls when parts can be handled and put back into service. |
| Safety and cleanup | Ventilation, solvent or water cleanup, dust containment | Follow the product label and local requirements rather than assuming all coatings behave alike. |
Safety notes for older cabinets
Sanding, scraping or otherwise disturbing old paint can create lead dust or fumes. If older coatings may be present, stop and consult current EPA lead-safe renovation guidance and applicable local rules before work. Use the protective equipment, containment and cleanup procedures required for the situation; do not treat an ordinary dust mask or household vacuum as automatically sufficient.
When professional refinishing makes more sense
Get a cabinet refinisher’s assessment when doors are warped, veneer is lifting, moisture damage is active, previous coatings are failing broadly, or the desired finish requires specialized stripping or spraying. A professional may also be sensible when the kitchen cannot be taken out of service long enough for proper drying and curing.
Quick Recap

Product prices and availability are accurate as of the date/time indicated and are subject to change. Any price and availability information displayed on Amazon at the time of purchase will apply.




