Free tools Windows power users keep installed
One-click scans. No signup required.
Do these 3 things before closing this tab:
1Clear out junk files and repair common Windows errors2Fix the driver behind crashes, sound loss and screen glitches3Repair Windows errors before they cause bigger problemsThatPainter is reader-supported. When you buy through links on our site, we may earn an affiliate commission. Learn More
A homemade stereoscopic viewer separates a left-eye and right-eye image so your brain can fuse them into one scene with apparent depth. You can build a simple version from cardboard, black paper and a pair of high-magnification reading glasses, then tune the card distance and lens angle until both views overlap and focus.
| # | Preview | Product | Price | |
|---|---|---|---|---|
| 1 |

|
Inexpensive Radex 3-D Stereo Realist slide viewer | $12.44 | Buy on Amazon |
| 2 |

|
3Dstereo Stereo Wide-View Viewer for Prints and Monitors | $37.95 | Buy on Amazon |
| 3 |
|
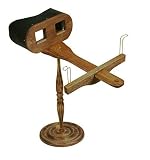
1 | $155.95 | Buy on Amazon |
How a stereoscopic viewer works
A stereo photograph is a matched pair of views made from slightly different positions. The viewer must deliver the left view to the left eye and the right view to the right eye. When the images overlap correctly, binocular vision supplies the depth impression.
This cardboard design is intended for paired images arranged as a left/right stereo pair. It is not an anaglyph viewer (which uses red/cyan filters) or an interleaved-display viewer (which uses glasses or barriers to separate superimposed images).
PC Slower Than It Used to Be?
A free scan shows the junk files, broken settings and background clutter dragging Windows down - then fixes them in one click.Free scan · Windows 10 & 11Outdated Drivers Are Slowing You Down
One free scan finds every outdated or missing driver and matches the right update for your exact hardware.Free scan · exact hardware match#1 Best Overall
Materials and tools
- Cardboard or pasteboard
- High-magnification reading glasses; the Smithsonian Lemelson Center activity documents a 2.5x pair as one example, not a universal specification
- Black construction paper
- Scissors and/or a utility knife
- Hot-glue gun and glue
- A correctly ordered stereo-pair print or card
Use sharp tools and hot glue only with handling appropriate to the maker’s age and experience. The historical Holmes design also used accessible materials: two glass lenses, wood, an awl handle and pasteboard.
Build the cardboard viewer
- Make the eye crosspiece. Cut two eye openings in a cardboard crosspiece, leaving a central divider between them. If you are reproducing the Smithsonian activity’s pattern, use its diagrammed dimensions as a starting template; dimensions are not universal because lens spacing and stereo-card size vary.
- Assemble the frame. Fold or glue the cardboard supports into a rigid frame that holds the crosspiece in front of your eyes.
- Prepare the lenses. Adapt the reading glasses into two lens pieces and position them above the eye openings. Support them securely so they cannot shift while you are viewing.
- Attach the lens assembly. Glue the lens pieces to the angled cardboard support. Keep the two optical centers aligned with the two eye openings.
- Add a light shield. Curve a strip of black construction paper over and behind the eye openings. This hood blocks peripheral light and makes it easier to concentrate on the stereo pair.
- Fit the image card. Hold the stereo pair in front of the lenses with the left image on the viewer’s left and the right image on its right. Start with the card roughly parallel to the lens plane.
Align the images for depth
- Look through the viewer and move the card toward or away from the lenses until the views begin to overlap.
- If the images remain side-by-side, verify the left/right order before changing the hardware.
- Adjust the angle of the lens assembly slightly. The Smithsonian maker reported that changing the angle helped when the images would not overlap.
- Continue fine adjustments until the combined image is sharp. Hold the frame steady and keep both eyes relaxed rather than forcing a cross-eyed view.
- Use the black hood to eliminate distracting peripheral scenery. Excessive side view can make fusion harder.
Card-to-lens distance is part of the optical adjustment, not merely a comfort setting. The National Park Service notes that Joseph Bates later added a way to alter this distance on Holmes’s design to improve focus.
Rank #2
- Stereo Wide-View Viewer for Prints and Monitors
- Designed to take up where most viewers leave off - viewing side-by-side (parallel) stereo pairs, larger than 3-1/2" x 5"
- Ideal for viewing images on TVs, computers, pads, and even a side of a barn, easily up to 14 feet away, or even more.
Choose the right viewing format
| Method | Image required | How separation works | Physical viewer |
|---|---|---|---|
| Side-by-side parallel | Two adjacent views, left then right | Lens spacing, distance and relaxed parallel viewing | Optional; a simple card viewer can help |
| Side-by-side cross-eyed | Two adjacent views, usually reversed for the intended eye assignment | Eye convergence | Optional |
| Anaglyph | One image containing color-coded views | Colored filters, commonly red/cyan | Requires matching color-filter glasses |
| Interleaved display | Superimposed or interleaved views | Display glasses or a barrier separates the views | Requires compatible display hardware or glasses |
The cardboard lens viewer described here is for a paired-image arrangement. Do not put an anaglyph image or an interleaved display in it and expect the same separation.
Independent reader supportYour contribution helps us test, update, and keep practical guides available for everyone.Useful dimensions—and their limits
For a simple two-hole card aid, the Stereoscopic Society suggests holes about 20 mm in diameter with centers about 65 mm apart. Its guide says free viewing is easiest with smaller pairs, roughly under 120 mm wide, and describes side-by-side methods for pairs up to about 175 mm wide. These are practical viewing suggestions, not mandatory dimensions for the Smithsonian-style cardboard frame. Adapt the openings and card position to your lenses, eye spacing and image format.
Rank #3
Troubleshoot a pair that will not fuse
- Images appear swapped: Recheck that the left eye receives the left view and the right eye receives the right view. Image order is the first check.
- Images never overlap: Change the card-to-lens distance, then make a small lens-angle adjustment.
- Overlap occurs but the picture is blurry: Move the card incrementally and keep the lenses centered over the eye openings.
- Peripheral light is distracting: Extend or darken the black-paper hood so the side view is blocked.
- The frame shifts: Reinforce the cardboard supports and lens mounts before continuing optical adjustments.
A short history of the design
The National Park Service dates Oliver Wendell Holmes Sr.’s stereoscope design to 1859. Its prototype used two glass lenses, wood, an awl handle and pasteboard. Holmes did not patent the design. Writing in 1869, he said: “There was not any wholly new principle involved in its construction, but, it proved so much more convenient than any hand-instrument in use, that it gradually drove them all out of the field, in great measure, at least so far as the Boston market was concerned.” The quotation is from Holmes’s 1869 article in The Philadelphia Photographer, as quoted by the National Park Service.
Quick Recap

Product prices and availability are accurate as of the date/time indicated and are subject to change. Any price and availability information displayed on Amazon at the time of purchase will apply.




