What’s actually slowing this PC down?
Pick the symptom - the matching free tool is one click away.
ThatPainter is reader-supported. When you buy through links on our site, we may earn an affiliate commission. Learn More
To finish a T-shirt quilt, layer the quilt top with batting and backing, baste the layers so they stay smooth, quilt them together, trim the excess, and bind the raw edges. The binding encloses the perimeter; quilting holds the three layers together.
What “finished” means
A finished quilt has the T-shirt quilt top, batting, and backing stitched together, with binding covering the raw perimeter. This guide assumes the shirt blocks are already cut and assembled. If your top is ready, work through the sandwich, basting, quilting, trimming, and binding steps below.
#1 Best Overall

- For T-Shirt Quilts, Memory Quilts, Honor Quilts, College Quilts, Baby Quilts, Concert Quilts
- Make up to (20) 12” x 12” finished blocks. Note: Yield will vary with block size.
- 100% Cotton Woven Fusible; Pre-shrunk
- Available in: White for lights shirts & Black for dark shirts
- Machine washable and dry cleanable; Made in U.S.A.
Gather materials and prepare the layers
- Quilt batting: Choose batting suitable for your quilt and check its label for the maximum distance allowed between quilting lines or ties. Large open areas in a T-shirt design may need additional quilting to stay within that limit.
- Quilt backing fabric: Wash it before quilting to reduce the risk of later puckering, particularly because the T-shirts may already have been washed many times.
- Quilt binding fabric: Prepare binding strips long enough to cover the quilt perimeter, with extra length for joining the ends.
- Basting supplies: Quilting safety pins, spray adhesive, or thread can temporarily hold the layers together.
Set up on a clean, flat surface large enough to support the whole quilt. The Fat Quarter Shop’s beginner guide recommends cutting batting and backing 5 inches larger than the quilt top on each side; this is that guide’s allowance, not a universal requirement. Follow the instructions for your batting and leave enough excess to accommodate shifting during quilting. (Fat Quarter Shop)
Make the quilt sandwich
- Spread the backing fabric on the work surface with its wrong side facing up. Smooth it flat and secure it so it cannot shift.
- Place the batting over the backing, smoothing out wrinkles without stretching it.
- Lay the quilt top on the batting with its right side facing up. Smooth from the center toward the edges, checking that all three layers are flat.
Keep the layers aligned and smooth before basting. Wrinkles or folds trapped now can be difficult to remove after quilting.
Rank #2

- 【Exquisite Quilt Cotton Balls】- Crafted from 100% cotton batting, our quilt cotton balls offer a natural softness and warmth that enhances the comfort of your quilts. The cotton is fluffy and resistant to tearing, making it ideal for quilting projects.
- 【Washing Instructions】- Avoid pre-washing the batting before quilting. After finishing your quilt, wash it in a large washing machine with cold water and a small amount of liquid soap. Tumble dry on low heat and then place the quilt in the sun to dry thoroughly. Initially, the batting may appear thin and less soft due to compression packaging. You can quilt at this stage or pat the batting to restore its fluffy and soft appearance.
- 【Dimensions】- Our cotton batting is available in multiple sizes: 47×59 inches, 59x79 inches, 71x79 inches, and 79x91 inches. These large sizes are perfect for crafting quilts, pot holders, wearable art, and other projects.
- 【High-quality Cotton Batting for Quilts】- Our dense cotton pads do not require disassembly and can be washed after quilting. This ensures that your bedding products have evenly distributed cotton, providing superior comfort and durability.
- 【Ease of Use】 - Our cotton batting is designed for easy cutting and layering. The flat and even texture allows you to cut it to your desired size without worrying about uneven tearing or poor distribution.
Baste the layers together
Basting holds the sandwich in position while you quilt. Choose the method that fits your workspace and working style; no single option suits everyone.
- Pin basting: Use quilting safety pins through all three layers, spaced closely enough to keep the fabric from shifting. It needs no adhesive cleanup, but you will need to remove pins as you quilt.
- Spray basting: Temporary fabric adhesive can hold the layers without pins. It may be convenient when pinning a large quilt is awkward, but requires a suitable, well-ventilated workspace and following the adhesive label.
- Thread basting: Temporary stitches secure the layers without leaving pins or adhesive in the quilt. It takes time to sew and later remove the basting stitches.
Whichever method you use, check both sides for puckers and loose areas before moving to the sewing machine. Segovia Quilts’ 2016 tutorial demonstrates pin basting as part of a full finishing process (watch the tutorial).
Rank #3
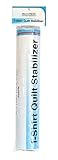
- T Shirt Quilt Stabilizer 12in x 5yds
- Too many t-shirts? Make a keepsake with a t-shirt quilt! Perfect for outgrown baby clothes, graduates, concert goers, sports fans and more. Preserve your memories with cherished quilt.
- Stabilize your t-shirts and knits for t-shirt and memory quilts
- Soft and invisible when applied to the back of the shirts
- Easy to quilt and does not gum the needles as you sew. T-Shirt Quilt Stabilizer Roll measures 12” x 5 yards.
Quilt the layers together
Choose a quilting design that suits the layout and your equipment. The design is your choice, but the batting’s stated quilting-distance limit is a constraint: keep the distance between quilting lines within the maximum on its label. T-shirt blocks can leave broad open spaces, so plan lines or another quilting approach that supports those areas as well as the seams.
Work steadily, keeping the quilt supported so its weight does not pull the sandwich out of alignment. If you are machine quilting, remove pins before the needle reaches them. Continue until the layers are secured across the quilt, then inspect both sides for skipped areas, folds, or loose sections.
Rank #4

- T-shirt Quilts Made Easy - Softcover
Trim the quilt edges
After quilting, lay the quilt flat and trim the excess batting and backing even with the edge of the quilt top. Use a ruler and rotary cutter or scissors, taking care not to cut into the top. The aligned edge gives the binding a consistent perimeter to cover.
Independent reader supportYour contribution helps us test, update, and keep practical guides available for everyone.Attach and finish the binding
Binding encloses the raw edges. The Fat Quarter Shop guide specifies a ¼-inch seam allowance when attaching binding; check your binding method and prepared strips, since construction details can vary. (Fat Quarter Shop’s guide)
Best Value

- XL Value Size (59") : The batting measures 47×59 inches (Approx 1.6 Yards), making it well suited for crib quilts, throw blankets, stuffing, totes, potholders, wearable art, wall hangings and various patchwork crafts
- 100% Natural Cotton: Made from 100% natural cotton, it is soft, breathable, and warm, with a clean odor-free quality ideal for baby and maternal products
- Durable Craftsmanship Guaranteed: Our product employs low-loft cotton compression technology to ensure strong tear resistance and minimal deformation, while maintaining a flat, uniform surface, compatible with hand sewing, machine sewing and topstitching
- Fluffy & Durable: With a medium loft suitable for all seasons, the cotton is evenly distributed to maintain lasting fluffiness and support, providing lightweight, pressure-free warmth for comfortable and breathable creations
- Ready to Use & Easy Care: No need to pre-wash before sewing—just fluff by hand upon first unfolding, then machine wash cold and tumble dry low after completion
- Join the binding strips as needed to make one continuous length. Press the joins open or to one side, then fold and press the strip lengthwise according to the binding style you prepared.
- Starting along an edge, align the binding’s raw edges with the quilt’s raw edge and sew it in place. Leave a tail at the starting point so you can join the ends when you come back around.
- At each corner, stop before the edge, fold the strip to form a neat miter, then continue along the next side. Keep the binding flat and avoid pulling it tight.
- When you reach the starting point, join the two ends so the binding lies smoothly around the perimeter. Trim the joined section if needed, then finish sewing the binding to the quilt.
- Fold the binding over the raw edge to the back of the quilt and stitch it down. Check as you sew that the stitching catches the folded binding on the back.
You can sew the folded binding down by hand or machine. Hand stitching gives you direct control over the back edge; machine stitching is faster for some makers, but requires careful placement to catch the binding on both sides. Segovia Quilts’ tutorial demonstrates making and attaching binding as part of its process (video tutorial); the National Park Service also illustrates a binding join and finish sequence (quilt-making activity).
Quick Recap





