Do these 3 things before closing this tab:
What’s actually slowing this PC down?
Pick the symptom - the matching free tool is one click away.
1Fix the driver behind crashes, sound loss and screen glitches2Clear out junk files and repair common Windows errors3Scan for outdated or missing drivers - takes under a minute
ThatPainter is reader-supported. When you buy through links on our site, we may earn an affiliate commission. Learn More
A cardboard cyanotype camera is a light-tight sliding box fitted with a large magnifying-glass or Fresnel lens. Instead of film, it uses UV-sensitive cyanotype paper—the same kind sold for blueprints and sun prints—to record a long-exposure image that you rinse in a sink. Make: Magazine estimates 8–16 hours to build and lists a $0–$50 project cost (published 2019, updated 2023): Make: Cardboard Cyanotype Camera.
What you are building
The camera has two cardboard sections. A front section holds the lens; a rear box holds the cyanotype paper. The lens section slides in and out so you can focus. A removable cardboard cap covers the lens whenever you are loading paper, moving the camera or waiting for an exposure.
Use the camera outdoors in sunlight with a simple, high-contrast subject. Cyanotype paper responds mainly to UV-A, so exposure times are measured in tens of minutes or hours rather than fractions of a second.
Materials and tools
- A large magnifying-glass lens or Fresnel lens
- Cardboard boxes large enough for your paper and lens assembly
- Cyanotype paper, such as the Super Sunprint Kit named in the Make: instructions
- Opaque tape; gaffer tape is recommended for sealing light leaks
- Box cutter and ruler
Optional supplies are white glue, a paintbrush, a bowl or spray bottle, 3% hydrogen peroxide and a scanner for digitizing finished prints. The example project uses half sheets of cyanotype paper and boxes approximately 10 × 10 × 11 inches. Your dimensions must follow your paper size and the lens focal length.
#1 Best Overall

- VERSATILE FOR FABRIC & MORE: Specially formulated cyanotype fabric dye and solution for fabric ensure vibrant, long-lasting results on textiles, paper, wood, and other surfaces, making it ideal for creative cyanotype fabric projects.
- MAKES 16 FL OZ PREPARED CYANOTYPE SOLUTION: This cyanotype kit includes concentrated Part A and Part B chemicals. Add 7.25 fl oz (214 mL) water to Part A and 6.25 fl oz (185 mL) to Part B, keep them separate, then mix equal amounts 1:1 as needed
- WELCOME INTO THE WORLD OF ARTS: Once processed, images produced with this cyanotype kit become durable and resistant to fading. The final product maintains stability under normal indoor lighting conditions
- BEGINNER-FRIENDLY: Easy-to-follow instructions guide you through mixing cyanotype liquid, coating surfaces, and exposing designs to sunlight, while high-purity chemicals deliver sharp, classic blue cyanotype prints every time
- IDEAL GIFT FOR ARTISTS: Whether for hobbyists exploring cyanotype techniques or professionals seeking reliable cyanotype chemicals, this kit combines convenience, quality, and creativity in one portable package
Choose the lens and calculate the box length
Measure focal length first
- Point the lens toward a distant window scene or other far-away view.
- Focus the image onto a wall by moving the lens toward or away from the wall.
- Measure the distance from the lens to the wall when the image is sharp. That distance is your starting focal length.
Make: gives a 300 mm (11.8 inch) focal length as one maker’s example. Build the sliding lens section around that distance, then measure again after the lens is mounted because the cardboard frame can change the optical spacing.
Fresnel lens versus magnifying glass
| Lens | Exposure guidance | Image characteristic |
|---|---|---|
| Fresnel | About 30–90 minutes in the Make: project’s sunlight guidance | Gathers more light, making shorter exposures practical |
| Magnifying glass | About 1–3 hours in the same guidance | Can produce a clearer image but generally needs longer exposure |
These are starting ranges, not fixed settings. Sun intensity, season, paper batch, lens size and subject all change the result. Make a test exposure before committing to an important scene.
Rank #2

- VERSATILE FOR FABRIC & MORE: Specially formulated cyanotype fabric dye and solution for fabric ensure vibrant, long-lasting results on textiles, paper, wood, and other surfaces, making it ideal for creative cyanotype fabric projects
- MAKES 16 FL OZ PREPARED CYANOTYPE SOLUTION: This cyanotype kit includes concentrated Part A and Part B chemicals. Add 7.25 fl oz (214 mL) water to Part A and 6.25 fl oz (185 mL) to Part B, keep them separate, then mix equal amounts 1:1 as needed
- WELCOME INTO THE WORLD OF ARTS: Once processed, images produced with this cyanotype kit become durable and resistant to fading. The final product maintains stability under normal indoor lighting conditions
- BEGINNER-FRIENDLY: Easy-to-follow instructions guide you through mixing cyanotype liquid, coating surfaces, and exposing designs to sunlight, while high-purity chemicals deliver sharp, classic blue cyanotype prints every time
- IDEAL GIFT FOR ARTISTS: Whether for hobbyists exploring cyanotype techniques or professionals seeking reliable cyanotype chemicals, this kit combines convenience, quality, and creativity in one portable package
Build the cardboard camera
1. Make the outer paper box
Choose a box that accommodates the cyanotype sheet without bending it. The cited example is about 10 × 10 × 11 inches for half sheets. Close every seam and reinforce joints with tape so no daylight reaches the paper.
The Tool Desk
Outbyte PC Repair FREEClear out junk files and repair common Windows errorsFree Scan →Outbyte Driver Updater FREEScan for outdated or missing drivers - takes under a minuteDriver Scan →2. Construct the sliding lens section
Make a smaller cardboard sleeve that fits snugly inside or over the front of the outer box. Its length should allow the lens to sit near the measured focal distance while still providing enough travel for focusing. A 10 × 10 × 11 inch sliding attachment is given as an example for a 300 mm lens; treat those dimensions as a model, not a universal pattern.
Rank #3

- COMPLETE CYANOTYPE KIT: Everything you need to start sun printing in one box. Includes Jacquard's 2-part cyanotype sensitizer set plus a Moshify sponge brush applicator for smooth, even coating on paper, fabric, wood, and more.
- WORKS ON ANY NATURAL SURFACE: Create stunning Prussian blue prints on cotton, linen, silk, canvas, wood, paper, and leather. Perfect for sun printing, blueprint photography, fabric arts, quilting, and mixed media projects.
- EASY SUN PRINTING PROCESS: Simply mix the two-part sensitizer, apply with the included sponge brush, place objects or negatives on your surface, and expose to sunlight. Results in minutes — no darkroom needed.
- GREAT FOR ALL SKILL LEVELS: Ideal gift for photographers, mixed media artists, printmakers, quilters, and kids. The cyanotype process is forgiving, magical, and fun for ages 8 and up. Makes 65+ prints from one kit.
- PROFESSIONAL QUALITY SUPPLIES: Jacquard is the industry-standard brand trusted by artists and photographers worldwide. Paired with a Moshify sponge brush designed specifically for even, mess-free sensitizer application.
3. Mount and seal the lens
Cut a centered opening, secure the lens without warping it and cover gaps with opaque tape. Gaffer tape is useful because it conforms to irregular cardboard edges and can be removed for adjustments. Keep the lens face clean and the optical axis centered.
4. Add a lens cap
Make a close-fitting cardboard cap that blocks the lens completely. The cap is your shutter: the paper should remain capped while you load it, frame the subject and move the camera.
Rank #4
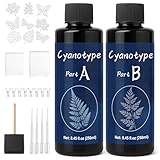
- Cyanotype Set: The Sunprint kit is a creative tool designed for art enthusiasts, harnessing the classical art of photography. Without requiring a darkroom or complex equipment, it utilizes the unique principle of sunlight development to transform negatives, plants, or any translucent objects into vintage blue-toned images
- The Cyanotype Kit Includes: 1 x cyanotype solution A & B, 9 x Cutout Patterns, 8 x Binder Clip, 4 x Droppers, 1 x Sponge Brush, 1 x A4 Clear Cyanotype Holder,1 x A5 Clear Cyanotype Holder. All necessary tools are provided, making it an ideal choice for beginners in artistic creation
- Suitable for Various Materials: Cyanotype can be applied to surfaces such as paper, linen, canvas, watercolor paper, drawing boards, wood, leather, and more, making this classic art form more accessible and usable by the general public
- Simple Operation: 1. Coat: Brush photosensitive solution onto sun print paper. 2. Arrange: After drying, place leaves, petals, or any objects you like on top. 3. Expose: Expose the Cyanotype paper to sunlight. Finally, rinse with clean water, and your blue artwork is instantly born
- Wide Application: The Cyanotype Kit is perfect for photography enthusiasts, lifestyle aesthetes, nature explorers, family bonding activities, creative artists, educators, and anyone interested in hands-on crafts. It offers simple techniques, high tolerance for mistakes, quick results, magical effects, and endless fun
5. Check for light leaks
- Work in a dim room or shade the camera from direct light.
- Put the cap on and inspect seams from inside the box, adding tape wherever you can see a bright line.
- Confirm that the paper holder and sliding joint do not leave an open path around the lens.
Load the cyanotype paper safely
Load paper in a room without direct sunlight. Keep the lens capped and place the cyanotype-coated side toward the lens unless your paper manufacturer specifies another orientation. Handle the sheet by its edges and close the box before taking it outdoors.
Recommended Free Tools
Set the camera on the ground or brace it with a cardboard wedge. A long exposure magnifies every movement, so do not hand-hold the box.
Best Value
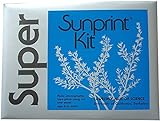
- EASY TO USE: Objects that eclipse the sun’s light will show up in white, with the rest of the paper turning a vibrant Prussian Blue. Place a fern, flower, or other object on the special paper and set it in the sun briefly. Then rinse the paper in water and watch as a beautiful long-lasting image appears!
- HANDS-ON FUN: Sunprinting is a great hands-on activity to do with groups. Whether it be in the classroom, in a camp, a museum workshop, birthday party or any other group setting, get people together, share ideas and play
- VERSATILE: Layering techniques, motion, and manipulation of the paper itself are all implements in the Sunprinter’s toolbox. Make prints of physical objects or transfer digital images via transparency sheet
- ART WITH THE POWER OF THE SUN: Sunprinting is based on the cyanotype process, which has been used by artists since its development in the 19th century
- SUN-BASED SCIENCE: Sunprint paper can be used as a scientific tool. Its sensitivity to ultra-violet light lends itself to sun-based investigations. It can also be used as a measuring tool for any other UV light source, or as a photographic medium to use in scientific experiments
Expose the photograph
- Choose a stationary subject with strong light-dark shapes: buildings, plants, tools or a high-contrast still life.
- Place and stabilize the camera before removing the lens cap.
- Uncap the lens and record the start time and weather.
- Begin with the appropriate range below, then adjust based on a test strip or successive sheets.
- Replace the cap before moving the camera or opening the box.
| Setup | Starting exposure range | Adjustment logic |
|---|---|---|
| Fresnel lens | 30–90 minutes | Use the shorter end in strong direct sun; extend in weaker sunlight. |
| Magnifying-glass lens | 1–3 hours | Extend when the image is faint or conditions are overcast. |
Keep direct sunlight from entering the box except through the lens. If the finished print is pale, increase exposure time or choose stronger sun; if detail is lost in broad dark areas, shorten the next exposure or choose a less contrasty subject.
Develop the cyanotype print
Rinse in a room without direct sunlight
- With the paper still protected from direct sun, open the camera and place the exposed sheet in a sink or bowl.
- Soak and rinse it in clean water.
- Replace the water and rinse two or three times to remove unreacted chemicals and improve contrast and print life.
- Lay the print flat to dry away from direct sunlight.
Accelerate the blue with hydrogen peroxide
A final wash or spray with 3% hydrogen peroxide speeds oxidation, darkens the blues and reveals the image sooner. Use the concentration specified in the project guidance; do not substitute a stronger product. Without peroxide, a strong image can take up to a day to reach its final appearance.
Troubleshoot the first print
| Symptom | Likely cause | Next change |
|---|---|---|
| Overall pale image | Too little UV exposure, weak sunlight or a light leak | Extend the test exposure, choose brighter sun and inspect seams. |
| Blurred subject | Camera moved during the exposure | Brace the box more firmly and avoid touching it after uncapping. |
| Image is out of focus | Lens-to-paper distance is wrong | Slide the lens section while focusing a distant scene, then recheck after assembly. |
| Low contrast | Insufficient rinsing or a low-contrast subject | Rinse two or three times and select simpler, higher-contrast forms. |
| Uneven blue or fogging | Paper saw stray light before or during exposure | Reload in a darker room, keep the cap on and reseal the box. |
Why this is useful as a teaching project
The Big Shoebox TBS-002 classroom design presents a related cardboard cyanotype pinhole-camera activity. It connects the build to optics, exposure, f-number and cyanotype chemistry, with supervised use and a take-home Prussian-blue print: Big Shoebox TBS-002 activity. For a class, pre-cutting cardboard and assigning one adult to handle cutters and chemistry keeps the optical and photographic parts accessible to students.
Scanning and preserving the result
Once completely dry, scan the print if you want a digital copy. Keep the original flat, dry and out of direct sunlight. Because the image is made on coated paper rather than conventional photographic film, retain the physical print as the primary original.
The Bottom Line
Build a light-tight sliding box around your lens’s measured focal length, stabilize it, start with 30–90 minutes for a Fresnel lens or 1–3 hours for a magnifying glass, then rinse the exposed cyanotype paper two or three times and optionally use 3% hydrogen peroxide to bring up the blue faster.
Quick Recap

Product prices and availability are accurate as of the date/time indicated and are subject to change. Any price and availability information displayed on Amazon at the time of purchase will apply.




