Windows Errors? Fix Them Before They Spread
Free tools Windows power users keep installed
One-click scans. No signup required.
Outbyte PC Repair · freeRepair common Windows errors and clear accumulated junk for a smoother, more stable PC - no reinstall needed.
Fix My PC Now →ThatPainter is reader-supported. When you buy through links on our site, we may earn an affiliate commission. Learn More
You can make a recycled soda-can truck in two practical ways: a 12-can semi-truck with plastic bottle-top wheels, or a simpler one-can truck with wooden wheels and dowel axles. The multi-can version has the stronger truck silhouette; the one-can version is easier to align and finish. Because cut aluminum is sharp, an adult should do all cutting, drilling and edge finishing.
Choose the right soda-can truck design
| Design | Construction | Wheels and axles | Best for |
|---|---|---|---|
| Multi-can truck | 12 cans assembled from a template; cutting, gluing and fitting several sections | 11 plastic bottle tops and 4 kabob skewers | A recognizable DIY semi-truck and a larger recycled-material project |
| One-can truck | One aluminum can with four carefully aligned axle holes | Two wooden axles, four wooden wheels and four hub caps | Beginners who want fewer parts and a quicker build |
| Traditional tin-can truck | Separate chassis, cab, wheels, axles and optional fittings | Varies by the maker | Experienced makers interested in the metalworking approach described in Edward Thatcher’s Making Tin Can Toys |
Neither design has published measurements for speed, load capacity or long-term durability, and neither has a child-safety certification. Treat the finished truck as a craft model unless you have inspected it carefully for safe play.
Safety before you start
- Have an adult cut or drill every beverage can. Thin aluminum can leave razor-like edges and can be crushed by children.
- File, fold or cover every cut edge before assembly. Run a cloth or cotton swab around the edge; snagging indicates more finishing is needed.
- Wear eye protection while drilling, keep fingers away from the drill bit, and clamp or hold the can securely.
- Use super glue in a ventilated area and follow its label. Keep glue away from skin and eyes while it cures.
- Check every joint, wheel and axle before letting anyone handle the truck. Bob’s Crafts cautions that similar can crafts may be better suited as ornaments than children’s toys.
Build the 12-can recycled truck
Materials
- 12 beverage cans
- 11 plastic bottle tops
- 4 kabob skewers
- Super glue
- A knife and scissors
- Optional LEDs for a nighttime display
Assembly steps
- Prepare the cans. Empty and rinse them, then let them dry completely. An adult should make the template cuts with the knife and scissors, and finish or cover every exposed aluminum edge.
- Lay out the body. Arrange the 12 cans according to the truck template, separating the main body, cab and other sections before gluing. Dry-fitting first helps reveal gaps and keeps the silhouette straight.
- Glue the body. Apply small amounts of super glue at the contact points, hold each joint still, and allow the adhesive to cure according to its label before adding weight or wheels.
- Make the wheel sets. Use the bottle tops as wheels and the kabob skewers as axles. Keep each pair of wheels at the same height and parallel to the opposite axle.
- Attach the axles. Position the axle assemblies under the body so they sit squarely across the truck. Confirm that each bottle top clears the body and spins before the glue fully sets.
- Test and decorate. Roll the truck gently on a flat surface. If a wheel binds, correct its angle before the adhesive hardens. Add paint, signs or optional LEDs only after all joints are cured.
Build the simpler one-can truck
Materials
- One aluminum can
- A drill
- Two wooden axles
- Four wooden wheels
- Four hub caps
- Paint
Attach the wheels and axles
- Mark the wheel locations. On opposite sides of the can, mark two axle positions. Use a ruler so the front pair and rear pair are at matching heights and the marks face one another.
- Drill four aligned holes. Drill one hole at each mark. Misaligned holes force an axle to bend or rub, which is the most common reason a can truck will not roll freely.
- Fit the first wheel on each axle. Thread one wooden wheel onto the inside end of each wooden axle. Leave enough clearance for the wheel to spin without scraping the can.
- Pass the axles through the can. Feed the two axles through their aligned holes. Check that both axles are parallel and that the can sits level.
- Add the outside wheels. Push the remaining wooden wheels onto the exposed axle ends, then secure the wheels with the hub caps.
- Spin-test before painting. Roll the bare assembly on a flat surface. Adjust an axle or wheel while it is still possible to correct the alignment; do not force a binding wheel.
- Finish the body. Paint the can after the mechanical parts work and the adhesive or hub-cap fit is secure. Allow the paint to dry fully before handling.
How to make the wheels roll smoothly
- Alignment comes first: holes directly opposite one another keep an axle straight.
- Provide clearance: wheels should not rub the can, glue or neighboring wheels.
- Use a flat test surface: a table reveals wobble and binding better than carpet.
- Cure adhesive completely: rolling too soon can shift an axle and permanently set it crooked.
- Correct, do not force: enlarge or realign a hole only with adult supervision, then remove burrs and cover the edge again.
Decorating ideas that suit a recycled can truck
Paint the cab and body in contrasting colors, add painted windows and headlights, or turn bottle tops into colored wheel hubs. Cardboard signs, stripes and a number panel add detail without adding much weight. For a display piece, the MAKE project notes that LEDs can add nighttime appeal; route and secure wires so no sharp edge or loose component is exposed.
What’s actually slowing this PC down?
Pick the symptom - the matching free tool is one click away.
Which build should you make?
- Choose the 12-can design when the semi-truck shape and a larger visual presence matter most.
- Choose the one-can design when you want fewer materials, a simpler body and a straightforward wheel-and-axle system.
- Choose the traditional tin-can route only if you are comfortable treating the chassis, cab, axles, wheels and fittings as separate metalworking tasks.
Frequently Asked Questions
How do I attach wheels to a soda can?
For the one-can method, drill two pairs of directly opposite holes, slide wooden axles through them, fit one wooden wheel on each axle inside the can, add the outside wheels, and secure all four with hub caps. Test that the axles are parallel and the wheels spin freely before painting.
#1 Best Overall

- ♻️ RECYCLE PAPER INTO GLOWING CRAFTS → FOR AGES 5-12: Turn waste paper into amazing glow-in-the-dark creations! This award-winning kit includes moulds, glow paint, and a paper-making screen. Create planets, dinosaur fossils, or a tabletop volcano. Eco-friendly crafting at its best!
- 🎨 EVERYTHING YOU NEED IN ONE BOX: Mesh tray, paper-making screen, plaster moulds, glow-in-the-dark paint, craft paints, brush, and scroll tool. Just add used paper and water – no extra supplies needed!
- CREATE UNIQUE PAPER MACHE PROJECTS: Make glow-in-the-dark planet mobiles, dinosaur fossils, or a tabletop volcano using the included moulds. The glow paint adds a magical, illuminating finish to your creations!
- 🧪 STEM LEARNING & CREATIVE COLLABORATION: Perfect for teaching recycling, material science, and sustainability while encouraging teamwork. Great for solo crafting, family bonding, or school projects.
- 🏆 AWARD-WINNING ECO-FRIENDLY GIFT: Red Dot Design Award 2015 winner. Ideal for birthdays, homeschool science, or Earth Day activities. Hours of screen-free, hands-on creative fun!
Are soda-can truck toys safe for children?
Only after an adult has completed the cutting and drilling, finished or covered every aluminum edge, allowed adhesives and paint to cure, and checked that no wheel, axle or decorative part can detach. Without those checks, treat the truck as an ornament rather than a toy.
Independent reader supportYour contribution helps us test, update, and keep practical guides available for everyone.The Bottom Line
The easiest reliable DIY soda can truck is the one-can version: accurately aligned holes, straight wooden axles and freely spinning wheels matter more than elaborate decoration. Build the 12-can model when its larger semi-truck silhouette is worth the extra cutting and gluing.
Quick Recap
Best Value

- DIY WOODEN MAGNETS: Includes 36 wooden crafts, 12 colored pens, 36 magnet stickers. Wooden educational toy magnetic art to meet your child's creative needs. They are different designs such as animals, fruits, insects, Easter eggs and bunny, even Christmas elements
- ARTS & CRAFTS KIT: This wooden painting crafts kit is designed to inspire creativity and provide hours of fun for boys and girls, suitable as arts and crafts for kids ages 4-8 8-12. Make their own unique wooden magnets to decorate your refrigerator, iron windows and more
- CREATIVE GIFTS FOR KIDS: Our 36 diy wooden magnets would be the best gift for children, families who love handmade wood products, packaged in an exquisite box, perfect for gifts exchange, creative activities, school art projects, family crafts, classroom prizes, treasure box toys, pinata stuffers, Easter crafts, Easter gifts, Easter basket stuffers, Easter egg fillers and Christmas stocking stuffers
- PARTY FAVORS FOR KIDS: Perfect birthday party gift ideas and craft kits for kids, painting kit for kids 6-12. Whether your kid is a beginner or an experienced wood painter, these 36 wooden magnets to paint for kids are a good choice, give it to your child for a great party time
- ART CRAFT SUPPLIES: Our wood cutouts are made of natural wood that has been cut and polished for a smooth surface that can be painted easily! Good crafts and painting set, rest assured for kids to use, you can enjoy creating your own art with your friends, kids and family
Rank #4

- (T) Green Creativity/Recycled Paper Beads
Rank #3

- ♻️【Paper making kit for kids】 Includes mesh tray (15 x 20cm), 2 mesh screens, volcano/dinosaur/planet moulds, glow paint, and scroll tool. Use blender or bottle method to create 5-8 sheets of 12cm x 15cm handmade craft paper from recycled newspapers
- ♻️【Glow-in-the-dark paper mache crafts】Transform pulp into 3 glow creations - planet mobiles, dinosaur fossil art, and erupting volcano (add baking soda + vinegar). Paint with included colors and highlight with glow paint for a magical finish
- ♻️【Flower press kit for kids】7-layer pressing system with corrugated cardboard, blotting papers, press cover, base, screws and wing-nuts. Press real flowers to create greeting cards and bookmarks while learning botany and nature preservation
- ♻️【Paper bead jewelry making】Specially designed twirling tool with handle rolls magazine strips and newspaper into colorful beads. Includes patterned paper strips, elastic string, and glue dabber. Craft bracelets and necklaces from recycled paper
- ♻️【STEM gift for boys and girls ages 5-12】3-in-1 eco craft kit teaches recycling, sustainability, chemistry, and botany. Ideal for classrooms, homeschool art, birthday gifts, and Easter baskets. Builds patience and fine motor skills
Rank #2
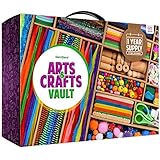
- Unleash & Spark Your Creativity: Your complete arts and crafts supply set with arts & crafts supplies for kids to create and craft. Packaged and stored in a beautiful 2-drawer case.
- Premium Value: Kit includes Pipe Cleaners, Fuzzy Sticks, Pom Poms, Wooden Pieces, Felt Strips, Craft Sticks, Sequins, Wooden Discs, Wooden Beads, Plastic Beads, Sticky Gems, Googly Eyes, Scissors, Sewing Needles, Glue, Glitter Glue, Feathers, Buttons, Thread.
- Unlimited Uses: Make jewelry by adding beads to the thread or pipe cleaners. A windcatcher by gluing sticks together into a shape, decorating them, and then tying beads to hang down. Using as many of the different supplies as possible, make the world’s strangest-looking monster. Create an animal that’s a mix of animals … the feathers of a bird, a tail like a monkey, and the trunk of an elephant. You get the idea... the possibilities are endless with this mega kit!

Product prices and availability are accurate as of the date/time indicated and are subject to change. Any price and availability information displayed on Amazon at the time of purchase will apply.
The Tool Desk
Outbyte PC Repair FREEClear out junk files and repair common Windows errorsFree Scan →Outbyte Driver Updater FREEFix the driver behind crashes, sound loss and screen glitchesFind Drivers →



