Outdated Drivers Are Slowing You Down
Outbyte Driver Updater · freeOne free scan finds every outdated or missing driver and matches the right update for your exact hardware.
Scan My Drivers Free →ThatPainter is reader-supported. When you buy through links on our site, we may earn an affiliate commission. Learn More
Quilt a strip quilt with straight horizontal lines beside its horizontal seams for a plaidlike look, or use alternating diagonal lines that zigzag through the blocks. Both approaches use marked stitching paths, a walking foot, and a test quilt sandwich.
Choose the quilting path that suits the quilt top
| Design | Stitching path | What it adds | Movement to plan for |
|---|---|---|---|
| Horizontal seam lines | Horizontal passes, each placed 1/2 inch on either side of the horizontal seams | A plaidlike effect that emphasizes the horizontal seams | Work from the center area toward the edges in paired passes, alternating sides of center |
| Alternating diagonals | Diagonal lines through squares and rectangles, alternating direction to form a zigzag down each vertical row | Lines that cross the blocks rather than follow the horizontal seams | Pivot at each turn with the needle down; quilt the next vertical row in the opposite direction |
Both designs are straight-line machine quilting. The AllPeopleQuilt tutorial does not compare their time, difficulty, durability, or performance, so choose by the line pattern you want and whether you prefer horizontal passes or repeated diagonal turns.
Prepare the quilt sandwich and machine
- Make the sandwich. Layer the quilt top, batting, and backing, then baste the layers together.
- Mark the design. Use an acrylic ruler with a water-soluble fabric marker or chalk to mark the intended stitching paths. For the horizontal design, mark parallel lines 1/2 inch on either side of the horizontal seams. For the diagonal design, mark the alternating diagonal route through the squares and rectangles.
- Set up the machine. The tutorial specifies a walking foot, a new machine needle, and 50-weight, 100% cotton thread in both the needle and bobbin. Check that the walking foot is compatible with your sewing machine; the tutorial does not specify a machine model or brand.
- Test before quilting the project. Stitch a sample made from the same quilt-sandwich layers to check the thread, needle, tension, and stitch length. Adjust as needed for your machine and materials.
Method 1: Quilt beside the horizontal seams
- Mark a horizontal line 1/2 inch above and another 1/2 inch below each horizontal seam.
- Begin near the center of the quilt and stitch along the marked lines toward an edge.
- Return to the center area and stitch the corresponding line on the other side. Continue in paired passes, alternating sides of center as you work outward.
The tutorial’s sample uses stitch lengths from 2.5 to 4.0 millimeters, as reported by American Patchwork & Quilting Editors in 2018. Treat that as an example rather than a universal setting; use your test swatch to choose a stitch that looks and feeds well with your machine and quilt sandwich. The tutorial says varying stitch length can add visual interest.
What’s actually slowing this PC down?
Pick the symptom - the matching free tool is one click away.
Method 2: Quilt alternating diagonals
- Mark diagonal paths through the squares and rectangles so the direction alternates, creating a zigzag down one vertical row.
- Stitch along the marked path. At each turn, stop with the needle down, pivot the quilt, and continue along the next segment.
- Work the next vertical row in the opposite direction, repeating the alternating pattern across the quilt.
This design asks for repeated pivots at the marked corners, unlike the horizontal method’s passes across the quilt. Keep the marked route visible as you sew so the alternating directions remain consistent.
#1 Best Overall
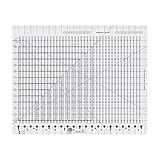
- Made in the USA with high quality acrylic and precision measurements ensuring accuracy for your quilting, sewing, patchwork, and crafting projects.
- Creative Grids exclusive non-slip grip allows you to easily slide the ruler over the fabric until positioned correctly. Then, when slight pressure is applied, the grip holds the ruler in place, eliminating slipping while you cut.
- Easy to read black and white markings, with cutting slots every 1/2in.
- Whole inch, half inch and quarter inch increments are marked. Additional markings for 1/4in and 3/4in cuts are also included.
- For quick reference, 1-1/2in cuts are highlighted with black stars and 2-1/2in cuts with black squares.
Finish and handle the marks carefully
The tutorial advises basting the remaining unstitched edges after completing each design. Marking products do not all behave alike: follow the marker or chalk manufacturer’s removal instructions, and test the product and removal method on a scrap before using them on the quilt.
Quick Recap
Rank #4

- Overall external size of the XL slotted quilting ruler: 17-3/4in x 22in, with the actual slot size for measurement being 13in x 20in.
- Our product is made of high-quality acrylic, featuring a precise slot design to assist you in accurately cutting fabric. We recommend using 45mm/60mm rotary cutter.
- [Quick measurement and precise cutting to meet various size requirements] Bold black lines quickly cut out integer squares ranging from 3in to 12in. Bold white lines quickly cut out ½-inch squares ranging from 4½in to 12½in. The 1½-inch cutting increment is marked with a black triangle, while the 2½-inch cutting increment is marked with a black circle.
- [Cutting in various shapes] The quilting ruler is marked with angle lines at 45°and 60°, facilitating easy cutting and crafting of various geometric shapes from fabric strips, such as squares, rectangles, triangles, and diamonds.
- [Giving away auxiliary supplies—arrow stickers + anti-slip rubber mats] The conspicuous red and blue arrow stickers can assist you in locating the required cutting size more quickly and precisely, making them ideal for bulk cutting of fabrics of the same size. Comes with multiple anti-slip rubber pads, effectively preventing cutting deviations caused by slipping during use, providing you with maximum control and safety.
Rank #3

- Makes half square triangles a breeze by combining brilliant engineering with the tube technique
- Perfect to use with strips and even includes directions to make our favorite block
- 'Great gadget, you can easily make accurate half square triangles from 1 to 9.5 inches'
- 'With this great gadget, you can easily make accurate half square triangles from 1 to 9.5 inches'
- Must have item
Rank #2

- Easy to Read: This 12.5 by 12.5 inch quilting ruler is made of high clear transparent acrylic,double color sight lines and large print numbers that show up on light and dark fabrics. High clear acrylic to see through the sewing ruler for a precise cutting.
- Ruler to Save Quilting Time: Square up blocks up to 12 inches;there is a cutting groove each 1/2 inch increments, just hold the rotary cutter perpendicular to the ruler along the groove and cut carefully, you don't need to remove while cutting,cutting several strips in one minute, it reduce rotary cutting time so much!
- Cutting Shapes:It is very convenient and fast to use the 45 degree and 60 degree angles to cut binding (Stripes),squares,triangles, diamonds,trapezoids and parallelograms. Both Left-handed or right-handed people can use our 30/45/60 angles to cut.
- Package:Ruler Dimension: 15inch*13inch, Comes with nonslip self adhesive silicone grips can help you avoid slippage of the ruler and template when using the rotary cutter, so that the cutting is safer and more accurate.
- Aftersales: If the products arrived broken,welcome to contact for a reasonable solution.

Product prices and availability are accurate as of the date/time indicated and are subject to change. Any price and availability information displayed on Amazon at the time of purchase will apply.




