Quick wins for a faster PC:
Scan for outdated or missing drivers - takes under a minuteDriver Scan →Clear out junk files and repair common Windows errorsFree Scan →Fix the driver behind crashes, sound loss and screen glitchesFind Drivers →
ThatPainter is reader-supported. When you buy through links on our site, we may earn an affiliate commission. Learn More
Make a hollow egg over a balloon, let each paper layer dry completely, then remove the balloon and add treats through the opening before patching it closed. The hands-on work is straightforward; drying is the part to plan ahead for.
What you need
- A balloon, such as a water balloon
- Newspaper or other paper, torn into small strips
- Wallpaper paste, flour-and-water paste, or PVA craft glue
- A brush or another way to spread paste
- A cup or stand to hold the balloon while the shell dries
- Scissors, if needed to trim paper
- Paint and decorations for finishing
- Wrapped treats to put inside
These are basic paper mache craft supplies; no particular brand is required. The Institution of Engineering and Technology (IET) lists a balloon, newspaper and white paper, paste or glue, a small plastic pot, scissors, paints, and decorative materials. Gathered’s fillable-egg instructions use a water balloon, newspaper, PVA glue, a brush, and a cup or stand.
Make the shell over a balloon
- Inflate the balloon. Tie it securely and rest it in a cup or stand so it stays steady while you work.
- Prepare the paper. Tear paper into small strips. Smaller pieces are easier to fit smoothly around the curved surface.
- Cover the balloon. Coat each strip with a thin layer of paste or glue and lay it over the balloon. Overlap the strips to build a continuous shell, but leave an opening near the tied end. Make the opening large enough to remove the balloon and later add treats.
- Dry the first layer completely. Wait until the paper is fully dry before adding more. The IET’s instructions call for two layers, with complete drying between them.
- Add and dry a second layer. Cover the first layer with another overlapping layer, keeping the access opening clear, then let it dry completely.
- Remove the balloon. When the shell is dry, carefully burst the balloon and pull it out through the opening.
Fill the egg and close the opening
- Put wrapped treats through the access opening. Keep the fill light enough that it does not strain the shell.
- Cover the opening with paper strips and paste or glue, overlapping the patch onto the dry shell so it is held in place.
- Let the patch dry fully before painting or handling the egg extensively.
Adding the treats before patching the access opening is the key difference between a treat-filled egg and a decorative shell. Gathered explicitly describes filling the egg before covering its opening.
Paint and decorate
Once the shell and its patch are completely dry, paint it and add decorations. You can keep the finish simple with paint, or add other craft materials. Avoid loading the shell with heavy decorations if its paper construction is delicate.
#1 Best Overall
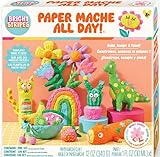
- A MODERN CLASSIC CAMP CRAFT – A fresh update on traditional paper mâché projects, redesigned with easy-to-use forms and templates that help kids create with confidence.
- JUST ADD WATER PAPER MÂCHÉ CLAY – Simply mix the paper mâché powder with water to create soft, sculptable clay that’s ready for shaping and building.
- BEGINNER-FRIENDLY FORMS & TEMPLATES – Slot-together cardboard templates guide sculpting, making it easy to build animals, flowers, masks, and imaginative creations.
- SCULPT, DRY, PAINT & PERSONALIZE – Shape projects, let them dry, then paint and decorate for a complete hands-on art experience from start to finish.
- CREATIVE, SCREEN-FREE GIFT FOR AGES 8+ – A fun and engaging craft kit for kids, girls, and teens that encourages creativity, focus, and imaginative play.
Plan for drying, not just crafting time
The IET labels its activity “60 or more mins,” but that is not a guaranteed start-to-finish drying time: its instructions also require each layer to dry completely before the next is added. Upstart Magazine estimates about 2–3 days of drying for its version of the project. That is a source-specific estimate, not a universal timetable; the pages do not quantify how conditions or construction choices change the time. Allow extra time rather than sealing or painting a shell that still feels damp.
Choose an opening style that suits the recipient
| Design | How it works | Useful when |
|---|---|---|
| Balloon mold with a patched access opening | Leave an opening while covering the balloon, remove the balloon after drying, add treats, then patch the opening. Gathered describes this fill-before-patching sequence. | You want a continuous shell that the recipient can open by tearing. |
| Cut or split egg | Make the egg in a way that creates a cut opening or two halves, then use that opening to add treats. Gathered mentions cut or split alternatives; Upstart describes covering a hole after filling. | You want more direct access or an opening that can be lifted rather than torn. The cited instructions do not establish a specific reusable hinge or closure. |
These are different craft approaches, not a controlled comparison. Decide whether the finished egg should be opened by tearing or by lifting a lid before choosing how to form its opening.
Rank #2
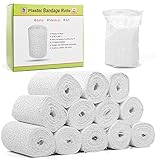
- ARTISTIC FLEXIBILITY: These plaster of paris rolls are the perfect canvas for your creativity, whether you're crafting a face wrap, a mask, or engaging in detailed plaster art and crafts.
- PREMIUM CRAFT PLASTER: Our plaster bandages for art provide a creamy, cement-like texture that dries to a sleek, professional finish, enhancing the quality of your craft plaster projects.
- QUICK SET DESIGN: Speed up your creative process with plaster bandages that set fast, perfect for artists working on paper mache strips, belly plaster for pregnant moms, and artful castings.
- USER-FRIENDLY HANDLING: Simple and straightforward, these plaster gauze strips are a dream to work with—dip in water, apply, and smooth out for a fuss-free application in mask making or belly casts.
- GENEROUS QUANTITY: Stock up with 12 rolls of our versatile plaster wrap gauze, each long enough for multiple projects, from belly bump casts to paper mache volcanoes, ensuring you always have your medium at hand.
Keep treats separate from craft materials
The cited instructions do not establish that paper, paste, glue, or paint is safe for direct food contact. Keep candy in its wrappers, and do not let unwrapped treats touch the shell or its craft materials. No food-contact certification or tested recommendation is provided for these projects.
Windows Errors? Fix Them Before They Spread
Repair common Windows errors and clear accumulated junk for a smoother, more stable PC - no reinstall needed.Free scan · no reinstallOutdated Drivers Are Slowing You Down
One free scan finds every outdated or missing driver and matches the right update for your exact hardware.Free scan · exact hardware matchQuick Recap
Best Value
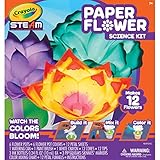
- DIY PAPER FLOWERS CRAFT KIT: This science kit features everything needed to make 12 Wicking Paper Flowers, as well as a guide with step-by-step instructions.
- CRAYOLA STEAM KITS: Hands-on learning experiences that allow kids to be creative are fun and educational
- GIFT FOR KIDS: The magic of these color changing flowers is something beautiful to behold This craft kit makes a great gift for girls and boys on birthdays, holidays, and more.
- EDUCATIONAL TOY: Crayola STEAM kits are perfect for educational play and at home learning
- SAFE AND NONTOXIC: Ideal for kids, ages 7 and up
Rank #4
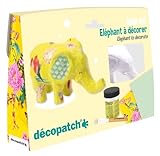
- Elephant Mache within the kit is 13x5.5x7cm in size
- Kit contains: papier-mâché elephant, brush, glue and 2 sheets of Decopatch paper
- Made from papier-mâché and is white
- Kit is suitable for anyone who wants to Decopatch but does not know where to start.
- Can be given as a gift or used for yourself
Rank #3

- 【INSTANT 3:1 MIX, READY IN MINUTES】Just combine Modoh paper mache powder with water at a 3:1 ratio and stir into smooth, moldable clay. No waiting, start creating right away.
- 【INCLUDES ALUMINUM MESH FOR ARMATURES】Comes with a high-quality aluminum mesh, easy to cut with scissors and shape into any form. Build a sturdy armature first, then wrap with paper mache clay for large sculptures, animals, or figures.
- 【DRIES SMOOTH, NO SANDING NEEDED】Unlike traditional paper mache, this formula dries to a smooth, ready-to-paint surface straight out of the mold. Color it while wet by mixing paint into the paste, or paint after it dries.
- 【CERTIFIED SAFE FOR ALL AGES】Tested and passed with US and EU standards. Non-toxic and safe for kids, families, classrooms, and professional artists.
- 【ENDLESS PROJECTS, EASY CLEANUP】From piñatas and Halloween pumpkins to home decor, volcano dioramas, and fine art sculpture, this clay handles it all. When you're done, cleanup is just soap and water, no harsh chemicals required.
Sources
- Institution of Engineering and Technology: Easter DIY: Make a Papier Mâché Easter Egg with Balloons
- Gathered: How to make a paper mache Easter eggs (published February 19, 2025)
- Upstart Magazine: Kids Easter Crafts: Papier Mache Easter Egg





