Quick wins for a faster PC:
Fix the driver behind crashes, sound loss and screen glitchesFind Drivers →Repair Windows errors before they cause bigger problemsFix Now →Scan for outdated or missing drivers - takes under a minuteDriver Scan →
ThatPainter is reader-supported. When you buy through links on our site, we may earn an affiliate commission. Learn More
Yes, you can create a smooth plaster fireplace wall around an electric insert, but the insert must determine the opening, depth, board, clearances, ventilation and electrical work. Start by selecting the exact model and reading its installation manual. Then measure the appliance and the proposed finished opening, frame and dry-fit everything, install only the specified board and finish system, and connect power exactly as instructed. There is no universal clearance, outlet rating or plaster recipe that safely applies to every electric fireplace.
Choose and measure the electric insert before building anything
A plaster surround is a finish layer, not a substitute for an appliance-designed cavity. Buy or select the insert first, download the current installation manual for that exact model, and use its dimensional drawing as the controlling plan. Heat & Glo asks installers considering its SimpliFire insert to measure an existing opening’s height, width and depth before choosing a unit. SimpliFire lists nominal widths of 25, 30 and 35 inches, but those labels do not tell you the complete rough-opening or finished-wall dimensions.
As an Amazon Associate I earn from qualifying purchases.
Do these 3 things before closing this tab:
1Repair Windows errors before they cause bigger problems2Fix the driver behind crashes, sound loss and screen glitches3Clear out junk files and repair common Windows errorsMeasure in several places because masonry and older framing are rarely perfectly square. Record the smallest clear height and width, the usable depth from the face of the opening to the first obstruction, and the position of the hearth or floor. For a new wall, measure the available room depth and mark the finished face, not just the studs. Add the thickness of every layer that will sit in front of the framing: board, joint compound, plaster or skim coat, tile or trim, and any manufacturer-supplied surround. A unit that fits between studs can still project too far once those layers are added.
Confirm the intended installation style
Some inserts are designed for an existing wood-burning fireplace opening and use a surround kit. Others are approved for a newly framed recess and have a self-trimming face. Heat & Glo describes both approaches for SimpliFire, but the option is model-specific. Do not assume that an insert approved for a masonry opening can be recessed into a timber-framed wall, or that a self-trimming model can be installed behind a separate surround.
#1 Best Overall

- Overall dimensions: 35 1/16" W x 26 31/32" H x 8 25/32" D. Firebox dimensions: 32 1/8" W x 25 9/16" H x 7 51/64" D. Please contact before ordering if you are not sure about if it will suit your opening.
- 3 flame intensity can be used with or without heat all year long; 100% energy saving LED technology. A sleek look with three-sided interior brick wall and clean glass front trim design, without the hassle of cleaning dust or ashes.
- Life-like resin log which is 11 13/16" high sitting on the grate above ember bed, that's just what a wood burning fireplace looks like.
- Adjustable thermostat; A supplemental heat for up to 400 sq. ft. NOT a MAIN heat source; Remote control provided for easy operation.
- Easy to install and uninstall. With flat bottom, the insert can just sit on the floor directly; Plug in and use under a voltage of 120, CANNOT be hard wired. Customer service is always ready for help whenever you need.
| Design path | What to verify before framing | Typical implications for the plaster wall |
|---|---|---|
| Existing fireplace opening | Measured height, width and depth; whether the model accepts the opening; surround-kit dimensions; required hearth and clearances | You may retain masonry and build a shallow finish coat around the supplied surround. Irregular masonry often needs packing or a separate frame to create a flat plane. |
| New framed opening | Manufacturer’s rough-opening drawing; framing material and anchoring; finished depth; ventilation and cable routes; backing for a mantel or television | The entire wall must be aligned before boarding. The self-trimming face, if the model provides one, establishes the final reveal. |
Use the appliance manual as the controlling specification
Electric fireplaces differ in fan location, heat outlet, controls, mounting points, ventilation and allowable finishes. Lowe’s cautions that installation instructions vary by fireplace model and says to follow the selected fireplace’s instructions along with local building and electrical requirements. Treat that instruction as a design constraint, not a suggestion.
- Clearances: Copy every top, side, rear and front clearance from the exact manual. Never borrow a dimension from another insert, even if the cabinet looks similar.
- Board and finish: Use the board type, thickness, fasteners and finishing material named for your model. “Electric” does not automatically mean that any plasterboard can touch the appliance.
- Ventilation: Keep intake and warm-air outlets open as shown. A decorative grille, deep mantel or thick skim coat must not block them.
- Mounting: Follow the specified brackets, screws and support method. The surrounding frame should not carry the appliance unless the manual expressly permits that arrangement.
- Electrical supply: Verify voltage, frequency, amperage, plug location and circuit requirements for your region and model.
Lay out the wall, structure and services
Before cutting studs or fixing board, draw the wall elevation at full size. Mark the insert’s outer face, the finished plaster plane, the centerline, the floor or hearth line, and the locations of any mantel, shelf or television. Locate existing studs and pipes. Provide solid backing wherever a surround, mantel, television bracket or heavy trim will be anchored; plasterboard alone is not structural support.
Outdated Drivers Are Slowing You Down
One free scan finds every outdated or missing driver and matches the right update for your exact hardware.Free scan · exact hardware matchWindows Errors? Fix Them Before They Spread
Repair common Windows errors and clear accumulated junk for a smoother, more stable PC - no reinstall needed.Free scan · no reinstallPlan cables and ventilation while the frame is open
Dimplex advises positioning electrical boxes and cable runs before closing the frame and planning the cavity and ventilation at the same stage. Decide whether the receptacle will remain accessible behind the unit, beside it, or below it as the manual allows. Route cables so they cannot contact hot-air outlets, moving fan components or sharp metal edges. Leave access to controls and any reset switch that the manual identifies.
Rank #2
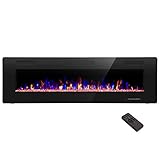
- Attractive and Practical Design: 3.86"D x 60"W x 18.11"H,The thickness of the new style is only 3.86 inches while the old one is 6 inches. And it operates the same as the old one. Also we redesign the location of main power and power cable, which makes the new fireplace more attractive and practical.
- Multi Operation Modes: Touch screen and remote control;12 flame & LED flame bed color modes;5 flame speed modes;5 flame brightness levels; Specially automatic flame design(the flame color and brightness changed
- Energy Saving: 750W & 1500W modes can be adjusted accordingly for both warm and energy saving purpose. The supplemental zone heating is for up to 400 square feet.
- Safety and Comfort: ETL Certificate Approved. It also has auto-heat kill safety to avoid the superheating. The heat is good for maintaining the natural humidity within the air without making the room too dry.
- Let R.W.FLAME electric fireplace warm your home and life.
Do not seal an opening that the appliance uses for airflow. A clean plaster finish can conceal a blocked grille, so mark every required opening on the elevation and keep it visible through boarding and decoration. If the wall is also intended to carry a television, compare the television’s mounting height and cable route with the fireplace’s heat-discharge zone; follow both manufacturers’ limits rather than guessing at a safe distance.
Check local construction and electrical rules
Permit, inspection and wiring rules depend on location and are unresolved without a project address. Contact the local building department before altering a masonry opening, constructing a new wall or running a new circuit. A qualified electrician may be required for new or modified wiring, even when the fireplace itself simply plugs into a receptacle.
Build and dry-fit the surround in a controlled sequence
- Protect the room and verify the substrate. Remove loose paint, crumbling mortar and dust. Confirm that the floor can support the frame and that the wall is plumb enough to establish a reliable reference plane.
- Set out the opening from the manual. Transfer the exact rough-opening height, width, depth and clearance zones to the floor and adjacent wall. Include the thickness of the planned board and plaster in the finished dimensions.
- Construct or adapt the frame. Use framing and anchors appropriate to the home’s construction and local requirements. Keep the cavity square, brace tall sections against racking, and install backing for the surround and any future accessories.
- Provide service routes. Install the approved receptacle or electrical box, route cable, and preserve all required ventilation paths. Photograph the open frame so you know where services run after boarding.
- Secure the frame and dry-fit the fireplace. Lowe’s recommends securing the frame, dry-fitting the fireplace and confirming fit and clearances before finishing. Set the unit or its template in place, check level and center, and verify that the face sits at the intended plaster plane.
- Resolve problems before closing the wall. Correct an opening that is tight, out of square, too shallow or too deep now. Check that the supplied surround, trim or self-trimming edge can be installed without forcing it against wet plaster.
- Install the specified board. Follow the insert manual for board type, thickness, joint layout and fasteners. Keep board edges and fasteners outside prohibited clearance zones unless the manual specifically permits them.
- Finish the surface. Tape and fill joints with the compatible system, feather edges, allow the material to dry, sand smooth and prime before decoration. Dimplex’s general DIY guidance recommends sanding and priming before painting, but your insert manual controls if it gives different instructions.
- Install and commission the appliance. Mount or position the insert as directed, fit the surround or trim, connect power, and test flame effects, heat, controls and fan operation. Keep the manual and photographs of concealed services for future maintenance.
Select board and plaster by model, not by appearance
Manufacturers do not all specify the same finish. Dimplex’s general DIY guide discusses plasterboard or cement board around its fires. A separate Studio Air manual, covering a different appliance, states that standard plasterboard is unsuitable and calls for noncombustible board with heat-resistant plaster. That contrast demonstrates why a generic “fireplace board” recommendation is unsafe: the Studio Air requirement must not be transferred to an unrelated electric insert, and Dimplex’s general guidance must not override your model’s manual.
What’s actually slowing this PC down?
Pick the symptom - the matching free tool is one click away.
Rank #3

- APPEARANCE: The Sideline electric fireplace is designed for recessed in-wall mounting. Creating a cozy atmosphere of a traditional fireplace, this electronic fireplace has realistic flames with a real fire look. The Sideline’s 5 flame intensity settings radiate a soft ember glow up to an intense blaze. Sideline gives you the total package. Control the heat and flame with the remote control. Designed to use one log or crystal, if you prefer you can mix both safely.
- FEATURES: The Sideline features an unmatched flame. Friends will be nervous to touch realistic flame behind the glass. The Sideline includes faux-fire logs & crystals to create an authentic feel, as well as an IR remote controlling flame color & intensity, the heater, and shut-off timer. Front facing heater vents allow you to position the Sideline just 8” under a flat screen TV. The Sideline can be hardwired or plugged in to your electric source.
Apply a finish that will remain stable
- Use the board and plaster or skim products approved for the appliance and the substrate. Confirm compatibility where cement board meets plasterboard or masonry.
- Stagger board joints and keep them away from corners and appliance openings where the manual or board system requires it.
- Embed joint tape fully, fill screw heads, and feather compound beyond the tape so sanding does not expose the board face.
- Reinforce external corners with the corner system specified for the finish. A rigid corner bead helps prevent chips on a projecting fireplace edge.
- Let each coat dry completely before adding the next. Rapid heating of damp plaster can produce cracking or discoloration.
- Prime the cured surface before paint. Keep paint, caulk and texture out of ventilation slots, controls and the appliance’s removable service panels.
If the manual names a heat-resistant plaster or noncombustible board, follow its preparation, thickness and curing instructions exactly. If it does not address plaster at all, ask the manufacturer or an approved installer in writing before closing the cavity rather than inferring approval from another product.
Complete the electrical installation safely
Electrical requirements are product-specific. The cited SimpliFire example calls for a properly grounded 15-amp, 120-volt, 60-hertz circuit. Heat & Glo presents that value for the example product; it is not a universal requirement for all electric inserts or all countries. Use the rating plate and manual for your unit, and have an electrician install or alter fixed wiring where local rules require it.
Do not hide an extension lead, power strip or inaccessible plug inside the wall. Keep the connection reachable in the manner allowed by the manual, protect the cable from abrasion, and avoid sharing a circuit if the instructions prohibit it. After energizing the unit, test every operating mode and listen for abnormal fan noise before applying final decorative trim.
Rank #4

- 【Wall Mount& Recessed Electric Fireplace】This electric fireplace is designed for both Wall Mounted and Recessed build in wall installation, fit for 2 x 4 and 2 x 6 Stud wall, flush mounted, to meet various home remodeling needs.Overall dimension:50’’(W) x 18.11’’(H) x 3.86’’(H); Recess Box Dimension:30.35’’(W) x 16.54’’(H) x 3.86’’(D)
- 【Ultra Thin Lightweight Design】3.86 inch thickness and 39.4lbs weight design, one person can easily hang it on the wall. With Lightweight Feature, this fireplace is also safer to mount on the wall for it takes less risk to drop out from the wall; 3.86 inch Ultra Thin fireplace box can also offered a more aesthetic sideline mounting effect which other fireplace can’t provide
- 【Realistic Flame Effect】 Amaze your guests with lifelike flames of this electric fireplace! Ultra High Intensity LED lights provide realistic flame effect:12 LED flame & crystal hearth color modes and 5 flame speed & brightness levels by Touch Screen Panel or Remote Control; Different flame settings can cater to your different desired ambience. Flame effect can be operated with or without heat for year-round ambience.
- 【Safe&Energy Saving Fireplace Heater】750W-1500W heating modes, 5100BTUS,12.5AMPS,plug-in 120v outlet, heating area up to 400sq.ft. This fireplace can be adjusted according to your preference making it a practical fixture. Using LED technology instead of gas or oil, ETL certified, save energy as this fireplace produces no messy or harmful by product, safe for both people and pets.While safety features include overheat protection and timer.
- 【Modern Home Décor Fireplace】 Fill in your big blank wall with a touch of modernity and elegance. This electric fireplace will serve as a functional décor in your bedroom, living room, office, or family room. Dual-mode function flame effects can operate with or without heat for year-round ambience; Free replacement for installation problems; Damage and missing parts within 1 year.Replace & refund within 1 month
Common mistakes and how to correct them
Framing to the nominal width
A 30-inch label is not a 30-inch rough opening. Recheck the manufacturer’s complete drawing, including face frame, brackets, rear clearance and finished reveal. If the frame is already built, stop before boarding and enlarge or reposition it to meet the drawing.
Plastering before the dry fit
Wet plaster hides an opening that is too tight and makes adjustment destructive. Remove the finish, dry-fit the appliance and trim, and confirm level, center and clearances before refinishing.
Blocking a grille with a “clean” design
A flush wall can accidentally cover intake or heat outlets. Compare the elevation with the manual’s ventilation diagram, keep openings unobstructed and retest the heater after decoration.
Best Value
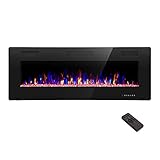
- Attractive and Practical Design:3.86"D x 50"W x 18.11"H ,The thickness of the new style is only 3.86 inches while the old one is 6 inches. And it opearates the same as the old one. Also we redesign the location of main power and power cable, which makes the new fireplace more attractive and practical.
- Multi Operation Modes:Touch screen and remote control;12 flame & LED flame bed color modes;5 flame speed modes;5 flame brightness levels; Specially automatic flame design(the flame color and brightness changed.
- Energy Saving: 750W & 1500W modes can be adjusted accordingly for both warm and energy saving purpose. The supplemental zone heating is for up to 400 square feet.
- Safety and comfort: ETL Certificate Approved. It also has auto-heat kill safety to avoid the super heating. The heat is good for maintaining the natural humidity within the air without making the room too dry.
- Let R.W.FLAME electric fireplace warm your home and life.
Using another appliance’s board specification
Noncombustible board and heat-resistant plaster may be mandatory for one model and unnecessary for another. Conversely, ordinary plasterboard may be disallowed by a particular manual. Obtain model-specific confirmation before selecting materials.
Leaving no service access
Fans, controls and power connections eventually need inspection. Preserve the access panels and removable trim shown in the manual; do not permanently plaster over them.
Crashes, No Sound, or Screen Glitches?
Random freezes, missing sound and display glitches usually trace back to one bad driver. Find and replace yours safely.Free scan · under a minutePC Slower Than It Used to Be?
A free scan shows the junk files, broken settings and background clutter dragging Windows down - then fixes them in one click.Free scan · Windows 10 & 11Ignoring local inspection requirements
Even a plug-in appliance can be part of a larger structural or electrical alteration. Check permit and inspection rules before work begins and document concealed framing and cable routes for the next owner or service technician.
Final pre-decoration and handover checklist
- Exact insert model and current manual are on site.
- Opening height, width and depth were measured and compared with the model drawing.
- Finished depth includes every board, plaster, trim and surround layer.
- Frame is anchored, square, level and backed where accessories will be fixed.
- Clearance zones and ventilation openings are open and visible.
- Board, fasteners and plaster system match the appliance instructions.
- Power route, receptacle and circuit match the rating plate and local rules.
- Appliance, surround and trim were dry-fitted before final plastering.
- All controls, service panels and approved power connections remain accessible.
- The completed unit has been tested in every mode before the wall is decorated.
The reliable way to achieve a crisp plaster fireplace is to let the selected insert set the engineering, then use the plaster finish to refine the appearance. Measure first, dry-fit before closing the wall, follow the exact board and electrical instructions, and involve qualified trades where structural, permit or wiring rules require them.
Quick Recap

Product prices and availability are accurate as of the date/time indicated and are subject to change. Any price and availability information displayed on Amazon at the time of purchase will apply.

