Quick wins for a faster PC:
The Tool Desk
Outbyte PC Repair FREEClear out junk files and repair common Windows errorsFree Scan →Outbyte Driver Updater FREEFix the driver behind crashes, sound loss and screen glitchesFind Drivers →Clear out junk files and repair common Windows errorsFree Scan →Fix the driver behind crashes, sound loss and screen glitchesFind Drivers →
ThatPainter is reader-supported. When you buy through links on our site, we may earn an affiliate commission. Learn More
The practical way to make a crate dollhouse is to treat each wooden crate as a room shell, check its usable interior before buying furniture, then join and finish the units as one open-front house. Two documented approaches are especially useful: a three-crate arrangement with a smaller unit on top and cut openings, and a two-crate build made from wooden CD crates measuring 17.9 × 5.8 × 4.4 inches each. They are project examples, not a universal dollhouse size or scale.
This guide explains how to choose a layout, prepare the crates, join them, add changeable or permanent finishes, and furnish the result without assuming that every miniature accessory will fit.
As an Amazon Associate I earn from qualifying purchases.
Outdated Drivers Are Slowing You Down
One free scan finds every outdated or missing driver and matches the right update for your exact hardware.Free scan · exact hardware matchWindows Errors? Fix Them Before They Spread
Repair common Windows errors and clear accumulated junk for a smoother, more stable PC - no reinstall needed.Free scan · no reinstallChoose a crate layout before you buy supplies
Crate dimensions determine the room footprint, wall height, and depth available for furniture. Measure the actual inside of every crate, not just the outside, because wood thickness and corner joints reduce usable space. Sketch each unit from the front and side, then mark where beds, tables, stairs, or cabinets will sit. A few minutes with a ruler prevents a finished room from being too shallow for its furniture.
| Documented approach | Units and arrangement | Dimensions stated by the tutorial | Openings and joining | Finish style |
|---|---|---|---|---|
| Three-crate expandable layout | Three crates, with a smaller crate stacked on top; additional crates can be added later | Not stated in the project | Door and window openings cut with a jigsaw; crates glued and clamped | Changeable wall and floor treatments, plus an outdoor pergola |
| Two-crate CD-crate layout | Two large wooden CD crates joined as a compact house | 17.9 × 5.8 × 4.4 inches per crate (L × W × H), as listed by Adrienne Brown in 2018 | Crates painted, papered, then glued together; no opening cuts described | Paint and decorative wrapping paper adhered inside |
The three-crate example offers a taller, expandable composition and requires power-tool cutting. The two-crate example has a known starting dimension and a simpler shell sequence. Neither tutorial establishes a standard miniature scale, a tested load limit, a child-age recommendation, or a comparison proving that one arrangement is safer, stronger, cheaper, or better than the other.
#1 Best Overall

- 【CLASSIC DESIGN】Cathy's Flower House features a transparent, pointed-arch structure and a variety of plants, creating a lush, botanical greenhouse. The inspiration for the complex and elegant design comes from classic aesthetics and the beauty of nature, making it a captivating addition to any decor.
- 【VERSATILE HOME DECOR】Cathy's Flower House is perfectly sized to adorn any tabletop, cabinet, shelf, or corner, creating a striking focal point wherever it's placed. Its charm adds a touch of elegance to any space, making it a memorable addition to your home decor.
- 【DOUBLE UPGRADE】Experience the Double Upgrade of Process and Material. Immerse in the oil painting corner of the botanical garden with high-precision prints, easy-assemble adhesive-free frames, pre-colored furniture, and no paper cutting needed.
- 【GIFT FOR DIY CRAFT HOBBY】Cathy's Flower House is the perfect gift for plant lovers and DIY enthusiasts. This miniature greenhouse offers an engaging and creative building experience, complete with intricate details and a variety of plants, making it a delightful and thoughtful present for any occasion.
- 【RESOLVE PROBLEM PROMPTLY】We are committed to providing customers with quality after-sales service. If you have any problems during assembly, please feel free to contact us. The best results can be obtained for any situation.
Plan the rooms and verify fit
Measure the usable interior
Record interior length, width, and height for each crate. Subtract any ledges or uneven corners. Compare those measurements with the height and footprint of the furniture you already own or intend to use. A chair that fits the length of a room may still fail because its back touches the ceiling or its arms cannot pass the front opening.
Draw the front elevation
Place the crates on a flat surface in their proposed arrangement. Mark the front edge, room divisions, and any openings on paper first. For the stacked three-crate design, check that the smaller upper unit sits fully on the crate below rather than balancing on a narrow edge. If the arrangement will be moved often, plan a carrying method before adding fragile details.
Do these 3 things before closing this tab:
1Repair Windows errors before they cause bigger problems2Scan for outdated or missing drivers - takes under a minute3Clear out junk files and repair common Windows errorsDecide whether the finish should be permanent
Permanent paper and paint create a consistent interior but make later changes difficult. Removable panels let you alter a room as furniture or themes change. The three-crate project uses fabric attached to card stock for wall coverings and a cut-to-fit placemat for flooring, so those surfaces can be replaced without rebuilding the crate shell. The two-crate tutorial glues decorative paper inside after painting, which is a fixed treatment.
Materials, tools, and sensible preparation
Core structural materials
- Two or three wooden crates selected for the planned arrangement.
- Wood glue for crate-to-crate joints.
- Clamps for holding glued joints while they dry in the three-crate method.
- A flat work surface, ruler, pencil, and measuring tape.
Finishing materials
- Paint, decorative paper, paper glue, a foam brush, and scissors, as listed in the two-crate tutorial.
- Fabric, card stock, spray glue, and a placemat for removable walls and floors in the three-crate approach.
- Square dowels, sheet moss, and hot glue for the documented outdoor pergola and ground treatment.
- Miniature furniture and accessories sized to the measured interiors.
Cutting and adhesive precautions
The three-crate author reports using a jigsaw to cut door and window openings. That is a project-specific method, not a complete safety guide. Follow the current instructions supplied with your jigsaw, secure the crate before cutting, protect your eyes and hearing as directed, and keep hands clear of the blade path. Use spray adhesive and hot glue only with the ventilation, heat, and surface precautions stated by their manufacturers. Let paint and adhesives dry and cure according to their labels before furnishing the rooms.
Build the three-crate open-front house
1. Arrange and mark the crates
Set two crates side by side or in the footprint you want, then position the smaller third crate on top as the upper room. Confirm that the fronts align and that no crate rocks. Mark the proposed door and window locations while every surface is still accessible. Keep openings away from corners and glue joints so the crate remains intact around its connections.
Rank #2

- Exquisite Design diy miniature house kit: A collectible featuring rich scenes for bookshelves or display cabinets. It serves as both ornament and art, complemented by LED.
- Stress-Relieving: Enjoy a pleasurable assembling experience with this diy dollhouse kit , providing a delightful and relaxing time.
- Simple Instructions: Step-by-step color instruction manual included for easy assembly of this mini dollhouse kit.
- Gift Choice: An impressive miniature house gift for craft and miniature enthusiasts, offering a unique and thoughtful present.
- Note: Not Contain dust cover and glue and music box.Batteries not included due to shipping restrictions. Please prepare 2 AAA batteries.
2. Cut the openings
Transfer your paper layout to the crate with a pencil. Drill a starter hole if your jigsaw instructions require one, then cut slowly along the marked lines. Smooth rough edges with appropriate sandpaper. Dry-fit the crates again after cutting; a shifted opening can interfere with a neighboring wall or with the upper unit.
3. Glue the structure
Apply wood glue to the mating edges, bring the crates together, and check the arrangement from the front, side, and top. The documented project uses clamps while the glue dries. Place clamps so they hold the joint without crushing thin crate slats, and wipe away squeeze-out before it hardens. Leave the assembly undisturbed for the adhesive’s stated curing period.
4. Test the shell before decorating
Place representative furniture inside each room. Open and close any movable pieces, check sight lines through the windows, and verify that the upper crate does not block access to the lower room. Correct alignment or rough edges now; paint and paper make structural repairs harder.
Build the two-crate CD-crate version
1. Confirm the crate specification
Adrienne Brown’s 2018 supply list calls for two large wooden CD crates, each 17.9 × 5.8 × 4.4 inches (length × width × height). Those figures describe the crates used in that tutorial only. Measure your own crates and their interior cavities because listings and batches can differ.
2. Paint and dry the crates
Apply the chosen paint with a foam brush, keeping coats thin enough to avoid pooling in corners. Paint the exterior and the interior areas that will remain visible around the paper. Allow the crates to dry fully before handling them; damp paint can pull away when paper or glue is applied.
The Tool Desk
Outbyte Driver Updater FREEFix the driver behind crashes, sound loss and screen glitchesFind Drivers →Outbyte PC Repair FREERepair Windows errors before they cause bigger problemsFix Now →Rank #3
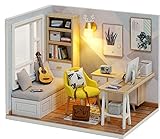
- Diy miniature house kit product Size: ( L x W x H ):12.7cm*10cm*10cm;Product weight: about 0.3KG;
- Detailed Instruction manual : Instruction manual each steps has been clearly showed in the instruction with pictures to guide you how to DIY.
- Package Contents : 1 x DIY Wooden House,dollhouse Kit and dust cover ; Parts are packaged in multiple bags, and items to build each component are rarely in the same bag. Pieces are numbered on the instructions.So you just need to follow the instructions and will finish it effectively;
- DIY dollhouse guide : All of our DIY Miniatures are included an English booklet so that you could read them and understand the steps clearly;
- Ornaments worth collecting: Hours of Fun for assembling, a good choice for your lover,friend,family.It looks great and pretty to show on your table, showcase or hang on the window and door, make your home more beautiful.
3. Trim and adhere the paper
Use the crate interior as a template. Cut decorative wrapping paper slightly oversize, test its position, then trim for a close fit around corners and edges. Brush on paper glue, place the paper from one edge outward, and smooth gently to reduce bubbles. Give the paper time to set before joining the crates.
4. Join the units
Apply wood glue to the contact surfaces, align the two crates, and leave them undisturbed for several hours or overnight, as the tutorial directs. Check that the fronts remain flush while the glue sets. Do not load the rooms until the adhesive has cured according to its label.
5. Furnish after the shell is stable
Arrange furniture only after the joined structure is dry. Keep tall pieces away from low ceilings and leave enough clearance to remove each item through the front. Because this version does not describe cutting doors or windows, access is through the open front unless you choose a separate, carefully planned modification.
Finish the interiors without wasting space
Removable walls and floors
For a changeable interior, cut card stock to the dimensions of each wall and attach fabric with spray glue. Let the adhesive become tacky as directed, then smooth the fabric from the center outward. Label the back of each panel by room so you can reinstall it in the same position. For flooring, cut a placemat to fit the crate base and paint it before placing it inside. A snug fit keeps the floor flat while still allowing removal.
Permanent papered rooms
Decorative paper works well when you want one finished theme. Make paper templates from scrap first, especially for the back and side walls. Mark grain or pattern direction so adjacent pieces look intentional. Seal or protect the paper only with a product compatible with its adhesive and paint; an untested coating can wrinkle or loosen it.
Rank #4

- 【SUITABLE FOR BEGINNERS】We designed this miniature Owl Bookstore tiny house kit specially for beginners and also anyone who loves DIY crafts. Take 1-2 hours of easy assembly with the colorful and detailed manual, you will get a super exquisite and fantastic book nook. Use less time, but gain a more wonderful dollhouse. Elegant home décor inside the bookshelf or on the desk. Looks great in the dark with the light on.
- 【OWL BOOKSTORE BOOK NOOK KIT】Open the door of the bookstore, you will travel back to the Renaissance era, a time full of sparks of ideas and artistic passion. Dark solid wood bookshelves, classical style table lamps, and paintings by famous artists on the wall together create an atmosphere as if you were in a Renaissance English bookstore.
- 【FUN DIY EXPERIENCE】 It's a combination of fun and leisure to finish this DIY book nook craft kit. Almost all of the scenes you have to create yourself to gain a great sense of achievement. You can DIY or add mini dolls or any other miniatures in it as you like. Suitable for people over 14 years old. The book nook miniature house kit is also a great way to communicate with teens and adults, and it can inspire you to plan and build like a real engineer.
- 【EXQUISITE HOME DECORATIONS】Every detail has been carefully designed, revealing a strong sense of history and artistic flavor. The DIY book nook bookend kit is more than a DIY book corner project, also an exquisite collection and room decoration. The miniature world contains rich scenes and interesting ideas. When you look at the vibrant corner of your bookshelf, it can offer you a sunny mood and help you calm down to immerse yourself in the world of books.
- 【PERFECT GIFT IDEA】No one would refuse such a creative and wonderful gift! This booknook is more refined than an ordinary handicraft. In addition to experiencing the fun of DIY, it can also be used as a room ornament. Great and thoughtful gifts for your loved ones, family and friends on special days like birthdays, anniversaries, Christmas, Thanksgiving day, Valentine's Day, etc.
Color and visual scale
Use darker colors on a back wall to create depth and lighter colors near the front to keep the room readable. Avoid assuming that a particular print represents a particular dollhouse scale. The crate tutorials do not specify a common scale, so judge patterns, trim, and furniture by proportion to your measured room.
Independent reader supportYour contribution helps us test, update, and keep practical guides available for everyone.Add an outdoor area to the three-crate design
The documented three-crate project extends the scene with a pergola made from square dowels. Cut and join the dowels according to the dimensions of your own structure, then use hot glue as reported in the project. Sheet moss can represent grass around the base. Dry-fit the pergola and moss before gluing so they do not obstruct the dollhouse opening or make the assembly difficult to move.
Furnish by measurement, not by label
Sort furniture by actual height, width, and depth. A package labeled “miniature” may be intended for a different scale or scene. Measure the largest piece in each room and preserve a clear route from the open front to the back wall. Place heavy items low and toward the rear, where they are less likely to tip when the house is touched. Use small accessories sparingly: too many objects hide the floor and make cleaning difficult.
Do these 3 things before closing this tab:
1Repair Windows errors before they cause bigger problems2Scan for outdated or missing drivers - takes under a minute3Clear out junk files and repair common Windows errorsPlan one visual anchor per room—a bed, table, stove, or seating group—then add only items that support how that room is used. In a narrow crate, a wall-mounted picture or shallow shelf may work better than a deep cabinet. Keep removable wall and floor panels accessible so redecorating does not require dismantling furniture.
Separate the shell project from tiny crate accessories
A separate 2020 tutorial titled “DIY Miniature Tutorial – 1:12 Dollhouse Crate” describes making a small accessory crate from craft sticks and coffee stirrers, with glue and a cutting mat. That 1:12 item is not the structural crate used for the two- or three-crate dollhouse. Use it as a prop only after checking that its proportions suit your chosen furniture and room design; do not infer that the larger shell has a 1:12 scale.
Best Value

- Exquisite Design 3D Puzzles for Adults: A collectible featuring rich scenes for bookshelves or display cabinets. It serves as both ornament and art, complemented by LED.
- Stress-Relieving: Enjoy a pleasurable assembling experience with this 3D Puzzle , providing a delightful and relaxing time.
- Simple Instructions: Step-by-step color instruction manual included for easy assembly of this Book Nook Kit.
- Gift Choice: An impressive miniature kit gift for craft and miniature enthusiasts, offering a unique and thoughtful present.
- Note: Batteries and glue not included due to shipping restrictions. Please prepare 3 AAA batteries.
Troubleshoot common build problems
The crates do not align
Stop before the glue cures. Remove excess adhesive, reposition the units on a flat surface, and clamp again. If the mismatch comes from different crate sizes, redesign the stack rather than forcing one corner into place.
Paper wrinkles or lifts
Uneven glue coverage, damp paint, and forcing a large sheet around a corner are common causes. Remove the panel if possible, let the surface dry, cut smaller sections, and smooth each piece from the center outward. Test the adhesive on scrap paper first.
Recommended Free Tools
Furniture will not fit
Measure the interior and the furniture again, including the clearance needed to turn an item through the front. Move the piece to another room, use a shallower alternative, or revise the floor plan. Do not enlarge an opening without checking the remaining wood around the joint.
The upper unit feels unstable
Unload the rooms and inspect the contact area. A small top crate should sit fully on its support, and the glue joint should be cured. If the arrangement still shifts, keep it as a stationary display and seek a fastening method appropriate to your materials rather than relying on loose stacking.
Edges are rough after cutting
Stop handling the opening until splinters are removed. Sand carefully, clean away dust, and cover the edge with a finish compatible with the wood and paint. Recheck that the opening remains large enough for furniture access.
Display, handling, and long-term care
These tutorials do not provide structural testing, load ratings, tool-safety instructions, glue or paint safety data, or an age recommendation. The finished project should therefore be treated as a craft display unless you have separately verified materials and construction for another use. Keep it on a stable surface, protect it from moisture and direct heat, and move it by supporting the crate body rather than a roof, pergola, or decorative trim.
Dust with a soft brush or dry cloth. Remove fabric panels and placemat floors before cleaning them according to their material labels. Inspect glued joints, paper edges, and cut openings periodically. Repair a loose joint before adding more furniture or accessories.
Quick Recap
A practical decision checklist
- Choose the three-crate layout if you want a stacked composition, possible future additions, removable finishes, and are prepared to cut openings with a jigsaw.
- Choose the two-crate layout if you prefer a compact shell with documented starting dimensions, painted and papered interiors, and no cutting step in the cited instructions.
- Measure every interior and every furniture piece before assembly.
- Decide whether walls and floors should be removable or permanently glued.
- Allow paint, paper glue, wood glue, spray adhesive, and hot glue to dry or cure according to their product instructions.
- Describe the result as a custom crate dollhouse, not as a tested toy or a standard-scale model.

Product prices and availability are accurate as of the date/time indicated and are subject to change. Any price and availability information displayed on Amazon at the time of purchase will apply.

