Do these 3 things before closing this tab:
1Repair Windows errors before they cause bigger problems2Scan for outdated or missing drivers - takes under a minute3Clear out junk files and repair common Windows errors
ThatPainter is reader-supported. When you buy through links on our site, we may earn an affiliate commission. Learn More
A damp-proof course (DPC) is a continuous moisture barrier built into a wall to interrupt movement of water from the ground through masonry. In England, the clearest design reference is the October 2024 merged edition of Approved Document C. It identifies acceptable material types, places an external-wall DPC generally at least 150 mm above adjoining ground, and requires the wall DPC to be continuous with the floor damp-proof membrane (DPM). Cavity-wall details also have specific requirements for cavity depth, trays and weep holes.
Those dimensions are design guidance for new work in England. They are not, by themselves, a diagnosis that damp in an existing property is rising damp, or proof that a missing or failed DPC is the cause.
As an Amazon Associate I earn from qualifying purchases.
Free tools Windows power users keep installed
One-click scans. No signup required.
What is a damp proof course?
A damp-proof course is a horizontal layer of moisture-resistant material placed across a wall. Its purpose is to stop water in the ground from travelling upward through mortar joints, bricks or blocks by capillary action. The barrier must be continuous across the wall section; gaps, badly lapped joints or penetrations can provide a route around it.
In a typical building, the wall DPC works with the floor damp-proof membrane. The DPC protects the wall, while the membrane protects the floor construction. Where the two meet, continuity prevents moisture from bypassing one element at the junction.
#1 Best Overall
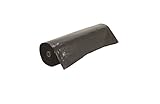
- Packaged plastic sheet has dozens of uses around the home, garden and garage
- Use it to cover and protect furniture, appliances and equipment
- Use to make storm windows and doors and to protect building materials, machinery or other things stored outdoors
- Use as a boat cover, as a moisture barrier; to make temporary enclosures; to cover plants and shrubs, etc.
- Light weight drop cloths are for covering furniture. The heavier weights can be used on the floor to cover carpeting, rugs, hardwood floors, etc.
Approved Document C, paragraph 5.4, states: Any internal or external wall will meet the requirement if a damp proof course is provided.
The sentence appears in guidance about resistance to moisture from the ground. It is not an inspection finding about an existing building and is not a complete specification for every wall construction.
Which rules apply?
The statutory guidance used here is Approved Document C: Site preparation and resistance to contaminants and moisture. It covers moisture resistance in floors, walls and roofs. The October 2024 merged edition, listed by the government as added on 1 October 2024, applies to England and is available in The Merged Approved Documents, October 2024 edition.
Recommended Free Tools
Approved Documents describe ways of demonstrating compliance with the Building Regulations in England. They are not automatically the rules for Scotland, Wales or Northern Ireland. A project in another UK jurisdiction needs the applicable national guidance and any local requirements checked separately.
What materials are used for a damp proof course?
The October 2024 guidance names several possible materials. It does not rank them by performance, cost or durability, and it does not establish that one product is suitable for every wall or exposure.
| Material named in the guidance | How it may appear in a project | What must still be checked |
|---|---|---|
| Bituminous material | A manufactured bitumen-based DPC layer | Compatibility with the wall construction, dimensions, laps and the project specification |
| Polyethylene | A polyethylene damp proof course roll or sheet | Specified thickness, width, jointing and suitability for the particular wall |
| Engineering bricks | A course of engineering brick forming the moisture break | Correct brick type, mortar detailing and continuity at corners and junctions |
| Slate in cement mortar | Slate laid in a continuous cement-mortar course | Sound bedding, continuous coverage and detailing around openings and changes in level |
| Another moisture-preventing material | A material selected by the designer for the wall system | Evidence that it prevents moisture and meets the applicable specification and jurisdiction |
A phrase such as “polyethylene damp proof course roll” describes a material category, not a blanket recommendation. Width, thickness, joint details and the wall build-up should be confirmed before purchase or installation.
How high should a damp proof course be above ground?
For an external wall, the example detail in the England guidance places the DPC at least 150 mm above adjoining ground, unless the design provides protection for the wall by another suitable arrangement. The 150 mm dimension is measured in relation to the adjoining ground level, so paving, paths, driveways and later landscaping need to be considered when setting the finished level.
Rank #2

- Material: Our waterproof membrane band rolls are made of quality polyethylene, it has stronger waterproof and anti-seepage capabilities, high quality materials ensure that our products have extremely high wear resistance, tear resistance and flexibility
- Product Features: 5inch x 98.5ft, the underlayment for laminate flooring mulch with a thickness of up to 20 mils can effectively prevent water or moisture from penetrating into wooden floors, ceramic tiles, cement or ceramic floors
- Easy to Use: The simple waterproofing band can be easily installed and assembled by a beginner. You can freely cut the length and width of the product according to your needs and laying area, it can be easily folded to fit various spaces
- Easy to Install: The tile waterproofing uncoupling membrane easy to use, just cut to size, spread a layer of the waterproof underlayment membrane, overlap the membrane at the seams to create a continuous waterproof layer
- Widely Applications: The Shower Membrane is suitable for kitchen, bathroom, shower room, sauna and other wall and floor waterproofing needs, compatible with marble, cement, ceramic tiles, ceramics and stone and other floor and wall materials
The exception matters: the guidance does not say that every wall must show an exposed DPC exactly 150 mm above every surface. A design can protect the wall by other means. The chosen detail should be documented rather than inferred from the visible face of a finished building.
Does a wall damp proof course need to connect to the floor membrane?
Yes. The guidance says the wall DPC should be continuous with the floor damp-proof membrane. Continuity is the moisture-control principle: the wall barrier and floor barrier should meet so water cannot pass through an unprotected strip at the wall-to-floor junction.
At design stage, draw the junction in section and identify where the DPC, floor membrane, floor slab or screed, insulation and wall leaves meet. On site, protect the membrane from puncture, keep laps and joints to the specified detail, and check that later trades have not cut or covered the connection. The exact construction varies with the floor and wall system, so the drawing and specification govern the installation.
Cavity-wall DPC details
An external cavity wall has two leaves separated by a cavity. Water reaching the outer leaf must not be allowed to bridge to the inner leaf. The 2024 England guidance describes two ways of arranging the lower part of the cavity.
Carry the cavity down below the lowest DPC
In the first arrangement, the cavity is carried at least 225 mm below the lowest DPC. The extra depth provides space for water to collect and drain without reaching the inner leaf. This is a minimum dimension for the described detail, not a universal depth for every wall design.
Use a damp-proof tray
Alternatively, a damp-proof tray can protect the inner leaf. The tray should direct water toward the outer leaf, where it can discharge through weep holes. In the described arrangement, weep holes are provided every 900 mm.
Rank #3

- High-Strength damp-proof barrier highly effective against moisture ingress and ground gases in floors and walls.
- Versatile damp proof membrane - Can be used on a large range of substrates such as brick and timber.
- Quick-Drying & Strong Bond - two-coat application with a fast 1-hour initial drying time: can be used immediately with no special curing required.
- Extensively tested for high performance and produced in accordance with quality and environmental management systems - 1L Coverage: Approx. 1m²
Detail trays above openings
Where a tray is installed above a window, door or other opening and does not extend for the full length of the exposed wall, the guidance calls for stop ends and at least two weep holes. These details prevent water from running sideways out of the tray and entering the cavity or inner leaf at the end of the opening.
Choosing between the two arrangements
The choice is a wall-design decision. Compare whether the cavity can be carried down the required 225 mm, whether a tray can be installed with reliable falls and stop ends, how water reaches the outer leaf, and whether the weep-hole spacing can be maintained. The applicable drawings, structural requirements and jurisdiction determine the compliant detail; the guidance does not provide a product-performance league table.
PC Slower Than It Used to Be?
A free scan shows the junk files, broken settings and background clutter dragging Windows down - then fixes them in one click.Free scan · Windows 10 & 11Outdated Drivers Are Slowing You Down
One free scan finds every outdated or missing driver and matches the right update for your exact hardware.Free scan · exact hardware matchDesign and installation checklist
For a new masonry project in England, the following sequence helps coordinate the DPC with the rest of the envelope:
- Confirm the governing requirements. Establish that the work falls under England’s Building Regulations and review the current Approved Document C edition alongside the project drawings.
- Set finished ground levels. Show adjoining soil, paving and other surfaces on the section so the external-wall DPC can be positioned at least 150 mm above ground, or the alternative protective design can be clearly identified.
- Choose the wall DPC material. Select from the specified material options or another demonstrably moisture-preventing material. Record width, thickness, laps, joints and compatibility with the masonry and mortar.
- Draw the floor junction. Make the floor DPM and wall DPC continuous. Mark every change in level, doorway, service penetration and corner where continuity could be lost.
- Resolve the cavity base. Either carry the cavity at least 225 mm below the lowest DPC in the described arrangement, or design a tray that protects the inner leaf and drains to the outer leaf.
- Locate drainage openings. For the tray arrangement, set weep holes at the stated 900 mm spacing. Above openings, include stop ends and at least two weep holes where the tray does not run the full exposed length.
- Inspect before covering. Photograph the DPC, DPM connection, tray, stop ends and weep holes before insulation, plastering or finishes conceal them. Check for tears, discontinuities, blocked openings or mortar droppings that bridge the cavity.
- Coordinate later work. Keep finished ground, render, paving, sealants and external coatings from defeating the designed drainage path. Any change to levels or openings should be referred back to the designer.
What a DPC does not prove about damp in an existing building
A visible damp patch, peeling paint or salt deposit does not establish that water is rising through the wall or that the DPC has failed. The England guidance gives design provisions for resistance to moisture from the ground; it does not provide a diagnostic method for an occupied, older property.
Existing damp can involve several possible paths, including rain penetration, plumbing leaks, condensation, damaged pointing, bridged details or ground levels that have been changed after construction. A survey should identify the moisture source and inspect the wall, floors, gutters, drainage, external levels and cavity details before any remedial work is specified.
Do not treat the 150 mm example as a test that can be applied in isolation to an old wall, and do not infer from the presence or absence of a visible DPC that chemical injection or another intervention is suitable. A treatment recommendation requires an assessment of the actual construction and moisture movement.
Do these 3 things before closing this tab:
1Scan for outdated or missing drivers - takes under a minute2Repair Windows errors before they cause bigger problems3Fix the driver behind crashes, sound loss and screen glitchesRank #4

- Warmer Surface Gets Better Adherence: EPDM rubber protective layer has good waterproofing and weather resistance. High-adhesion self-adhesive layer ensures secure bonding with no peeling, developing greater tack over time to provide a lasting protective barrier for roofs.
- Can Be Cut To Size: Waterproof membrane size is 3.3ft x 16.4ft, with a thickness of 50mil. It can be freely cut to size according to construction requirements, meeting the coverage needs of standard roofing projects as well as repairs for localised corners or intricate details.
- The Ideal Material For Roof Protection: Once installed, rubber roof membrane forms a complete and continuous waterproof barrier across the roof surface, effectively preventing rainwater, snowmelt and moisture from penetrating the building, extending the roof's service life.
- Solving All Manner Of Waterproofing Issues: Perfect for waterproofing across diverse scenarios including flat roofs, pitched roofs, metal roofing, terraces, balconies and garage roofs. It also effectively addresses repairs around roof corners, pipe roots and around chimneys.
- Peel And Stick Easy Installation: Featuring a self-adhesive design, simply peel off the protective film to apply directly, significantly reducing installation time and labour costs. Whether for home DIY repairs or large-scale installations, it can be completed swiftly.
Common detailing failures
Ground raised against the wall
New paving, soil or render can reduce the designed separation between ground and the DPC. Record the finished levels and make sure the external detail still protects the wall.
Broken continuity at the floor junction
A DPC that stops short of the floor membrane leaves a potential bypass at the perimeter. The junction should be inspected before the floor and wall finishes hide it.
Bridged cavity
Mortar droppings, insulation or debris can create a path between leaves. Keep the cavity clear and verify that tray drainage and weep holes remain open.
Missing tray end details
A tray above an opening without stop ends can discharge water at the wrong location. Where the tray does not run the full exposed length, provide the specified stop ends and at least two weep holes.
Free tools Windows power users keep installed
One-click scans. No signup required.
Assuming one national rule
The dimensions quoted here come from England’s guidance. Applying them as if they were automatically statutory in every UK jurisdiction can produce the wrong design or approval route.
Practical specification questions to settle before work starts
- Which jurisdiction and edition of guidance govern the project?
- What are the final adjoining ground levels, including future paving and landscaping?
- Which DPC material, width, thickness and joint detail are specified?
- Where exactly does the wall DPC meet the floor DPM?
- Is the cavity carried 225 mm below the lowest DPC, or is a tray used?
- If a tray is used, where are the falls, stop ends and 900 mm-spaced weep holes shown?
- How will the work be inspected and protected before plaster, render, paint or other finishes conceal it?
Bottom line
A masonry DPC is a continuous moisture barrier, not a cure-all label for damp. For work governed by England’s October 2024 Approved Document C, use the guidance’s 150 mm external-wall example, maintain continuity with the floor DPM, and detail cavity drainage with either the 225 mm cavity depth or a properly drained tray, including the stated weep-hole and stop-end provisions. For an existing building, investigate the actual moisture path before deciding that the DPC is missing, failed or needs replacement.
Quick Recap

Product prices and availability are accurate as of the date/time indicated and are subject to change. Any price and availability information displayed on Amazon at the time of purchase will apply.

