Windows Errors? Fix Them Before They Spread
Recommended Free Tools
Repair common Windows errors and clear accumulated junk for a smoother, more stable PC - no reinstall needed.
Fix My PC Now →Free scan · no reinstall
ThatPainter is reader-supported. When you buy through links on our site, we may earn an affiliate commission. Learn More
As an Amazon Associate I earn from qualifying purchases.
A cedar-fence-picket countertop can be built over a 3/4-inch plywood base with basic woodworking tools, construction adhesive and brad nails. Kristi Linauer’s bathroom project shows the sequence from removing the old counter through cutting a drop-in sink opening, but her later review also makes the limitations clear: rough pickets, uneven edges and unfilled seams demand more preparation than the original rustic finish suggests.
Outdated Drivers Are Slowing You Down
One free scan finds every outdated or missing driver and matches the right update for your exact hardware.Free scan · exact hardware matchWindows Errors? Fix Them Before They Spread
Repair common Windows errors and clear accumulated junk for a smoother, more stable PC - no reinstall needed.Free scan · no reinstallThis is a documented 2013 project, so its price is historical. Use the construction method as a starting point, then adapt the seam preparation and finish to the moisture exposure around your own sink and to the current instructions for any coating you choose.
#1 Best Overall

- Package Includes: One box includes Canadian red cedar boards of various lengths, ranging from 16 inches to 55 inches, covering a total of 10.5 square feet
- High Quality: Our red cedar wood paneling is all sourced from sustainable forests in Canada, with high density, exquisite texture, and no knots
- Safe For Your Family - Compared with other 3D acoustic panels, our wooden panels have no chemical treatment, are made of 100% natural wood, are safer, and have a beautiful smell
- Wide Application: Cedar has durability and acoustic properties, so it is widely used in interior and exterior wall panels, scented drawer liners, and closets planks
- Easy to install: Compared to peel and stick wood planks, our tongue and groove planks are thicker and easier to install. Even with the use of adhesive, they will not curl or fall off
What the cedar-fence countertop is
Linauer built the top as a layered assembly rather than trying to make a solid slab from thick lumber. She first fitted a 3/4-inch plywood panel to the vanity, then covered that panel with cedar fence pickets. The pickets provide the visible surface; the plywood supplies the continuous structural base that can be fastened to the cabinet.
The finished look was intentionally rustic. Nail holes and some spaces between boards remained visible in the original version, giving the counter a weathered character rather than the seamless appearance of a shop-machined countertop. That choice matters near a sink: an open seam is harder to clean and gives finish and water more opportunities to reach the wood below.
The project was published by Addicted 2 Decorating on January 22, 2013 (the page was updated August 6, 2023). The instructions below distinguish what she actually built from improvements she identified later.
Recommended Free Tools
Materials and tools used
Visible and structural materials
- Four cedar fence pickets for the countertop surface, plus a fifth picket purchased as a spare.
- A 2-by-4-foot sheet or piece of 3/4-inch plywood cut to the vanity footprint.
- 1-by-2-inch cedar boards for the exposed edging.
- Construction adhesive (Liquid Nails in the original project).
- Wood glue for the edge pieces.
- Brad nails and a brad nailer.
- Golden Oak stain.
- Sandpaper and rags. These, along with nails, wood glue and polyurethane, were already on hand for Linauer, so they were not all included in her cash total.
Tools and layout items
- A drill and bit for the starter hole inside the sink cutout.
- A jigsaw for cutting the drop-in sink opening.
- A sander or sanding blocks for leveling the pickets and smoothing the edges.
- A miter saw or other means of making the front-corner miter.
- The template supplied with the drop-in sink.
The original build did not rely on a table saw, jointer or planer to straighten the pickets. That kept the tool list approachable, but the absence of those machines became important in the later assessment of the countertop.
Historical cost and build time
Linauer wrote that the top took about three hours and cost $34.11 in her 2013 account. Her exact description was: “The best thing about this wood countertop was that it just took about three hours to make, and it cost a grand total of $34.11.” That is one homeowner’s historical price, not a current estimate or a general construction benchmark.
| Item in the 2013 project | Reported cost |
|---|---|
| Four cedar fence pickets | $7.88 |
| Cedar edging | $2.46 |
| 2-by-4-foot plywood piece | $15.65 |
| Golden Oak stain | $4.78 |
| Liquid Nails construction adhesive | $3.34 |
| Reported total | $34.11 |
The total excludes supplies she already owned, including nails, wood glue, rags and polyurethane. Picket, plywood, adhesive and finish prices vary by region, retailer and date, so price the materials locally before treating the idea as a budget plan.
How to build the countertop
1. Remove the old counter and make a plywood template
Take off the existing countertop and expose the vanity cabinet. Measure the cabinet carefully, including wall irregularities and the desired overhang. Linauer fitted a 3/4-inch plywood base to that footprint. Dry-fit the plywood before adding any cedar; the surface must sit flat and leave the sink and backsplash areas in the positions required by the vanity.
What’s actually slowing this PC down?
Pick the symptom - the matching free tool is one click away.
Rank #2
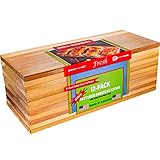
- Textured Grilling Planks for More Smoke and More Flavor!
- 5.5". x 11.00" x 1/3" - Upgraded Thickness!
- Grilling planks are only intended for single use. Reuse is unsanitary.
- Grilling Instructions Included | Perfect for Gifts or Home Use
- Sourced & Made in the USA!
Use the plywood to establish the finished outline. If the old top supplied a useful template, transfer its wall and front edges, but verify every measurement against the cabinet and the new sink before cutting cedar.
2. Lay out the cedar pickets
Arrange the pickets across the plywood so their grain and color look intentional. The four boards used for the top came from inexpensive fence material, so expect variation in width, thickness and surface texture. Select the straightest boards for the most visible areas and keep the spare board available for a bad cut or a board that proves too warped.
Mark where the sink and faucet will fall before permanently fastening anything. A dry layout lets you shift seams away from the most exposed splash zone and confirms that the cedar covers the plywood without an accidental short edge.
3. Attach the boards to the plywood
Apply construction adhesive to the plywood in a pattern that gives the pickets continuous support, then set each board in its planned position. Linauer secured the pickets with adhesive and a brad nailer. Drive nails where they will hold the boards while the adhesive sets, keeping fasteners consistent if you want the nail holes to read as part of the rustic design.
Wipe away adhesive squeeze-out promptly. Glue left on the face can resist stain and create shiny patches that sanding may not remove evenly. Follow the adhesive maker’s current instructions for working time and curing before stressing the assembly.
4. Level and smooth the surface
Sand the assembled top until it feels even to the touch and the pickets no longer have splinters or abrupt ridges. Fence pickets are rougher than furniture-grade boards, so sanding can consume a substantial part of the project. Work progressively rather than trying to remove deep unevenness with one aggressive pass that could create dips.
At this stage, inspect every longitudinal seam. Decide whether you want the original open, rustic effect or a more closed surface suitable for repeated wiping. The later recommendation from Linauer was to fill the cracks thoroughly, preferably with waterproof wood filler, then sand the filler flush. Do that preparation before staining or applying a clear coat.
Rank #3
- Package Includes: One box includes Canadian red cedar 8x88x400-1400(0.32"x3.4"x16"-55") lengths, ranging from 16 inches(400mm) to 55 inches(1400mm), covering a total of 20 Square Feet
- High Quality: Our red cedar boards are all sourced from sustainable forests in Canada, with high density, exquisite texture, and almost no knots, Ideal wood for wall panels
- Safe For Your Family - Compared with other 3D acoustic panels, our wooden panels have no chemical treatment, are made of 100% natural wood, are safer, and have a beautiful smell
- Wide Application: Cedar has durability and acoustic properties, so it is widely used in interior and exterior wall panels, scented drawer liners, and closets planks
- Easy to install: Compared to peel and stick wood planks, our tongue and groove planks are thicker and easier to install. Even with the use of adhesive, they will not curl or fall off
5. Add the cedar edging
Cover the exposed plywood edge with 1-by-2-inch cedar. Linauer used wood glue and brad nails, then mitered the front corner so the edging met cleanly instead of exposing a square end grain joint. Dry-fit both pieces, mark the miter, and check that the edging sits flush with the top before gluing.
Windows Errors? Fix Them Before They Spread
Repair common Windows errors and clear accumulated junk for a smoother, more stable PC - no reinstall needed.Free scan · no reinstallOutdated Drivers Are Slowing You Down
One free scan finds every outdated or missing driver and matches the right update for your exact hardware.Free scan · exact hardware matchClamp or hold the edging in position while the glue sets, and keep the nail pattern clear of the cabinet hardware below. Sand the transition between top and edging so a cloth will not catch on a lip.
6. Mark and cut the drop-in sink opening
Place the sink template on the completed top and align it with the cabinet, plumbing and faucet layout. Trace the opening exactly as directed by the sink maker; the rim needs enough flat, supported area to seal and sit securely.
Drill a pilot hole inside the waste area of the marked opening, large enough for the jigsaw blade. Insert the jigsaw blade through that hole and cut along the template line. Support the waste section so it does not tear out as the final cuts meet. Test-fit the sink before finishing the wood, because correcting a tight or misplaced opening is easier before stain and clear coating.
7. Stain and plan the protective finish
Linauer stained the top Golden Oak. She initially postponed polyurethane while deciding on the cabinet color, so the first post documents stain but not a completed clear topcoat. If you stain, keep the coat even and remove excess according to the stain label; residue in seams can remain tacky or produce darker lines.
Do not treat stain as a moisture barrier. The protective system is a separate decision, and the finish must be selected and applied according to its current label for bathroom use.
Independent reader supportYour contribution helps us test, update, and keep practical guides available for everyone.What the maker would change
In her later comparison of her DIY countertops, Linauer said the cedar fence boards were rough and required a lot of sanding. Because she did not have a table saw, jointer or planer, she could not make every edge perfectly straight. The result was visible cracking between boards.
Rank #4
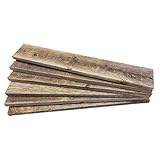
- Do you love barn wood? You want real weathered wood? This is it! The real deal!
- 100% authentic naturally weathered rustic wood that will make your projects look amazing!
- Amaze your friends with your beautiful creations and make authentic barn wood creations
- Each piece is unique and has earned its character and patina over decades of being in the elements - this kind of wood you can't buy in the stores.
- Six planks - Each plank is 3.5" wide, 24" long, about half inch thick
Her retrospective recommendation was specific: “And as long as you sand the boards down until they’re smooth, make sure all of the cracks between the boards are filled really well with wood filler (waterproof wood filler is preferable) and sanded smooth, and the countertop has several coats of a clear polyurethane, it should hold up quite well.” This is Linauer’s own assessment in the later article, not an independently verified durability guarantee for this countertop.
That advice changes the labor calculation. The original three-hour account reflects a quick first attempt with a rustic look. A practical vanity top with closed seams requires extra filler, drying time, sanding and multiple finish coats. Linauer still described the cedar version as inexpensive, but said she would recommend other countertop projects if the budget allowed.
The Tool Desk
Outbyte PC Repair FREERepair Windows errors before they cause bigger problemsFix Now →Outbyte Driver Updater FREEFix the driver behind crashes, sound loss and screen glitchesFind Drivers →Finish choices around a bathroom sink
Clear polyurethane over prepared cedar
For this specific project, the later improvement path is straightforward: prepare the seams, sand them smooth, then apply several coats of clear polyurethane. A clear product keeps the stained wood’s appearance more visible than an opaque coating, although the exact color and sheen depend on the product. Use the manufacturer’s instructions for surface preparation, recoat windows, ventilation and cure time; no source establishes a service-life number for this cedar top.
Waterlox manufacturer guidance
Waterlox Coatings Corporation’s countertop guidance lists its interior wood finishes for countertops and vanities, including bathrooms and areas around sinks. The company states, “Around sinks, bathrooms and laundry rooms are where Waterlox® products really show their strength,” and claims a waterproof finish. Those are manufacturer statements, not independent comparative tests, and Waterlox was not the finish documented in Linauer’s build.
Rust-Oleum HOME Countertop Coating
Rust-Oleum’s HOME Countertop Coating support instructions, updated January 13, 2026, list wood among the surfaces that may be coated. The system uses a base coat and a top coat. The instructions call for a small adhesion test before coating the entire surface and caution against allowing water to pool for extended periods. They also state that the product is not intended for a food-preparation surface.
This coating is a refinish alternative, not part of the original tutorial. Follow the current product label, including preparation and cure requirements, and do not infer a durability ranking from the manufacturer’s instructions. No independent source in the project record compares polyurethane, Waterlox products and the HOME system on this exact cedar-fence countertop.
Practical checks before you install the top
- Check the cabinet support: The plywood and cedar assembly must bear on the vanity rails or other solid supports, not hang from a thin cabinet face.
- Check sink clearance: Dry-fit the sink, faucet and backsplash relationship before finishing. A correct template cut can still conflict with a wall, drawer or plumbing route.
- Check every seam: If a fingernail catches, sand again. If a crack remains open, decide whether to fill it before stain rather than hoping clear coat will bridge it.
- Check adhesive and finish compatibility: Remove glue spots and dust completely; contamination can show through stain or prevent a coating from bonding.
- Control water exposure: Wipe standing water instead of letting it sit, especially during the finish’s cure period. The Rust-Oleum instructions specifically warn against extended pooling.
- Ventilate and protect the work area: Stains, fillers, adhesives and clear finishes have their own safety requirements. Use the label’s ventilation, skin and eye protection guidance.
Is this approach right for your vanity?
Choose cedar pickets over plywood when the appeal is a low-cost, visibly handmade surface and you are willing to sort boards, sand extensively and work through seam preparation. The layered construction avoids milling a thick slab, and the sink opening can be cut with a drill and jigsaw.
Choose a different countertop method if you need a factory-smooth, nearly maintenance-free surface or do not want to spend time correcting warped edges and open joints. The project record supplies no independent test data or quantitative durability comparison, so the decision should rest on your tolerance for rustic variation, your finish manufacturer’s permitted use and the amount of water management your bathroom requires.
The most faithful way to reproduce the project is therefore two-stage: build the plywood-backed cedar shell as documented, then improve the original by closing and smoothing the seams and applying a complete protective system selected from current product instructions.
Quick Recap

Product prices and availability are accurate as of the date/time indicated and are subject to change. Any price and availability information displayed on Amazon at the time of purchase will apply.
Quick wins for a faster PC:
Fix the driver behind crashes, sound loss and screen glitchesFind Drivers →Clear out junk files and repair common Windows errorsFree Scan →Scan for outdated or missing drivers - takes under a minuteDriver Scan →
