PC Slower Than It Used to Be?
Do these 3 things before closing this tab:
1Scan for outdated or missing drivers - takes under a minute2Repair Windows errors before they cause bigger problems3Fix the driver behind crashes, sound loss and screen glitchesOutbyte PC Repair · freeA free scan shows the junk files, broken settings and background clutter dragging Windows down - then fixes them in one click.
Run a Free PC Scan →ThatPainter is reader-supported. When you buy through links on our site, we may earn an affiliate commission. Learn More
Part One of Lauren’s project is a faux fireplace surround and entertainment center assembled from a reclaimed mantel, plywood and 2×4 framing. It is not a working fireplace. The opening is designed as concealed storage and an access panel for an electrical outlet, while the overall size is customized to the mantel, wall and television layout rather than copied from a universal plan.
The original tutorial was published July 21, 2014, and updated July 30, 2022. Its reported prices—$100 for the mantel and under $500 for the broader project—are historical, author-reported figures, not a current bill of materials.
As an Amazon Associate I earn from qualifying purchases.
What Part One actually builds
The project creates a freestanding-looking fireplace feature that is anchored to the wall. A framed hearth supports the reclaimed mantel, plywood forms the surround, and a hinged panel in the faux firebox provides access to an outlet. That arrangement lets the household hide television or equipment cords instead of leaving them exposed across the wall.
There is no burner, chimney, vent, heat-producing insert or appliance installation in this phase. Lauren mentions that a gas insert might be considered in the future, but the tutorial gives no insert model, clearances, compatibility checks or installation procedure. Treat the published build as decorative millwork and storage, not as an appliance enclosure.
#1 Best Overall

- 【Electric Fireplace】 An updated 23" plug-in electrical fireplace was included. Compared with the 18'' electric fireplace, the updated 23" electrical fireplace has a new appearance, wider dimension, and high efficiency to make the room warm faster.
- 【Adjustable Shelves offers Large Storage Space】3 adjustable level for both side shelves, allow you to put in different size of items. The center top shelves are great for display the entertainment equipment such as: Games, DVDS, or CDs and etc. Pre-punched holes for the cords on the back panel, which allow you to neatly put electronic essentials on the shelves, no more mess of wires in your cabinet.
- 【Sliding Barn Door】Fireplace TV stand barn door design upgrading the decoration style. The two sliding barn doors glide smoothly along door track hardware to keep storage hidden or reveal home accents you wish to show off.A Built-in Magnet to Insure the door stays open during the electric fireplace operation.
- 【Modern Farmhouse Style】Farmhouse-inspired TV stands with a modern design. Barnwood woodgrain top finish adds a rustic appeal and blends well with contemporary and industrial decor styles. Perfect decor for your living room or entertainment space.
- 【Dimension】Overall Dimension: 30.7"(H) x 59"(W) x 15.5"(D). Accommodates most flat curved screen TVs in the market, up to 65 inches. Electric fireplace Dimension: 23"(H) x 17.5"(W).
The complete Part One account is available in Lauren’s Bless’er House tutorial. The follow-up, Part Two, covers the television cable route and the plank wall above the mantel.
Plan around your room and mantel before buying lumber
The tutorial deliberately avoids universal dimensions: “I didn’t include measurements in this post since your measurements will depend on the mantel you use as well as the size of your room.” That is the most important planning rule. A large surround can look undersized in a big room, while an oversized build can overwhelm a narrow wall.
Record the measurements that control the build
- Measure the mantel’s overall width, height, depth and the size of its opening.
- Measure the wall, ceiling height and the clearances around windows, doors, trim and vents.
- Mark the television’s width, height and mounting position, including space for equipment and ventilation.
- Locate the outlet that will be reached through the access panel and decide where cords should emerge.
- Allow for the thickness of the plywood and the amount of overhang you want at the hearth and shelf.
Make a full-size outline with painter’s tape on the wall or floor before cutting. This is a layout check, not a substitute for measuring each board. Confirm that the mantel, television and any equipment can be carried into the room and serviced after the surround is assembled.
Rank #2

- Modern Aesthetic Design: This 70 inch fireplace TV stand combines modern and farmhouse styles in one sleek piece. It fits TVs up to 80 inches and blends seamlessly into any living room, delivering a stylish yet functional entertainment hub. Whether you’re watching movies, unwinding after a long day, or hosting gatherings, it elevates your space with warmth and a refined sense of ceremony
- 3-Sided Electric Fireplace: This 36-inch electric fireplace with decorative faux wood can offer 16 flame colors and 5 flame brightness levels for selection, creating a different and astonishing visual effect. At the same time, the temperature can be adjusted from 62°F to 82°F using the remote control, with a time setting range of 0.5 to 9 hours to provide warmth
- Ample Storage Space: This TV cabinet with a fireplace in the living room is available in two styles: open and closed. It is equipped with three open spaces, which can accommodate your TV remote control or gaming equipment, keeping your living room tidy and organized. Additionally, the closed glass doors provide more storage space and allow you to display beautiful items, enhancing the overall atmosphere
- Sturdy Construction: This Media Entertainment Center is made of sturdy materials and is specially designed for long-term daily use. The sturdy base enhances the overall stability of the TV cabinet. The tabletop can support 199 pounds, and each shelf can support 48 pounds, providing reliable support for your entertainment equipment. It is also equipped with an anti-tip device, allowing you to enjoy your leisure time with peace of mind
- Easy Assembly: This Modern TV Consoles comes with detailed step-by-step instructions and clearly labeled, numbered components for easy identification and hassle-free installation. With straightforward assembly and no complicated tools required, you can quickly set it up and start enjoying its warmth and stylish design right away
Materials and tools named in the tutorial
The source identifies the following supplies. It does not specify plywood grade or thickness, lumber species, screw or nail sizes, piano-hinge dimensions or tool models, so those choices must be made for your particular build.
| Category | Items named | What the source establishes |
|---|---|---|
| Salvaged feature | Ready-made mantel front | Lauren reports buying hers on Craigslist for $100 in 2014. |
| Sheet goods and framing | Three plywood sheets; nine 2×4 boards | Used to form the hearth, surround, supports and access-door structure; exact thicknesses are not stated. |
| Fasteners | Carpentry nails, finishing nails, drywall screws | Exact sizes and spacing are not stated. |
| Hardware | Piano hinge | Cut to length for the hinged access panel; hinge dimensions are not stated. |
| Measuring and cutting | Tape measure, circular saw, jigsaw, hacksaw | Used for layout, plywood cuts, corner refinement and trimming the hinge. |
| Driving and fastening | Hammer or pneumatic nail gun, power drill | Used to assemble the frame and attach plywood. |
Buy the mantel first if possible. Its width and depth establish the hearth length, surround proportions and the amount of plywood required. A new mantel may simplify sourcing but can cost more; a reclaimed one may provide character at a lower price but needs inspection for damage, out-of-square parts and old finishes.
Part One assembly sequence
The steps below follow the author’s order. They describe one documented build, not an engineered plan. Verify every dimension against your own mantel and room before cutting.
Rank #3
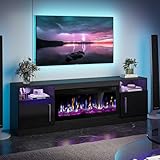
- NOTE: The product will be divided into two separate packages and may arrive at different times.
- [TV Stand with Electric Fireplace] :Adopting a 2-in-1 design, combining the TV Stand with the electric fireplace. Firepalce tv stand for TVs up to 80”, and the desktop can bear up to 300 pounds. It comes with a 36-inch electric fireplace,can heat up to a 400-square-foot room, adjustable between 750 watts and 1,500 watts. Making the TV stand more stable and provide a better viewing experience. The electric fireplace has 12 types of flames, and the speed and brightness of 5 types of flames can be adjusted, allowing you to customize various atmospheres.
- [Entertainment center with fireplace]: Set the perfect mood with the built-in LED lights, offering 20 vibrant colorsand 5 brightness levels. Easily adjust the lighting with the remote control to match your mood or occasion. Please note that the remote control requires batteries, which are not included. Enjoy dynamic lighting that elevates your entertainment experience.
- [Excellent Storage Space Design] :The entertainment center with fireplace has two cabinets and two additional storage spaces on both sides of the TV cabinet, providing you with more convenience. You can put your own items, such as books and cameras, in it. There is additional space above the cabinet for your belongings, making your TV cabinet look cleaner and more beautiful.
- [Friendly Customer Services] :VITESSE takes full responsibility for any quality issues, we always stand by and offer satisfying services with all efforts.
- Find the wall center and set the overall footprint. Mark the centerline of the wall, then position the mantel and television layout around it. Use the mantel’s actual dimensions to determine the hearth width, surround height and opening position.
- Frame the hearth. Cut two long 2×4 rails about 8 inches longer than the mantel. Join them with 24-inch crosspieces. Lauren describes securing the end pieces, a center piece and the remaining middle supports. Check the rectangle for square before tightening every connection.
- Center and anchor the base. Position the hearth frame on the wall centerline and attach its back to the wall. The authors chose not to cut their carpet to anchor the base to the floor, reasoning that the heavy assembly would remain stable. That was their site-specific choice, not a general structural recommendation; floor anchoring, wall fastening and local conditions need separate evaluation.
- Add the plywood hearth top. Cut plywood to cover the framed base and fasten it in place. The author says she set the circular-saw blade shallow for this plywood cut. Support the sheet, keep the cut line clear and follow the saw manufacturer’s instructions.
- Build supports behind the mantel. Add 2×4 supports behind the mantel and wall-side anchors. Attach plywood strips to the back of the mantel so the surround has a solid surface to connect to. Dry-fit the mantel before final fastening to confirm that the shelf is level and the opening remains centered.
- Close in the surround. Fasten plywood over the mantel opening to create the surround face. Mark the access-door opening first. Leave the small lower threshold described by Lauren; she says it helps prevent the surround from bowing. Use the jigsaw to refine corners and test the panel in the opening before adding the hinge.
- Make and hang the access panel. Cut the piano hinge to length with a hacksaw and attach it to the door and its frame. Lauren added a frame behind the mantel to reduce flex and adjusted the door for fit. The panel should open far enough to reach the outlet without scraping the floor or shelf.
- Connect the mantel, sides and top. Join the mantel to the wall anchors with plywood strips, then add the surround sides and top. Finish the shelf edge with another plywood piece and finishing nails. Check plumb, level and the door swing as you go; correcting alignment before the final face pieces are attached is easier than repairing a finished surface.
How the hidden outlet and television cable route work
The faux firebox is useful because it is not sealed permanently. Opening the hinged panel exposes the outlet and creates a place to manage excess cord. Keep the outlet accessible rather than burying a receptacle behind fixed material, and do not overload it with equipment beyond the circuit’s capacity.
Part Two explains the television route: the authors drilled through the mantel shelf and directed cords down to the outlet behind the access door. They also added a plank wall above the mantel. That follow-up lists pine planks, quarter round, a long level, brad nails and an optional hole-saw bit; the authors marked wall studs, fastened the planks at studs and secured the TV mount to a stud. Those details belong to the follow-up, not the initial frame.
Independent reader supportYour contribution helps us test, update, and keep practical guides available for everyone.Preparing the surround for paint
Part One concentrates on carpentry and does not specify a paint color, primer or finishing schedule. If you plan to paint the surround, complete all structural fastening and cable planning first. Then treat the plywood and nail holes as a finish surface rather than assuming they will disappear under one coat.
Rank #4

- 3-Side Glass Display - 40" panoramic fireplace lets you enjoy 12 realistic flame colors and 6 brightness levels from different viewing angles. Side glass panels extend the visual effect, while the generous 4.3" log set creates a warmer, more immersive fireplace experience
- Classic Design - Glass side doors feature screen-printed decorative mullions, paired with a classic woodgrain finish and thick bottom platform for a refined blend of traditional and modern style. Built with 710 kg/m³ MDF and 670 kg/m³ particle board, the double-layer tabletop supports up to 250 lbs
- 40" Electric Fireplace & LED Lights - Adjust the temperature from 62°F to 82°F by remote control for added convenience. Delivering 5,120 BTUs, the fireplace supplements heat for up to 500 sq. ft., while 12 LED light strip colors add customizable ambiance to your room
- Fits TVs 85"+ - AMERLIFE 75" TV stand accommodates TVs up to 85" and includes a 40" electric fireplace. TV Stand Dimensions: 13.8"D x 75"W x 31"H; Fireplace Dimensions: 17.7"D x 40"W x 18.5"H. Key internal structural panels use 15mm particle board for added support
- Space Management - Spacious open-top shelves keep DVDs and décor within easy reach, while two oversized enclosed cabinets provide room for books, game consoles, and everyday essentials. Rear cable management holes help keep cords organized, with a 3mm MDF back panel completing the storage structure
Finish-ready checklist
- Confirm that the access panel opens, closes and reaches the outlet after the final trim is installed.
- Make sure exposed screw or nail heads are set below the surface and that no fastener projects into the door path.
- Fill visible nail holes and seams with a compatible wood filler; allow it to dry and sand it flush.
- Ease sharp plywood edges so paint does not build into a brittle ridge.
- Remove dust before priming, and test the primer on a scrap of the same plywood if the face contains visible wood grain or patches.
- Mask the wall, floor and mantel surfaces that will remain unpainted. Protect the outlet and keep it de-energized while working around it.
Painting cannot correct a crooked frame, a door that binds or an inaccessible outlet. Resolve those functional issues before cosmetic preparation.
The Tool Desk
Outbyte Driver Updater FREEScan for outdated or missing drivers - takes under a minuteDriver Scan →Outbyte PC Repair FREERepair Windows errors before they cause bigger problemsFix Now →Decisions to make before committing to this approach
| Decision | Advantages | Limitations to consider |
|---|---|---|
| Reclaimed versus new mantel | Reclaimed material can add character and, in Lauren’s case, cost $100 in 2014; new material may offer predictable dimensions. | Salvaged pieces vary in condition, size and availability. Current prices are not established by the tutorial. |
| Plywood surround versus a more finished cladding | Plywood is the documented approach and is easy to cut into a custom opening. | Edges, seams and fasteners require finish work if the surround will be painted; the source does not compare alternative claddings. |
| Decorative opening versus future appliance conversion | A faux opening keeps the project focused on appearance, storage and cable access. | A future gas or electric appliance would require a different enclosure, clearances, venting or electrical provisions and qualified review. Part One does not establish compatibility. |
| Custom build versus prefabricated entertainment unit | Custom framing can fit an unusual wall and the exact mantel or television. | It requires measuring, cutting, anchoring and finishing. A ready-made unit may reduce labor but cannot be assumed to fit your room or outlet layout. |
What the project cost—and what that number does not mean
Lauren reports finding the mantel for $100 on Craigslist and describes the broader project as costing under $500. Both figures refer to her 2014 project and are author-reported estimates, not a verified itemized budget or a current market price. Lumber, plywood, hardware, tools, delivery and local salvage prices can change the total substantially.
The tutorial does not state how much each plywood sheet, 2×4, fastener or tool cost, nor does it identify a current source for the materials. Make your own list after measuring the mantel and room, and include waste from plywood cuts, trim, primer and paint if the finished surround will be painted.
Boundaries, safety and future changes
- This is a faux surround, not a tested fireplace or approved appliance installation.
- Do not infer that a gas insert can be added simply because the opening exists. Appliance size, heat clearances, venting, noncombustible materials, gas work and local approvals are not addressed.
- Wall anchors, television mounting and any floor attachment must suit the actual wall structure and load. The author’s decision to leave her carpet intact does not establish a safe method for every floor.
- Use appropriate protection and operating procedures for saws, drills, nailers and a hacksaw. Keep cords and the outlet accessible, and avoid enclosing electrical connections where they cannot be inspected.
For a decorative entertainment center, the documented plywood-and-2×4 method offers a clear sequence: size the build from the mantel, frame a supported hearth, create a serviceable access panel and finish the surround only after the structure and cable path work. Any change from faux millwork to a heat-producing appliance is a new project requiring current product specifications and local professional review.
Quick Recap

Product prices and availability are accurate as of the date/time indicated and are subject to change. Any price and availability information displayed on Amazon at the time of purchase will apply.

