Quick wins for a faster PC:
Do these 3 things before closing this tab:
1Repair Windows errors before they cause bigger problems2Scan for outdated or missing drivers - takes under a minute3Clear out junk files and repair common Windows errorsRepair Windows errors before they cause bigger problemsFix Now →Scan for outdated or missing drivers - takes under a minuteDriver Scan →
ThatPainter is reader-supported. When you buy through links on our site, we may earn an affiliate commission. Learn More
Usually, yes—but primer and sealer solve different problems. Prime a bare, porous, chalky, patched, or otherwise unstable wall before painting so the mural bonds evenly. After the mural has fully cured, apply a compatible exterior isolation coat and UV- and weather-resistant varnish or clear coat when the paint system allows it. Clean and repair the wall first, observe masonry cure times, and test the complete coating system on a small area before covering the mural.
Primer and sealer do different jobs
A mural is only as durable as the wall-and-coating system beneath it. Primer prepares the substrate for paint; sealer or varnish protects the finished artwork. Neither product fixes structural or moisture problems.
As an Amazon Associate I earn from qualifying purchases.
What primer does
Sherwin-Williams describes primers as an intermediary between substrate and topcoat. A suitable primer binds or seals porous material, limits uneven absorption, and gives the mural paint a more uniform surface to grip. Golden Artist Colors likewise advises that, after cleaning, a primer coat can improve adhesion.
What a sealer or varnish does
An exterior varnish or clear coat sits above fully cured mural paint. It can reduce damage from ultraviolet light, moisture, pollutants, handling, and abrasion, depending on the product and the exposure. Golden recommends an isolation coat followed by an appropriate exterior varnish for mural longevity. A protective finish cannot stop water entering through a leaking wall, stabilize loose masonry, or make peeling paint sound.
#1 Best Overall
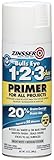
- Interior/exterior use on new or previously painted Drywall, concrete, wood, masonry, metal and glossy or difficult surfaces
- Oil-based formula seals uniformly and will Stick to surface without sanding
- Dries to the touch in just 30 minutes and covers up to 12 sq ft
- Has excellent stain blocking resistance and can be used over any oil or Latex topcoat
- Provides a smooth, White finish and; is designed to block imperfections with only one Coat
When an outdoor mural needs primer
Plan on priming when the wall is new, absorbent, dusty, chalky, repaired, or exposed to bare substrate. The following conditions are the clearest cases.
Bare concrete, stucco, render, or masonry
Unpainted masonry normally has an irregular pore structure. One area may absorb paint immediately while another remains wet-looking, producing flashing, weak color, and inconsistent sheen. An exterior masonry primer helps even out that absorption and provides a more predictable base. It does not replace the masonry supplier’s required cure period.
Chalky or weathered surfaces
Rub your clean, dry hand over the wall. A powdery residue indicates chalking. Remove as much loose material as possible and use a compatible binding or masonry primer only after the surface is sound. Painting over chalk leaves the mural attached to dust rather than to the wall.
Patched repairs and mixed substrates
Filled cracks, skim coats, replacement render, and exposed spots in an old coating absorb and grip paint differently from the surrounding wall. Spot-priming may be enough if the existing finish is firmly bonded and compatible; a full prime coat is safer when the wall has many repairs or changing textures.
Walls with old coatings
A firmly adhered, clean, non-chalking coating may not require a complete prime coat. Check compatibility with the mural paint, remove gloss or loose material as appropriate, and prime any exposed substrate. If the old coating is peeling, blistered, or poorly bonded, remove the unstable layer rather than trying to lock it down with primer.
Can you paint a mural straight onto concrete?
Sometimes, but “straight onto” should mean properly prepared concrete, not untreated concrete. The wall must be structurally sound, dry, clean, and sufficiently cured. Fresh concrete and other masonry commonly require about 30 days of cure before painting, according to Sherwin-Williams guidance. That same guidance describes a seven-day cure-plus-primer route for situations that cannot wait, but only under the specified product and site conditions; follow the coating manufacturer’s written system rather than treating seven days as a universal rule.
What’s actually slowing this PC down?
Pick the symptom - the matching free tool is one click away.
Rank #2
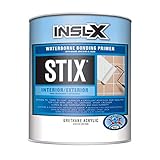
- Premium-quality, acrylic-urethane bonding primer-sealer with unparalleled adhesion to the most challenging surfaces, including glossy tile, PVC, vinyl, plastic, glass, glazed block, glossy paint, pre-coated siding, fiberglass, and galvanized metals.
- Bonding primer for drywall, plaster, ceiling, acoustical tile, wood trim and doors, Formica, ceramic tiles, glossy surfaces, PVC plastic, masonry walls, wood, trim, shutters, masonry, stucco, concrete, cement block, galvanized metal, aluminum, and other challenging surfaces.
- Bonds to "hard-to-coat" surfaces and can be top coated with almost any product.
- Fully cures in temperatures as low as 35 °F.
- 75 - 100 square foot coverage for interior or exterior use
Before deciding to skip primer, check absorption with a clean-water test in an inconspicuous area and inspect for powder, grease, efflorescence, patching, and differing textures. A wall that appears solid can still be too porous or contaminated for direct mural paint. If any section behaves differently, prime the affected areas or use a full compatible primer coat to avoid visible boundaries.
When an exterior mural should be sealed
Sealing is most useful after the mural paint has reached its full cure, not merely when it feels dry. Exterior walls face ultraviolet radiation, rain, condensation, airborne pollutants, dirt, and occasional contact. A suitable varnish or clear coat can slow fading and make routine cleaning less damaging.
Choose a coating made for the complete system
Look for an exterior-rated, non-yellowing, UV-resistant product whose chemistry is approved for the mural paint. Golden’s MSA Varnish with UVLS is one example of a product described for protecting artwork from moisture, pollutants, and ultraviolet damage. That example does not make every clear finish interchangeable: a generic interior varnish or an unapproved clear polyurethane may soften, whiten, yellow, react with the paint, or fail outdoors.
Use an isolation coat when the paint maker specifies one
An isolation coat separates the cured paint film from the removable protective varnish. Apply it only as part of the paint manufacturer’s system, at the stated thickness and cure time. Substituting an unrelated product can create adhesion or removal problems later.
Crashes, No Sound, or Screen Glitches?
Random freezes, missing sound and display glitches usually trace back to one bad driver. Find and replace yours safely.Free scan · under a minutePC Slower Than It Used to Be?
A free scan shows the junk files, broken settings and background clutter dragging Windows down - then fixes them in one click.Free scan · Windows 10 & 11Preserve breathability on masonry walls
Direct-to-masonry murals can have moisture moving through the wall. Golden advises thin coats for this type of work so the assembly can breathe; trapping moisture behind an impermeable film can cause premature adhesion failure. A coating that is excellent on a sealed panel may be unsuitable on a damp-prone wall. If the building has rising damp, leaks, or persistent condensation, solve that condition before selecting a varnish.
Primer and sealer decision table
| Situation | Primer approach | Sealer or varnish approach | Main check |
|---|---|---|---|
| New, unpainted masonry | Use a compatible exterior masonry primer after the required cure period. | Use the mural manufacturer’s exterior isolation-coat and varnish system after full paint cure. | Confirm cure, alkalinity, moisture, and breathability requirements. |
| Clean, firmly bonded, non-chalking paint | A full prime coat may not be necessary; prime exposed or repaired areas if compatible. | Use an exterior-rated, non-yellowing, UV-resistant finish approved for the mural paint. | Check adhesion and compatibility of the existing coating. |
| Chalky or powdery wall | Remove loose chalk and use a suitable binding or masonry primer on a sound surface. | Delay clear coating until the mural is fully cured and the substrate is dry. | Do not use primer as a substitute for cleaning or removal of unstable material. |
| Patched or mixed surface | Spot-prime repairs or prime the whole wall for uniform absorption. | Coat the complete mural evenly; test for gloss differences. | Look for texture, porosity, and color boundaries. |
| Damp, leaking, cracked, or efflorescent wall | Do not proceed until the underlying condition is repaired. | Do not trap moisture under a clear coat. | Find and correct the water source and stabilize the masonry. |
| High UV, rain, or abrasion exposure | Use the primer specified for the exterior paint system. | Favor the approved UV- and weather-resistant exterior varnish, with maintenance inspections. | Confirm recoat limits, sheen, and cleaning instructions. |
Recommended application sequence
- Inspect the wall. Identify leaks, rising damp, cracks, loose render, efflorescence, peeling paint, chalking, grease, and biological growth. Photograph and mark repairs so they are not missed.
- Make the substrate sound. Repair water entry and cracks, remove loose coatings, and replace unstable render. Primer cannot stabilize failing masonry.
- Clean thoroughly. Wash away dirt, grease, chalk, salts, and other contamination using a method suitable for the substrate. Rinse residues and allow the wall to dry completely. Golden places cleaning before priming in its mural guidance.
- Observe the masonry cure period. New masonry commonly needs about 30 days. If a product system specifically permits a seven-day cure followed by primer, use that documented route only under its stated conditions.
- Test adhesion and absorption. On a small, inconspicuous area, apply the proposed primer and mural paint. Check whether the film bonds, dries evenly, and develops unexpected gloss, whitening, or color change.
- Prime the required areas. Apply the compatible exterior masonry primer at the manufacturer’s coverage, temperature, humidity, and recoat limits. Keep a wet edge where a full coat is required and avoid leaving ridges or puddles.
- Apply the mural paint. Follow the paint maker’s substrate, thinning, number-of-coats, and drying instructions. Protect the wall from rain, dew, dust, and freezing conditions during application and cure.
- Allow full cure. “Dry to the touch” is not the same as a cured film ready for varnish. Use the stated cure time and extend it when cool, humid, shaded, or poorly ventilated conditions slow drying.
- Apply the isolation coat if required. Use the specified material and number of thin coats. Let it cure before adding the protective varnish.
- Apply the exterior varnish or clear coat. Use the approved product, tools, coat thickness, and environmental limits. Thin coats are especially important where the mural is painted directly on masonry and must release moisture.
- Inspect and document. Look for pinholes, runs, missed areas, whitening, gloss variation, and edge lifting after the coating has set. Record product names, batch information, dates, and recoat limits for future maintenance.
How to run a useful test patch
Choose an area with the same orientation, substrate, and exposure as the mural. Clean it as you will clean the full wall, then apply the actual primer, mural paint, isolation coat, and varnish in the planned sequence. Observe it through drying and weather changes rather than judging it immediately.
Rank #3

- Premium-quality, acrylic-urethane bonding primer-sealer with unparalleled adhesion to the most challenging surfaces, including glossy tile, PVC, vinyl, plastic, glass, glazed block, glossy paint, pre-coated siding, fiberglass, and galvanized metals.
- Bonding primer for drywall, plaster, ceiling, acoustical tile, wood trim and doors, Formica, ceramic tiles, glossy surfaces, PVC plastic, masonry walls, wood, trim, shutters, masonry, stucco, concrete, cement block, galvanized metal, aluminum, and other challenging surfaces.
- Bonds to "hard-to-coat" surfaces and can be top coated with almost any product.
- Fully cures in temperatures as low as 35 °F.
- Coverage: 300 - 400 square feet per gallon.
- Gloss: Check whether the clear coat creates a distracting shine or uneven sheen.
- Whitening: A cloudy or milky appearance can signal moisture, incompatibility, or application outside the product’s limits.
- Adhesion: After the stated cure, inspect for lifting, softening, or easy removal at an edge.
- Color: Compare the patch with an uncoated reference for darkening, yellowing, or other color shift.
- Breathability: Watch for blistering or dampness on a wall known to receive moisture from behind.
If the patch fails any of these checks, stop and obtain a compatible system recommendation from the coating manufacturer instead of coating the mural.
Independent reader supportYour contribution helps us test, update, and keep practical guides available for everyone.Common failure modes and fixes
| Symptom | Likely cause | What to do |
|---|---|---|
| Paint absorbs unevenly or looks patchy | Porous, mixed, or unprimed substrate. | Stop, let the surface dry, correct preparation, and prime with a compatible product before repainting affected areas. |
| Paint flakes or peels | Loose substrate, chalk, contamination, incompatible coating, or trapped moisture. | Remove failed material, fix the moisture source, clean, test adhesion, and rebuild the system. |
| Clear coat turns cloudy | Moisture, high humidity, uncured paint, or incompatible chemistry. | Do not add another coat. Allow proper drying, identify the cause, and consult the product maker about removal or repair. |
| Surface becomes unexpectedly glossy | Varnish sheen differs from the intended finish or was applied unevenly. | Evaluate the test patch first; use only a compatible matte, satin, or gloss option approved for the mural. |
| Blisters or bubbles appear | Water movement through masonry, heat, or application over an unstable layer. | Remove the source of moisture and failed coating before recoating; do not seal over active dampness. |
| Color changes after varnishing | Clear-coat chemistry, incomplete cure, or an untested interaction. | Use the tested system and follow the paint maker’s isolation-coat procedure. |
Weather, tools, and application conditions
Exterior products specify limits for air and surface temperature, humidity, dew, wind, and rain. Those limits matter more on a large wall than on a small studio panel because shade, sun, and masonry temperature can vary across the same mural. Do not apply when rain or condensation is expected before the coating can set. Wind can carry dust into wet varnish and accelerate skinning at the edge of a roller or brush pass.
Use clean, compatible brushes, rollers, or spray equipment listed by the product maker. Keep a wet edge, avoid overworking a partially dried film, and maintain the stated coverage. If spraying, protect adjacent property and use the required ventilation and personal protective equipment. The exact tool, thinner, cleanup method, and recoat interval depend on the chosen system and are not interchangeable between products.
Maintenance after the mural is finished
Inspect the wall periodically, especially after severe storms or a wet season. Look for new cracks, damp marks, salt deposits, peeling, abrasion, graffiti, and loss of clear-coat integrity. Clean gently with the method approved for the varnish; aggressive pressure or solvents can remove the protective layer and paint.
Protective finishes weather over time. Renewal is a maintenance decision based on exposure, visible wear, and the varnish maker’s instructions, not a fixed universal interval. Before recoating, clean the surface, verify that the existing finish is sound and compatible, and run another small test patch. If the mural has failed because of water movement or unstable masonry, repair that cause before renewing the finish.
A practical decision checklist
- Is the wall bare, porous, chalky, patched, or worn to the original substrate? If yes, plan for compatible exterior masonry primer.
- Is the existing paint firmly bonded, clean, non-chalking, and chemically compatible? If yes, spot priming or no full prime may be possible.
- Are leaks, rising damp, cracks, efflorescence, or loose masonry present? Repair them before any coating.
- Has new masonry reached the required cure? Use the substrate and coating manufacturer’s period; about 30 days is common guidance, while any seven-day alternative must be specifically documented.
- Has the mural reached full cure before isolation coat or varnish? Do not rely on touch-dry time.
- Is the clear coat exterior-rated, non-yellowing, UV-resistant, and approved for the mural paint?
- Will the system allow the masonry to breathe? Use thin coats where the mural manufacturer requires vapor movement.
- Did a complete test patch pass adhesion, appearance, color, and moisture checks?
For most outdoor walls, the durable path is preparation, repair, compatible primer where the substrate needs it, fully cured mural paint, then a tested exterior protection system. Skipping a step is reasonable only when the wall and coating manufacturer’s instructions establish that the step is unnecessary.
Quick Recap

Product prices and availability are accurate as of the date/time indicated and are subject to change. Any price and availability information displayed on Amazon at the time of purchase will apply.

