Free tools Windows power users keep installed
One-click scans. No signup required.
ThatPainter is reader-supported. When you buy through links on our site, we may earn an affiliate commission. Learn More
A workable dream kitchen starts with a measured room, a clear task sequence, and appliance doors that can open without blocking people, counters, or each other. Use the work triangle as one check—not the whole design—then test landing space, storage, circulation, accessibility, electrical work, and budget before choosing cabinets or finishes.


As an Amazon Associate I earn from qualifying purchases.
1. Measure the room before drawing cabinets
Record every wall length, ceiling height, window and sill position, doorway, radiator, vent, plumbing point, gas line, and structural projection. Measure the opening of each door, including the direction of its swing. A laser distance measurer can make repeated checks faster, but verify critical dimensions with a tape measure before ordering anything.
The Tool Desk
Outbyte Driver Updater FREEScan for outdated or missing drivers - takes under a minuteDriver Scan →Outbyte PC Repair FREERepair Windows errors before they cause bigger problemsFix Now →Draw the room at a consistent scale. Mark the trim, casing, and any space that cannot accept a cabinet. A plan that ignores a deep window trim or a door that swings into a cabinet is not a usable plan, regardless of how attractive its elevations look.
#1 Best Overall
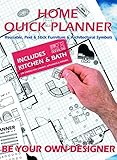
- Kit for designing your own home layout
- Encourages fine motor dexterity, planning skills, creativity, logic
- Kids love to invent and design, just like a real architect
- An exciting way for adults to plan home design too!
- 700 pre-cut, reusable peel & stick furniture and architectural symbols
2. Map the work you actually do
List a normal week rather than an idealized cooking routine. Include unloading groceries, storing bulk items, making coffee, preparing school lunches, cooking, baking, serving, loading the dishwasher, recycling, and entertaining. Note who performs each task and whether two or more people do it at once.
Use those tasks to define four zones: food storage, preparation, cooking, and cleanup. The shortest route is not always the best route; a clear route that does not cross the dishwasher door or a busy doorway is usually more useful than a few saved steps.
3. Use the work triangle, but do not worship it
The classic triangle connects the refrigerator, sink, and range. It can reveal an awkwardly distant appliance or a path that repeatedly crosses another person’s work area. The National Association of Home Builders (NAHB) states: “Although the work triangle is important to any kitchen, it shouldn’t be your sole focus.”
Test the triangle alongside storage, landing areas, door swings, circulation, and the room’s actual uses. In a kitchen with multiple cooks, an island, or separate beverage and baking activities, several smaller paths may work better than one mathematically neat triangle.
4. Give the refrigerator a real landing zone
Plan counter space beside the refrigerator’s latch side so groceries and chilled ingredients have somewhere to go immediately. NAHB gives 18 inches as a practical rule of thumb at the refrigerator latch side. Treat that as attributed guidance, not a universal code requirement, and check the selected refrigerator’s hinge, handle, and door-clearance drawings.
In new-home planning, NAHB recommends positioning the kitchen near the garage to shorten the grocery-carrying route. In an existing home, you may not be able to move the room, so improve the route with a nearby pantry, unobstructed entry, and a landing counter.
5. Protect the sink’s preparation space
NAHB suggests 24 inches of counter on each side of the sink. This creates room for a cutting board, dirty dishes, a drying rack, or a child-safe staging area. The figure is a planning rule of thumb from NAHB’s kitchen guidance; confirm the sink, faucet, window, and cabinet specifications together.
The Tool Desk
Outbyte PC Repair FREEClear out junk files and repair common Windows errorsFree Scan →Outbyte Driver Updater FREEFix the driver behind crashes, sound loss and screen glitchesFind Drivers →Keep the sink close enough to the range and refrigerator for efficient preparation, but do not let a corner cabinet force the sink into an unusable angle. A sink centered under a window may be appealing, yet the window’s height, faucet clearance, and operability still need checking.
6. Reserve safe landing space at the range
NAHB recommends 18 inches of counter on either side of the range. Use that space for hot pans, utensils, and ingredients, and avoid placing the range where a wall, tall cabinet, or doorway makes one side inaccessible.
Verify the manufacturer’s required side clearances, heat protection, hood dimensions, and fuel or electrical connection. The counter rule does not replace installation instructions or local code.
7. Draw every door and drawer open
Make a second plan showing refrigerator doors at their full opening, the dishwasher door down, oven doors open, drawers extended, and corner cabinet doors swung out. This catches conflicts that disappear on a closed-cabinet plan.
Crashes, No Sound, or Screen Glitches?
Random freezes, missing sound and display glitches usually trace back to one bad driver. Find and replace yours safely.Free scan · under a minuteWindows Errors? Fix Them Before They Spread
Repair common Windows errors and clear accumulated junk for a smoother, more stable PC - no reinstall needed.Free scan · no reinstallNAHB specifically warns that a corner sink can interfere with opening a dishwasher. Place the dishwasher where the person loading it can stand without blocking the sink, a principal walkway, or the only route through the room. Check adjacent drawer pulls as well as the appliance body.
8. Choose a shape for the room, not for fashion
| Layout | Potential strengths | Questions to resolve |
|---|---|---|
| U-shaped | NAHB describes it as efficient, with work areas on three sides. | Will the opening feel pinched, and can opposite doors and drawers open together? |
| L-shaped | Two connected runs can leave more open floor area and may support an island. | Is there enough continuous counter for preparation, and where does cleanup occur? |
| Galley/parallel | Two opposing runs can make food-storage-to-cooking paths compact. | Do opposing appliance doors, people, and stools compete for the same aisle? |
| Single-wall | Preserves the most open floor area and suits compact rooms. | Can it provide enough landing counter and storage without excessive walking? |
These are tradeoffs, not a universal ranking. Compare each option by work paths, unobstructed circulation, counter area, storage, accessibility, island value, and utility-installation cost.
9. Add an island only after proving the clearances
An island can provide preparation surface, seating, storage, and a social focus. It also consumes floor area and can turn a comfortable plan into a bottleneck. Draw the island at its actual finished depth, including panels and overhangs, then test every appliance and cabinet door open.
Do not use an island to compensate for a missing work surface elsewhere. If the island is the only place to chop food, serve meals, or put down a hot pan, its position and circulation become critical. Confirm that people can pass without squeezing behind seated diners.
Do these 3 things before closing this tab:
1Fix the driver behind crashes, sound loss and screen glitches2Repair Windows errors before they cause bigger problems3Scan for outdated or missing drivers - takes under a minute10. Treat an island sink as a plumbing and safety decision
An island sink can face the room and keep preparation central, but NAHB notes potential water and slip issues. Splashing, wet towels, and a drippy colander can affect the walking surface on every side of the island.
Plan the faucet, waste line, dishwasher, shutoff access, and any required venting before cabinet fabrication. A sink on the perimeter may be preferable when the island’s main purpose is dry preparation, seating, or serving.
11. Plan clearances for accessibility, not just appearance
The NAHB Fair Housing Act Design Manual describes a 40-inch minimum between opposing kitchen elements and a 30-by-48-inch clear floor space at appliances and fixtures in the guideline context it addresses. Those dimensions are accessibility-related guidance, not a universal substitute for applicable law, project requirements, or professional review.
Rank #4
Consider who will use the kitchen: a wheelchair user, someone using a walker, a child, or an adult with limited reach may need different approach space and control heights. Check that cabinet doors, appliance handles, switches, and storage can be reached without twisting around an open door. If Fair Housing requirements or another accessibility standard applies, have the design reviewed by a qualified professional.
12. Size storage for your household’s real inventory
Count cookware, food containers, serving pieces, small appliances, cleaning supplies, recycling bins, and pantry staples. Decide which items must be near the range, sink, refrigerator, or dining area. Put daily-use objects in the easiest-to-reach drawers and shelves; reserve high or deep storage for occasional items.
NAHB’s article suggests planning for 18 square feet of general storage plus six additional square feet per person. That is dated, undated advice rather than a current standard, so use your inventory as the deciding evidence. Pull-outs, drawer bases, tray dividers, and corner organizers can improve access, but they add hardware cost and require exact cabinet dimensions.
13. Put lighting where tasks happen
Layer ambient, task, and accent lighting rather than relying on one ceiling fixture. In its log-home guidance, NAHB recommends task lighting at the sink, stove, refrigerator, and island. Place fixtures so a person’s head or upper cabinet does not cast a shadow on the cutting board.
Coordinate lighting with cabinet heights, hood placement, window glare, and the electrical plan. Specify color temperature, dimming, and switch locations with the electrician before drywall or backsplash work hides the wiring.
14. Resolve island receptacles before construction
NAHB’s March 25, 2026 article explains that, in jurisdictions adopting the unamended 2023 National Electrical Code, receptacles mounted on the vertical sides of islands and peninsulas can no longer satisfy the applicable countertop-outlet provisions. Countertop-integrated access and other compliant solutions may be available.
Best Value
Code adoption varies by state and local jurisdiction, and amendments can change the result. Ask the electrician and the local authority having jurisdiction which edition and amendments apply to your project, where receptacles may be placed, and what inspection will require. Do this before ordering an island or closing walls.
15. Compare complete plans before choosing finishes
Put two or three scaled options side by side and score each one against the same questions:
- Can groceries move from the entry to the refrigerator without crossing the cooking zone?
- Is there landing space at the refrigerator, sink, and range?
- Can the dishwasher, oven, refrigerator, drawers, and corner doors open simultaneously where needed?
- Can the intended users approach appliances and reach controls safely?
- Does storage match the household’s measured inventory?
- Does an island add more useful function than the floor area it consumes?
- Are plumbing, ventilation, gas, structural, lighting, and electrical changes affordable and permitted?
Only after a plan passes those tests should you select door styles, worktops, paint colors, and decorative hardware.
Clearance and planning figures at a glance
| Figure | What it describes | How to use it |
|---|---|---|
| 18 inches | Counter at the refrigerator latch side | NAHB rule of thumb; verify the appliance drawing. |
| 24 inches each side | Counter beside the sink | NAHB rule of thumb for staging and preparation. |
| 18 inches each side | Counter beside the range | NAHB rule of thumb; installation clearances still control. |
| 40 inches minimum | Between opposing kitchen elements | Dimension described in the NAHB Fair Housing Act Design Manual context. |
| 30 by 48 inches | Clear floor space at appliances and fixtures | Accessibility-related guideline dimension in that manual’s context. |
| 8 by 10 or 10 by 10 feet | Compact example room sizes | NAHB examples, not a minimum kitchen requirement. |
| 9 by 12 feet | Size some designers recommend | Undated NAHB-attributed advice, not a universal standard. |
Budget and construction checks
NAHB has cited 5% to 15% of a home budget as a kitchen-planning range. Because the source page is undated and its figures are not current cost data, use that range only as historical, attributed context. Build a project estimate from your actual cabinets, appliances, labor, permits, plumbing, electrical work, ventilation, flooring, lighting, countertops, and contingency.
Moving a sink, range, or refrigerator can trigger several trades. Ask for a written scope that identifies what stays, what moves, and what must be opened or repaired. Confirm appliance models before finalizing cabinet dimensions; substitutions can change hinge locations, depth, ventilation, and electrical requirements.
Final pre-order checklist
- Re-measure the finished room after demolition and framing.
- Confirm windows, doors, trim, ceiling height, and utility locations.
- Overlay appliance specifications and full door swings.
- Mark landing counters and the main preparation surface.
- Walk the grocery, prep, cooking, serving, and cleanup paths.
- Test the dishwasher, oven, refrigerator, and drawers open at the same time.
- Verify accessibility dimensions and approach spaces that apply to your household and jurisdiction.
- Approve plumbing, ventilation, lighting, and island electrical locations with licensed trades.
- Check permits and locally adopted code editions before work begins.
- Freeze appliance and cabinet models before fabrication.
A dream kitchen is therefore a tested plan, not a particular shape or style. The best layout is the one that lets your household move, store, prepare, cook, clean, and gather safely within the room you actually have.
Quick Recap

Product prices and availability are accurate as of the date/time indicated and are subject to change. Any price and availability information displayed on Amazon at the time of purchase will apply.
Recommended Free Tools

