Quick wins for a faster PC:
Clear out junk files and repair common Windows errorsFree Scan →Fix the driver behind crashes, sound loss and screen glitchesFind Drivers →Repair Windows errors before they cause bigger problemsFix Now →
ThatPainter is reader-supported. When you buy through links on our site, we may earn an affiliate commission. Learn More
The easiest panel quilt is a wholecloth finish: square the printed fabric, add batting and backing, quilt it, and bind it. If you want a larger or more decorative project, surround the panel with one or two borders, cornerstones, simple piecing, prairie points, or even an attic-window frame.
A fabric panel is a large piece of quilting cotton with a complete printed image—or several coordinated images—already on the cloth. Unlike a traditionally pieced quilt center, it does not require you to construct the main picture from dozens of small units. That makes a panel a practical starting point for a first quilt, a quick baby gift, seasonal wall art, or a larger throw with relatively simple piecing. See examples of panel quilt patterns and finishing ideas before choosing your layout.
As an Amazon Associate I earn from qualifying purchases.
Quick guide: which easy panel quilt idea should you choose?
| Idea | Difficulty | Keeps the panel intact? | Best for |
|---|---|---|---|
| Panel-only wholecloth | Beginner | Yes | The fastest first project |
| Simple one- or two-border frame | Beginner | Yes | Most panel types and sizes |
| Border with cornerstones | Beginner | Yes | A decorative but straightforward frame |
| Prairie-point wall hanging | Beginner | Yes | Seasonal decor and nursery art |
| Stars-and-stripes border | Beginner | Yes | Children’s, holiday, or patriotic panels |
| Precut or checkerboard border | Beginner to moderate | Yes | A larger throw quilt |
| Cut-apart block layout | Moderate | No | Multi-image and storybook panels |
| Attic-window treatment | Easy to moderate | No | Scenic and landscape panels |
1. Make a panel-only wholecloth quilt
For a panel that already has a complete scene or printed border, you may not need to add piecing at all. Trim and square the panel, layer it with batting and backing, quilt through the layers, and finish the edges with binding.
This is sometimes called a wholecloth-style finish because the printed fabric supplies the visual design. It works especially well with scenic panels, holiday artwork, character panels, and designs with a built-in border. Missouri Star’s guide includes a “panel only” finish for panels that already look complete, while Denyse Schmidt Quilts offers a beginner wholecloth approach that uses only a couple of seams and includes sizes from baby/crib through king. Read the wholecloth panel quilt instructions for a guided version.
#1 Best Overall
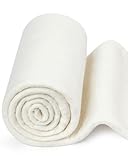
- 1. 4 Size Options: 47"x36" (1 Yard), 47"x72" (2 Yards), 47"x108" (3 Yards), 47"x144" (4 Yards) Available in four practical sizes to meet different project needs. Pre-cut and vacuum-packed for convenience, suitable for everything from small crafts to full-size quilts. Easy to handle and store during sewing or quilting workflows
- 2. 100% Natural Cotton Material – Safe and Breathable Crafted from unbleached, chemical-free cotton. This natural material is soft, low-irritation, and allows air to circulate easily, helping maintain comfort and insulation in handmade textile projects such as quilts, cushions, or bags
- 3. Lightweight, Breathable and Easy to Work With This batting fabric features a low-loft profile that is easy to cut, shape, and layer. The material is odorless and breathable, offering a balance of structure and softness. Supports both hand-sewing and machine quilting techniques
- 4. Versatile Application for DIY and Handmade Projects Can be used in quilting, sewing, stuffing, craft padding, potholders, placemats, bags, wall hangings, and more. Also compatible with crib size, twin size, and king size quilting formats, providing consistent texture and flexibility in use
- 5. Important Usage Note Due to vacuum packaging, the batting may appear compressed upon arrival. Allow at least 48 hours to regain full loft; gentle patting or shaking can help accelerate recovery. Do not pre-wash before quilting. Machine washable after quilting is completed
Choose this idea if: you want the image to remain uninterrupted and your priority is the quickest route from fabric panel to finished quilt.
2. Add a simple one- or two-border frame
A plain border is the most adaptable way to enlarge a panel without competing with its artwork. Add a narrow inner border, a wider outer border, or both. The inner border can create a crisp outline; the outer border can provide most of the additional size.
What’s actually slowing this PC down?
Pick the symptom - the matching free tool is one click away.
- Pull one quiet color directly from the panel for a cohesive frame.
- Use a solid or small-scale print if the image is already busy.
- Choose a darker value to outline a light panel.
- Use a low-contrast border when the panel should remain the dominant feature.
- Use a high-contrast border when the panel needs stronger definition.
Straight borders are easier than constructing a pieced border, but they still need accurate measuring. Do not cut every strip to the nominal panel width. Measure the quilt center after it has been pieced, then cut the border to that measurement. This prevents wavy edges and helps the finished quilt remain square.
Choose this idea if: you are making your first panel quilt or the printed design is too attractive to interrupt.
3. Frame the panel with cornerstones
Cornerstones are small squares placed where border strips meet. They add a little pattern and color without requiring a complicated quilt block. Use a plain square, a fussy-cut motif, or a small pieced unit that repeats a color or shape from the panel.
One simple arrangement is a narrow inner border, a wider outer border, and four cornerstones at the outer corners. Another is to place cornerstones between sections of a multi-strip border. Keep the cornerstone print relatively simple: a very busy square can distract from the central image.
Free tools Windows power users keep installed
One-click scans. No signup required.
Missouri Star identifies borders with cornerstones as one of its accessible panel-finishing options. This is a good middle ground between a plain frame and a fully pieced quilt.
4. Build a pieced border around the intact panel
A pieced border lets you add visual interest and increase the finished size while leaving the printed center untouched. Suitable beginner units include squares, rectangles, checkerboards, half-square triangles, and simple stars.
Choose a controlled palette taken from the panel instead of adding many unrelated colors. A border made from three or four coordinated fabrics will usually support the image better than a collection of every color in the print.
For a concrete example, Riley Blake Designs’ I Sew Panel Quilt combines a large central panel, coordinated precut strips, and small background squares in a checkerboard-style border. Its published finished size is 58.5 by 66.5 inches. The instructions also explain how to add oversized coping strips when the panel does not initially meet the required dimensions. Review the Riley Blake panel quilt PDF for the construction details.
Recommended Free Tools
Choose this idea if: you want a substantial throw quilt and are comfortable sewing repeated, straight-lined units.
5. Try a stars-and-stripes frame
A stars-and-stripes layout surrounds the panel with striped sections and adds stars at the corners or along the border. It gives a familiar quilt-block appearance without asking you to piece the central image.
Rank #2

- Crib quilting batting : 45inch by 60inch
- Do not shift gather ,no beard.Warning: No pre-washing. Machinewashable after quilted.This product is incredibly soft and will keep you warm during the autumn and winter seasons. It is the best choice for sewing your quilt in your leisure time during these colder months.
- Soft natural cotton batting for quilts,potholders, Craft andWearable Arts. This is 1lt came with a few spots on it,which are the scraps ofcotton leaves
- There is a smell of cotton, not a musty smell.
- The batting has been upgraded.Inorder to make the batting have a tensile force, a layer of scrim isadded. Please do not use for hot pads in microwave ovens as thereis a layer of scrim.
SewCanShe’s beginner-friendly example starts with panels around 36 by 42 inches and finishes at approximately 49 by 55 inches—about 16 inches larger in both height and width. The surrounding pieces can be adjusted for panels with different dimensions. For a sample 36-by-44-inch panel, the project lists coordinating fabric, background fabric, backing, batting, binding, and basic rotary-cutting supplies. The pattern’s striped sections can also use 2.5-inch jelly-roll strips.
This idea is not limited to patriotic fabric. Use stars with a winter panel, bright children’s fabric, or a holiday print; change the colors and the motif becomes a general-purpose frame. Follow the easy stars-and-stripes panel quilt tutorial for the adjustable approach.
The Tool Desk
Outbyte Driver Updater FREEFix the driver behind crashes, sound loss and screen glitchesFind Drivers →Outbyte PC Repair FREERepair Windows errors before they cause bigger problemsFix Now →6. Make a prairie-point panel wall hanging
Prairie points are folded fabric triangles inserted into a seam to create a dimensional edge. They are an effective way to turn a panel into wall art without piecing a bed-sized quilt.
Utah State University Extension’s level-1B project uses an approximately 21.5-by-30.75-inch center panel, an inner border, an outer border, and sixteen 5-inch charm squares folded into prairie points. The supply list includes a quarter yard for the inner border, three-quarters of a yard for the outer border, one charm pack or sixteen assorted 5-inch squares, backing, binding, thread, and a sewing machine. The project is designed to be assembled in an afternoon and can be adapted to a different panel with coordinating squares.
Keep the folded points evenly spaced and check that their open edges face the intended direction before stitching the final seam. Because prairie points add texture, this format is particularly effective for seasonal panels, nursery scenes, and decorative quilts that will be viewed rather than heavily used.
See the complete USU prairie-point panel wall-hanging project.
7. Use a charm pack or jelly roll for the border
Precut fabric can simplify fabric selection and rotary cutting. A charm pack supplies coordinated 5-inch squares; a jelly roll or strip roll generally supplies coordinated 2.5-inch strips. Charm squares can become prairie points, cornerstones, checkerboard pieces, or simple patchwork. Jelly-roll strips can become a striped border.
Precuts are convenient, but they are not automatically compatible with every panel. Matching availability depends on the fabric collection and retailer, so check the actual width, usable quantity, and color relationship before buying.
For shopping, a cotton quilt fabric panel is the central material; a charm pack quilting fabric or jelly roll quilting fabric is an optional border resource, not a requirement.
8. Cut a multi-image panel into separate blocks
Some panels contain several framed scenes, alphabet squares, storybook pictures, calendar images, or sampler-style blocks. Instead of using the panel whole, cut the images apart and reassemble them with sashing, cornerstones, or simple filler blocks.
Outdated Drivers Are Slowing You Down
One free scan finds every outdated or missing driver and matches the right update for your exact hardware.Free scan · exact hardware matchWindows Errors? Fix Them Before They Spread
Repair common Windows errors and clear accumulated junk for a smoother, more stable PC - no reinstall needed.Free scan · no reinstallThis creates more design flexibility but removes the easiest feature of a panel: its intact, printed composition. Before cutting:
- Photograph the complete panel so you have a reference for the original arrangement.
- Measure each printed block and mark the intended cut lines.
- Confirm that every image will retain the required seam allowance.
- Label the blocks with removable notes or a diagram.
- Check the orientation of directional images before sewing.
- Lay out the entire quilt before cutting supporting fabric.
AllPeopleQuilt shows how fussy-cut printed panels can become a fast twin-bed quilt with florals, rickrack, dots, and tone-on-tone fabrics. Its featured fabrics may not still be available, however, so treat the project as a layout reference and substitute current standard-size panels or coordinating fabrics as needed. Browse the AllPeopleQuilt panel quilt ideas for examples.
Choose this idea if: your panel contains clearly separated images and you want a more traditional block-and-sashing appearance.
Rank #3

- Exquisite quilt cotton balls: 100% cotton batting, natural cotton is soft and warm, making your quilt more comfortable, fluffy and not easy to tear cotton balls, easy for quilting.
- Washing: Do not pre-wash before quilting. When finished, wash in a large washing machine with plenty of cold water and a little liquid soap. You can use low heat to tumble dry the warm and natural quilt batting. Then place in the sun to dry thoroughly. When first opened, the jersey is thin and not soft due to the compression packaging. Quilting can be done at this time. Or you can pat the quilting batting down to make the cotton batting look fluffy and soft.
- Dimensions:The cotton batting is 47×59 inches (59x79 inches; 71x79 inches; 79x91 inches); Large size for grinding natural cotton batting for quilts, pot holders, crafts and wearable art,ext .
- High-quality Cotton Batting for Quilts: Cotton pads with dense shapes, no need to disassemble, and can be washed after quilting. Make bedding products spread cotton more evenly.
- Easy to use: It is easy to use for cutting and laying wadding. The whole cotton is flat and even. It can be cut as big as you want, so you don’t have to worry about uneven tearing and poor wadding.
9. Create an attic-window or faux-window effect
An attic-window treatment makes each section of a panel look like a view through a three-dimensional window. The panel becomes the view; light, medium, and dark strips create the angled frame.
Do these 3 things before closing this tab:
1Repair Windows errors before they cause bigger problems2Fix the driver behind crashes, sound loss and screen glitches3Clear out junk files and repair common Windows errorsMissouri Star’s 2026 tutorial divides a panel into 20 blocks and uses contrasting strips to create the illusion. Its example finishes at approximately 56 by 58 inches. This is visually impressive, but it is better described as easy-to-moderate rather than absolute beginner work: accurate cutting, consistent value placement, row labeling, and careful orientation all matter.
It is most convincing with landscapes, architecture, windows, scenic artwork, or panels whose sections can be divided without cutting through important faces or lettering. Make a paper or fabric test block first if you are unsure how the values will read.
Follow the attic-window panel quilt tutorial for the demonstrated layout.
Measure the panel before buying fabric or cutting borders
Panel sizes are not standardized. Common examples include 24-by-44-inch, 30-by-44-inch, and 36-by-44-inch panels, but the printed area, selvage placement, and manufacturer’s cutting instructions can change the usable dimensions. Quiltster provides horizontal and vertical panel-planning templates, but emphasizes choosing the template that matches the actual panel. Use its panel-planning guidance as a planning aid, not as a substitute for measuring your fabric.
The Tool Desk
Outbyte PC Repair FREEClear out junk files and repair common Windows errorsFree Scan →Outbyte Driver Updater FREEFix the driver behind crashes, sound loss and screen glitchesFind Drivers →Use this measurement sequence
- Read the panel’s instructions. Some panels specify a finished image size, a trim line, or a required seam allowance.
- Wash only if appropriate for your workflow. If you prewash, account for possible shrinkage and press the fabric flat before measuring.
- Measure the actual panel. Record the usable width and height after accounting for selvages, printed borders, and any manufacturer marks.
- Decide whether the panel is portrait or landscape. Do not rotate a directional image merely to fit a pattern.
- Square and trim it. SewCanShe recommends trimming excess fabric around the printed image and making the opposite long edges and opposite short edges match. A nominal 44-by-36-inch panel may be smaller after trimming.
- Preserve the artwork. If the design reaches close to the edge, leave the seam allowance specified by the pattern. USU’s prairie-point project, for example, recommends leaving a quarter-inch seam allowance around the outside of the panel design.
Riley Blake likewise instructs makers to verify the panel size before cutting. If the panel is too small for an intended opening, add oversized coping strips and trim them after sewing rather than trying to stretch the fabric into place.
How to calculate and sew borders accurately
After the panel is squared, measure the quilt center—not the pattern’s nominal size—to determine border length. Measure through the center and in at least two additional places, then average the results. USU Extension recommends this method because small differences in the panel can otherwise produce loose, rippled borders.
Cut the border strips to the averaged measurement, mark the center of both the border and quilt edge, and pin those centers first. Ease only a small amount where necessary; do not force a significantly longer strip onto a shorter edge. Sew, press, and remeasure before adding the next border.
Crossgrain borders have some give, while lengthwise-grain borders generally have less stretch but may require more fabric. Either can work; the important point is to account for grain and avoid using the border as a way to conceal an unsquared panel.
When the panel is too small
You have several options:
- Add a coping strip around the panel before attaching the main border.
- Use sashing to reduce the opening required by a layout.
- Make the border wider rather than altering the printed center.
- Recalculate the entire design from the panel’s measured dimensions.
Quiltster gives an example in which a 1-inch sashing option allows a 28-inch panel to fit a layout intended for a 30-inch panel. Sashing is therefore a practical fitting tool, not merely decoration.
Independent reader supportYour contribution helps us test, update, and keep practical guides available for everyone.Beginner supply checklist
For most easy panel quilts, gather:
- A cotton quilt fabric panel
- Coordinating border, sashing, or cornerstone fabric
- Quilt backing fabric
- quilt batting
- Binding fabric
- Sewing machine and suitable thread
- rotary cutter, acrylic quilting ruler, and self-healing cutting mat
- Iron and ironing surface
- Fabric marking tool
- Pins or clips
- Labels or a layout diagram if the panel will be cut apart
The most useful basic cutting setup is a rotary cutter, acrylic quilting ruler, and self-healing cutting mat. Use the ruler and mat to square the panel and cut borders, but remember that a ruler cannot correct a design that was measured incorrectly.
A quilt top is not a finished quilt. You still need backing, batting, quilting, and binding. For the finishing stage, compare quilt batting, cotton quilt backing fabric, and quilt binding fabric after deciding the finished size and intended use.
Rank #4

- 8 Quilt Patterns for Panels – Features 8 creative quilt patterns designed to highlight your favorite fabric panels using simple 1-yard cuts.
- Perfect for Panel Lovers – Works with a variety of panel block sizes and includes instructions for combining panels with coordinating fabrics.
- Beginner Friendly Instructions – Clear, easy-to-follow directions with full-color diagrams and helpful fabric placement suggestions.
- Just 3 Yards of Fabric – Each pattern uses one panel (or 1 yard) and two additional 1-yard cuts—or three 1-yard cuts total—for a complete quilt top.
- Directional Fabric Friendly – All patterns are designed with directional prints in mind for Fabric #1 placement—no more upside-down blocks!
Common panel-quilt mistakes to avoid
Cutting before measuring
Do not assume the label’s dimensions are the final usable dimensions. Trim lines, selvages, shrinkage, and imperfect printing can change the size.
Cutting the panel apart too soon
Once cut, the original layout cannot be restored without extra seams. Photograph and map the panel first, then confirm seam allowances and orientation.
Ignoring portrait versus landscape orientation
A pattern may offer horizontal and vertical options, but the image itself determines which orientation makes sense. Directional prints should remain aligned.
Using a border that is too visually loud
A dramatic border can be successful, but a busy print around a busy panel may make both elements difficult to read. Test fabrics beside the panel in natural and indoor light.
Cutting all borders to one nominal length
Panel edges are rarely perfect enough for this shortcut. Measure the quilt center, average multiple measurements, and cut each border accordingly.
Recommended Free Tools
Forgetting the quilt sandwich
Panel projects are fast quilt-top projects, not instant finished quilts. Allow for batting, backing, quilting, and binding when estimating materials and time.
Assuming a pictured fabric is still available
Published patterns remain useful even when their original panel or collection is discontinued. Substitute a panel with compatible dimensions, but recalculate the border rather than assuming the pictured finished size will remain unchanged.
Best first project recommendation
If this is your first panel quilt, use the panel whole and add one narrow inner border plus one wider outer border. This teaches the essential skills—squaring fabric, measuring borders, sewing accurately, pressing, making a quilt sandwich, and binding—without asking you to reconstruct the printed image.
Choose the prairie-point wall hanging if you want a small decorative project, the stars-and-stripes frame if you want recognizable beginner blocks, or the checkerboard border if you need a larger throw. Save cut-apart and attic-window designs for a panel whose artwork can tolerate division and for a project where you are willing to slow down and label every piece.
Crashes, No Sound, or Screen Glitches?
Random freezes, missing sound and display glitches usually trace back to one bad driver. Find and replace yours safely.Free scan · under a minuteWindows Errors? Fix Them Before They Spread
Repair common Windows errors and clear accumulated junk for a smoother, more stable PC - no reinstall needed.Free scan · no reinstallFrequently Asked Questions
What is the easiest panel quilt to make?
A panel-only wholecloth quilt is usually the easiest. Square or trim the panel, layer it with batting and backing, quilt it, and bind it. If the panel needs more size, add a simple one- or two-border frame.
Do I need to cut a fabric panel apart?
No. Most panels can be used intact. Cut one apart only when it contains separate images or blocks and you have checked the cut lines, seam allowances, orientation, and final layout.
How do I make a panel quilt bigger?
Add borders, coping strips, sashing, cornerstones, or a pieced border. Measure the actual squared panel first, then calculate the surrounding pieces from those measurements rather than relying on the nominal size on the package.
What size are fabric quilt panels?
There is no universal size. Examples include approximately 24 by 44, 30 by 44, and 36 by 44 inches, but the usable printed area varies by manufacturer. Measure your actual panel before cutting.
What’s actually slowing this PC down?
Pick the symptom - the matching free tool is one click away.
The Bottom Line
For the safest beginner choice, keep the panel intact and surround it with a quiet border. Measure and square the fabric first, calculate borders from the quilt center, and treat batting, backing, quilting, and binding as part of the project—not optional extras. Move to cut-apart blocks or an attic-window effect only when the panel’s artwork and your layout plan can support the additional accuracy.
Quick Recap

Product prices and availability are accurate as of the date/time indicated and are subject to change. Any price and availability information displayed on Amazon at the time of purchase will apply.




