Free tools Windows power users keep installed
One-click scans. No signup required.
ThatPainter is reader-supported. When you buy through links on our site, we may earn an affiliate commission. Learn More
“Fox and Geese” can describe more than one quilt-block pattern, so choose a specific diagram and use its cutting plan from start to finish. One fully specified version finishes at 16 inches and combines half-square-triangle corners, flying-geese side units, and a center square. A separate template pattern is available in 6-, 10-, and 12-inch sizes.


As an Amazon Associate I earn from qualifying purchases.
Identify the Fox and Geese pattern you want to make
The name alone does not tell you which shapes to cut. The 16-inch pieced version described here uses rotary-cut squares and rectangles; Jinny Beyer Studio’s Block 0200 uses templates. A separate Duck and Ducklings chart also lists “Fox and Geese” as an alternate name, but its grid and construction are different.
Quick wins for a faster PC:
Scan for outdated or missing drivers - takes under a minuteDriver Scan →Repair Windows errors before they cause bigger problemsFix Now →Fix the driver behind crashes, sound loss and screen glitchesFind Drivers →- For the 16-inch pieced block: use the complete cut list and assembly sequence below.
- For a template block: choose one of Jinny Beyer Studio’s 6-, 10-, or 12-inch templates and follow its fabric-placement guidance. Check the printed PDF scale against the two-inch line before cutting; the example design is for a 10-inch block, and fabric placement differs for other sizes.
Do not combine the 16-inch cut list with the template shapes or the separate Duck and Ducklings chart. The patterns are not interchangeable.
#1 Best Overall

- Pattern only
- Skill level: Intermediate
- Finished Quilt Size: 40" x 40"
Cutting list for the 16-inch finished block
The following quantities and measurements belong to the 16-inch version. They are cut dimensions, not finished patch sizes.
| Fabric group | Pieces to cut | Used for |
|---|---|---|
| Light or ivory | Two 5-inch squares; thirty-two 2.5-inch squares | Half-square triangles and flying-geese patches |
| Light print | One 8.5-inch square | Center |
| Assorted prints | Two 5-inch squares; sixteen 2.5-by-4.5-inch rectangles | Half-square triangles and flying-geese patches |
Choose fabrics with enough contrast for the geese to read clearly against their backgrounds. A rotary cutter, ruler, and cutting mat can help with repeated measured cuts, but no particular brand or tool is specified by these instructions.
How to assemble the 16-inch version
- Make four half-square triangles. Pair the two 5-inch light/ivory squares with the two 5-inch assorted-print squares according to the pattern’s construction directions. Trim the resulting four units to 4.5 inches.
- Make sixteen flying-geese patches. Use the sixteen 2.5-by-4.5-inch assorted-print rectangles and the thirty-two 2.5-inch light/ivory squares. The rectangle-and-two-squares method is explained in the next section.
- Build four side units. Join four flying-geese patches for each side unit, arranging the goose points so they chase around the center.
- Lay out the block. Place the 8.5-inch center square in the middle, with one side unit along each side and a trimmed half-square triangle at each corner. Check that the geese point in the intended directions before sewing the rows.
- Join the rows. Sew the three rows, then join the rows to complete the block. Use the original pattern’s illustrations and pressing directions for its exact unit orientation and pressing sequence.
Make flying geese with crisp, complete points
In the rectangle-and-two-squares method, a flying-geese unit finishes twice as wide as it is tall. The dimensions below are examples from New Quilters’ tutorial; the general cutting rule is to make the rectangle one-half inch larger than the finished unit in both dimensions, and to cut both squares to the finished height.
| Finished unit | Rectangle to cut | Two squares to cut |
|---|---|---|
| 2 by 4 inches | 2.5 by 4.5 inches | 2.5 inches each |
| 3 by 6 inches | 3.5 by 6.5 inches | 3.5 inches each |
- Place a square on one corner of the rectangle, right sides together, and sew diagonally across the square as directed by the method.
- Trim the excess fabric while retaining a quarter-inch seam allowance, then flip the triangle open and press.
- Repeat on the opposite corner with the second square, taking care not to cover or reverse the first point.
The quarter-inch allowance above the point is intentional: it leaves room for the joining seam so the point can reach the finished seam line. Sewing directly at the point or trimming away that allowance can make the point appear clipped in the assembled block.
Plan the block orientation before making a quilt top
Flying-geese directions can vary within the block, and the way whole blocks are rotated changes the secondary pattern across a quilt. Patchwork Square’s sample layouts show groups of four Fox and Geese blocks rotated by 90 degrees; one layout sets groups on point and includes blank blocks. Arrange a few blocks—or draw a small layout—before joining many units so you can check the overall direction and spacing.
Independent reader supportYour contribution helps us test, update, and keep practical guides available for everyone.Pattern attribution
Jinny Beyer Studio’s Block 0200 pattern attributes the design “Fox and Geese, Nancy Cabot, 1933.” That is the attribution printed in that pattern; it is not, by itself, an independently verified claim about the block’s origin.
Quick Recap
Best Value
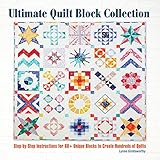
- Mix and match classic and modern designs to make thunders of combinations
Rank #4

- Pattern only
- Skil level: Advanced beginner
- Finished quilt size: 54" x 66"
- Fat quarter friendly

Product prices and availability are accurate as of the date/time indicated and are subject to change. Any price and availability information displayed on Amazon at the time of purchase will apply.
Recommended Free Tools




