Windows Errors? Fix Them Before They Spread
Repair common Windows errors and clear accumulated junk for a smoother, more stable PC - no reinstall needed.
Fix My PC Now →Free scan · no reinstall
ThatPainter is reader-supported. When you buy through links on our site, we may earn an affiliate commission. Learn More
As an Amazon Associate I earn from qualifying purchases.
Yes—you can make a dated kitchen look substantially newer without replacing its cabinets, splashback and benchtops. A Better Homes & Gardens Australia makeover published on May 21, 2021 reported a $600 cosmetic renovation that did exactly that: the owners painted the cabinetry, refinished the benchtops, repaired visual details, made a utensil holder and changed the light while keeping the original 1970s tiles.
Recommended Free Tools
That figure is a reported project headline, not a current quote or an itemized receipt. The useful lesson is the method: spend on visible surfaces, keep sound period features that have meaning, and treat preparation as seriously as the finish. The instructions below explain what the project involved, what to check before copying it and where modern safety or product limitations matter.
#1 Best Overall

- Transform the look of outdated countertops with a faux marble kit
- Easy 3-step application uses ultra white base coat, gray veining paint, and satin top coat
- Countertop coating kit covers 75-100 sq. ft. per kit; ready for full use after 24 hours
- No stripping, sanding, or priming required for a complete countertop refresh
- Satin sheen offers maximum wear and stain resistance with Life Tested protection
What the reported $600 makeover actually changed
The project was a surface refresh, not a kitchen replacement. The article does not provide a receipt, labor cost, project duration or a present-day equivalent of $600, so use the number as historical context rather than a promise that your kitchen can be completed for the same amount.
| Area | Reported change | What is not established |
|---|---|---|
| Cabinet doors and frames | Fine sanding, shellac-based stain blocker, two coats of hard-wearing enamel; timber trims received two coats of clear varnish. | Paint brand, quantities, labor, exact color and current cost. |
| 1970s splashback | Original tiles were retained and used as inspiration for the new light. | Tile condition, cleaning products, grout repairs or whether the tiles suit every kitchen. |
| Benchtops | A stone-look finish with slight sparkle using a Countertop Transformations kit in Diamond White. | Current formulation, stock, price, coverage and compatibility with your worktop. |
| Storage detail | A rolling pin was hung from two large cup hooks, with smaller cup hooks screwed into the pin for utensils. | Load rating, timber condition and the hardware sizes used. |
| Lower cabinet edges | 20 x 80 mm timber moulding was cut to door width, varnished and fixed with contact adhesive. | Whether that dimension fits your doors or how much moulding was purchased. |
| Lighting | A standard batten fitting was converted with a pendant suspension-cord kit and a chosen shade. | Electrical compliance, suitability of a particular fitting, installation method and jurisdiction. |
The makeover’s strongest idea is selective editing. A feature can be old without being a problem; a damaged or poorly prepared surface can look new for only a short time even when expensive materials are used.
Decide what to refresh and what to replace
Check the kitchen’s condition first
Cosmetic work is appropriate when cabinet boxes are dry, stable and square; doors still close; hinges can be adjusted; and the benchtop is structurally sound. Look for swelling around sinks and dishwashers, delaminating edges, loose doors, movement in the worktop and persistent dampness. Paint cannot repair water damage or make an unsafe electrical installation safe.
- Refresh: sound doors with a tired color, intact laminate or timber surfaces, and a benchtop whose defects are shallow and cosmetic.
- Repair before painting: loose hinges, chipped edges, open joints, dents, grease buildup and failed caulk.
- Replace or obtain specialist advice: swollen particleboard, mold, a worktop that moves, cracked tiles that admit water, or wiring and fittings you cannot verify.
Retain a period feature deliberately
The owners kept the 1970s splashback because it carried personal memories. They then selected a bright light fitting that responded to the tile colors, turning an element that might otherwise be hidden into a deliberate focal point. Retention works best when the feature is clean, secure and compatible with the rest of the palette. If you dislike the tiles or they are failing, do not keep them solely to imitate this project.
Rank #2

- Luxurious Aesthetic: Emulates the high-end look of white quartz with a glassy sheen, ideal for adding a touch of elegance to both traditional and contemporary spaces.
- Easy Transformation: A simple three-step process designed to revitalize Formica, laminate, Corian, butcher block, cultured marble, and traditional granite countertops in just one weekend.
- Comprehensive Kit: Comes with all necessary components, including primer, epoxy resin, rollers, brushes, and more, sufficient to cover up to 35 square feet of countertop space.
- Safe and Low Odor: Formulated for safe indoor use with very low odor and zero VOCs, ensuring a comfortable and eco-friendly application process.
- Durable and Protective Finish: Includes a high-gloss, crystal clear Epoxy Resin Topcoat that not only enhances the finish but also provides long-lasting protection against daily wear and tear.
Understand the trade-off
A surface refresh usually creates less demolition, waste and disruption than replacing a kitchen, but it cannot change the cabinet layout, storage capacity, worktop depth or plumbing. Replacement may be justified by structural failure or an unusable layout; it is not automatically the better answer to dated color.
Build a realistic budget before buying materials
The 2021 article gives one total but no breakdown. Make your own list and price it locally, including consumables and contingencies. Separate materials from any paid labor so you can see what the headline budget did and did not cover.
| Budget category | Items to price | Evidence from the makeover |
|---|---|---|
| Cabinet preparation and coating | Fine-grit sandpaper, dust-removal supplies, shellac-based stain blocker, hard-wearing enamel, brushes or rollers and masking materials. | These preparation and coating stages are reported; amounts and prices are not stated. |
| Timber protection | Clear varnish for existing trims and the new moulding. | Two coats are specified for both applications; cost is not stated. |
| Benchtop finish | A compatible countertop coating kit, applicators and cleaning supplies. | The named kit is Rust-Oleum Countertop Transformations in Diamond White; present suitability and price require confirmation. |
| Small hardware | Large and small cup hooks, a rolling pin and fixings. | The utensil-holder concept is reported; quantities and prices are not stated. |
| Moulding | 20 x 80 mm stock, cutting and sanding supplies, clear varnish and contact adhesive. | The dimension and adhesive method are reported; waste allowance and cost are not stated. |
| Lighting | Pendant suspension-cord kit, shade and, where required, licensed electrical labor. | The conversion is described briefly; compliance and labor requirements are not established. |
Do not treat a one-time 2021 total as a current market estimate. Material prices, shipping, regional rules and the condition of your kitchen can all change the result.
Quick wins for a faster PC:
Repair Windows errors before they cause bigger problemsFix Now →Scan for outdated or missing drivers - takes under a minuteDriver Scan →Clear out junk files and repair common Windows errorsFree Scan →Paint the cabinets for a durable finish
Cabinet painting is the most preparation-sensitive part of the makeover. The reported sequence is simple, but skipping a stage can cause peeling, bleed-through or visible brush marks.
Rank #3

- Transform the look of outdated countertops with a faux marble kit
- Easy 3-step application uses ultra white base coat, gray veining paint, and satin top coat
- Countertop coating kit covers 75-100 sq. ft. per kit; ready for full use after 24 hours
- No stripping, sanding, or priming required for a complete countertop refresh
- Satin sheen offers maximum wear and stain resistance with Life Tested protection
- Remove and label the doors. Take off doors and hardware where practical, and mark each door and hinge position so reassembly does not become a guessing game. Protect floors, appliances and adjacent surfaces.
- Clean before sanding. Degrease cooking residue and allow the surface to dry. Sanding a greasy film can spread contamination rather than create a sound surface.
- Rub the doors with fine-grit sandpaper. The article specifically calls for fine grit. Sand evenly to dull the existing sheen and smooth loose fibers; do not aggressively remove a stable factory coating. Feather chips and wipe away every trace of dust.
- Apply a shellac-based stain blocker. This isolates stains and helps prevent discoloration from migrating through the new color. Follow the product label for ventilation, recoat time and compatible topcoats; shellac products can have strong odor and flammability warnings.
- Apply two coats of hard-wearing enamel. Use thin, even coats and respect the drying interval on the label. Rushing the second coat can drag the first, trap solvent or leave a soft film. Inspect edges and profiles from several angles before reinstalling hardware.
- Finish timber trims separately. Lightly sand the timber trims, remove dust and apply two coats of clear varnish, allowing the stated drying time between coats. Varnish protects the timber appearance but does not correct movement or water damage.
- Reassemble only after full cure. “Dry” and “cured” are not always the same. Use the coating maker’s handling guidance before closing doors, fitting bumpers or loading shelves.
Painting pitfalls and fixes
- Peeling at edges: usually points to grease, gloss or dust left under the coating. Stop, scrape only the loose area, clean, feather-sand and reprime rather than burying the failure.
- Stains showing through: add targeted stain-blocking preparation after the surface is clean and dry; a thicker enamel coat alone is not a reliable stain barrier.
- Visible lap marks: maintain a wet edge, avoid overworking partially set enamel and check that the roller or brush is appropriate for the product.
- Doors sticking: allow additional cure time and check whether coating has built up on contact points or hinge adjustments are needed.
Use the 1970s splashback as a design anchor
Keeping the tiles saves demolition, but it also commits you to working with their colors, grout lines and scale. Clean them thoroughly, repair loose grout or tiles where necessary and protect the surface while painting. The reported project used the splashback to inspire a bright light fitting; you can repeat the principle without copying the exact color: select one or two existing tile tones for hardware, textiles or a shade, then keep the newly painted cabinets quieter so the period detail reads as intentional.
Do not paint over a tile surface merely to avoid cleaning or repairs. A coating may fail under heat, steam and grease, and the article does not establish a tile-paint system or performance result.
Refinish the benchtop only after checking compatibility
The makeover names Rust-Oleum Countertop Transformations in Diamond White for a stone-look finish with a slight sparkle. Treat that as the product used in the 2021 story, not as a universal recommendation. Confirm the current instructions, substrate list, preparation requirements, curing time, food-contact limitations and local availability before purchase.
Outdated Drivers Are Slowing You Down
One free scan finds every outdated or missing driver and matches the right update for your exact hardware.Free scan · exact hardware matchWindows Errors? Fix Them Before They Spread
Repair common Windows errors and clear accumulated junk for a smoother, more stable PC - no reinstall needed.Free scan · no reinstall- Identify the existing benchtop material and inspect for movement, swelling, loose laminate or water damage.
- Read the current kit instructions and verify that the substrate, sink edge, backsplash junction and intended use are covered.
- Remove grease and residue exactly as directed, mask adjoining surfaces and plan how the sink and cooking area will remain protected.
- Apply each component at the specified coverage and thickness. Do not improvise a shortcut because the finish looks opaque after one pass.
- Respect the product’s cure and use restrictions before placing appliances, washing dishes or preparing food on the surface.
If the worktop is moving or swollen, repair or replace it rather than disguising the defect. A decorative coating changes appearance; it does not restore structural integrity.
Rank #4
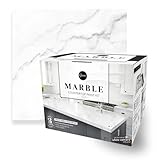
- Giani Countertop Paint is a simple, three-step application that will transform Formica, laminate, Corian, ceramic tile, butcher block, cultured marble, and traditional granite in a single weekend.
- Each kit contains all necessary tools and covers 35 square feet of surface, which is the average amount of countertop area in a kitchen.
- The updated Giani Marble Kit comes with a NEW extra-durable, high-gloss Epoxy Resin Topcoat that finishes and protects the application against the everyday use of your countertops.
- Giani Countertop Paint is safe for interior use, very low odor, and zero VOC. The specialized primer hides existing discoloration, burns, stains, and minor scratches, while the mineral colors create the characteristics of marbled quartz
- AVAILABLE AND IMPROVED! Giani Marble now includes our brand new Giani Epoxy Resin Topcoat for an even more durable and glossy finish. Stain and water-resistant and as tough as engineered quartz, this second generation of our countertop paint kit will help you remake your kitchen into the space you’ve always dreamed of.
Add inexpensive details that solve visible problems
Rolling-pin utensil holder
The article’s holder uses one rolling pin, two large cup hooks to suspend it and smaller cup hooks screwed into the pin for utensils. Test the wall or cabinet side for a solid fixing point, keep the holder clear of heat and water, and space hooks so loaded tools do not collide. Pre-drilling a pilot hole can reduce splitting, but choose the bit and fixing for the actual timber and wall material.
Timber moulding on lower door edges
For rough lower edges, measure each door rather than assuming every opening is identical. Cut 20 x 80 mm moulding to the door width, sand the cut edges, apply two coats of clear varnish and attach it with contact adhesive, as described in the makeover. Dry-fit first: the moulding must clear adjacent doors, hinges, plinths and the floor through the full swing. Contact adhesive creates a strong bond only when both surfaces are clean, correctly coated and joined according to its label. Support the piece while it sets.
Treat the light conversion as an electrical job
The story describes converting a standard batten fitting with a pendant suspension-cord kit and shade. That brief description is not a wiring guide and does not prove that every batten, cord kit or shade is compatible. Requirements differ by country and jurisdiction.
Recommended Free Tools
- Switch off the circuit at the consumer unit, identify it and verify isolation with an appropriate tester; a wall switch alone is not proof of dead conductors.
- Check the kit’s rating, strain relief, lamp type, shade clearance and mounting method against the existing fitting.
- Use a licensed electrician where local rules require one, where the fitting is hard-wired, or whenever you cannot positively identify the conductors and mounting system.
- Do not leave exposed terminals, unsupported cable or a shade that can contact a hot lamp.
The design lesson is safe to borrow even when the installation must be professional: let the retained splashback influence the visible shade while the electrical work follows current code.
Best Value
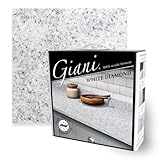
- 3 simple steps that will transform Formica, laminate, Corian, ceramic tile, butcher block, cultured marble, and traditional granite in a single weekend.
- Authentic granite finish offered in 5 contemporary colors, that cover 35 sq. ft. or 16 running ft. of 24 in. wide countertops.
- 100% Acrylic formula - Low odor, low VOC, water-based, durable, high-gloss, food safe topcoat that lasts for years.
- Simple sponge on and roll on application that is customizable to the look of your space. Step by step detailed instructions.
- This kit is cool-toned, with subtle blue undertones. This can show up more in your space depending on your lighting and surrounding colors.
Put the work in an order that protects new finishes
- Inspect the structure, moisture and electrical points; decide what is being retained.
- Remove hardware, label doors and protect the room.
- Clean, sand, repair and stain-block the cabinets.
- Paint cabinet doors and frames, then varnish timber trims.
- Complete benchtop preparation and coating, keeping the surface out of service for the required cure.
- Cut, sand and varnish moulding while doors are accessible; install it after the finish is ready.
- Fit the utensil holder and other hardware without drilling through services.
- Have the light conversion completed and tested by the appropriate qualified person.
- Reinstall doors, adjust hinges and inspect every edge, junction and seal before normal use.
The source does not state how long the original work took. Your schedule should therefore follow product drying and curing instructions, contractor availability and inspection results rather than an assumed weekend timetable.
How to judge whether your result matches the promise
Success is not merely a brighter color. The doors should open without sticking, edges should be sealed, the benchtop should meet its stated use restrictions, the splashback should look intentional and the new hardware should be secure. Photograph each surface before work so defects are not mistaken for new coating failure. Keep product labels and batch details in case a touch-up or warranty question arises.
The reported makeover demonstrates that a small, focused intervention can change the feel of a retro kitchen. It does not establish that every kitchen can be renewed for $600, that the named benchtop kit is still sold in the same form, or that the described light conversion is legal or suitable everywhere. Use the six ideas selectively, verify current products and electrical rules, and spend your effort where preparation and daily visibility intersect.
Do these 3 things before closing this tab:
1Clear out junk files and repair common Windows errors2Scan for outdated or missing drivers - takes under a minute3Repair Windows errors before they cause bigger problemsQuick Recap

Product prices and availability are accurate as of the date/time indicated and are subject to change. Any price and availability information displayed on Amazon at the time of purchase will apply.

