Free tools Windows power users keep installed
One-click scans. No signup required.
ThatPainter is reader-supported. When you buy through links on our site, we may earn an affiliate commission. Learn More
Yes, a retaining wall can incorporate a bench, counter, or storage—but only after the wall is checked as an earth-retaining structure. The seat, cabinets, appliances, masonry, and people add surcharge or concentrated loads; openings and attachments can interrupt reinforcement; and blocked drainage can raise water pressure until the wall moves or fails. Have a qualified wall designer assess the existing or proposed wall, keep furniture loads independently supported wherever practical, preserve a continuous drainage path, and confirm permits, setbacks, height limits, and guard rules before excavation.
As an Amazon Associate I earn from qualifying purchases.
Start with the wall, not the furniture
A retaining wall holds back soil that is heavier and less predictable than a normal patio load. Adding a seat or outdoor-kitchen run changes the forces at the wall top and may change how water reaches the wall. The safe design sequence is therefore structural: document the wall, define every new load, verify stability and drainage, select a support strategy, then detail the built-ins.
Do these 3 things before closing this tab:
1Clear out junk files and repair common Windows errors2Fix the driver behind crashes, sound loss and screen glitches3Repair Windows errors before they cause bigger problemsThis is especially important when retrofitting an existing wall. A wall that already leans, bulges, cracks, settles, or stays wet may have little reserve capacity. Built-ins can hide movement and make later repairs harder, while a cabinet, counter, or bench can add a concentrated load exactly where the wall is most sensitive.
#1 Best Overall

- Universal Compatibility: this 2 Pack drainage solution works with retaining wall materials from 3 to 8 inches including concrete timber and natural stone; It integrates with many landscape bricks modular blocks, flowerbed walls, and courtyard walls with no extra modifications needed
- Easy Installation: created for no cut installation these blocks fit smoothly into pre drilled gaps or interlayer positions in your wall; Suitable for both DIY users and professional landscapers helping simplify the building process and support efficient installation
- Effective Drainage: drainage pipes that help direct water away from the back of the wall; This helps lower water pressure supports stable wall performance and supports consistent function for your retaining wall
- Reliable Outdoor Performance: made with strong weather ready materials these blocks hold up well under UV exposure freeze thaw cycles and soil contact; They maintain dependable function in tough outdoor environments for extended use
- Enhanced Wall Support: designed to support your retaining wall structure with reliable drainage; The system helps reduce water buildup and soil pressure supporting long lasting performance and keeping your wall in stable condition over time
When to stop and obtain an assessment
- The wall leans, bows, rotates, or has stepped cracks.
- Soil is spilling through joints, outlets are blocked, or water ponds behind the wall.
- The footing is exposed, undermined, or settling.
- The retained slope, driveway, building, deck, hot tub, vehicle, or large tree is close to the wall.
- You cannot identify the wall type, reinforcement, footing, or drainage route.
Do not excavate, core, cut, or anchor into a wall showing these conditions. Arrange a site assessment first.
What loads the built-ins add
Designers must include more than the empty weight of a countertop. A seat may carry several people at once; a counter may support a grill, refrigerator, sink, stone slab, utensils, and someone leaning on its edge; and a cabinet may hold dense stored goods. Masonry caps, concrete slabs, steel frames, and filled planters add permanent weight even when no one is using the area.
Make a load schedule before choosing details
- Draw the seat, counter, and cabinet footprint, including depth, length, and height.
- List permanent components: cap blocks, slabs, framing, appliances, plumbing, doors, shelves, and finishes.
- List variable loads: maximum occupants, stored firewood or tools, food, fuel containers, and removable equipment.
- Mark where each load bears. A point load near the wall edge is different from a distributed load on an independent footing.
- Show nearby loads that already surcharge the retained soil, such as stairs, paving, vehicles, structures, fences, or raised planting beds.
- Give the wall designer the maximum credible arrangement, not an average day of use.
The designer then checks the combined effects on sliding, overturning, foundation pressure, bearing, internal reinforcement, and the soil behind the wall. A built-in that looks light can still be critical if its load is concentrated or close to the crest.
Recommended Free Tools
Survey an existing retaining wall
Record the wall before ordering materials. Photograph every face and the ground above and below it, and mark the property line and nearby structures. Measure the exposed wall height, length, batter or setback, cap width, and any visible footing. Note whether it is cast concrete, reinforced masonry, mortared block, stone, timber, or a segmental retaining-wall system.
Drainage and movement checklist
- Locate weep holes, outlet pipes, cleanouts, swales, and discharge points.
- Look for damp streaks, efflorescence, algae, frost damage, or soil washed through joints.
- Check for bulges, open joints, displaced caps, settlement, and cracks that widen toward the top.
- Identify the retained soil type, slope, and any groundwater or irrigation source.
- Find buried utilities before excavation or new footings.
- Measure the distance to property lines, easements, buildings, decks, and guardrails.
A survey does not prove that the wall can carry a new bench. It supplies the information needed for an engineer or qualified wall designer to determine what is known, what must be opened up, and whether an independent support is safer.
Check permits, setbacks, and guard requirements
Rules vary by jurisdiction, wall height, location, and whether the work changes a structure or creates occupied space. Ask the building or planning department which approvals apply before demolition or excavation. Confirm property-line setbacks, easements, excavation limits, height thresholds, stormwater requirements, electrical and gas permits, and accessibility rules.
Rank #2

- 8-Pack Faux Stone Garden Edging: Includes 8 gray landscape edging panels designed to create a clean stone-look border for flower beds, lawns, mulch areas, walkways, patios, and paths
- No-Dig Installation: Each garden border panel features built-in ground stakes, making it easy to push into soft soil without digging or shoveling. Great for quick garden edging and seasonal landscape updates
- Practical Size for Garden Borders: Each panel measures about 17.3 x 12.6 inches, including the ground stakes. The 8-piece set covers approximately 11.5 feet in a straight layout, helping you plan your garden border before purchase
- Durable PP Plastic Construction: Made of lightweight polypropylene plastic with a faux stone texture, these edging panels are designed for outdoor garden use and help maintain a neat border with minimal upkeep
- Decorative Edging for Multiple Areas: Use the faux stone border panels around flower beds, vegetable gardens, tree rings, pathways, patios, and mulch areas. Designed for decorative edging and light soil or mulch separation, not for structural retaining walls
Brisbane City Council states that retaining-wall work must comply with applicable building codes and standards even when building approval is not required. Portland’s Chapter 24.70 requires a retaining wall to be stable against overturning, sliding, excessive foundation pressure, and water uplift. That code identifies a minimum safety factor of 1.5 for sliding and overturning and calls for additional seismic lateral-earth-pressure design when more than 6 feet of backfill is retained. Those figures are Portland requirements, not universal rules; use the requirements in your own jurisdiction.
A seat at a drop-off can also trigger guard or barrier rules. A counter used for food preparation may trigger electrical, plumbing, gas, sanitation, or fire-clearance requirements. Treat the permitting check as a design input, not a final paperwork step.
Choose how the built-in will be supported
The safest general principle is to separate the wall’s primary retaining function from the furniture function. A structural bench slab, posts, cabinet frame, or small independent footing can carry the built-in while the retaining wall continues to hold soil without an unverified attachment.
Design options
| Option | Where it works | Main structural and maintenance issues |
|---|---|---|
| Cap-seat | A modest bench integrated with a wall system whose cap units and top course are designed for the seat load. | Limited depth; cap connection, wall-top reinforcement, edge stability, and occupant load must be checked. Keep drainage outlets accessible. |
| Cantilevered bench slab | When a deeper, continuous seat is desired and the slab can be engineered. | Requires designed reinforcement and a reliable connection or independent support. Cantilever forces can increase demand at the wall top. |
| Freestanding counter or cabinet run | Outdoor-kitchen functions, appliances, plumbing, and substantial storage. | Usually the most forgiving arrangement: an independent frame or footing carries the equipment while the wall mainly retains soil. Provide rear ventilation and service access. |
| Recessed storage niche | Only where the wall system expressly permits openings and the drainage and reinforcement layout can remain continuous. | Openings can interrupt geogrid, reduce wall continuity, collect water, and make repairs difficult. Treat as a special structural detail, not a field alteration. |
Cap blocks and seat edges
A cap block or coping stone can finish the wall and form a seat edge when the selected wall system is designed for that use. The cap should be bonded or mechanically restrained as specified, with a bearing surface that does not rely on an unsupported block lip. A concrete or stone seat slab may be more comfortable and durable, but it still needs a designed bearing or independent frame. Do not assume that a decorative cap is a structural bench.
Independent frames and footings
For counters and storage, use a weatherproof frame on a designed slab, posts, or small footing. The support must account for frost, settlement, drainage, and the distance from the retaining-wall footing. A frame that touches the wall can still transfer lateral or vertical force; detail a movement joint or deliberate connection rather than allowing random bearing. Keep plumbing, gas, and electrical penetrations out of the wall unless the wall designer has coordinated them.
Build drainage before the seat or counter
Water pressure is one of the primary causes of retaining-wall distress. Surface runoff, irrigation, groundwater, and clogged outlets can raise pressure behind the wall far beyond the dry-soil condition used in a simple sketch. The drainage assembly must remain effective and maintainable for the wall’s service life.
Rank #3
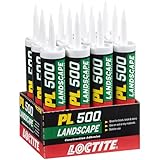
- Heavy Duty Adhesive: Formulated specifically for outdoor landscaping projects like installing cement paving stones or securing cap stones
- All Weather Application: Waterproof and resistant to all types of weather ranging from sub-freezing temperatures at 0°F to 100°F
- Versatile: Provides strong, durable bonds to brick, stone, metal, concrete, slate, wood, treated lumber, timbers and more
- Cold Weather Gunnable: Can be gunned directly onto wet and frozen lumber and will not roll up as other adhesives will
- Fills Gaps and Surfaces: Particularly effective bonding irregular surfaces and bridging gaps between surfaces
Typical drainage assembly
- Place a soil-retaining filter fabric or approved filter layer so fine soil cannot migrate into the drain.
- Install clean, free-draining aggregate in the drainage zone behind the wall.
- Provide a perforated subdrain at the designed elevation, with continuous fall to a lawful outlet.
- Protect the pipe from crushing and keep access points or cleanouts serviceable.
- Grade the paving and counter surface so water flows away from the wall rather than toward joints or penetrations.
- Confirm that the outlet discharges safely without eroding a neighbor’s property, footing, public way, or the wall toe.
Hong Kong’s Building (Construction) Regulation section 24(3) requires a retaining-wall drainage system to be designed and constructed so its performance can be maintained throughout the wall’s service life. The 2020 edition of Geoguide 1 makes the same maintenance principle central to geotechnical practice. Do not bury a cleanout behind a cabinet or seal a weep hole under a countertop.
The cited Iowa Department of Transportation segmental-wall specification calls for a minimum 4-inch subdrain pipe. That is a specification value for that work, not a universal pipe size; your wall design may require a different diameter, slope, outlet, or redundancy.
Segmental retaining walls: use one approved system
Segmental retaining walls depend on the interaction of approved units, a leveling pad, drainage aggregate, filter or engineering fabric, geogrid, compacted backfill, and cap units. Select those components as one manufacturer-approved system and follow its installation details. Mixing blocks, geogrid, connectors, and caps from unrelated systems can invalidate the tested behavior and make the built-in connection impossible to verify.
Installation controls that matter for built-ins
- Excavate only as far as the approved base and reinforcement layout requires.
- Prepare and level the pad; do not use loose soil or random rubble as a substitute.
- Place and compact backfill in the specified lifts without damaging geogrid.
- Extend geogrid to the designed length and orientation; do not cut it for a cabinet niche or footing without a revised design.
- Keep drainage aggregate and filter fabric continuous behind the wall.
- Install cap units with the specified adhesive, pins, setback, or coping detail.
For a seat, the wall designer must verify that the top course, cap, and any connector can resist occupant loads and edge forces. For a counter or storage run, an independent support is usually easier to inspect and replace than a field-cut opening through the reinforced zone.
Detail the seating
Cap-seat arrangement
A cap-seat is compact and visually integrated. Use a cap width and surface finish that provide the required sitting depth without leaving an unstable overhang. The wall system must be checked for the maximum number of users, edge loading, and the force of someone standing or bracing against the seat. Round or ease exposed edges, slope the surface enough to shed water, and avoid a slick finish where rain is common.
Cantilevered or slab bench
A deeper slab can provide a more comfortable seat, but the reinforcement and connection become the design. The slab may be supported by a rear beam, posts, a separate footing, or a specifically engineered wall connection. Include movement, thermal expansion, waterproofing, and drainage details so the slab does not pry against the wall or funnel water into joints. Do not drill reinforcing steel or core through a segmental wall to add a bracket without an approved detail.
Rank #4

- Get a Carefully Trimmed Garden Appearance: 12-piece set with artificial stone edges provides you with the charm of a natural garden view; You no longer need physical labor because the garden no longer requires digging or shoveling, experiencing the ultimate combination of convenience and beauty, maintaining the attractiveness of the garden
- Easy Installation: due to the built-in foundation piles and lightweight structure, the installation process is easy and seamless; The decorative landscape edges are easy to install, saving a lot of time and effort, allowing you to easily enjoy the fruits of labor
- Reliability of Measurement and Durability: the overall size is 17.32 x 12.6 inches/ 44 x 32 cm, and the ground section is 17.3 x 7.5 inches, providing optimal size and durability; These decorative garden frames can withstand various weather conditions and maintain the integrity of your layout regardless of time and season; They will not break or damage in harsh weather conditions
- Our decorative garden frames are made of sturdy plastic structures designed to withstand lawn mowers, temperature fluctuations, and any seasonal ground movements with minimal maintenance, supply the charm of your garden lasts for years
- Experience the Diversity of Uses: expand its use beyond the garden boundary; The landscape edge is suit for lanes and various landscape elements, allowing you to unleash your creativity by combining them in different ways to support different fence shapes, enjoy the additional charm they bring to your vegetable garden, or enhance the attractiveness of any private landscape
Backs, arms, and guards
A backrest or arm can create additional leverage and may be mistaken for a guard. If the bench is near a drop, the required barrier height, openings, loads, and climbability are controlled by local rules. Resolve the guard question with the authority having jurisdiction before fabrication.
Free tools Windows power users keep installed
One-click scans. No signup required.
Detail counters and outdoor-kitchen runs
A counter should be treated as a small structure, not a slab glued to the wall. Support the countertop on a frame or footing designed for the slab, appliances, and service loads. An outdoor-rated countertop slab or porcelain paver can sit on an independently supported frame when the span, edge support, and weather movement are designed.
Coordinate appliances and utilities
- Reserve manufacturer-required clearances around grills, refrigerators, burners, and combustible materials.
- Provide ventilation and heat shielding where appliances require it.
- Use listed, weather-rated electrical equipment with required ground-fault protection.
- Route water, waste, and gas through accessible chases, not through unverified wall cores.
- Provide shutoffs and service panels that remain reachable after doors and drawers are installed.
- Keep fuel, chemicals, and heavy stored goods within the load schedule supplied to the designer.
Slope the finished counter away from the retaining wall, seal penetrations with compatible exterior sealants, and prevent splash from saturating the backfill. A backsplash or raised rear edge should not dam water against the wall.
Detail weatherproof storage
Storage is attractive because it hides tools and cushions, but a cavity can become a drain blockage or a moisture trap. Prefer a cabinet module on an independent frame. Use exterior-rated panels, corrosion-resistant fasteners, adjustable feet or a plinth that keeps the cabinet above runoff, and replaceable seals.
Access and ventilation requirements
- Keep doors, hinges, latches, shelves, and service panels reachable without dismantling the wall.
- Ventilate enclosed compartments that contain appliances, batteries, gas equipment, or damp items.
- Provide a drained floor or removable tray so leaks cannot soak the wall or footing.
- Do not cover weep outlets, subdrain cleanouts, inspection ports, or movement joints.
- Leave enough clearance to remove a damaged cabinet without excavating the retaining wall.
Recessed niches should be used only when the wall system’s engineering explicitly allows them. Cutting a niche after construction can sever reinforcement, remove drainage aggregate, and create a path for soil loss.
Construction sequence
- Survey and document. Measure the wall and retained slope, photograph defects, locate drainage and utilities, and identify property lines.
- Define loads. Draw the seat, counter, appliances, cabinets, stored items, and maximum occupancy; provide the schedule to the wall designer.
- Obtain approvals. Confirm permits, setbacks, height limits, guards, excavation, utility, electrical, gas, plumbing, and stormwater requirements.
- Approve the support strategy. Select a cap-seat, engineered slab, independent frame, or approved niche detail. Resolve footing and movement joints before ordering materials.
- Protect the existing wall. Shore or isolate excavation as required; never undermine the wall toe or cut reinforcement casually.
- Install drainage. Place filter fabric, aggregate, perforated subdrain, outlets, and surface grading before closing the wall or framing the modules.
- Install the retaining-wall system. For segmental construction, use the approved units, leveling pad, geogrid, backfill, fabric, subdrain, and caps as one system.
- Build the independent supports. Place slabs, posts, or frames on designed bearing; maintain movement and drainage clearances.
- Add the horizontal surfaces and modules. Set caps, seat slabs, counters, doors, and appliances without blocking outlets or cleanouts.
- Finish and inspect. Seal penetrations, verify outlet discharge, check slopes and clearances, and photograph concealed drainage before backfill or cladding hides it.
Common failure modes and fixes
| Symptom or shortcut | Why it is risky | Corrective action |
|---|---|---|
| Counter anchored directly to a cap or unsupported block edge | Creates concentrated load and prying force that the wall may not have been designed to resist. | Obtain a connection design or move the counter onto an independent frame or footing. |
| Cabinet covers weep holes or cleanouts | Prevents inspection and allows water pressure to build unnoticed. | Relocate the module, add accessible removable panels, and restore the drainage path. |
| Geogrid cut for a niche or footing | Reduces reinforcement length and wall stability. | Stop work and obtain a revised wall-system design; do not patch geogrid informally. |
| Concrete or pavers slope toward the wall | Funnels runoff into joints and backfill. | Regrade or rebuild the surface with positive drainage away from the wall. |
| Decorative stone placed over a wet wall | Hides leakage, adds weight, and can delay detection of movement. | Find and correct the water or stability problem before cladding. |
| Excavation at the toe for a new footing | Can undermine the existing foundation and trigger sliding or rotation. | Have excavation limits and temporary support designed before digging. |
Inspection and long-term maintenance
Inspect the wall and built-ins after major rain, freeze-thaw periods, irrigation changes, and any nearby excavation. Look for new cracks, bulges, displaced caps, settlement, ponding, blocked outlets, soil loss, rusting hardware, swollen cabinet panels, and counter joints opening.
Keep gutters and surface drains clear. Flush or inspect accessible subdrains as the wall design permits. Replace failed sealants and hardware before water reaches the frame. Keep vegetation roots, stored materials, and added planters from imposing unplanned loads. If movement accelerates, an outlet stops discharging, or water appears behind the wall, stop using the built-in and obtain a professional assessment.
How to decide which configuration fits
- Choose a cap-seat when the wall system is new or specifically verified for seating, the required depth is modest, and drainage access can remain open.
- Choose a cantilevered slab when you need a deeper continuous bench and can fund engineered reinforcement and connection details.
- Choose an independent counter and cabinet run when appliances, plumbing, gas, or substantial storage are involved; it best separates service loads from earth retention.
- Avoid a recessed niche unless the approved wall design already includes it and reinforcement, drainage, waterproofing, and replacement access are documented.
The right answer is the arrangement that keeps the retaining wall stable, keeps water moving, and lets you inspect or replace the furniture without dismantling the earth-retaining system. There is no universal cost or installation-time figure for this combined work: wall type, height, soil, access, climate, jurisdiction, and engineering details control the price and schedule.
Quick Recap

Product prices and availability are accurate as of the date/time indicated and are subject to change. Any price and availability information displayed on Amazon at the time of purchase will apply.
Quick wins for a faster PC:
Clear out junk files and repair common Windows errorsFree Scan →Scan for outdated or missing drivers - takes under a minuteDriver Scan →Repair Windows errors before they cause bigger problemsFix Now →
