Crashes, No Sound, or Screen Glitches?
The Tool Desk
Outbyte Driver Updater FREEFix the driver behind crashes, sound loss and screen glitchesFind Drivers →Outbyte PC Repair FREEClear out junk files and repair common Windows errorsFree Scan →Outbyte Driver Updater · freeRandom freezes, missing sound and display glitches usually trace back to one bad driver. Find and replace yours safely.
Find the Right Drivers →ThatPainter is reader-supported. When you buy through links on our site, we may earn an affiliate commission. Learn More
A decorator table is a deliberately plain table designed to disappear beneath a tablecloth or fabric cover. In the documented bedside-table project, two open-shelf tables were built from one sheet of 1/2-inch MDF, then prepared for painted tops and fabric panels. Each finished table measured 30 inches wide, 15 inches deep, and 34 inches high.
The build is straightforward in concept—cut panels, glue and nail the shelves between supports, stiffen the back, edge the top, then fill, sand, prime, and paint—but the original account stops while the fabric panels were still being prepared. It is therefore a useful MDF table-building plan and progress record, not a complete upholstery tutorial. The dimensions, materials, and historical price below come from the author’s 2010 Addicted 2 Decorating project, updated on that site in 2015.
As an Amazon Associate I earn from qualifying purchases.
Free tools Windows power users keep installed
One-click scans. No signup required.
What a decorator table is
A decorator table is a functional table made with a simple, often inexpensive structure because its visible surfaces are intended to be covered. The covering can be a tablecloth or a constructed fabric panel. Unlike a conventional finished wood table, the underlying box does not have to carry the entire decorative effect.
That distinction matters for a bedside project. You can concentrate on a stable footprint, useful shelf storage, and a top that accepts a cover, rather than spending time on exposed joinery or a clear-coated hardwood surface. The documented project uses rectangular tops and open shelves, making a pair of matching bedside units rather than adapting commercially finished nightstands.
#1 Best Overall
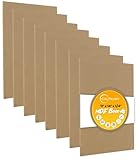
- ●MEGA PACK MDF BOARDS - This pack is for 8 pieces 11 inches wide by 14 inches long by 1/4 inch thick MDF boards. Get the most out of these exact-cut MDF board sheets
- ●HIGH-QUALITY MDF BOARDS - Both sides have machined, smooth unfinished surfaces with precision-cut straight, sanded edges. Each board is sturdy and has some weight to it
- ●VERSATILE SHEET BOARD MATERIAL - MDF is a cost-effective alternative to other sheet boards. It’s perfect as a picture frame backing board, signage, centerpieces, pyrography, interior design pieces, scrapbooking, or other hobby crafts
- ●SUITABLE FOR PAINTING - Accepts different paints exceptionally well. Since MDF is quite porous, a coat or two of paint primer or gesso primer is a must. These boards are also suitable for stenciling, distressing, whitewashing, antiquing paint techniques
- ●HIGHLY CUSTOMIZABLE UNFINISHED BOARD SHEETS - Aside from painting, you can glue or add embellishments to your MDF board. They’re easy to cut by hand saw or power saws ,and are also perfect for routing and engraving
The documented build at a glance
| Feature | Reported specification | How to interpret it |
|---|---|---|
| Number of tables | Two | The author says both tables were made from one sheet of 1/2-inch MDF. |
| Finished size of each table | 30 inches wide × 15 inches deep × 34 inches high | These are the author’s 2010 project dimensions, not a universal bedside-table standard. |
| Main material | 1/2-inch MDF | Panel thickness affects every cut and the amount of edge support needed. |
| Storage | Open shelves | The shelf count and exact vertical spacing were not stated. |
| Fastening | Wood glue and nails, applied with a brad nailer | The account describes glued-and-nailed assembly rather than a published screw schedule. |
| Back treatment | Rear support strips | These keep the shelving unit square and help stop objects being pushed off the back. |
| Top treatment | 1 × 2 MDF edging with mitered corners | The edging builds a finished-looking perimeter before filling and painting. |
| Reported total cost | $25 for both tables | A historical 2010 figure, not a current material estimate. |
| Fabric finish | Panels planned for attachment from underneath | The source ends before installation is demonstrated. |
Plan the pair before cutting
Confirm the footprint
At 30 inches wide and 15 inches deep, each unit has a long rectangular footprint. A 34-inch height is taller than many modern bedside tables, so measure the mattress, bed frame, and the height at which you normally reach for a lamp or book. Do not silently substitute a different height: the published dimensions describe this particular pair, while your room may require a revision.
Also check clearance for doors, drawers, curtains, baseboards, and electrical outlets. Two tables need mirrored placement but do not necessarily need mirrored shelf contents. Mark the usable wall width and the distance from each table to the bed before committing to the full 30-inch width.
The Tool Desk
Outbyte PC Repair FREERepair Windows errors before they cause bigger problemsFix Now →Outbyte Driver Updater FREEScan for outdated or missing drivers - takes under a minuteDriver Scan →Use a cut list, not memory
The account says the store cut the MDF, leaving assembly at home. That approach reduces the need for a table saw, but it makes an accurate written cut list essential. The source does not publish panel dimensions for the sides, shelves, top, or back strips, so derive those dimensions from your chosen 30 × 15 × 34-inch outside envelope and the actual MDF thickness available.
When laying out the list, account for the 1/2-inch panel thickness at every meeting edge. Decide whether the side pieces run full height, whether shelves fit between them or sit on top of them, and how the 1 × 2 edging changes the apparent top size. Label every cut for table one and table two. A cutting error repeated across both units can consume the material intended for the second table.
Materials and tools used in the project
The following list reflects the described build. It is not a current shopping list with brands, prices, or guaranteed availability.
- One sheet of 1/2-inch MDF for the two table structures.
- Wood glue.
- Nails and a brad nailer.
- 1 × 2 MDF boards for edging the tops.
- Wood filler for seams, gaps, and nail holes.
- Primer and paint.
- A miter saw for the 1 × 2 edging.
Have a tape measure, square, pencil, clamps, sanding materials, and a stable assembly surface available as practical workshop equipment. The cited account specifically identifies the MDF, glue, nails, brad nailer, MDF trim, filler, primer, paint, and miter saw; it does not identify a brand, grade beyond 1/2-inch thickness, or current product specification for any item.
Rank #2

- Perfectly Sized & Easy to Cut – Includes 12 pieces of 12” x 12” x 1/4”MDF wood boards, ideal for various DIY projects. The smooth surface allows for easy sanding, glazing, or dyeing, and you can cut them into different shapes to suit your needs.
- Premium Quality & Durable – Made from quality medium density fiberboard wood, these 1/4-inches (6mm) thick MDF boards feature smooth, unfinished surfaces with precision-cut edges. Sturdy and evenly structured, they offer excellent durability for crafting and woodworking.
- Versatile Sheet Board Material – MDF is an excellent alternative to other sheet boards, making it perfect for picture frame backing, signage, centerpieces, pyrography, interior design, scrapbooking, and other hobby crafts.
- Suitable for Painting – Accepts different types of paint exceptionally well. Since MDF is porous, applying a primer or gesso is recommended before painting. Also great for stenciling, distressing, whitewashing, and antiquing techniques.
- Highly Customizable Unfinished Boards – In addition to painting, you can glue or add embellishments to these MDF boards. They are easy to cut with an engraving tool, hand saw, or power saw, and work well for routing and engraving.
Step-by-step MDF assembly
1. Inspect and label the cut panels
Before applying glue, lay out all panels on a flat surface and check them against your cut list. Mark the inside face of each side, the front and back edge, and the intended top. MDF edges can look similar in every direction; clear labels prevent installing a shelf upside down or reversing a side.
Dry-fit the pieces without adhesive. Confirm that the shelves reach the supports, the two sides are parallel, and the planned 15-inch depth remains consistent. This is the moment to correct a cut or adjust a shelf position, not after nails have locked the box together.
2. Mark the shelf locations
The author marks shelf positions before assembly. Use a square to transfer each shelf line across both side supports so the shelves sit level from left to right. Because the original post does not state the number of shelves or their spacing, choose positions based on the objects you will store and record those measurements for the second table.
Keep the marks on the inside faces and distinguish the top edge from the bottom edge. Matching reference marks on both tables are more reliable than measuring each shelf independently.
3. Glue the shelf joints
Apply a continuous, controlled bead of wood glue where each shelf meets a side support. Avoid flooding the MDF edge; excess glue makes cleanup harder and can interfere with filler and paint. Bring the shelf to its reference marks, check that the front edge is flush, and hold the joint in alignment while fastening.
4. Fasten with the brad nailer
The described assembly uses a brad nailer to drive nails through the side supports into the shelf edges. Set the nailer for the fastener length appropriate to your actual material stack, and test on scrap first. The source does not provide a nail length or spacing pattern, so do not treat a particular number as part of the published plan.
Rank #3
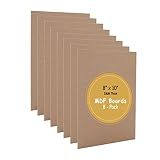
- 1. MEGA PACK MDF BOARDS - This pack is for 8 pieces 8 inches wide by 10 inches long by 2mm thick MDF boards. Get the most out of these exact-cut MDF board sheets.
- 2. HIGH-QUALITY MDF BOARDS - Both sides have machined, smooth unfinished surfaces with precision-cut straight, sanded edges. Each board is sturdy and has some weight to it.
- 3. VERSATILE SHEET BOARD MATERIAL - MDF is a cost-effective alternative to other sheet boards. It’s perfect as a picture frame backing board, signage, centerpieces, pyrography, interior design pieces, scrapbooking, or other hobby crafts.
- 4. SUITABLE FOR PAINTING - Accepts different paints exceptionally well. Since MDF is quite porous, a coat or two of paint primer or gesso primer is a must. These boards are also suitable for stenciling, distressing, whitewashing, antiquing paint techniques.
- 5. HIGHLY CUSTOMIZABLE UNFINISHED BOARD SHEETS - Aside from painting, you can glue or add embellishments to your MDF board. They’re easy to cut by hand saw or power saws ,and are also perfect for routing and engraving.
Drive fasteners where they will not collide with another nail or split a narrow edge. Wipe away squeeze-out while the glue is workable. Check each shelf with a square before moving to the next joint; a small error at the first shelf can become a visibly leaning case by the top.
5. Add rear support strips
Rear support strips are a key structural detail in this project. The author adds them to keep the shelving unit straight and sturdy and to stop items from being pushed off the back. Fit the strips across the rear of the assembly after the shelves are aligned, then glue and nail them in the same general manner.
Use the back supports as a squaring check: measure diagonals or compare opposite corners before the adhesive sets. The strips are not described as a full back panel, so do not assume they close the entire rear opening or provide dust protection.
6. Build the top edge
The top is edged with 1 × 2 MDF boards. The corner pieces are mitered, creating a continuous frame around the top rather than leaving raw MDF edges exposed. Cut and dry-fit the four pieces first. A miter saw is the named tool for this operation, but the important requirement is four accurately matching corners.
Glue the edging in place and fasten it. Keep the upper surfaces flush so the planned fabric cover will not bridge a sharp step. If a joint leaves a small gap, reserve it for wood filler rather than forcing the pieces out of square.
Fill, sand, prime, and paint
Fill the visible defects
After the glue has cured, apply wood filler to nail holes, miter gaps, and other visible seams. The top edging is intended to create a paint-ready perimeter, so inspect every corner under strong light. Let the filler dry according to its product directions before sanding; sanding soft filler too soon can pull it out of the hole.
What’s actually slowing this PC down?
Pick the symptom - the matching free tool is one click away.
Rank #4

- Perfectly Sized & Easy to Work With – Includes 24 pieces of 12” x 12” x 1/8” MDF craft wood panels, ideal for a variety of DIY projects. The smooth, uniform surface allows for effortless sanding, staining, or painting, and they can be cut into different shapes to fit your creative needs.
- Durable & Premium Quality Material – Made from premium-density fiberboard, these 3mm-thick MDF sheets feature precisely cut edges and a smooth, unfinished texture. Strong and structurally sound, they provide excellent reliability for woodworking and artistic projects.
- Versatile for Multiple Applications – A great alternative to plywood, these MDF boards are ideal for picture frame backing, signage, centerpiece bases, wood burning, model making, scrapbooking, and home décor projects.
- Ideal for Painting & Finishing – Highly absorbent and suitable for acrylics, oils, and stains, these MDF sheets require a primer or gesso base for best results. Perfect for stenciling, distressing, antiquing, and whitewashing techniques to achieve a unique artistic finish.
- Easy to Cut & Customize – These unfinished MDF boards can be effortlessly shaped, engraved, or routed using hand tools, power saws, or engraving machines. Easily adaptable for gluing, crafting, and embellishing, making them a must-have for creative projects.
Sand without rounding the geometry
Sand the filled areas level with the surrounding MDF. Keep the outside corners and top plane crisp enough that the fabric panel can sit predictably. Remove dust before priming. MDF dust is fine and persistent, so use appropriate eye and respiratory protection and follow the tool and coating manufacturers’ safety instructions.
Prime the MDF
The project includes primer before paint. Priming seals the prepared surface and gives the topcoat a more even base. Pay particular attention to exposed MDF edges and filled areas, which can absorb coating differently from the broad faces. The source does not name a primer type, number of coats, drying time, or paint color; those choices remain part of your finish plan.
Paint the tops and other exposed areas
Paint after the primer has dried and the surface is free of dust. Apply thin, even coats rather than trying to hide all variation in one heavy coat. Allow the finish to cure before placing fabric or bedding against it. The original account says the tops were filled, sanded, primed, and painted; it does not report a final color, sheen, durability test, or completed-room photograph.
Independent reader supportYour contribution helps us test, update, and keep practical guides available for everyone.How the planned fabric finish fits the design
The fabric panels were being made while the tables were under construction, with the intention of attaching them from underneath. Leaving the tops unattached during this stage allowed the author to prepare the panels before committing the final attachment.
Windows Errors? Fix Them Before They Spread
Repair common Windows errors and clear accumulated junk for a smoother, more stable PC - no reinstall needed.Free scan · no reinstallCrashes, No Sound, or Screen Glitches?
Random freezes, missing sound and display glitches usually trace back to one bad driver. Find and replace yours safely.Free scan · under a minuteThat is the limit of the documented upholstery information. No finished panel installation sequence, fabric specification, dimensions, fastener type, tension method, or removal procedure is supplied. Treat the cover as a separate design phase: determine how much fabric must wrap the top, where the underside attachment will remain accessible, and how the panel can be removed for cleaning or repainting before you cut cloth.
Do not describe this project as a completed fabric-upholstery tutorial. It demonstrates the MDF carcass and a planned covered finish, but the source ends before the finished tables are shown.
Best Value

- MDF Wood Boards:You will receive 24 pieces of medium density fiberboards, each MDF board measuring approx.30 x 30 cm/ 12 x 12 inches, the thickness is 3 mm/1/8 inches, sufficient quantity is enough to meet your daily use and replacement needs, and you also can share them with your friends and family
- Reliable Material:Our boards are made of reliable medium density fiberboard, sturdy and hard to break or deform, and the wood art boards have flat smooth surfaces with fine workmanship, feature neat edges without burrs, which will not scratch your hands
- Creative Blank Surfaces: The MDF wood boards feature blank surfaces, which provide you enough large blank spaces for painting, staining, distressing, carving and sanding, you also can decorate MDF with stencils, ribbon, lace, wooden letters, flowers, beads and other embellishments, release your imagination and creativity to make your personalized crafts
- IIdeal Craft Supplies:The MDF wood panels can be cut with a cutter machine, you can cut them into different shapes and sizes according to your preferences, and make personalized handicrafts, great for birthdays, weddings, baby showers, holiday parties, Graduation parties, Halloween parties, Christmas parties and more, ideal supplies for DIY crafts projects
- Wide Range of Uses:The unfinished wood art boards are very suitable for DIY crafts projects, such as book boards, drawing boards, illustration boards, posters, signs, plaques, wall decor, card marking and so on, and the wood panels also can be used to protect valuable photos, artwork or important documents while moving homes or offices
Historical cost and what it does—and does not—tell you
The author reported spending $25 total for two tables in 2010. That figure is useful evidence of the project’s original budget ambition, not a current estimate. MDF, coating, fastener, and cutting-service prices change by location and date, and the account does not itemize the $25 or state whether the author already owned any tools.
The same period post compares decorator tables priced at approximately $20 and $70, and a storage table priced at $185. Those are historical examples used in the author’s 2010 comparison. They should not be read as today’s retail prices or as a guarantee that a handmade pair will cost less than a ready-made alternative.
Do these 3 things before closing this tab:
1Fix the driver behind crashes, sound loss and screen glitches2Repair Windows errors before they cause bigger problems3Scan for outdated or missing drivers - takes under a minute| Decision factor | What this project establishes | What remains unknown |
|---|---|---|
| Up-front cost | $25 total was reported for the two-table project in 2010. | Current regional material and tool costs are not stated. |
| Storage | Open shelving is part of the design. | Exact shelf count and clearances are not stated. |
| Footprint | Each table is 30 × 15 inches. | Whether that footprint suits your bed and room must be measured locally. |
| Height | Each table is 34 inches high. | The source does not compare this height with a particular mattress or bed frame. |
| Finish | Painted MDF tops with fabric panels planned. | Final panel installation and finished appearance are not demonstrated. |
| Tools | Store cutting, glue, nails, a brad nailer, and a miter saw are described. | Current store cutting policies, tool ownership, and alternative methods are not stated. |
Quality checks before the tables enter the bedroom
- Check both outside envelopes. Measure width, depth, and height on each finished carcass and confirm they match the intended 30 × 15 × 34-inch dimensions.
- Check for racking. Push gently from opposite corners. Excess movement indicates that the shelves or rear strips are not holding the case square.
- Check every shelf. Place a level or straightedge across each shelf and compare the left and right ends. Correct misalignment before painting.
- Inspect the rear edge. Confirm that the support strips are secure and that stored objects cannot slide through an unintended opening.
- Inspect the top frame. Run a finger over each miter and edging seam. Any ridge or sharp protrusion can telegraph through a fabric cover.
- Inspect the coating. Look for exposed MDF, unfilled nail holes, sanding scratches, and dust nibs before bringing the table indoors.
- Test the intended use. Place the lamp, books, or other bedside items you expect to store on the shelves and verify that the open design works without blocking outlets or walkways.
When this build is the right choice
Choose this approach when you want a matched pair, a specific 30-inch-wide by 15-inch-deep footprint, open shelf storage, and a table intended to accept a decorative cover. It is especially attractive when you can obtain accurate panel cuts and already have access to fastening and finishing tools.
Choose a different plan when you need enclosed dust-free storage, a completed upholstery method, a lighter material, or a height that cannot be adapted safely from the published envelope. The source does not provide tested alternatives, current retail comparisons, or a performance claim for other constructions, so those decisions require their own measurements and specifications.
What the original progress report leaves unfinished
The project account is valuable precisely because it records the construction in progress: the pair has been assembled, reinforced, edged, filled, sanded, primed, and painted, while the fabric panels are still being prepared. It does not show the completed panel attachment or a final reveal. That boundary should guide your expectations and your schedule.
If you follow the documented build, treat the MDF table as complete only after you have independently resolved the cover’s dimensions, underside attachment, removability, and clearance from the bed. The woodworking portion supplies a clear concept and reported dimensions; the decorative textile portion remains an open design decision.
Free tools Windows power users keep installed
One-click scans. No signup required.
The Bottom Line
This project is a compact way to build two matching, open-shelf bedside decorator tables from one sheet of 1/2-inch MDF. Use the reported 30 × 15 × 34-inch dimensions, glue-and-brad-nail assembly, rear support strips, and mitered 1 × 2 edging as the documented baseline, but treat the $25 cost as historical and plan the fabric-panel installation separately because the original account does not complete it.
Quick Recap

Product prices and availability are accurate as of the date/time indicated and are subject to change. Any price and availability information displayed on Amazon at the time of purchase will apply.

