Free tools Windows power users keep installed
One-click scans. No signup required.
ThatPainter is reader-supported. When you buy through links on our site, we may earn an affiliate commission. Learn More
A fiber-cement facade is not just a panel fixed to a wall. It is a coordinated rainscreen assembly comprising the substrate, air and water control layer, insulation, subframe, drained and ventilated cavity, panels, flashings, joints, fire provisions and terminations. Design those parts as one system, then install the selected manufacturer’s details without substituting dimensions from another product.
As an Amazon Associate I earn from qualifying purchases.
This guide sets out a practical workflow for architects, specifiers, contractors and owners. It explains how to choose visible or concealed fixings, preserve drainage and ventilation, detail openings and movement, and verify structural, fire and regional requirements.
The Tool Desk
Outbyte Driver Updater FREEFix the driver behind crashes, sound loss and screen glitchesFind Drivers →Outbyte PC Repair FREERepair Windows errors before they cause bigger problemsFix Now →Start with the complete facade assembly
Begin with a section through the entire wall, not with the panel alone. Record the supporting structure and substrate, the air and water control layer, insulation, brackets or rails, cavity, cladding, flashings and interior interfaces. Sto’s design guide treats facade products as components of a larger assembly and organizes details around interfaces such as grade, rooflines, windows, parapets, penetrations, corners and movement joints. Those details are examples of coordination work, not universal details to copy without checking the selected system.
#1 Best Overall

- Size : 6.3 Inches x 4.75 inches
- Material : Made from a thin piece of PVC
- Easy to Install : Clean, peel, stick, flatten and paint
- Weatherable: Works fine from 5 degrees Fahrenheit to140 degrees Fahrenheit.
- Package Include : 12 Patches Repair Kit & 1 User's Manual
James Hardie describes Hardie Panel on ventilated timber or metal substructures. EQUITONE documents both face-fixed and concealed systems. In each case, the approved panel, fastener, subframe, cavity and accessory combination matters. A panel that works on one rail or substrate may require a different fixing, hole, washer, support spacing or edge distance on another.
Define the performance brief
Before selecting a panel, write down the conditions that control the design:
- Project country, jurisdiction and applicable building regulations.
- Building height, occupancy and fire strategy.
- Substrate type, tolerances and available fixing zones.
- Wind actions, seismic or other movement demands and structural support capacity.
- Climate exposure, driving rain, freeze-thaw risk, salt or industrial atmosphere.
- Thermal, airtightness, acoustic and moisture requirements.
- Desired panel format, thickness, colour, texture, joint pattern and replacement method.
- Maintenance access, cleaning expectations and access for inspecting the cavity.
- Whether the facade will use face-fixed screws or rivets, or concealed anchors.
The reviewed manufacturer pages do not establish one code-compliant recipe for every country, building type or exposure. The design professional must select the applicable rules and obtain project-specific structural and fire confirmation.
Outdated Drivers Are Slowing You Down
One free scan finds every outdated or missing driver and matches the right update for your exact hardware.Free scan · exact hardware matchPC Slower Than It Used to Be?
A free scan shows the junk files, broken settings and background clutter dragging Windows down - then fixes them in one click.Free scan · Windows 10 & 11Choose the panel and fixing system together
Fixing is a system decision. Compare the panel’s thickness and format with the approved substrate, rail, fastener, washer, anchor, hole and support arrangement. Also consider how the attachment looks, how a damaged panel will be replaced and whether the chosen hardware is suitable for the exposure.
| Approach | Typical appearance | Key coordination questions | Trade-offs |
|---|---|---|---|
| Face-fixed screws | Visible screw heads create a regular fixing grid. | Is the screw approved for the panel and timber or metal subframe? Are corrosion resistance, head colour, edge distance, hole size and torque specified? | Simple visual checking and generally straightforward replacement, but the hardware remains visible. |
| Face-fixed rivets | Visible rivet heads form a deliberate pattern. | Is the rivet approved for the panel and aluminium or steel support? How are movement holes, washers and installation tools specified? | Suitable for some metal subframes, but drilling and rivet installation must follow the system details. |
| Concealed anchors | Cleaner face with no exposed fastener heads. | Is the anchor approved for this panel thickness, edge zone, subframe and load? Can installers access and replace a panel? | Improved visual continuity, but tighter compatibility and installation requirements can limit options. |
James Hardie’s fixing information distinguishes panel screws for wood, rivets for aluminium or steel and concealed anchors for specified applications. Those are product-specific examples, not a generic schedule for all fiber-cement boards. EQUITONE also describes face-fixed and concealed systems. Obtain the current regional manual and use its compatibility tables, not a fastener selected only by appearance or availability.
Rank #2
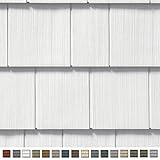
- Patented PanelThermometer for precise installation True Texture finish
- Designed and tested to withstand hurricane force winds Molded Continuous Perimeter Lock
- Made from high quality polymer material Made in the USA
- Limited lifetime warranty
- Panel Projection: 3/4 Inch (Accepts 3/4 Inch J Channel only) Width: 14in. D/7 Inch
Panel thickness and classification: examples, not universal values
James Hardie Europe lists Hardie Panel in 8 mm and 11 mm thicknesses. Its European product information states an A2-s1,d0 classification for that product context. The classification applies to the stated regional product and should not be extended to every fiber-cement panel or to a complete facade assembly. Verify the locally applicable classification, tested construction, cavity barriers and attachment requirements.
Lay out the structure before ordering panels
Set the panel module and support grid together. Joints should land on suitable framing or rails, with enough bearing and edge distance for the approved fastener. Coordinate the grid with windows, doors, corners, parapets, soffits, base clearances and structural movement joints before fabrication.
Coordinate horizontal and vertical joints
- Draw the intended joint widths and alignment on elevations and sections.
- Check that every fixing line has the support required by the manufacturer.
- Keep joints clear of unsupported edges and service penetrations.
- Decide how joint backing, flashings, gaskets or open-joint profiles maintain drainage.
- Allow for fabrication tolerances so the installed grid does not force panels against one another.
Do not make a joint look continuous on an elevation while leaving its drainage or support unresolved in section. A panel pattern that ignores window heads, sills and corners often creates narrow pieces, weak edge zones or blocked cavity paths.
Design movement into face-fixed panels
Fiber-cement panels and their supports can move from temperature, moisture, building drift and structural movement. The selected system’s fixed/sliding or STOP/GO logic determines which holes restrain a panel and which allow movement.
EQUITONE’s cited U.S. guidance for its described face-fixed system uses oversized 11 mm holes and two STOP points per panel; the remaining fixings are GO points. This dimension and point arrangement belong to that guidance. Do not transfer them to another panel, region or attachment system without confirmation.
Rank #3
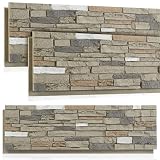
- Coverage and Package: this package includes 3 fireproof panels, each approximately 11.8" x 45.6" in size; Providing nice coverage, these panels are ideal for large scale projects or covering expansive wall surfaces
- Safety Assurance: place safety at the forefront with our panels, thanks to their B1 fire rating; Our faux stone wall panels provide resistance to fire, ensuring safety and reliability for use
- Reliable Quality: boasting a quality PU material, our exterior siding panels boast longevity and durability; This UV resistant material ensures color fading stays negligible even with the longest duration of exposure to sunlight
- Aesthetic Appearance: with gray color and realistic stone imitation, the exterior panels effortlessly replicate the look and feel of real stone; It is designed to deliver an exquisite feeling to any setup
- Ease of Installation: the lightweight nature of our fireproof outdoor wall panels makes handling during installation an effortless task; Easy to hang with simple adhesives, these panels transform the installation process into a seamless experience
Movement detailing checklist
- Identify the exact fixed points and sliding points on the installation drawing.
- Use the specified hole size, washer, screw or rivet and installation sequence.
- Do not clamp a GO point, fill an oversized hole or substitute a fastener that prevents sliding.
- Keep panel edges, corners and joints free to move as the system requires.
- Coordinate facade movement joints with structural movement joints in the building.
- Check that sealants, tapes and flashings do not bridge a joint that must move.
Keep the cavity drained and ventilated
A rainscreen relies on a continuous path for air movement and drainage behind the cladding. The cavity must remain open at intended inlets and outlets, while flashings direct water out at bases, sills, heads, roof transitions and penetrations.
The Tool Desk
Outbyte Driver Updater FREEFix the driver behind crashes, sound loss and screen glitchesFind Drivers →Outbyte PC Repair FREEClear out junk files and repair common Windows errorsFree Scan →James Hardie warns that horizontal framing can block rear ventilation. Its Hardie Plank FAQ states a minimum 20 mm ventilation gap in that product-specific context. That figure is not a universal clearance for every fiber-cement facade panel, climate or code. Use the selected system’s current requirement and show the cavity path on the drawings.
Check continuity at each transition
- Base and grade: provide a drained outlet, protect the cavity from splashback and maintain the manufacturer’s clearance to paving or soil.
- Roofline: keep the upper cavity opening and weathering details compatible with gutters, copings and roof membranes.
- Windows and doors: connect sill flashings to the drainage plane, protect heads and jambs, and prevent the frame or trim from closing the cavity unintentionally.
- Parapets: coordinate coping, membrane termination, cavity opening and panel support.
- Penetrations: sleeve and flash pipes, ducts, cables and brackets without creating a water trap or blocking ventilation.
- Horizontal framing: avoid rails or blocking that interrupt the designed rear-ventilation route unless the system provides a tested alternative.
Sto’s guide includes dedicated conditions for grade, roof, windows, parapets, wall penetrations, movement joints and corners. Use such details as coordination references, then reconcile them with the selected panel, membrane, subframe and local approval.
Detail corners, openings and terminations before installation
Most facade defects begin where two systems meet. Produce enlarged details for every change in plane and every termination, and identify the responsible trade for each membrane, flashing, seal, rail and panel cut.
Windows and doors
Set the panel module around the opening so joints align with support and the reveal does not create an unsupported sliver. Show head, jamb and sill sections, including the weather barrier, insulation returns, subframe, cavity, flashing, sealant and trim. Verify that the opening detail permits panel movement and remains serviceable if the window or panel is replaced.
Rank #4

- OSHA-compliant: take on siding, fiber cement, Hardie board, or shower backer boards with a 1/2-inch (13mm) max cutting capacity
- Cut glass, wood, plastic, and other conventional building materials up to 5/16 inch (8mm) thick
- Pressure sensitive trigger cuts anywhere from 0 to 2500 strokes per minute
- Swiveling head rotates a full 360 degrees to meet the needs of any project
- Includes a set of reversible and replaceable steel cutting blades, a lock-on power switch, a 6-foot power cord, and a two-year warranty
Corners and changes in plane
Choose an external-corner strategy—trim, folded metal, butt joint or another approved profile—only after checking panel edge protection, joint width, drainage and movement. Internal corners need the same attention: a sealant line must not close a cavity outlet or bridge a required movement joint.
Base, soffit and parapet
At the base, maintain the specified panel clearance and provide a protected drainage exit. At soffits, keep ventilation openings from being sealed by finishes or insulation. At parapets, coordinate the top edge with coping and membrane upstands so wind, water and movement are addressed together.
Confirm fire performance for the actual wall
Never infer the fire performance of a complete facade from a generic statement that a panel is non-combustible or from one product classification. The wall’s reaction-to-fire classification, cavity barriers, insulation, membranes, rails, fixings and floorline details all affect compliance.
James Hardie states A2-s1,d0 for Hardie Panel in its European product context. Sto’s design guide includes floorline fire-protection details. Confirm the classification and tested or approved assembly for the project’s jurisdiction, building height and use. Have the design professional verify cavity barriers, fire stopping, attachment materials and interfaces at every floorline and compartment boundary.
Recommended Free Tools
Engineer the support and fasteners for the project
Fastener count, spacing, rail dimensions, edge distances, pull-out resistance and panel capacity depend on wind actions, building geometry, substrate and the approved system. The available guidance does not provide a project-specific structural schedule, so do not invent one from a typical elevation.
Best Value

- including: 2 x Siding Overlap Gauge Set
- Convenience:Allows for easy and accurate 1-person siding installations
- Two gauges support the entire length of plank and precisely gauge a standard 1-1/4-Inch overlap - even on a bowed wall Works on old or new 5/16-Inch fiber cement siding plank
- Usage method :For Use With Fiber Cement Siding, Overall Length 6 in, Safety Latch No, Handle Color Silver, Material Steel, Features Precision-Ground Tip Assures Gauge Grips Behind Siding, Two gauges Support Entire Length of Panel and Precisely Gauge a Standard 1-1/4 in Overlap even on a bowed wall
Information the structural review should establish
- Design wind pressure and suction for each facade zone, including corners and parapets.
- Substrate strength, embedment and allowable fixing locations.
- Rail, bracket and connection capacity, including deflection limits.
- Panel span, fixing spacing, edge distance and corner-zone requirements.
- Movement from drift, thermal effects and structural joints.
- Compatibility and corrosion resistance of screws, rivets, anchors, rails and accessories.
- Installation tolerances and the remedy when the substrate is outside them.
Require the installer to record deviations from the approved grid and to obtain written direction before relocating a fixing or cutting away a support. A visually acceptable panel can still have inadequate edge distance or pull-out capacity.
Independent reader supportYour contribution helps us test, update, and keep practical guides available for everyone.Specify cutting, handling and installation controls
Fiber-cement cutting creates dust and can damage panel edges if the wrong blade or method is used. James Hardie’s fixing page states: “Use Hardie Blade™ saw blade or Hardie™ Guillotine for clean cuts and minimal dust.” That is manufacturer guidance for its boards; other products may require different blades, tools or dust controls.
Pre-installation checks
- Confirm the current regional installation manual, approved accessories and revision status.
- Inspect panels for damage, moisture, colour variation and correct thickness before distributing them to elevations.
- Verify that the substrate, membrane, insulation and subframe match the approved drawings.
- Check cavity openings, flashings, fire barriers and window interfaces before covering them.
- Set out a sample bay or mock-up that includes a joint, corner, opening and termination.
- Agree inspection hold points for support alignment, fasteners, movement holes, flashings and cavity cleanliness.
Installation sequence
- Prepare and survey the substrate; correct out-of-tolerance areas before installing rails.
- Install the air and water control layer, insulation and flashings so laps and penetrations drain outward.
- Fix the subframe to the engineer’s spacing and verify that rails do not obstruct the designed ventilation route.
- Install cavity barriers and fire-stopping at the locations shown in the approved fire detail.
- Set the first panel course, base clearance and drainage outlet; do not use the cladding to hide a failed base detail.
- Cut panels with the approved product-compatible tool and dust-control method, then protect cut edges as the manufacturer requires.
- Install panels using the specified fixed and sliding points, fastener type, hole size, washers and torque.
- Check joint width, alignment, corner treatment and opening flashings as each elevation progresses.
- Keep the cavity free of offcuts, packaging and mortar that could block drainage or ventilation.
- Complete a final inspection of terminations, penetrations, fire barriers, visible fasteners and replacement access.
Use a mock-up to resolve appearance and buildability
A representative mock-up reveals problems that elevations cannot: screw-head alignment, rivet colour, shadow lines, panel flatness, corner build-up, window reveals, flashings and the visual effect of joint tolerances. Include the actual panel finish, fasteners, trims, cavity openings and sealants. Approve the mock-up against the drawings and retain it as the workmanship reference.
Free tools Windows power users keep installed
One-click scans. No signup required.
Plan maintenance and replacement
Owners should receive a facade plan showing panel types, finishes, fixing systems, joint details, flashings, fire barriers and access points. Record which panels use visible fasteners and which use concealed anchors. A concealed system may provide a cleaner elevation but can require a defined removal sequence and special access. Face-fixed panels may be easier to inspect, but replacement hardware and colour-matched heads must remain available.
Schedule inspections after severe weather and at intervals set by the facade designer. Look for cracked or displaced panels, loose fasteners, open joints, blocked cavity openings, damaged flashings, failed sealants and corrosion. Repair the cause—not just the visible symptom—before replacing a panel.
Common design failures and their fixes
| Failure | Why it happens | Design or site response |
|---|---|---|
| Blocked rear ventilation | Horizontal rails, insulation, trims or debris interrupt the cavity. | Draw the complete air path, avoid blocking members where prohibited, inspect the cavity before closure and maintain specified openings. |
| Cracked panel at a fixing | A sliding point was clamped, a hole was wrong, or edge distance was inadequate. | Follow the system’s STOP/GO or fixed/sliding logic and replace the panel only after correcting the fixing detail. |
| Water staining below openings | Sill or head flashing does not discharge into the cavity or out of the wall. | Rework the opening detail so the water-control layer, flashing and cavity drainage connect continuously. |
| Uneven joint pattern | Subframe tolerances or panel module were not coordinated. | Survey the support grid, establish a controlled datum and revise panel cuts before the elevation is closed. |
| Unexpected fire-compliance issue | A panel classification was treated as the classification of the whole wall. | Verify the tested or approved assembly, cavity barriers, insulation, membranes and floorline details for the jurisdiction. |
| Corroded or loose hardware | Fasteners were chosen without exposure or substrate compatibility review. | Use the approved hardware and corrosion class, then inspect and document the installation. |
Decision checklist before approval
- Is the jurisdiction, building use, height and fire strategy stated?
- Is the selected panel identified by product, thickness, finish and regional approval?
- Are visible or concealed fixings selected with their compatible subframe and accessories?
- Are fixed/sliding points or STOP/GO points shown, including the system-specific hole dimensions?
- Does the cavity have a continuous ventilation and drainage path at bases, roofs, openings, corners and penetrations?
- Are movement joints coordinated with the building structure?
- Are wind design, substrate capacity, rail spacing, fastener capacity and tolerances signed off?
- Are the complete wall’s fire classification, cavity barriers and floorline details approved?
- Are cutting, dust control, handling, inspection and replacement procedures written into the method statement?
- Has a representative mock-up been inspected and accepted?
What to obtain from the manufacturer and design team
For the chosen system, request the current regional installation manual, fixing compatibility tables, panel data, fire documentation, movement guidance, cavity and flashing details, approved accessories, cleaning and maintenance instructions, warranty conditions and details for openings, corners, parapets and movement joints. The design team should reconcile those documents with the project drawings, structural calculations, fire strategy and local approvals.
Manufacturer guidance is valuable for system-specific decisions, but it does not replace the current code review, structural design, fire engineering or qualified site supervision. Where a generic article conflicts with the selected manual, the approved project documents and current manufacturer instructions govern.
PC Slower Than It Used to Be?
A free scan shows the junk files, broken settings and background clutter dragging Windows down - then fixes them in one click.Free scan · Windows 10 & 11Crashes, No Sound, or Screen Glitches?
Random freezes, missing sound and display glitches usually trace back to one bad driver. Find and replace yours safely.Free scan · under a minuteThe Bottom Line
Design fiber-cement cladding as a ventilated, drained and fire-coordinated assembly. Select the panel and fixing system together, preserve movement and cavity paths, detail every opening and termination, and obtain project-specific structural and fire approval before installation.
Quick Recap

Product prices and availability are accurate as of the date/time indicated and are subject to change. Any price and availability information displayed on Amazon at the time of purchase will apply.

