Free tools Windows power users keep installed
One-click scans. No signup required.
What’s actually slowing this PC down?
Pick the symptom - the matching free tool is one click away.
ThatPainter is reader-supported. When you buy through links on our site, we may earn an affiliate commission. Learn More
Patchy wall paint is not one defect. If the old color shows through, you have poor hiding; if the color is covered but some areas look shinier, you have flashing; darker edges indicate picture framing or hatbanding; and drooping paint is sagging. Identify the appearance first, then correct the surface, tool, film thickness, and drying conditions that caused it. In most cases, the reliable repair is a properly prepared surface, the correct roller nap, paint applied at the label’s spread rate, and another coat after the stated recoat time.
As an Amazon Associate I earn from qualifying purchases.
Identify the defect before opening another can of paint
Walk around the wall in daylight and view it from several angles. A defect that looks like uneven color straight on may actually be an uneven sheen that becomes obvious only when light strikes the wall from the side. Use the symptom—not the assumption that the paint simply needs “more”—to choose the repair.
Recommended Free Tools
| What you see | Likely defect | What usually caused it | Corrective direction |
|---|---|---|---|
| The previous color, substrate, or repaired area remains visible. | Poor hiding | Paint film is too thin, the color change is large, the substrate is porous, or the coating and applicator are unsuitable. | Prime porous areas, use a compatible roller or brush, apply the specified film build, and recoat after the label’s drying time. |
| The wall is covered, but some sections are glossy and others dull. | Flashing | Porosity, uneven film thickness, insufficient film build, moisture or condensation during drying, or temperature changes. | Seal or spot-prime absorbent areas and apply a uniform additional coat when the product instructions allow it. |
| The perimeter or brushed edges look darker or different from the rolled center. | Picture framing or hatbanding | The cut-in and rolled areas have different thicknesses, the wet edge was lost, or paint was not mixed completely. | Keep cut-in narrow, roll close to corners, work in smaller sections, and maintain a wet edge. |
| Runs, curtains, or drooping ridges are visible. | Sagging | Too much paint, cool or humid conditions, over-thinning, a glossy surface, or contamination. | Redistribute wet excess; once dry, sand the defect smooth and apply a new coat at the recommended spread rate. |
These categories come from Sherwin-Williams coating-troubleshooting guidance. The page provides application guidance rather than an independent comparison of paint products, so the label and technical data for your specific coating take precedence.
#1 Best Overall
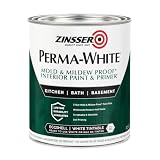
- Self-Priming formula - requires no sanding
- Mold & Mildew-Proof paint film - guaranteed for 5 years
- Resists dirt and moisture on film coating
- Finish is washable and scrubbable with soap and water
- Product contains a mildewcide to prevent the growth of mold and mildew on the paint film only
Plan the repair around the wall and the product label
Map the surface
Mark bare spots, joint-compound patches, glossy sections, and areas where the old color remains visible. Note whether the wall is smooth or textured. A patch can absorb paint at a different rate from surrounding cured paint, which is why a visually small repair can remain obvious after a new coat.
Read the paint and primer directions
Find the product’s required spread rate or film build, drying time, recoat time, acceptable temperature and humidity range, compatible surfaces, and any instruction about thinning. There is no universal coat count or drying interval that works for every interior paint. Do not recoat merely because the surface feels dry; wait for the stated recoat time.
Choose an appropriate roller cover
| Wall surface | Manufacturer guidance | Why it matters |
|---|---|---|
| Smooth | Mohair or a 1/4-inch or 3/8-inch nap is usually sufficient. | A shorter, even nap helps deposit a controlled film without unnecessary texture. |
| Textured | 3/4-inch nap or greater is generally needed. | Longer fibers reach recesses so the coating is not left only on the texture’s peaks. |
Sherwin-Williams gives those nap sizes as general guidance. Confirm that the cover is compatible with your selected coating and the wall’s actual texture; a nap recommendation is not a substitute for the paint label.
The Tool Desk
Outbyte PC Repair FREEClear out junk files and repair common Windows errorsFree Scan →Outbyte Driver Updater FREEScan for outdated or missing drivers - takes under a minuteDriver Scan →Gather only what the repair needs
- The same paint, or a compatible replacement specified for the existing coating.
- A primer suitable for the substrate and topcoat when the wall is bare, patched, or absorbent.
- A roller cover matched to the surface and a brush for controlled cut-in.
- Fine abrasive paper or a sanding tool for cured runs and ridges.
- Clean containers and a stirrer so the coating can be mixed thoroughly.
Fix poor hiding when the old color shows through
Poor hiding means the dried coating does not obscure the color or surface beneath it. A thin application, a dramatic color change, low-hiding paint, the wrong roller or brush, a porous wall, poor flow and leveling, or unauthorized thinning can all contribute. Adding a heavy coat is not the same as applying the correct film build and can create its own sagging problem.
Step 1: Decide whether the surface needs primer
Prime bare, porous, or repaired areas when the product system calls for it. A primer creates a more uniform base so the finish coat is not absorbed differently from one section to another. For a localized repair, spot-prime the patch rather than leaving a high-absorption island under the finish paint.
Rank #2
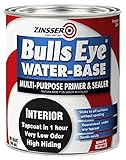
- Use to prime interior surfaces such as walls, doors, trim, plaster, concrete and more
- Water-based low-odor formula provides exceptional stain hiding even on dark or porous surfaces
- Dries to the touch in 30 minutes and covers up to 100 sq. ft. per quart
- Creates a uniform flat-finish surface ideal for top coating
- Adheres to slick surfaces without the need for deglossing or sanding
Where a primer is appropriate, the troubleshooting guidance lists white primer, a color-appropriate P-Shade primer, or a primer shaded toward the topcoat color. Use the option allowed by the primer and finish-paint labels; a tinted primer is not automatically suitable for every coating.
Step 2: Apply the finish coat at its specified film build
Load the roller evenly and distribute paint without stretching it until the cover is nearly dry. Keep the application consistent across adjacent passes. The goal is the label’s spread rate, not the thickest film you can place on the wall.
Step 3: Recoat only after the stated interval
A second or further coat may be necessary, especially after a large color change or over a porous substrate. Wait the product’s specified drying and recoat time, then inspect in the same lighting. Do not assume that one coat must hide every color or substrate.
Step 4: Check the applicator if the problem repeats
An unsuitable nap or brush can leave too little or uneven paint even when the color and primer are correct. For smooth walls, start with the manufacturer’s mohair, 1/4-inch, or 3/8-inch guidance; for textured walls, use the longer nap specified for reaching the profile.
Fix flashing when the sheen is uneven
Flashing is a difference in gloss, sheen, or luster rather than a failure of color to cover. It often appears over joint-compound repairs or other porous areas, where the wall absorbs the coating differently. Uneven film thickness, insufficient film build, moisture or condensation while the paint dries, and temperature fluctuations can also produce it.
Rank #3
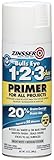
- Interior/exterior use on new or previously painted Drywall, concrete, wood, masonry, metal and glossy or difficult surfaces
- Oil-based formula seals uniformly and will Stick to surface without sanding
- Dries to the touch in just 30 minutes and covers up to 12 sq ft
- Has excellent stain blocking resistance and can be used over any oil or Latex topcoat
- Provides a smooth, White finish and; is designed to block imperfections with only one Coat
Step 1: Locate the porosity difference
Use angled light to identify dull or shiny islands. If the outline matches a patch or bare area, the surface is probably taking up the coating at a different rate from the surrounding wall.
Quick wins for a faster PC:
Clear out junk files and repair common Windows errorsFree Scan →Fix the driver behind crashes, sound loss and screen glitchesFind Drivers →Step 2: Seal or spot-prime the affected area
Use a primer or sealer suited to both the substrate and the topcoat. Spot-priming reduces the contrast between an absorbent patch and the existing painted surface. Let the primer dry for the time on its label.
Step 3: Recoat the wall uniformly
Apply the finish paint at the specified film build with the correct applicator. If the product instructions permit, an additional coat can even out the sheen. Maintain the environmental conditions listed for the coating; condensation or a rapid temperature change during drying can undermine an otherwise uniform application.
Step 4: Judge the result only after the coating has cured as directed
Wet paint can look glossier than the final film. Inspect after the label’s drying or curing guidance, using consistent lighting and viewing angles.
Fix darker edges and a different-looking center
Picture framing, also called hatbanding, occurs when brush-cut edges do not match the roller-applied center. The visible difference comes from non-uniform color or film thickness, losing the wet edge, or incompletely mixed paint.
Rank #4
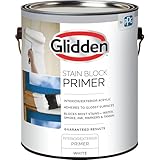
- Interior/exterior acrylic primer
- Adheres to glossy surfaces
- Blocks most stains- water, smoke, ink, markers and tannins
- May be topcoated in 1 hour
- Soap & water clean up
Use a section-by-section workflow
- Mix the paint thoroughly before beginning and again as directed during use.
- Work on a manageable wall section instead of cutting in the entire room first.
- Brush a narrow band at the corner, ceiling, trim, or adjacent wall.
- While that band is still workable, roll the field and bring the roller close to the corner.
- Overlap each fresh section into the previous one while its edge remains wet.
- Finish with light, even passes in the same direction without repeatedly working paint that has begun to set.
A wide brushed strip creates a larger area with a different texture and thickness. Keeping it narrow and rolling near the corner lets the brushed and rolled films merge visually.
Independent reader supportYour contribution helps us test, update, and keep practical guides available for everyone.Fix runs and drooping paint
Sagging is a physical film defect: paint has flowed downward and dried in a curtain, ridge, or drip. Heavy application, cool or humid conditions, over-thinning, glossy surfaces, and contaminants are listed causes.
If the paint is still wet
Redistribute the excess with a brush or roller. Work the run into the surrounding paint with controlled passes rather than adding more material. Correct the application rate and check that the room and surface meet the product’s stated environmental conditions.
If the sag has dried
- Allow the coating to dry for the period required by its label.
- Sand the ridge or curtain until the surface is smooth and the transition is feathered.
- Remove sanding residue without leaving contamination on the repair.
- Apply a new coat at the recommended spread rate with the correct applicator.
Do not try to bury a cured sag under one unusually heavy coat. Sherwin-Williams advises two coats at the recommended spread rate instead of one heavy coat when correcting this type of problem, subject to the product label.
Do not thin by guesswork
Over-thinning can contribute to sagging and poor hiding. Thin only when the coating label expressly permits it and specifies how; otherwise use the paint as supplied.
Best Value
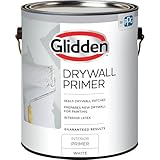
- Seals drywall patches
- Prepares new drywall for painting
- Interior latex
- Soap and water clean up
A controlled application sequence for the final coat
- Condition check: Confirm that the wall, room, and paint meet the product’s stated requirements for temperature, humidity, moisture, and ventilation.
- Surface check: Prime or seal bare and porous areas, and make sure any sanded repair is smooth and clean.
- Mix: Thoroughly mix the paint so color and solids are distributed consistently.
- Set the section: Choose a small working area that you can complete while maintaining a wet edge.
- Cut in narrowly: Brush only the edge needed for the section, not the entire room in advance.
- Roll consistently: Use the nap suited to the wall, keep pressure even, and apply the label’s film build.
- Join wet edges: Overlap the next section before the previous edge dries.
- Stop overworking: Once the film begins to set, leave it alone rather than creating a patch of different texture.
- Recoat on schedule: Wait the specified recoat time, then decide whether another coat is appropriate.
When the first repair does not solve the problem
The old color still shows
Check that the primer was compatible and that porous areas were actually sealed. Verify the roller nap and the finish coat’s spread rate. A large color change may require another properly applied coat; there is no universal number that guarantees coverage.
The wall is covered but still flashes
Look for an unsealed patch, an uneven film, or drying conditions outside the product’s instructions. Spot-prime the absorbent area and recoat uniformly rather than repeatedly touching only the visible spot.
The perimeter is still darker
Reduce the brushed band, roll closer to the corner, mix the paint again, and divide the wall into smaller sections so each joint remains wet. If the center and edge have different textures, a full uniform coat is more reliable than isolated touch-ups.
Runs return
Reduce the amount of paint on each pass, avoid unauthorized thinning, and correct cool or humid conditions if the label identifies them as unsuitable. Sand cured runs before recoating; do not bury them under a heavy application.
Quick Recap
Common mistakes that make patchiness worse
- Choosing a coat count in advance: Coverage depends on the color change, substrate, coating, film build, and applicator. Follow the product directions and inspect between coats.
- Using one roller nap everywhere: A short nap that works on a smooth wall may not reach a textured profile; an overly long nap can leave unwanted texture on a smooth surface.
- Painting over unprimed patches: Different absorption can remain visible as flashing even when the color is correct.
- Cutting in the whole room first: The edges may dry before the center is rolled, creating a visible band.
- Stretching paint too far: A film that is too thin may not hide the underlying color or produce a consistent sheen.
- Thinning without label approval: Added liquid can reduce hiding and encourage sagging.
- Touching up only the shiny or dull spot: The new film may create another sheen boundary. Correct the cause and apply a uniform coat where the product instructions call for one.
- Repainting before the stated recoat time: The underlying film may not be ready to accept another coat, particularly in cool or humid conditions.
Quick decision checklist
- If you can see the previous color: treat it as poor hiding; check porosity, primer, applicator, film build, and color change.
- If the wall is covered but reflects light unevenly: treat it as flashing; seal or spot-prime absorbent areas and control drying conditions.
- If only the edges differ from the center: treat it as picture framing; narrow the cut-in and maintain a wet edge.
- If paint has flowed downward: treat it as sagging; redistribute wet paint or sand cured defects before recoating.
- For every defect: use the paint and primer labels for spread rate, compatible surfaces, environmental limits, drying time, and recoat time.

Product prices and availability are accurate as of the date/time indicated and are subject to change. Any price and availability information displayed on Amazon at the time of purchase will apply.

