Quick wins for a faster PC:
What’s actually slowing this PC down?
Pick the symptom - the matching free tool is one click away.
Clear out junk files and repair common Windows errorsFree Scan →Scan for outdated or missing drivers - takes under a minuteDriver Scan →
ThatPainter is reader-supported. When you buy through links on our site, we may earn an affiliate commission. Learn More
Foundation paper piecing (FPP) means sewing fabric to a numbered paper foundation, one section at a time. The completed fabric unit is a mirror image of the printed pattern, so placement is checked from the paper’s reverse side while stitching is done with the marked side facing up. Print the template accurately, oversize every fabric piece, sew the numbered lines in order, press and trim after each seam, then remove the paper carefully.
What you need
- Sewing machine, quilting cotton or scraps, thread, pins, cutting mat, rotary cutter, ruler and iron
- A foundation pattern printed or traced with all lines, numbers and registration dots
- Temporary foundation paper such as tracing paper, lightweight newsprint, translucent vellum, wash-away paper, tear-away stabilizer or ordinary typing paper
- Optional permanent foundation materials such as muslin, flannel or sheer cut-away stabilizer
- Glue stick or tape, seam ripper and tweezers
- An Add-A-Quarter ruler, or an ordinary ruler with a clear 1/4-inch mark
1. Print and prepare the foundation
Print the pattern at 100% (often labeled “Actual size” or “Do not scale”). If it includes a test square, measure that square before cutting anything. A wrong print scale changes every finished measurement.


As an Amazon Associate I earn from qualifying purchases.
Trace the design if necessary, transferring every section line, number and dot. Cut the paper roughly 1/4 inch outside the pattern’s dashed outer line. Leave the final seam allowance intact; you will trim the block precisely after all sections are sewn.
Understand the two sides
The printed side carries the sewing lines. Fabric is placed against the unprinted side. Because the finished block reverses the drawing, a directional print or angled stripe must be positioned as a mirror image of how you want it to appear on the finished front.
#1 Best Overall
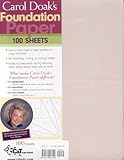
- High-Quality Foundation Paper: 100 sheets of 8.5" x 11" foundation paper designed for quilting and sewing projects
- Printer Compatibility: Compatible with inkjet and laser printers as well as most home and office printers for easy printing
- Durable and Stable Material: No shrinking, curling, or brittleness - durable paper for stitching and easy removal after use
- Versatile Sewing Applications: Suitable for paper piecing, applique, and other sewing techniques with professional quality results for crafters
- Safe and Biodegradable: Acid-free and biodegradable paper that is safe for long-term storage
2. Cut fabric with a safety margin
Rough-cut each numbered fabric piece at least 1/4 inch larger than its paper section on every side. A 1/2- to 3/4-inch margin is safer, especially for beginners or sharply angled sections. FPP stabilizes the fabric, so you do not need to align every piece perfectly with the grain.
| Cutting choice | When it helps | Trade-off |
|---|---|---|
| 1/4 inch extra | Experienced sewing and simple shapes | Little room for placement error |
| 1/2 inch extra | Most everyday blocks | Uses a little more fabric |
| 3/4 inch extra | Large angles, bias edges or first attempts | More trimming waste, but the safest coverage |
3. Place section 1
Lay the foundation unprinted-side up. Put fabric piece 1 right-side out against that side of the paper. It must cover the entire section and extend beyond every boundary line, including the seam allowance. Hold it with a pin outside the stitching path or a small dab of glue.
Windows Errors? Fix Them Before They Spread
Repair common Windows errors and clear accumulated junk for a smoother, more stable PC - no reinstall needed.Free scan · no reinstallCrashes, No Sound, or Screen Glitches?
Random freezes, missing sound and display glitches usually trace back to one bad driver. Find and replace yours safely.Free scan · under a minuteHold the paper and fabric toward a window or lightbox if you cannot see the coverage clearly. Do not rely on the printed side alone: the fabric is being positioned on the reverse.
4. Add section 2 and check the coverage
Place fabric piece 2 right-sides together with piece 1, aligning the edge that will form the seam. Keep the paper folded on the line between sections 1 and 2 and hold it up to the light. When the seam is sewn and the fabric is opened, piece 2 must cover all of section 2 and leave a seam allowance beyond its outer edge.
A reliable fold-back check
- Fold the paper sharply on the printed seam line.
- Position the new fabric under the fold, right sides together with the previous piece.
- Open the paper without shifting the fabric and confirm that the new piece reaches beyond the whole next section.
5. Sew exactly on the printed line
Turn the foundation printed-side up. Stitch directly on the line separating sections 1 and 2. Use a short stitch: about 1.5-1.8 mm, or approximately 12-18 stitches per inch. Cotton + Joy recommends 1.5-1.8 mm; AllPeopleQuilt gives 12-16 stitches per inch and pairs that range with a size 90/14 needle; Urban Loon gives 14-18 stitches per inch. Short stitches secure the seam and perforate the paper so it tears away more easily later.
Begin and end according to the pattern’s seam-start guidance. If none is given, sew a few stitches beyond the line into the seam allowance rather than stopping exactly at the endpoints. Keep the needle down when you need to pivot or reposition the paper.
6. Press open and trim after every seam
Open piece 2 and press it flat, away from the seam. Pressing prevents tucks and makes the next placement accurate. Fold the paper back on the sewn line, then trim the fabric excess to about a 1/4-inch seam allowance. An Add-A-Quarter ruler creates this allowance quickly; a standard ruler works if its 1/4-inch mark is kept against the folded paper edge.
Cut the fabric, not the paper. The newly trimmed edge is now the reference edge for the next numbered piece.
Rank #3

- Each sheet produces a single 6-inch Woven Star Quilt Block
- Paper designed for easy sewing and tearing
- Shaded diagrams for clear color placement
- Includes fabric cut sizes
- Includes quilt layout guide
7. Repeat the numbered sequence
Continue with sections 3, 4 and onward in numerical order. Every section follows the same cycle:
- Place the next fabric right-sides together with the sewn unit.
- Fold the paper on the next printed seam and verify full coverage.
- Turn the paper printed-side up and stitch the line with the short stitch length.
- Press the new fabric open.
- Fold back on the sewn line and trim to a 1/4-inch seam allowance.
Do not skip the coverage check. The most common FPP failure is discovering after sewing that the next piece was too small.
Recommended Free Tools
8. Trim the completed block
When every numbered section is sewn and pressed, trim the fabric and paper together on the final dashed outer line. Preserve the pattern’s required outer seam allowance; trimming inside that line can make the block undersized.
If the design contains multiple FPP units, you can join them with their paper still attached. The paper can help keep bias edges stable and preserve the exact shape. Remove it after the units are joined if that gives you better alignment.
9. Remove the paper without loosening stitches
Start at the outside edges or the center, whichever gives the easiest access, and tear slowly along the perforated stitch lines. Pull in the direction of the stitches rather than straight up. Use tweezers for small fragments.
If the paper resists, lightly mist it, score along the stitch line with a pin or seam-ripper tip, and try again. Avoid forceful tugging, which can pull out stitches. Permanent foundations such as muslin or cut-away stabilizer are not meant to be removed; trim their excess according to the pattern’s instructions.
Foundation materials: which type suits your block?
| Foundation | Removal and visibility | Best use |
|---|---|---|
| Tracing paper, newsprint, vellum or typing paper | Temporary; transparency ranges from good to moderate; tears after short stitching | General-purpose blocks and easy pattern tracing |
| Wash-away paper | Dissolves with water; print accuracy depends on the product and printer | Intricate blocks where picking out paper is difficult |
| Tear-away stabilizer | Temporary and generally easy to remove; can be less transparent than vellum | Stabilizing delicate or tightly pieced work |
| Freezer paper | Can adhere temporarily and is often repositionable; removal and printer compatibility vary | Situations where holding the foundation in place is useful |
| Muslin, flannel or sheer cut-away stabilizer | Permanent; no paper removal, but adds a layer to the finished unit | Blocks that need lasting stabilization |
Troubleshooting common mistakes
A section is not covered
Stop before trimming the seam allowance. If the fabric does not extend beyond every edge of the next section, unpick the seam and replace that piece with a larger cut. For future pieces, use the fold-back or lightbox check before sewing.
The fabric is right-side/wrong-side reversed
FPP’s reverse-side placement makes orientation easy to misread. Check the fabric on the unprinted side before stitching, and remember that the finished design mirrors the paper. If the mistake is sewn, remove only the affected seam and replace the piece.
Best Value
A seam is crooked or in the wrong place
Use a seam ripper to cut a few stitches at intervals, then gently pull the intervening threads. Working in short sections reduces the chance of tearing the paper.
Tucks or ripples appear
Press each piece fully open after sewing. Tucks usually mean the fabric was not opened completely or the seam allowance was not trimmed before the next piece was added.
Crashes, No Sound, or Screen Glitches?
Random freezes, missing sound and display glitches usually trace back to one bad driver. Find and replace yours safely.Free scan · under a minuteWindows Errors? Fix Them Before They Spread
Repair common Windows errors and clear accumulated junk for a smoother, more stable PC - no reinstall needed.Free scan · no reinstallThe paper will not tear cleanly
Confirm that the stitch length is short enough, score the line with a pin, lightly mist the paper, and remove fragments with tweezers. Do not yank on a stubborn section.
Quick Recap
A quick pre-sewing checklist
- Pattern printed at 100% and test square measured
- Paper cut outside the dashed outer line
- Fabric pieces cut at least 1/4 inch oversize, preferably 1/2-3/4 inch for safety
- Section 1 placed on the unprinted side, right side of fabric facing out
- Next piece checked by folding the paper on its seam line
- Stitch length set to about 1.5-1.8 mm (12-18 stitches per inch)
- Every seam pressed open and trimmed to 1/4 inch before the next number
- Final trim made on the outer dashed line before paper removal

Product prices and availability are accurate as of the date/time indicated and are subject to change. Any price and availability information displayed on Amazon at the time of purchase will apply.




