Do these 3 things before closing this tab:
1Fix the driver behind crashes, sound loss and screen glitches2Clear out junk files and repair common Windows errors3Scan for outdated or missing drivers - takes under a minute
ThatPainter is reader-supported. When you buy through links on our site, we may earn an affiliate commission. Learn More
The dependable way to improve drainage behind a retaining wall is to give water a continuous, filtered path down to a perforated collector pipe and then to a legal, working outlet. A typical assembly uses specified free-draining rock, a suitable nonwoven geotextile separator, and a perforated pipe near the wall base. The exact width, pipe size, slope, outlet and structural details must follow the wall’s approved design and local requirements; the dimensions below are examples from particular government and geotechnical documents, not universal rules.
Why drainage is part of retaining-wall safety
Soil exerts pressure on a wall even when it is relatively dry. Water trapped in the backfill adds hydrostatic pressure, which can be substantial because it acts across the entire submerged area. A wall that was adequate for its soil and expected surcharge can crack, rotate, bulge or slide when water has nowhere to go. Snohomish County’s retaining-wall guidance states plainly that a drainage system is a necessary component of retaining-wall design.
As an Amazon Associate I earn from qualifying purchases.
Free tools Windows power users keep installed
One-click scans. No signup required.
Drainage is therefore more than a landscaping improvement. It is one part of the structural load path, alongside the wall type, footing, reinforcement, retained slope, soil strength, groundwater, nearby structures and any surcharge such as vehicles, buildings, fences or stored materials. Improving one part without checking the others can create a dangerous false sense of security.
The assembly described here is most straightforward for a new wall. An existing wall may be carrying load already, and excavating behind it can remove the support that keeps it stable. Treat a retrofit as an engineering and construction project, not as a routine weekend trench.
#1 Best Overall
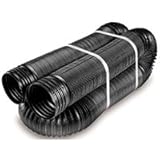
- Pipe unfolds and expands from 2 to 25-feet
- Perforated pipe is for ground water drainage (French drains, dispersing water from flower beds)
- Exceeds all applicable ASTM Standards
- Compatible with most traditional 3-in. and 4-in. corrugated pipe and 4 in. PVC
- 30-Percent higher load-bearing rating than standard corrugated pipe
What a typical drainage assembly contains
Viewed from the retained soil toward the wall, a common arrangement is a soil separator or filter, a continuous zone of free-draining aggregate, and a perforated collector pipe at the bottom. Water enters the permeable zone, travels downward, enters the pipe and flows by gravity to an approved discharge point. The details must remain continuous; a gap in the rock, a clogged filter or a pipe that ends in a blocked outlet defeats the system.
| Part | Function | Documented examples and limits |
|---|---|---|
| Free-draining rock | Provides open voids so water can move down instead of pressing against the wall. | Snohomish County homeowner guidance calls for at least 1 foot of washed drain rock. Other project reports specify their own widths, heights and aggregate gradations. |
| Nonwoven geotextile separator/filter | Separates native soil from the aggregate and limits migration of fine particles that can clog the drainage path. | Place and wrap it as the approved detail shows. A generic landscape fabric is not automatically equivalent to a specified nonwoven filter. |
| Perforated collector pipe | Collects water at the base of the drainage zone and conveys it to the outlet. | The cited recommendations commonly use perforated PVC at least 4 inches in diameter. Hole orientation differs by document, so follow the pipe instructions and engineered detail. |
| Solid outlet pipe and discharge point | Carries collected water away without allowing it to soak back against the wall. | The outlet must be legally permitted, protected from blockage and able to accept the expected flow. A submerged or unauthorized discharge is not a dependable outlet. |
| Cleanout (when specified) | Provides access to inspect or flush a pipe run. | GeoEngineers project guidance calls for a cleanout riser at the upper end of each run. Include one only where the approved design requires it, and keep it accessible. |
Washed aggregate is important because excessive fines can fill the voids that make the drainage layer work. Use the gradation and dimensions on the approved plans or geotechnical recommendations rather than substituting whatever gravel is most convenient.
Free tools Windows power users keep installed
One-click scans. No signup required.
Check the site before choosing a fix
Drainage cannot be designed responsibly from wall height alone. Assemble the following information before ordering materials or starting excavation:
- Wall construction: Identify whether it is segmental block, cast-in-place concrete, masonry, timber, crib, gabion or another system. Each has different details for backfill, reinforcement, pipe placement and allowable excavation.
- Geometry and loading: Record exposed height, wall length, batter, retained slope and what is above the wall. A driveway, building, pool, fence footing or stacked materials can add surcharge.
- Ground conditions: Note native soil type, visible seepage, seasonal groundwater, springs and any history of settlement or landslides. The same pipe arrangement is not suitable for every soil or groundwater condition.
- Available working room: Measure the space behind the wall and identify property lines, trees, foundations and access limits. A conventional gravel zone may not fit.
- Utilities and existing drainage: Locate buried power, gas, water, communications, irrigation, septic components and other pipes before digging.
- Approved documents and jurisdiction: Find the wall drawings, permit conditions and local drainage or grading rules. Some authorities restrict pipe materials, discharge locations or work near property boundaries.
- Outlet route: Determine where water can travel by gravity without eroding a slope, flooding a neighbor, entering a foundation or discharging onto a public way without permission.
Snohomish County recommends using a design professional to determine site-specific drainage features and the outlet. That recommendation is especially important when the wall is tall, supports a structure or roadway, shows movement, or sits where an outlet is not obvious.
How to build the drainage system for a new wall
Use the sequence below as an explanation of a typical assembly, not as a substitute for the wall’s approved detail. The dimensions, pipe material, filter specification, outlet and construction tolerances belong to the project design.
- Confirm the design and discharge permission. Verify the wall section, drainage detail, pipe route, cleanout locations, aggregate specification and outlet with the designer or building authority. Do not begin until the discharge destination is acceptable.
- Prepare a stable excavation. Excavate only as far as the design and site safety plan allow. Keep spoil piles, equipment and construction traffic away from the excavation edge so they do not add unplanned surcharge. Protect workers from cave-in hazards and maintain utility clearances.
- Install the wall foundation and wall elements to the approved detail. Drainage cannot compensate for an inadequate footing, reinforcement system or bearing surface. Build the structural portion in the order required by the wall manufacturer or engineer.
- Place the soil separator. Install the specified nonwoven geotextile between native soil and the drainage aggregate. Extend and overlap it as detailed so surrounding fines cannot bypass the filter. If the design wraps the aggregate, keep the fabric continuous around the sides and top as shown.
- Form the free-draining zone. Place the specified washed rock or drainage aggregate in the required width behind the wall. Snohomish County’s homeowner example uses at least 1 foot; an ENGEO project recommendation also describes at least 12 inches of specified rock. These figures apply to those documents, not automatically to every wall. Keep soil, concrete slurry and construction debris out of the voids.
- Set the perforated base pipe. Install the collector near the bottom of the drainage zone with the diameter, material, bedding and perforation orientation shown on the approved detail. Four-inch perforated PVC is a common recommendation in the cited guidance. Some geotechnical details place holes facing down, while the Snohomish County page does not state an orientation; follow the project instruction rather than assuming one arrangement is universal.
- Maintain a continuous gradient. The pipe must have a positive route toward the outlet with no sags that can hold sediment or water. One GeoEngineers report specifies a minimum slope of 0.25 percent; another geotechnical report gives a 1 percent gradient. Those are examples from separate projects, not a single nationwide requirement. Set the grade with a level or surveying method appropriate to the project.
- Connect to the outlet system. Transition from the perforated collector to solid pipe where the design indicates, then carry water to the approved discharge point. Protect the outlet against crushing, sediment, animal entry and erosion. Do not simply terminate the pipe in backfill, a footing trench, a neighboring property or a permanently submerged location.
- Install cleanouts where required. Bring a cleanout riser to an accessible location at the upper end of each run when the design calls for one. Fit a secure cover that can be found and removed for inspection without dismantling the wall or landscape.
- Backfill in controlled lifts. Place drainage aggregate and other backfill in the sequence and lift thickness specified for the wall. Avoid pushing heavy equipment directly against the wall unless the design permits it. Keep the filter in place as backfill rises so soil does not contaminate the rock.
- Finish the surface drainage. Grade soil and paving so rainfall flows away from the wall or into the separate system shown on the plans. Seal or protect the top of the drainage zone as specified; do not allow loose fines and mulch to wash into the rock.
- Document the installation. Photograph pipe elevations, outlet connections, cleanouts and filter placement before they are covered. Record material specifications and inspection approvals for future maintenance or property work.
Choose and protect the outlet
A drainage pipe is only as effective as its outlet. Before construction, trace the entire route from the wall to the final receiving system. Depending on the site and local rules, that may be a permitted daylight outlet, a stormwater system connection, a swale, a dispersion area or a sump-and-pump arrangement. The receiving point must have enough capacity and must not create erosion, nuisance flow or a new hazard.
Do not infer that a cited slope is a code minimum for your location. The 0.25-percent example from GeoEngineers and the 1-percent example in an ENGEO recommendation show why project documents differ. Pipe diameter, length, roughness, expected inflow, cleanouts, outlet protection and local standards all affect the design.
Where gravity discharge is impossible, a designer may specify a collector leading to a sump and pump. That changes the reliability and maintenance requirements: the sump needs access, power, a properly sized pump, an alarm or backup strategy where required, and a discharge route that remains legal during a power outage or equipment failure. Do not convert a gravity system to a pump system without a design review.
Control water before it reaches the wall
Subsurface drainage handles water that reaches the drainage zone; it should not be treated as the site’s universal storm drain. Concentrated inflows can overwhelm the pipe or saturate the retained soil.
Rank #2

- Superior Filtration: Prevents Clogging.Drain Filter sock Equipped with a precision-woven mesh, our French drain filter sleeve ensures unobstructed water flow while effectively trapping soil, sediment, sand, silt, and small stones. By blocking debris from entering pipes, it prevents stubborn clogs, reduces internal buildup over time, and maintains consistent drainage performance—saving you time and money on costly pipe repairs
- Elastic & Easy to Install: Durable Polyester. French drain fabric is crafted from high-quality synthetic polyester, this drainage filter fabric boasts exceptional wear resistance and longevity, standing up to harsh underground conditions. Its elastic design allows for hassle-free installation: simply slide the sleeve over your 4-inch pipe and stretch it to the desired length. It fits snugly against pipe surfaces without tearing or slipping, ensuring reliable protection
- Suitable for 4-inch pipe: This package comes with one roll of 4" x 50' drain pipe filter sleeve, tailor-made for pipes with a 4-inch diameter. The 50-foot length provides abundant material to cover various drainage needs, making it a go-to solution for both small residential tasks and large-scale commercial or construction projects—no need for frequent repurchases
- Broad Compatibility: Designed specifically for 4-inch diameter piping systems, this filter sleeve is compatible with a wide range of pipe materials, including PVC, concrete, metal, and plastic. Whether you’re working on a new drainage setup or upgrading an existing one, it offers the flexibility to fit your project’s specific pipe type
- Versatile Applications: Perfect for residential, commercial, agricultural, and construction environments, this drain pipe filter sleeve delivers consistent performance across uses. Filter fabric for drainage is an essential addition to French drains, septic systems, subsurface drainage, garden drainage, and more—providing reliable filtration no matter the application or conditions
Roof and downspout runoff
Route downspouts through a separate pipe system or approved stormwater feature when the design calls for it. A GeoEngineers report recommends separate systems for downspout water rather than sending roof runoff into the retaining-wall subdrain. Keep discharge away from the crest and the backfill unless an engineer has designed that arrangement.
Recommended Free Tools
Surface grading and paving
Shape the ground above the wall so ordinary rain does not pond at the crest. Inspect paving joints, channel drains and swales for blockages. A small depression that repeatedly holds water can add more load than a brief storm that sheds cleanly away.
Irrigation and landscape maintenance
Texas Department of Transportation guidance cautions that extensive landscape watering can increase hydrostatic pressure and calls for additional drainage measures when heavy irrigation is anticipated. Use irrigation zones that do not saturate the backfill, repair broken emitters promptly and avoid planting or edging practices that puncture the filter or outlet pipe.
Options when there is not enough room for a gravel zone
Space constraints do not justify omitting drainage. They may require a different, project-specific detail.
Geocomposite or panel drains
A geocomposite drain or drainage panel can provide a thinner water path where a conventional aggregate zone will not fit. The cited project guidance treats these systems as alternatives subject to designer or governing-agency review. Flow capacity, compressive strength, filter compatibility, laps, terminations and connection to the base collector all matter. Do not attach a thin panel to an existing wall and assume it replaces a designed gravel-and-pipe assembly.
Gravel pockets and weep holes
One geotechnical report describes gravel pockets connected to weep holes, with a collector conveying water onward, for situations in which the standard system cannot fit. The report provides example dimensions and spacing but expressly requires approval by the retaining-wall designer. Weep holes that discharge onto a walkway, slope or neighboring property can create new erosion and safety problems, so their location and outlet protection must be designed.
Designing the wall for water pressure
If drainage cannot be provided, the wall may instead be designed to resist hydrostatic pressure in addition to earth pressure. This is a structural design choice that can change wall thickness, reinforcement, footing and cost. It is not a homeowner workaround for a missing drain.
Independent reader supportYour contribution helps us test, update, and keep practical guides available for everyone.Approach an existing wall differently
Signs that water or movement may be affecting an existing wall include new horizontal or diagonal cracks, bulging, tilting, displaced blocks, widening joints, sinkholes behind the wall, persistent wet spots, muddy discharge, or doors, paving and fences moving near the wall. If movement is accelerating, keep people and heavy loads away from the area and obtain an urgent assessment.
Do not excavate a trench immediately behind a loaded wall as a casual fix. Removing backfill can reduce the lateral support that is temporarily keeping a failing wall upright; vibration from machinery can worsen the condition. A qualified engineer or experienced retaining-wall contractor may need to shore the wall, expose limited areas in stages, intercept water uphill, or design a new drainage and structural system. The safe sequence depends on the actual wall and ground conditions, so there is no universal retrofit procedure.
What’s actually slowing this PC down?
Pick the symptom - the matching free tool is one click away.
Rank #3

- Effective Filtration for Drainage Systems: This French drain fabric features a precision-knitted mesh structure designed to allow water to flow through while blocking soil sand silt and fine debris from entering perforated pipes; Helps reduce clogging and sediment buildup over time supporting consistent drainage performance
- Compatible with 4-Inch Pipes: This drain sock is specifically sized for 4-inch diameter pipes; The roll provides 100 feet in length offering sufficient material for residential drainage projects French drain installations or landscape grading tasks without the need for frequent repurchases
- Durable Construction: Crafted from white polyester knit fabric with a weight of 200 grams this filter sleeve is designed to resist tearing during installation; The material also offers resistance to rot mildew and biological degradation when buried in underground or outdoor conditions
- Elastic and Easy to Install: The knitted fabric has a flexible; stretchable design that slides over pipes much like a compression sock; It conforms to pipe surfaces without the need for special tools or adhesives and can be trimmed to the desired length with standard scissors for customized fitting
- Broad Application Scenarios: Suitable for use with various pipe materials including PVC concrete metal and corrugated drainage pipes; This filter fabric is applicable in French drains septic systems subsurface drainage garden landscaping and construction site water management projects
Sometimes the least invasive first step is to stop an identifiable water source: repair a leaking supply line, redirect a downspout, fix an irrigation valve or clear a blocked surface drain. That can reduce new inflow while a permanent assessment is arranged, but it does not prove that the wall’s hidden drainage is adequate.
Inspection and maintenance after installation
Keep cleanouts, outlet ends and inspection points visible and reachable. After major storms, look for flowing water at the intended outlet, erosion around the discharge, sediment buildup, crushed pipe, blocked grates or new wet areas behind the wall. An outlet that is dry during a dry period is not evidence of failure; compare its behavior with weather and groundwater conditions.
- Remove leaves, mulch and sediment from surface inlets before they wash toward the wall.
- Keep vegetation roots, stakes and fence posts out of the drainage zone unless the design specifically allows them.
- Do not seal a weep hole or cover a cleanout with an immovable deck, paving slab or shed.
- Repair erosion at the outlet with a designed protection measure rather than simply extending loose pipe across a slope.
- Have a professional inspect unexplained changes in wall alignment, cracking, seepage or settlement before making cosmetic repairs.
Flushing or jetting a pipe should be done only when the pipe, connections and outlet can tolerate it. High-pressure cleaning can dislodge poorly supported fittings or force water into the backfill.
How to decide which drainage approach fits
| Site condition | Likely direction | What must be verified |
|---|---|---|
| New wall with adequate room behind it | Conventional filtered aggregate zone and base perforated collector. | Rock gradation and width, pipe size and orientation, slope, outlet and cleanout details. |
| Restricted space between wall and property line or structure | Geocomposite/panel drain or another thin engineered detail. | Designer or agency approval, product performance, filter continuity and connection to the outlet. |
| No practical gravity outlet | Designed collector-to-sump arrangement or another approved discharge strategy. | Pump capacity, power, alarms or backup, maintenance access and legal discharge. |
| Existing wall with movement or uncertain construction | Assessment and staged repair; avoid unplanned excavation. | Wall stability, temporary support, utilities, groundwater and a safe construction sequence. |
| Heavy roof runoff or irrigation near the crest | Separate surface-water controls plus the wall drainage system. | Downspout routing, grading, irrigation volume and erosion protection. |
| Drainage intentionally omitted | Wall designed structurally for earth and hydrostatic pressures. | Stamped design assumptions, groundwater conditions, surcharge and local approvals. |
Common mistakes that cause drainage systems to fail
Treating one dimension as a code rule
One foot of washed rock and a 4-inch perforated pipe appear in Snohomish County guidance, while project reports use their own widths and slopes. Copying those numbers onto a different wall can produce an undersized or incompatible system. Use them as examples and follow the approved detail for your site.
Do these 3 things before closing this tab:
1Fix the driver behind crashes, sound loss and screen glitches2Repair Windows errors before they cause bigger problems3Scan for outdated or missing drivers - takes under a minuteUsing the wrong fabric
Fabric that clogs quickly, tears during backfill or allows fines to pass can close the aggregate’s flow paths. The specification should identify a suitable nonwoven geotextile and its placement. “Landscape fabric” is a broad retail description, not a performance specification.
Leaving the pipe without a real outlet
A perforated pipe that ends in compacted soil, a blocked fitting or standing water cannot relieve pressure reliably. Trace the route and verify the discharge before covering the system.
Mixing roof water into the wall drain
Downspouts can deliver concentrated flows during storms. Unless the design expressly allows it, keep roof drainage separate and send it to an approved stormwater destination.
Blocking access
Burying a cleanout under paving or a permanent structure turns a maintainable system into an inaccessible one. Keep covers marked and reachable.
Excavating behind a loaded wall without a plan
The apparent shortest route to add a drain may remove the wall’s support or destabilize the slope. Obtain a site-specific method before exposing the back of an existing wall.
Questions to settle with the designer or authority
- What wall and soil assumptions control the drainage detail?
- How wide and how high must the specified aggregate zone be?
- Which nonwoven geotextile, pipe material, diameter and perforation orientation are approved?
- What minimum slope applies to this pipe run, and how will grade be checked?
- Where can the water discharge legally, and what outlet protection is required?
- Is a cleanout, inspection port, sump or pump required?
- How should roof runoff, irrigation and groundwater be managed separately?
- What temporary support and excavation limits apply if the wall already exists?
Answering these questions before construction prevents the most expensive error: installing a visible pipe or layer of gravel that is disconnected from the structural and surface-water design.
Quick Recap

Product prices and availability are accurate as of the date/time indicated and are subject to change. Any price and availability information displayed on Amazon at the time of purchase will apply.

