Do these 3 things before closing this tab:
The Tool Desk
Outbyte PC Repair FREERepair Windows errors before they cause bigger problemsFix Now →Outbyte Driver Updater FREEFix the driver behind crashes, sound loss and screen glitchesFind Drivers →1Scan for outdated or missing drivers - takes under a minute2Clear out junk files and repair common Windows errors3Fix the driver behind crashes, sound loss and screen glitches
ThatPainter is reader-supported. When you buy through links on our site, we may earn an affiliate commission. Learn More
Install a window air conditioner only after confirming that the window, building, support hardware and electrical circuit can carry it safely. The reliable sequence is: verify the opening and permissions, read the exact model manual, attach an independent support, connect only to a suitable outlet, lift with help, secure the sash, level the cabinet, slope condensate outdoors, seal every gap, and test before leaving the unit running.
A correctly installed unit should remain stable in wind and vibration, discharge water outside, maintain an airtight seal, and operate without overheating the plug or tripping the breaker. These eight tips explain how to reach that result and what to do when something is wrong.
As an Amazon Associate I earn from qualifying purchases.
What’s actually slowing this PC down?
Pick the symptom - the matching free tool is one click away.
1. Check the window, frame, outlet and permissions first
Do not begin by carrying the air conditioner to the window. Start with a compatibility check while the unit is still on the floor. Window air conditioners are single-phase, encased appliances intended for window or through-wall mounting. The opening, structure and electrical service must all suit the particular model.
Inspect the opening and structure
- Measure the clear opening exactly as the installation manual instructs. Record width, height and any sill or track depth that affects how the cabinet sits.
- Identify the window type. A double-hung, sliding, casement or unusually deep frame may require a different mounting method, and some models are not approved for every design.
- Check the sill, jambs, sash and surrounding trim for rot, cracks, loose fasteners or movement. A strong air-conditioner bracket cannot compensate for a failing frame.
- Confirm that the window can open far enough for the specified minimum opening and that the unit will not obstruct an emergency exit or violate a fire-safety rule.
Confirm permission and electrical reach
In a rental, condominium or managed building, obtain written permission before installing anything that bears on the exterior or requires brackets. Local rules can require a particular support system or prohibit units on certain facades.
#1 Best Overall
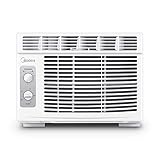
- PERFECT FOR SMALLER ROOMS - Midea's Affordable Window AC unit is perfect to help your room be as comfortable as possible. It can cool 150 sq. ft. with 7 temperature settings, 2 cooling/2 fan-only speeds, and 2-way air direction to give you the perfect amount of cooling every time.
- ENERGY EFFICIENT- Midea's 5,000 BTU window air conditioner has a Combined Energy Efficiency Rate (CEER) of 11.0 which helps reduce the energy costs to save you money throughout the year.
- QUIET & EASY TO USE - This window AC unit is quieter than a household refrigerator. It also features easy-to-use mechanical controls to quickly set the time, temperature, and mode and has a removable & reusable air filter.
- EASY INSTALLATION - Easily install in your home or apartment's existing window frame. Suitable for windows 23''-36'' wide and minimum 13'' high. All mounting accessories are included. A screwdriver is required (but not included) for installation. For some window frames, pilot holes are recommended before installing screws. Please see included instruction manual for further detail.
- WARRANTY: 1 Year Parts & Labor Warranty comes with each Midea product to ensure the quality of our brand to our customers. Our team is happy to help if any questions or issues arise and make sure to register your product on our website for even faster support in the future.
Locate the receptacle before choosing the final position. Manufacturer guidance requires the cord to reach a suitable outlet accepting the supplied three-pronged plug. The outlet should be close enough that the cord is not stretched, pinched by the sash or exposed to water. If the circuit or receptacle is inadequate, arrange an electrician’s repair rather than improvising with an unsafe extension arrangement.
2. Read the exact installation manual before lifting
Two units that look alike can have different screw locations, side-curtain hardware, drainage provisions, minimum clearances and allowable window orientations. Keep the manual open during installation; do not substitute a generic sequence for the model’s instructions.
Make a parts and measurement checklist
- Identify every supplied screw, bracket, rail, angle, shim, side curtain, gasket and weather-strip.
- Note the minimum and maximum opening dimensions, the cabinet weight and the required rear clearance.
- Check whether the manual calls for a specific sill angle, a support bracket, a window sash lock or an anti-tip fastener.
- Read the drainage section. Some cabinets manage condensate internally; others provide a drain fitting or require a particular outlet direction.
Lay the parts out on a clean surface and compare them with the diagrams. If a required part is missing or damaged, stop and obtain the correct replacement. Drilling new holes or using random hardware can weaken the frame and void the installation guidance.
3. Provide independent structural support
The window sash is not a substitute for a support system. A window air conditioner must be supported from below or fastened from inside with hardware that transfers the load into the building structure.
Choose a support method
Depending on the model and building, an approved solution may be a metal support bracket, mounting rail, interior angle, mounting frame or a manufacturer-specified combination. NYC Department of Buildings guidance says supporting brackets and interior angles should be structurally fastened to the building and strong enough for the unit’s size and weight. The fasteners must engage sound framing or masonry, not just thin trim.
Use shims only when the manual permits them. Each shim needs independent attachment and must be secured against vibration, wind and weather. A loose block placed under the cabinet can shift and create a fall hazard.
What’s actually slowing this PC down?
Pick the symptom - the matching free tool is one click away.
Dry-fit before committing to screws
With another person supporting the cabinet, place the unit or its frame in the opening without releasing the load. Confirm that the bracket bears evenly, the mounting surface is flush as specified, the sash can close onto the unit and the side curtains can reach their attachment points. The U.S. Department of Energy job aid calls for a stable, safe dry fit before mounting. If the support flexes, twists or pulls away from the wall, remove the unit and correct the structure before proceeding.
4. Treat the electrical connection as a safety requirement
Cooling capacity does not make an unsuitable circuit safe. The supplied cord must reach an outlet that meets the applicable electrical requirements, and the maximum breaker size must match the appliance marking. DOE guidance references NFPA 70 Article 422 for the cord-and-outlet installation.
Rank #2

- BEST FOR SMALL ROOMS: Cools up to 150 sq ft efficiently with 5,000 BTU cooling power. Ideal for bedrooms, home offices, dorm rooms, workshops, and studio apartments. Compact 16.4" W x 13.4" D x 12.6" H design fits tight spaces.
- QUIET OPERATION - Quieter than many older window AC units, with 2 cooling modes (low 52 dBA for nighttime, high 56 dBA for rapid cooling) and 2 fan speeds for personalized comfort. Simple mechanical controls mean no annoying digital beeps.
- SIMPLE, RELIABLE MECHANICAL CONTROLS: Easy-to-use dials for temperature and fan speed—no Wi-Fi, apps or complex setup required. 10 temperature settings let you dial in your perfect comfort level. Auto restart after power outages.
- LOW MAINTENANCE & ENERGY SMART: No manual draining under normal conditions. Washable, reusable filter for easy care. Low 440W power draw helps reduce energy costs compared to older, inefficient units.
- EASY DIY INSTALLATION: Fixed chassis installs easily and fits double-hung windows 27.125"–36" wide and 13.375" high minimum. EZ Mount kit with foam insulation included. Backed by 1-year GE limited warranty for peace of mind.
Verify the service
- Read the rating label for voltage, amperage and maximum overcurrent protection.
- Compare the label with the receptacle and circuit serving the window. Do not assume a nearby outlet is on a suitable circuit.
- Inspect the plug, cord and receptacle for heat damage, loose contact, discoloration or cracked insulation.
- Keep the plug connection indoors and away from the condensate path.
Never cut off the grounding pin, defeat a ground-fault device, use a multi-plug adapter or hide a connection under the unit. If the breaker rating, wiring or receptacle does not match the label, have a qualified electrician correct it. Repeated breaker trips are a fault to investigate, not a reason to install a larger breaker.
5. Lift with help, seat the unit and secure the sash
A window air conditioner is dense, awkward and easy to drop. Plan the lift before anyone picks it up. Clear the floor, move furniture, and have a second adult hold the opposite side. Do not attempt to balance the cabinet on the sill while reaching outside.
- Install the support hardware and any frame or rail required by the manual.
- With two people holding the cabinet, set its mounting surface flush against the bracket, frame or window surface specified by the manufacturer.
- Keep the cabinet centered and fully seated. Make sure no portion of the support is bearing on a fragile trim piece.
- Fasten the sash, sash lock or anti-tip hardware exactly as shown. Close and lock the side curtains or panels.
- Keep both installers supporting the load until every required fastener is tight and the manual’s retention steps are complete.
Do not release the cabinet merely because it appears to sit level. The sash and side panels are part of the restraint system, and an unsecured unit can move when the compressor starts or when wind pushes against the exterior.
6. Level the cabinet and route condensate outward
After the unit is secured, check its orientation from inside. DOE instructions call for leveling from left to right and keeping the mounting surface flush with the specified bracket, frame or window surface. Follow the model manual if it specifies a different front-to-back position; do not create a steep tilt that stresses the frame or changes airflow.
Give water a safe path
Condensation forms as warm, humid air crosses the indoor coil. The rear of the cabinet must be at the lowest practical point so water moves toward the outdoor side or the designated drain. Keep the condensate outlet clear of the sill, wall and support hardware.
LG warns that insufficient rear tilt can allow condensate to overflow indoors, creating potential shock, fire and property-damage hazards. If water appears on the room side, turn the unit off, disconnect power if it can be done safely, and correct the level or drain arrangement before operating again. Do not drill an unapproved hole in the cabinet; use the drain parts and position specified for that model.
Free tools Windows power users keep installed
One-click scans. No signup required.
7. Seal every gap with weather-resistant material
An open gap around the cabinet wastes cooling, admits hot outdoor air and can let wind-driven rain enter the room. ENERGY STAR installation guidance calls for supplied weather-stripping or gasket materials that minimize air and water leaks at the unit, sill, head, sash and the joint between fixed and movable sashes.
Seal in the correct order
- Apply the supplied sill or cabinet gasket where the manual shows it, before the final load is released.
- Extend weather-stripping along the meeting rail and head so the closed sash compresses it continuously.
- Fasten and seal both side curtains. Fill small irregular gaps with compatible gasket foam rather than leaving folds or open corners.
- Inspect the exterior edge for a path that could direct rain behind the cabinet. Use only weather-resistant materials approved for the installation.
ENERGY STAR’s FAQ discusses foam or insulated side-curtain materials as part of an energy-efficient, weather-tight installation. Traditional single-layer plastic accordion panels may not satisfy the insulation requirement by themselves. Replace damaged panels or add the specified insulated material instead of relying on household tape as the primary seal.
Rank #3

- Effortless Cooling: Achieve optimal comfort with customizable temperature settings and two fan speeds; Effortless Temperature Control helps to maintain your preset temperatures for consistent comfort
- Easy Maintenance: Keep your air conditioner running efficiently with the easy-to-clean washable filter, designed to capture dust from the air for long-lasting performance
- Undisturbed Comfort: Experience a peaceful home environment with a quiet performance at 52 dBA – ideal for bedrooms or small spaces up to 150 sq. ft.
- Effortless Convenience: Benefit from the Auto Restart feature, which automatically restores the unit's previous settings once power is restored to the window air conditioner
- Hassle-Free Operation: The extra-long three-prong power cord eliminates the need for extension cords, while the adjustable side panels easily extend to best fit your window, ensuring a secure installation with optimal efficiency and airflow
8. Test stability, drainage, airflow and electrical behavior
Before leaving the air conditioner unattended, perform a controlled test. Keep hands and tools clear of the fan and do not lean on the cabinet while it runs.
Use this commissioning checklist
- Stability: Push gently on the indoor cabinet and observe the support, sash and frame. Nothing should shift, rock or pull away.
- Drainage: After the unit has operated long enough to produce condensate, verify that water is leaving on the outdoor side or through the approved drain and is not wetting the sill or wall.
- Seal: Inspect daylight, moving curtains and gasket compression. Close the sash fully and confirm that the seal remains continuous.
- Airflow: Keep the indoor intake and outlet clear of curtains, furniture and insulation. Make sure the outdoor coil has the clearance required by the manual.
- Electrical behavior: The plug and receptacle should remain normal to the touch, without burning odor, buzzing, discoloration or repeated breaker trips.
Stop operation immediately for movement, indoor water, a burning smell, a damaged cord, sparking or repeated trips. Disconnect power only if it is safe to do so, then have the support, drainage or electrical defect corrected before testing again.
The Tool Desk
Outbyte PC Repair FREERepair Windows errors before they cause bigger problemsFix Now →Outbyte Driver Updater FREEScan for outdated or missing drivers - takes under a minuteDriver Scan →Choose a compatible unit before installation
Installation problems often begin with a unit that was never compatible with the window or circuit. Compare these factors before purchase or delivery:
| What to compare | Why it matters | What to verify in the manual or on the rating label |
|---|---|---|
| Cooling capacity and room | An oversized or undersized cabinet may cool poorly, cycle improperly or fail to control humidity. | Capacity guidance for the room and the unit’s operating ratings. |
| Window type and opening | The sash must close onto the cabinet and the side curtains must cover the opening. | Approved window designs, minimum and maximum opening dimensions, sill depth and required clearances. |
| Weight and support | Heavier cabinets impose greater loads on the sill, brackets and building attachment. | Shipping or operating weight, approved bracket or rail, fastener locations and any anti-tip requirement. |
| Outlet and breaker | An incompatible circuit can overheat or trip when the compressor starts. | Voltage, running current, plug configuration and maximum breaker size. |
| Controls and noise | Placement affects access to controls and whether operating sound is acceptable in a bedroom or workspace. | Control location, operating modes and the manufacturer’s published noise information, if provided. |
| Condensate handling | Incorrect drainage is a direct route to indoor leaks. | Rear tilt, drain fitting, drain direction and any prohibition on drilling the cabinet. |
| Sealing materials | Unsealed side panels leak conditioned air and rain. | Included weather-stripping, gasket foam, insulated curtains and replacement-part specifications. |
| Efficiency qualification | A more efficient model can reduce operating energy over its service life. | Whether the exact model is ENERGY STAR qualified and the applicable regional listing. |
The U.S. Department of Energy reported in 2022 that a typical new room air conditioner used 39% less energy than its 1990 counterpart. That figure describes a comparison between typical new and 1990 equipment, not a guaranteed saving for every household; actual consumption depends on capacity, weather, thermostat settings, hours of use and installation quality.
Fix common installation failures safely
The cabinet moves or appears to sag
Turn it off and keep people away from the area. Check that the bracket or frame is attached to structural material, that all specified fasteners are present and that shims are independently secured. Replace damaged framing or hardware; do not wedge in loose objects or add weight to the sash.
Water leaks into the room
Stop the unit and inspect level, rear drainage, the sill gasket and the side-panel joints. Clear the approved drain path and reseal gaps. If the manual requires a particular tilt or drain fitting, restore that configuration rather than drilling or bending the cabinet.
Quick wins for a faster PC:
Repair Windows errors before they cause bigger problemsFix Now →Fix the driver behind crashes, sound loss and screen glitchesFind Drivers →The breaker trips or the plug gets hot
Switch the unit off and disconnect it if safe. Compare the appliance label with the circuit and breaker, and inspect for a loose or damaged receptacle. A qualified electrician should diagnose wiring or service problems; never install a larger breaker to keep the unit running.
Air or rain enters around the sides
Check that both curtains are fully extended and fastened, the sash is locked against the top gasket and the supplied foam is continuous. Replace deteriorated weather-stripping and insulated panels instead of filling a large structural gap with tape alone.
Quick Recap
Final pre-use checklist
- Permission and local requirements are confirmed.
- The opening, frame, sill and sash meet the model’s dimensions and condition requirements.
- The support is structurally fastened to the building and rated for the cabinet.
- The cord reaches a compliant outlet, and the breaker matches the appliance marking.
- Two people completed the lift, and the sash, curtains and retention hardware are secured.
- The cabinet is level as directed, with condensate routed away from the room and building.
- Weather-stripping, gasket foam and insulated side panels close every intended gap.
- A running test shows no movement, indoor water, blocked airflow, overheating, odor or repeated trips.

Product prices and availability are accurate as of the date/time indicated and are subject to change. Any price and availability information displayed on Amazon at the time of purchase will apply.

