Windows Errors? Fix Them Before They Spread
Recommended Free Tools
Repair common Windows errors and clear accumulated junk for a smoother, more stable PC - no reinstall needed.
Fix My PC Now →Free scan · no reinstall
ThatPainter is reader-supported. When you buy through links on our site, we may earn an affiliate commission. Learn More
As an Amazon Associate I earn from qualifying purchases.
Prevent muddy watercolour washes by preparing enough paint, using a clean brush and water, moving in smooth continuous strokes, keeping a consistent wet bead at the working edge, and leaving drying areas alone. If you need an even field, premix the colour on your palette. If you want a soft blend, place a small number of colours into a clean, wet area and let them mingle without repeated brushing. Wait until a layer is completely dry before glazing over it.
The Tool Desk
Outbyte PC Repair FREEClear out junk files and repair common Windows errorsFree Scan →Outbyte Driver Updater FREEFix the driver behind crashes, sound loss and screen glitchesFind Drivers →First identify the problem. A dull, greyed mixture is usually caused by overmixing, contaminated tools or excessive reworking. Patchy marks, dark rims and cauliflower shapes are usually drying patterns such as backruns or blooms. The correction is different for each.
#1 Best Overall

- 【Premium Heavyweight Cold Pressed Watercolor Paper】1Pack of 9" x 12" Professional Heavyweight Watercolor Pads. 20 sheets in each watercolorpad, total of 20 premium watercolor paper sheets at the affordable price, that are ideal for watercolor and mixed media techniques.
- 【Premium & Sturdy Material】Watercolor pads have heavyweight, 140 lb, 300 gsm, cold-pressed textured surface natural white paper sheets. The cold-press slightly textured surface makes the sheets ideal for mastering watercolor techniques.
- 【Versatile Usage】These versatile, durable, acid-free, neutral pH watercolor paper sheets are suitable for dry, watercolor and mixed media paper and all skill levels of artists. Excellent for use with watercolor, acrylic, colored pencils, graphite pencils, pens, markers, charcoal, pastel, etc.
- 【Budget-Friendly Choice】High school and college instructors love the quality paper and often recommend it as an economical option for art students. These premium watercolor pads make a perfect gift to anyone who enjoys painting, drawing, and creating art.
- 【Manufacturer】Hapikalor paper are FSC certified for the traceable use of wood from non-threatened forests. We are the professional manufacturer engaged in the research, development, production, sale and service of many kinds of paper. Our products are exported to North America, Europe, Australia and Southeast Asia and other areas.We are committed to providing best products and services.
Identify what has gone wrong before you try to fix it
Artists use muddy for several different results. Treating every unwanted mark as a colour-mixing problem leads to more brushing and often makes the painting worse.
| What you see | Likely cause | Best prevention |
|---|---|---|
| A dull, neutral or grey mixture where you wanted luminous colour | Too many pigments mixed together, dirty water or palette wells, or repeated strokes that homogenised the passage | Use fewer pigments, clean the mixing area, premix enough paint and make fewer brush passes |
| Uneven bands or dry-looking gaps in an otherwise flat area | The wash began drying while you were still working, or an area was revisited at a different moisture level | Prepare the mixture first, work continuously and do not return to a section that is starting to dry |
| A dark tide line, halo or cauliflower-shaped mark | A backrun: wetter paint or clean water flowed into a partially drying wash and pushed pigment toward an edge | Keep moisture levels compatible and leave the wash untouched while it dries |
| A soft, uncontrolled cloud of colour | Pigment spreading through a very wet surface, often with more water than the paper can hold evenly | Control the wetness of the paper and introduce colour in measured amounts |
The distinction between a dull mixture and a drying mark is also supported by IKANE PARIS’s guide to streaks, blooms and muddy colours. A laboratory paper on droplet evaporation and imbibition in watercolour paintings found that droplets on dry paper can form ring-shaped stains, with the pattern affected by pigment concentration and water distribution. That experiment explains why a ring is not automatically evidence of “bad” colour mixing; it does not establish one universal fix for every wash.
Set up a wash that can be completed without stopping
Choose and prepare the paper
Use watercolour paper and make a small test mark on scrap from the same pad or sheet. Test the dilution, drying behaviour and colour transition before committing to the painting. A paper pad is useful for this practice, but the instructional sources do not establish that a particular brand, grade or paper weight is required.
Place the sheet on a support that lets the wash travel in the direction you intend. The Watercolor Learning Center wash guide demonstrates a tilted support, overlapping strokes and lifting excess paint at the end. Treat that as one workable method rather than a mandatory angle for every subject: the essential requirement is that you can keep a controlled wet edge moving.
Clean the water, brush and palette
Start with clean water and rinse until the brush releases its previous colour. A stained-looking mixing well can contaminate a pale wash even when the brush appears clean. Keep a separate area of the palette for each mixture, and wipe away dried crumbs that could break loose into the new paint.
Rank #2
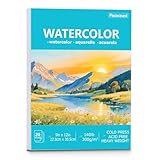
- 【Premium Heavyweight Watercolor Paper】 This pack includes 20 sheets of 9"" x 12"" professional-grade, heavyweight (140 lb / 300 gsm) watercolor paper. It pairs exceptional durability with superior handling to warping and buckling, performing brilliantly with wet-on-wet, drybrush, mixed media, and all painting techniques. It's the perfect choice for artists, illustrators—and an exceptional gift for anyone on their artistic journey.
- 【High-Quality Cold pressed Paper】 Every sheet in our watercolor notebooks features a cold-press texture, striking the ideal balance between rough and hot-press surfaces. This watercolor paper journal excels at maintaining color vibrancy, evenly absorbing pigments to keep your artwork true and intact while capturing every detail with precision.
- 【Glue-Bound Watercolor Sketchbook with Removable Pages】This watercolor sketchbook features an innovative binding, securely combining durable threads with adhesive to keep pages firmly in place until you decide to remove them. Each page tears out cleanly and easily for neat displays of your artwork. This dual-purpose design offers ultimate flexibility: work on individual sheets for a lighter, a more comfortable, travel-friendly option, or use the book as a whole to maintain a cohesive collection—seamlessly uniting the convenience of loose-leaf paper with the integrity of a bound journal.
- 【Versatile Watercolor Pad】This watercolor pad features thick, acid-free paper with high absorbency, allowing it to quickly and evenly take in pigments. This prevents colours from bleeding or blurring, resulting in artwork with intense color saturation. It is the perfect choice for everyone from beginners to professional artists. Its excellent compatibility supports a wide range of media, including watercolor, acrylic, colored pencils, graphite, pen, markers, charcoal, and pastels.
- 【Budget-Friendly Gift】Our water color paper is the perfect gift for artists of all levels, including, adults, beginners, artists, amateurs, professionals.A teacher-recommended and economical choice, it is ideal for educational, professional, and personal art projects, excelling in crafts, painting, and artistic expression.
Mix more paint than you think you need
Premix enough paint to cover the entire shape before the brush touches the paper. Stopping to remix halfway through is a common cause of a visible band or a change in saturation. Aim for a mixture whose value and strength are already close to the finished wash; adjusting it mid-stroke forces you to work into an area that may be drying.
For a flat wash, palette mixing gives the most even control. For a soft, varied passage, you can let selected colours meet on wet paper, but limit the number of colours and avoid repeatedly stirring them together with the brush. The difference between these goals is explained in Keeping Out of the Mud and the Center’s guide to washes.
Paint a clean flat wash
A flat wash is intended to dry as an even field of colour. The method below follows the continuous-bead approach described by Daler-Rowney’s watercolor learning resources, with the tilted, overlapping-stroke option shown in the Watercolor Learning Center guide.
- Pre-wet your plan. Decide the boundaries and direction of the wash. Do not wet the paper unless your design specifically calls for a wet-in-wet start; an uncontrolled pre-wet area can make a supposedly flat wash spread.
- Load the brush fully. Pick up enough premixed paint that the brush can make a long stroke without running dry. If the brush is overloaded to the point of dripping, remove the excess at the palette edge rather than on the paper.
- Begin at one edge. Hold the support so the wash moves predictably. Lay down the first stroke and leave a small, visible bead of wet paint along its lower edge.
- Overlap while the bead is wet. Start the next stroke inside the previous stroke’s wet edge. Move across the shape in a steady sequence, keeping the bead continuous instead of scrubbing back and forth.
- Reload before the brush runs out. Pick up paint while the working edge is still wet. A dry brush dragged through a drying area creates a light gap that is difficult to disguise.
- Finish the final edge deliberately. At the end of the area, use a clean, damp brush to lift a hanging bead or excess puddle. Do this once, lightly, rather than repeatedly touching the surface.
- Stop. Put the brush down as soon as the shape is covered. Do not smooth isolated streaks after they have begun to lose their sheen; the extra stroke is more likely to create a patch than to remove one.
Keeping a bead does not mean flooding the paper. It means maintaining a connected, mobile edge so each new stroke joins the previous one before either dries. If the surface is already becoming matte, the safest choice is to let it dry and correct the value with a later layer.
Build a graded wash without a midstream colour change
A graded wash changes value or hue in a planned direction. The simplest version is one colour diluted progressively with clean water. A two-colour grade requires more preparation because both mixtures must be available before the transition begins.
Rank #3

- Micro - Perforated and True - size Paper: 24 sheets of premium heavyweight watercolor paper (140lb/300gsm), true to size with fine perforated lines, which can be easily removed without risking unsightly tears. Cleverly, a 0.59 - inch space is left between the spiral and perforations, allowing users to note brush types, colors, and the date. It is ideal for both professional painters documenting their work and enthusiasts preserving creative moments.
- Convenient Spiral - Bound: Watercolor sketchbooks are double - spiral bound, enabling 180° flat lay and 360° rotation. Which suits both left - and right - handed users in any orientation. They keep watercolor projects organized and accessible, boosting the creative experience and making art management easy.
- Premium Watercolor Paper: Our water color paper materials are FSC - certified and their wood source can be traced back to non - threatened forests. Acid - free for art preservation. Cold - pressed on both sides, great for watercolor. Absorbs well, blends colors smoothly. It doesn't bleed through pages easily. It is ideal for quality - seeking artists. Teachers also recommend it as an economical option for students.
- An Ideal Gift: This watercolor paper suits both wet and dry media. Tools like watercolors, acrylics, watercolor pencils, graphite pencils, fountain pens, markers, charcoal, and pastels work well on it. It is great for artists of all levels, meeting their diverse creative needs.
- 3 Sizes for Every Need – Portable to Studio-Ready: Choose from 9x12" (large studio sheets), 7x10" (class projects), or 5.5x8.5" (pocket travel size). Whether for detailed paintings, daily sketching, or outdoor plein air, there’s a perfect fit!
Single-colour value grade
- Mix the strongest value you need and load the brush.
- Lay the first band with a continuous bead, as for a flat wash.
- Before the bead becomes dry, add clean water to the palette mixture, not directly into the paper, so the next band is lighter but still related in hue.
- Continue with overlapping strokes, adding water in small stages. Keep the brush wet enough to join the previous band without depositing a watery puddle.
- Leave the final light edge alone once it has joined. Do not chase a perfect fade with repeated passes.
Two-colour transition
Premix both colours at similar saturation and have enough of each within reach. The Watercolor Learning Center recommends preparing the intended transition before starting; this prevents a pause while one end of the wash dries. Begin with the lighter or more transparent end, move through the overlap while both mixtures are wet, then proceed into the darker end. Let the colours meet through overlapping strokes rather than repeatedly scrubbing the junction.
If the transition turns grey, first ask whether the pigments themselves neutralise when mixed. If they do, a different pair or a cleaner, less-intermixed transition may be needed; adding more brushing will not restore brightness.
Use wet-in-wet for soft blends, not for controlled flat areas
Wet-in-wet creates soft edges because pigment can travel through a damp surface. It is useful for clouds, distant forms, atmospheric backgrounds and other passages where a perfectly even boundary would look artificial. It is not a shortcut for a flat wash.
- Moisten the area evenly. The surface should be damp enough for colour to move, not covered with standing water. Excess water gathers at the edges and can later produce a tide line.
- Place a limited number of colours. Touch the loaded brush to the damp paper and allow the pigment to spread. Add the next colour where you want the transition to occur.
- Let the paper do the blending. Watch the movement instead of stirring the colours together. Repeated heavy strokes can homogenise a varied passage into a dull neutral.
- Remove only obvious puddles. Use the tip of a clean, damp brush to wick up a pool at the edge; avoid dragging that brush through the main colour field.
- Leave it to dry undisturbed. The appearance will change as water evaporates, so judge the result after it is dry rather than continually correcting the wet paint.
Wet-in-wet and palette mixing are not contradictory rules. They serve different purposes: premixing offers control for an even wash, while restrained on-paper mingling preserves soft variation. The distinction is set out in Washes: The Foundation of Watercolor Painting and Keeping Out of the Mud.
Control how pigment and water move as the wash dries
Understand backruns and blooms
A backrun occurs when wetter material enters a section that is partly drying. The incoming water pushes pigment toward a boundary, where it can dry as a dark rim or cauliflower shape. This can happen when a brush loaded with clean water touches a drying wash, when a neighbouring wash floods into it, or when a damp brush lifts and redistributes pigment.
Rank #4

- Artist’s watercolor pad for amateurs, professionals, and students
- Cold-press textural surface is ideal for media such as watercolor, acrylic, ink, pencil, charcoal, pastel, and more
- Heavy-weight, acid-free construction for archival longevity
- True-to-size sheets can be easily removed from the pad
- Heavy chipboard backing and fold-over cardstock cover
Prevent it by matching moisture levels. Either keep the whole area comparably wet while you work or wait until it is fully dry before adding moisture. Do not drop a very wet mark into a surface that has just lost its shine. If a bloom has already formed, resist chasing it while the paper is damp; further disturbance usually enlarges the mark. Once dry, decide whether it can become part of the texture, be softened with a controlled glaze, or be removed by lifting in a separate correction.
Keep a drying wash still
Water movement during evaporation naturally changes the appearance of a wash. The 2026 study Pattern formation by droplet evaporation and imbibition in watercolor paintings, dated March 22, 2026, reports ring-shaped stains from droplets drying on dry paper and links pattern formation to pigment concentration and water distribution. This is a physical explanation for some halos; it is not evidence that every ring can be prevented by using a particular pigment or paper.
Mix colour without neutralising it
Use a small, intentional palette
Every added pigment changes the mixture. For a luminous wash, start with one pigment or a deliberate pair and test the result. Three or more pigments can still be useful, but each should have a purpose. If the mixture loses chroma, return to the palette, clean the well and mix a fresh, simpler batch rather than trying to revive the grey on the paper.
Distinguish palette mixing from on-paper mixing
| Approach | Use it when | How to avoid mud |
|---|---|---|
| Palette mixing | You need an even flat wash or a predictable graded wash | Mix the complete batch first, check a test stroke and keep the brush path continuous |
| On-paper mingling | You want soft, naturally varied transitions in a wet-in-wet passage | Choose a few compatible colours, place them with separate touches and stop before the brush turns the area into one neutral mass |
| Layered colour | You need depth while preserving clear colour passages | Let the previous wash dry completely and apply the next layer with a light touch |
Repeatedly working a mixture with a brush can also lift earlier pigment from the paper and redistribute it unevenly. If the area needs more strength, allow it to dry and add a transparent layer instead of continuing to scrub the wet surface.
Glaze only after the underlying wash is dry
Layering is a controlled alternative to trying to achieve every value in one wet pass. Wait until the first wash is fully dry before applying the next. If the underlying layer is still damp, the new water can reactivate and lift pigment, creating a streaky or contaminated result. Daler-Rowney’s guidance recommends a light touch and gradual building.
Best Value

- 【Premium Heavyweight Watercolor Pad】Professional 9" x 12" watercolor pad with 40 sheets per pad (80 Pages total). Features 140lb/300gsm cold-pressed textured paper ideal for watercolor, mixed media, and all painting techniques. Perfect for artists, illustrators - an excellent art gift for drawing, painting, and creative projects.
- 【Premium & Cold-Pressed Paper】 Heavyweight 140lb/300gsm natural white paper with a slightly textured surface optimizes watercolor techniques. Acid-free, pH-neutral sheets maintain vibrant colors and prevent yellowing. Sturdy backing board protects your artwork.
- 【Versatile Usage】 These versatile, durable, acid-free, neutral pH watercolor paper sheets are suitable for dry media, watercolor and mixed media, Suitable for all skill levels of artists - from beginners to professional artists. Excellent for watercolor, acrylic, colored pencils, graphite pencils, pens, markers, charcoal, pastels, etc.
- 【Effortless Page Removal & Protection】Tear-resistant glue binding allows clean page removal for framing or sharing. making it convenient for showcasing your work. Thick cardstock cover and heavy backboard prevent damage while creating. This watercolor paper sketchbook is designed to absorb water effectively, preventing any bleed-through and ensuring that your artwork remains crisp and clear. Keep the paper in good shape all the time, provide better drawing & writing experience.
- 【Premium Watercolor Paper for all artists】This wonderfully watercolor paper pad is Ideal for professionals. Great for artist supplies, Christmas gifts, and daily art practice. Excellent for watercolor techniques, sketching, and mixed media projects.
- Check the surface under normal light. A cool-looking or slightly darker wet passage may dry lighter, so avoid judging its final value while it is still glossy.
- Touch the back of your hand near, not into, the painted area to sense whether the paper is still cool and damp. Do not use a finger on the paint itself.
- Mix the glaze to the intended strength before loading the brush.
- Make one controlled pass over the dry area. Avoid repeated back-and-forth strokes.
- Let the glaze dry before deciding whether another layer is necessary.
For a clean boundary between adjacent washes, the same rule applies: let the first area dry completely before placing a neighbouring shape that could flow into it.
Troubleshoot a wash by its symptom
| Symptom after drying | What probably happened | Next action |
|---|---|---|
| The whole area is dull but even | The pigments neutralised, or too many colours were mixed together | Mix a simpler, cleaner colour and glaze it lightly after the original is dry; do not scrub the existing layer |
| The area has horizontal bands | The brush ran short of paint or a stroke was added after the preceding band had started drying | On the next attempt, premix more paint and keep a continuous bead. For the current painting, soften only the most visible boundary with a controlled dry glaze |
| A pale patch appears inside the wash | A section dried before the next stroke reached it, or a thirsty brush pulled paint away | Leave it to dry. If the paper surface remains sound, unify it with a thin glaze rather than rewetting the entire wash |
| A dark edge surrounds a lighter centre | A puddle or backrun concentrated pigment at the perimeter | Prevent recurrence by removing excess water before drying. Afterward, decide whether the edge can be incorporated into the subject; lifting a dry ring may leave a lighter halo |
| Colours look dirty only where they overlap | The brush or water carried a previous pigment into the new colour | Rinse thoroughly, change the water and remix the overlap. Keep separate palette wells for light mixtures |
| Wet-in-wet shapes spread too far | The paper was wetter than intended or the brush carried excess water | Use less water, wait for the sheen to reduce and place smaller touches. Do not force the spread back with repeated strokes |
Practice drills that isolate one variable at a time
Flat-wash ladder
Draw four equal rectangles on scrap paper. Mix one batch large enough for all four. Paint the first rectangle with a continuous bead, then repeat while changing only brush size or stroke speed. Mark where a bead broke, where the paper began to dry and where you lifted excess paint. This reveals whether your main problem is insufficient paint, a slow stroke or overworking.
Value-grade ladder
Prepare one strong mixture and five small portions of progressively cleaner water. Paint a connected strip from dark to light without pausing to remix. Because each dilution is ready, you can concentrate on joining the bands and observing when the surface loses its sheen.
Do these 3 things before closing this tab:
1Fix the driver behind crashes, sound loss and screen glitches2Repair Windows errors before they cause bigger problems3Scan for outdated or missing drivers - takes under a minuteTwo-colour mingling test
Wet three identical squares to the same sheen. In the first, place two colours and leave them untouched. In the second, make one gentle connecting stroke. In the third, make several strokes. Compare the dry results: the last square demonstrates how repeated disturbance can erase variation and create a duller mixture.
Backrun demonstration
Paint a small rectangle and let one half become matte while the other half remains glossy. Drop a small amount of clean water into each half. The wet half should accept the water with less edge contrast; the partly drying half is the one likely to form a tide line. This makes the moisture mismatch visible before it occurs in a finished painting.
Choose the wash mode that matches the edge you need
| Desired result | Wash mode | Preparation priority | Main thing to avoid |
|---|---|---|---|
| One even tone across a shape | Flat wash | Enough premixed paint, a continuous bead and a clear stopping point | Returning to a section as it dries |
| A planned light-to-dark or hue-to-hue transition | Graded wash | Pre-diluted stages or premixed endpoint colours ready before the first stroke | Stopping to remix at the transition |
| Soft, atmospheric colour changes | Wet-in-wet | Even surface dampness and restrained pigment placement | Stirring colours together after they have begun to spread |
| Deeper colour over a stable underpainting | Glaze or layered wash | Complete drying between layers and a light touch | Reactivating the underlying wash with a wet brush |
A concise checklist before you lift the brush
- Have I identified whether the problem is dull colour, patchiness or a backrun?
- Is the water clean and the mixing area free of stray pigment?
- Did I prepare enough paint to finish the shape without stopping?
- Does this passage need a flat wash, a graded wash or wet-in-wet softness?
- Can I keep the working bead wet until the next stroke overlaps it?
- Am I about to touch a surface that has started to dry?
- Would a dry glaze solve this more safely than reworking wet paper?
Most muddy washes are prevented before the first stroke: choose the intended edge, prepare the mixture and water, then work once through the area and let it dry. When a mark is caused by evaporation or a moisture mismatch rather than by colour mixing, changing your timing and water control matters more than adding another pigment.
Quick Recap

Product prices and availability are accurate as of the date/time indicated and are subject to change. Any price and availability information displayed on Amazon at the time of purchase will apply.
The Tool Desk
Outbyte Driver Updater FREEScan for outdated or missing drivers - takes under a minuteDriver Scan →Outbyte PC Repair FREEClear out junk files and repair common Windows errorsFree Scan →
