PC Slower Than It Used to Be?
Outbyte PC Repair · freeA free scan shows the junk files, broken settings and background clutter dragging Windows down - then fixes them in one click.
Run a Free PC Scan →ThatPainter is reader-supported. When you buy through links on our site, we may earn an affiliate commission. Learn More
Press the backing, place it right side down on a clean surface, secure the edges without stretching the fabric, and build the quilt sandwich one layer at a time. Smooth from the center toward the edges, then baste from the center outward. This prevents wrinkles, tucks and puckers from being stitched permanently into the quilt.
Prepare the backing before layering
Press every section
Press the backing fabric before it reaches the work surface. If the backing is pieced, press its seams carefully so they lie flat. Let the fabric cool and settle before spreading it out.
Packaged batting can retain folds. Brother’s beginner-quilting guidance advises removing it from its packaging so the creases can relax; The Quilters Guild guide recommends allowing packaged batting to lie flat for at least a day. Follow the batting maker’s instructions if they differ.
Leave enough allowance
Do not cut the backing flush with the quilt top. The Quilters Guild recommends at least 2 inches of extra backing on every side to allow for movement and shrinkage during quilting. A Brother search-result excerpt recommends at least 3 inches on each side for bed-size quilts. These are different guidelines for different contexts, so use the allowance required by your longarm quilter or batting manufacturer when applicable.
#1 Best Overall

- Temporary, repositionable, fabric adhesive used to temporarily bond fabric, 12.4 ounce cans
- Odorless, colorless, no mist, does not gum sewing needles
- Use for machine applique, quilting and basting
- Excellent for holding fabric to stabilizers in machine embroidery and hemming
- Acid free – no cfc’s
Choose and prepare a large, clean surface
Your surface must be large enough for the complete quilt sandwich. A protected dining table can work for a small quilt; a cleared floor or shared classroom table is more practical for a large one. Remove grit, pet hair and objects that could mark the fabric.
Spread the backing wrong side up (right side down). Smooth it outward with your hands. Painter’s tape or masking tape around the perimeter can hold it in place on a hard floor. On a table, clamps can serve the same purpose. These aids should stabilize the fabric, not pull it wider.
Keep the fabric smooth without stretching it
Flat and lightly tensioned is the goal; drum-tight is not. Pulling the backing can distort its grain, and fabric may relax later, creating fullness or ripples. Treat the secondary advice about fabric relaxing after excessive tension as a practical caution rather than a measured test result.
Rank #2

- Temporary, repositionable, fabric adhesive used to temporarily bond fabric, 7.2 ounce cans
- Odorless, colorless, no mist, does not gum sewing needles
- Use for machine applique, quilting and basting
- Excellent for holding fabric to stabilizers in machine embroidery and hemming
- Acid free – no cfc’s
Work with the fabric’s natural grain. If a wrinkle appears, lift that section, smooth it from the center outward, and lay it back down rather than dragging the edge.
Build the sandwich one layer at a time
- Secure the backing. Check that it is square enough for your project and that the extra fabric extends beyond every edge.
- Place the batting. Center it over the backing, then smooth folds toward the outside. Do not tug the batting to force it into position.
- Add the pressed quilt top. Center the top over the batting and smooth it from the middle toward the edges. If your work area is smaller than the quilt, expose and smooth one section at a time, or roll the layers gradually as you proceed.
- Inspect before basting. Run your hands over the entire surface and look underneath the edges for folds, tucks or pleats. Correct them now; stitching through a wrinkle fixes it in place.
Anne Williams of The Quilters Guild summarizes the risk: “It’s worth taking time to do this carefully as wrinkles, puckers and folds will spoil the appearance of your quilt, and once they’re stitched in place then you’re stuck with them.”
Baste from the center outward
Start near the center and work toward the edges. This order pushes excess fullness outward instead of trapping it in the middle. Keep checking the underside as you progress.
Rank #3

- QUILTING & CRAFTING SPRAY: Magic Premium spray for quilting helps to improve accuracy of cutting, creasing & sewing, while also flattening seams & wrinkles. Our odor eliminating craft spray reduces stretching for point matching and is fragrance & flake-free. Product works well with fabric adhesive spray & basting spray for quilting.
- IMPROVE ACCURACY FOR CUTTING, CREASING & SEWING: Using the right spray for crafts is key because it stiffens the fabric which helps you cut and piece with greater precision. Use with quilting spray adhesive for fabric for improving accuracy of cutting, creasing, sewing, and reduces the amount of time for point matching on quilts.
- FLATTEN SEAMS & WRINKLES: This smoothing wrinkle releaser spray makes pressing easier by relaxing wrinkles and leaving your fabric sleek, soft, and static-free. This is the best press spray starch for quilting to flatten seams and wrinkles! Just a spray and you're on the way!
- ODOR ELIMINATING & FRAGRANCE-FREE: This odor eliminator spray for crafts has an odor eliminating formula to keep crafts smelling fresh. Your anti wrinkle spray for clothing leaves your quilts or fabric crafts smelling fresh without all the overpowering scents!
- ABOUT US: Since 1887, Faultless Brands has been an essential staple in fabric care. Our Magic Premium Quilting & Crafting spray was developed by our fabric care experts to deliver solutions specific to the needs of quilters and crafters.
Quilter’s safety pins
Safety or quilters’ pins are commonly suited to machine quilting. Place the pins across the sandwich before closing them. The Quilters Guild warns that twisting a pin closed while the layers are still shifting can introduce puckers. Close each pin only after the surrounding fabric is smooth. Curved quilting pins are an optional supply, not a requirement established by the guide.
Crashes, No Sound, or Screen Glitches?
Random freezes, missing sound and display glitches usually trace back to one bad driver. Find and replace yours safely.Free scan · under a minuteWindows Errors? Fix Them Before They Spread
Repair common Windows errors and clear accumulated junk for a smoother, more stable PC - no reinstall needed.Free scan · no reinstallThread tacking or hand basting
Thread basting is often comfortable for hand quilting. Pins can catch the quilting thread or create knots, especially when the hand quilting line passes near them. Use a neutral-colored thread; a strongly dyed thread may stain if it remains in the quilt.
Temporary spray adhesive
Spray basting can suit a small quilt or a maker who prefers an adhesive method. Follow the product label for ventilation, distance and removal instructions. Some quilters prefer not to put chemicals on a quilt, and the available guidance does not establish one spray as universally best.
Rank #4
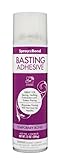
- Temporary Bond: Provides a non-permanent hold, so you can reposition fabric while working.
- Clear & Odorless: Leaves no visible residue and avoids strong fumes.
- Sewable: Doesn’t gum up sewing machine needles.
- Repositionable While Tacky: Allows you to make adjustments quickly before the bond fully sets.
- Clean-Up Tip: After use, hold the can upside down and spray briefly to clear the nozzle and prevent clogging.
Methods for different spaces and quilt sizes
| Approach | Useful when | How to control wrinkles |
|---|---|---|
| Hard floor with painter’s tape | You need a large uninterrupted area | Tape the backing perimeter, smooth each layer outward, and avoid kneeling or leaning on unsecured sections. |
| Large table with clamps | You want a raised work height or have limited floor space | Clamp the backing lightly, repositioning clamps as you work across the table. |
| Design wall | You are working in sections and need vertical support | Keep the layers aligned as each section is smoothed; verify that the backing is not hanging under its own weight. |
| Rolling on pool noodles or similar tubes | The quilt is too large to keep fully open | Roll and unroll gradually, smoothing every newly exposed section before adding more basting. |
| Spray or pin basting | You need the layers held together before quilting | Choose the method that matches your quilting technique and keep the center-outward sequence. |
These floor, table, wall and rolling approaches are practical reader suggestions rather than comparative trials, so choose according to your available space, quilt size and mobility.
Independent reader supportYour contribution helps us test, update, and keep practical guides available for everyone.Backing fabric choices that affect handling
Width and seams
Standard-width fabric may be adequate for quilts under about 40 inches wide, according to The Quilters Guild. Wider quilts can use wide backing fabric or joined lengths. A pieced backing adds seam allowances that may make hand quilting harder, so plan seam placement with your quilting direction in mind.
Free tools Windows power users keep installed
One-click scans. No signup required.
Prints versus solids
Patterned backing can disguise minor irregularities in stitching more effectively than a plain fabric. It does not replace careful smoothing, but it can be a forgiving visual choice.
Best Value

- JT TRADING-505 Spray & Fix Temporary Fabric Adhesive. 505 is a temporary fabric adhesive for use in sewing, applique, quilting, and paper craft projects. Spray the adhesive onto the back of fabric for a temporary bond to other fabrics, batting, paper, chipboard, and other such materials. It is odorless, colorless, stainless, spotless, and will not gum needles. Each can contains 12. 4 ounces of spray adhesive. DANGER: Extremely flammable. Vapors harmful. Contents under pressure. Keep out of reach of children. Imported
- Package length:2.65"
- Package width:2.65"
- Package height:9.4"
Troubleshoot common problems before quilting
A wrinkle appears after the layers are together
- Stop adding pins or stitches.
- Lift the affected section rather than stretching the edge.
- Smooth the backing first, then the batting, then the top.
- Recheck the area from both sides before continuing outward.
The backing looks tight like a drum
Release excessive edge tension and re-secure the fabric with only enough hold to keep it flat. Over-tightening can distort the grain and leave later looseness.
You are running out of backing at an edge
Stop before quilting. The backing should extend beyond the top by the allowance required for your project; never rely on a flush edge to stay aligned during quilting.
Puckers form around closed pins
Open the nearby pins, smooth the layers, and close them again without twisting the fabric. Place and align all pins in the area before closing them.
Recommended Free Tools
Quick Recap
Final inspection checklist
- The backing was pressed and, if pieced, its seams were flattened.
- Batting had time to relax from packaging according to its instructions.
- The backing is right side down on a clean, adequately sized surface.
- Edges are held with tape or clamps only as firmly as needed.
- Backing and batting extend beyond the top on every side.
- Batting and top were smoothed in sequence without tugging.
- Basting proceeds from the center toward the edges.
- No fold, tuck or wrinkle remains on either side before quilting begins.

Product prices and availability are accurate as of the date/time indicated and are subject to change. Any price and availability information displayed on Amazon at the time of purchase will apply.




