ThatPainter is reader-supported. When you buy through links on our site, we may earn an affiliate commission. Learn More
To make a classic two-loop ribbon bow, cut about 15 inches of 1-inch-wide ribbon, form two equal loops, tie them like shoelaces, and then tighten, trim, and shape the result. If you are new to bow making, start with 15–20 inches so you have extra length to adjust the loops and trim the tails.
As an Amazon Associate I earn from qualifying purchases.
This tutorial makes a small, detachable bunny-ear bow from one strip of ribbon. It is not the same construction as a large wired wreath bow, a florist bow, or a bow tied directly around a wrapped package.
Free tools Windows power users keep installed
One-click scans. No signup required.
What you need
- Ribbon
- Sharp scissors
- Ruler or measuring tape, optional
That is all you need for the basic two-loop bow. A small piece of narrow ribbon, pipe cleaner, floral wire, chenille stem, double-sided tape, or glue is optional if you plan to attach the finished bow to a wreath, basket, sign, gift, or other project.
#1 Best Overall

- Size: 1 inches wide ribbon, continuous 25 yards per spool without splices, to meet your creative ideas
- Double Faced: made of 100% polyester
- Material: Smooth surface; elegant shine; washable; non-shrink; color-fast
- Wide Range of Uses: Hair bows; gift wrapping; ribbon crafts; party decorations; scrapbooking; bottle decorations; baking crafts; flower arrangements; floral design; baby shower; all crafting and sewing
- Easy to Use: Smooth and soft, easy to tie bows, makes your packages look pretty and classy
How much ribbon do you need?
The amount of ribbon depends on its width, stiffness, loop size, and the length of tails you want. The often-cited 15-inch measurement is a starting point for a medium bow made from approximately 1-inch-wide ribbon—not a universal formula for every bow.
| Intended result | Starting amount | Important qualification |
|---|---|---|
| Small classic bow | 10–12 inches | Works best with narrow ribbon and short tails. |
| Medium classic bow | About 15 inches | A useful starting point for approximately 1-inch ribbon. |
| Easier beginner version | 15–20 inches | Extra length gives you room to make larger loops and trim later. |
| Large wired decorative bow | 2 yards or more | This uses a different, repeated-loop construction. |
| Bow tied around a package | Measure the package first | You need enough ribbon to wrap the box, make the bow, and leave tails. |
When in doubt, cut longer. You can shorten a tail after the bow is tied, but you cannot add length to a ribbon strip that was cut too short. The Knot also recommends starting with longer ribbon for this reason.
Choose the right ribbon
Ribbon width and body affect the finished bow as much as the measurement does. A wide, soft ribbon may make a floppy bow, while a narrow, firm ribbon can hold a compact shape.
Recommended Free Tools
| Ribbon | Advantage | Limitation | Best use |
|---|---|---|---|
| Double-faced satin | Both sides look finished. | The smooth surface can slip while you tie. | Polished gift bows and elegant decorations. |
| Single-faced satin | Shiny and formal. | The dull underside may show if the ribbon twists. | Use when you are comfortable controlling the ribbon’s orientation. |
| Grosgrain | The ribbed surface is easier to grip and gives the bow a crisp look. | It is less glossy than satin. | One of the easiest choices for beginners. |
| Lightly wired ribbon | The loops can be reshaped and hold their form. | It is bulkier and may need a separate center tie. | Large or sculpted decorative bows. |
| Sheer or organza | Light, airy appearance. | Often has less body and may not hold a small loop well. | Layered or florist-style bows. |
| Velvet | Soft, rich texture. | The directional surface can change how the ribbon looks when turned. | Decorative bows with a soft drape. |
| Cotton or linen | Natural, matte appearance. | Cut edges may unravel. | Rustic projects, provided the ends are finished. |
For a first attempt, double-faced ribbon is the least frustrating because an accidental rotation is less visible. Grosgrain is another forgiving option because it is less slippery. The Knot lists silk, grosgrain, velvet, and wired ribbon as workable choices, with wired ribbon being especially useful when the bow needs a structured shape.
Before you start: keep the ribbon facing the right way
If both sides of your ribbon look the same, simply keep the strip flat as you work. For single-faced satin or another ribbon with a distinct front and back:
- Place the finished side facing upward before you begin.
- Keep the strip flat at each bend instead of allowing it to roll.
- At the center, make any necessary half-turn deliberately so the visible face remains outward.
- If keeping the correct side visible becomes confusing, switch to double-faced ribbon.
Do not pull the knot tight until you have checked the ribbon orientation. It is much easier to correct a twist while the center is still loose. The Knot’s basic bow instructions likewise emphasize controlling the ribbon so the same finished side remains visible.
How to make a bow out of ribbon in 4 steps
1. Cut a 15-inch piece of ribbon
Measure and cut approximately 15 inches of about 1-inch-wide ribbon for a medium classic bow. Use 15–20 inches if you want longer tails, larger loops, or more adjustment room.
What’s actually slowing this PC down?
Pick the symptom - the matching free tool is one click away.
Make a clean cut with sharp scissors. Start longer than you think you need; the tails can be shortened after the bow is tied.
What it should look like: one straight ribbon strip with enough length for two loops, two tails, and a center knot.
Rank #2
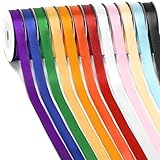
- 120 Yards 12 Colors:12 Colors, 3/8 inch wide, 120 yards total.
- Extra-long Design:The ribbon is extended to 10 yards per roll, a total of 120 yards. Most ribbons on the market are 5 yards per roll.
- Rainbow Shades:Enjoy 12 bright colors, this classic rainbow-themed ribbon is enough for any occasion.Each color is bright and eye-catching, with high saturation, just like concentrating the gorgeous rainbow on the ribbon.
- Excellent Quality:Made from washable 100% polyester fabric with a smooth finish, these ribbons won't shrink or fade, keeping them looking new for years to come, giving you peace of mind.
- Wide Application:Perfect for gift wrapping, craft hair accessories, bouquets, wedding party decorations. 12 rich colors can meet your different decoration ideas and style needs, easily creating a unique and unforgettable atmosphere.
2. Form two equal loops
Hold the ribbon near its middle. Bend one side into a loop, then bend the other side into a matching loop. Leave a tail extending below each loop, and keep the two loops approximately the same size.
Think of the result as two upright “bunny ears” with a small opening between them. Keep the ribbon’s finished side facing outward and avoid creasing the loops.
PC Slower Than It Used to Be?
A free scan shows the junk files, broken settings and background clutter dragging Windows down - then fixes them in one click.Free scan · Windows 10 & 11Crashes, No Sound, or Screen Glitches?
Random freezes, missing sound and display glitches usually trace back to one bad driver. Find and replace yours safely.Free scan · under a minuteAt this stage, do not worry about perfect symmetry. Make the loops close in size, but leave the center loose enough that you can adjust them after tying.
What it should look like: two similar loops side by side, with two tails hanging below them and a visible opening at the center.
3. Cross and pull one loop through the center
Tie the loops using the same basic motion as a shoelace:
- Cross the right loop over the left loop.
- Fold the left loop behind the right loop.
- Pass the left loop through the opening at the center.
Pull the loop through only enough to create a loose center knot. Keep the ribbon flat and do not cinch it tightly yet. This center opening is the part that is easiest to misunderstand, so look for the loop passing through the space created where the two loops crossed.
The Tool Desk
Outbyte Driver Updater FREEScan for outdated or missing drivers - takes under a minuteDriver Scan →Outbyte PC Repair FREEClear out junk files and repair common Windows errorsFree Scan →What it should look like: a loose bow with two loops, two tails, and a center knot that still allows the ribbon to slide for adjustment.
4. Tighten, trim, and shape the bow
Pull the two loops outward to tighten the center, then pull the tails gently to secure the knot. Adjust the tension gradually instead of making one hard pull, which can crush the loops or make one side longer than the other.
Compare the two loops and tails. If one side is uneven, loosen the knot slightly and slide the ribbon through the center until the sides match. Once the proportions look right, trim the tails.
Rank #3

- Size: 1-1/2 inches wide ribbon, continuous 25 yards per spool without splices, to meet your creative ideas
- Double Faced: made of 100% polyester
- Material: Smooth surface; elegant shine; washable; non-shrink; color-fast
- Wide Range of Uses: Hair bows; gift wrapping; ribbon crafts; party decorations; scrapbooking; bottle decorations; baking crafts; flower arrangements; floral design; baby shower; all crafting and sewing
- Easy to Use: Smooth and soft, easy to tie bows, makes your packages look pretty and classy
Finish each tail with a straight cut, diagonal cut, or V-shaped notch. Finally, fluff the loops, smooth any twists, and rotate the bow until it sits symmetrically.
Quick wins for a faster PC:
Repair Windows errors before they cause bigger problemsFix Now →Scan for outdated or missing drivers - takes under a minuteDriver Scan →What it should look like: a compact center knot with two balanced loops and two neatly finished tails.
Three ways to finish the ribbon tails
- Straight cut: the quickest and simplest finish.
- Diagonal cut: gives each tail a pointed, polished appearance.
- V-notch or dovetail: cut a centered V into the end for a traditional decorative finish.
Make both cuts at the same angle and length. Tail finishing is not only decorative: it makes uneven ends less noticeable, improves symmetry, and can reduce the appearance of fraying. Hallmark’s bow guidance also includes diagonal and V-shaped tail finishes.
How to prevent the ribbon from fraying
- Use sharp scissors for a clean edge.
- For a loose-weave ribbon, trim the edge cleanly and consider a compatible fabric fray sealant.
- For suitable synthetic ribbon, heat sealing may fuse the fibers at the cut edge. Test a scrap first.
- Do not assume every ribbon can be heat sealed. Natural fibers and synthetic fibers respond differently to heat, and wired ribbon may contain materials that should not be exposed to a flame.
If you use heat, follow the ribbon manufacturer’s guidance and work carefully. Do not use an open flame on unknown, delicate, natural-fiber, or wired ribbon. The U.S. International Trade Commission describes heat sealing as an anti-fray treatment for suitable ribbons, while University of Georgia textile guidance explains why natural and synthetic fibers have different heat sensitivities.
Troubleshooting an uneven or floppy bow
| Problem | Likely cause | Fix |
|---|---|---|
| One loop is larger. | The loops were not equal before the center was tied. | Loosen the center, resize both loops, and retighten gradually. |
| One tail is longer. | The starting tails were uneven or the ribbon shifted during tying. | Trim the longer tail to match the shorter one, or retie if the difference is substantial. |
| The dull side is showing. | A single-faced ribbon twisted during a bend or at the center. | Retie with the finished side facing up, control the center turn, or use double-faced ribbon. |
| The bow looks flat. | The ribbon lacks body or the loops are too small. | Try grosgrain or lightly wired ribbon, or make fuller loops. |
| The bow slips loose. | The ribbon is very smooth or the center knot is not tight enough. | Retighten the knot. For a display bow, add a narrow center tie or securing device. |
| The center looks bulky. | Too much material has been pulled into the knot. | Use thinner ribbon or make a smaller center crossing. |
| Wired edges curl or buckle. | The wire was bent unevenly or sharply. | Smooth the ribbon and reshape the wire gently rather than creasing it. |
| The tails are too short. | The ribbon was cut close to the intended finished size. | Start again with a longer strip; this is why beginners should begin with 15–20 inches. |
| The ends unravel. | The ribbon has a loose or cut edge. | Trim cleanly and use a compatible edge treatment after testing it on scrap. |
| The bow falls apart when attached. | The bow was tied separately without an attachment point. | Secure the center with narrow ribbon, wire, tape, or an adhesive suited to the project surface. |
Make your adjustments before the final pull. Once the center is fully cinched, correcting uneven loops usually requires loosening the knot or starting over.
How to attach a finished bow
The classic bow normally stays together through its own center knot. If you are attaching it to a basket, wreath, painted sign, frame, gift, or other decoration, add a separate attachment method based on the surface:
- Narrow ribbon: wrap it around the center and tie or knot it on the back.
- Floral wire, pipe cleaner, or chenille stem: useful for securing the bow to a wreath, branch, basket handle, or wire frame.
- Double-sided tape or glue: useful for lightweight bows on appropriate surfaces. Test first, especially on painted or finished surfaces, because some adhesives can lift paint or leave residue.
A small classic bow does not require wire or glue merely to exist. Securing hardware becomes useful when the bow is large, the ribbon is slippery, the bow will be moved, or it must remain attached to a project.
If you meant a different kind of ribbon bow
Bow tied directly around a package
For a package bow, the ribbon is measured for the box first rather than cut as a separate 15-inch strip. Wrap the ribbon around the package in the directions required, then leave additional length for the bow and tails. Hallmark describes a package-specific method that begins by wrapping ribbon around the package four times before cutting; that is a measuring shortcut for its package technique, not a universal amount for a detachable bow.
Large wired or wreath bow
A large decorative bow uses much more ribbon—often 2 yards or more—and creates several loops before the center is secured with a pipe cleaner, floral wire, zip tie, or chenille stem. Current Michaels bow-making instructions are an example of this larger wired-ribbon approach, using wider 1.5–2.5-inch wired ribbon and a chenille stem.
Do these 3 things before closing this tab:
1Scan for outdated or missing drivers - takes under a minute2Clear out junk files and repair common Windows errors3Fix the driver behind crashes, sound loss and screen glitchesRank #4

- 【Please Note】Due to different light or screen, the pink ribbon may have a little color difference.The single side pink ribbon is made of polyester to reduce fraying. For clean edges, simply seal with a lighter.
- 【Party Decoration Ribbon】The pink color ribbon is bright and vivid, use as napkin ties, hanging streamers, favor box wraps, chair bows, or photo booth backdrops. Ideal for breast cancer awareness events, baby showers, parties, and birthday celebrations.
- 【 Ideal for Hair Accessories】This pink ribbon is 1 inches wide and 50 yards long; Soft and smooth ribbon works great for hair bows, headbands, ponytail wraps, and braiding accents.
- 【Making Beautiful Bows】The pink ribbon can be used for wreaths, gift wrapping, hair clips, and shoe clips. In addition, the ribbon is also suitable for wedding decoration, balloons, cake packaging, crafts project, home decoration, etc.
- 【Use Occasions】Pink satin ribbons can be used for weddings, brings a kind of romance about love, and it also suitable for Valentine's Day/Mother's Day/Easter/Graduation/Halloween/Christmas gift wrapping or party decorations
This method is better for wreaths, mantels, large packages, florals, and substantial signs. Do not simply keep adding ribbon to the small bunny-ear method; beyond a certain size, the center knot becomes bulky and the loops lose control.
Florist or multi-loop bow
A florist-style bow is built from multiple alternating loops that are twisted and gathered at the center. It is designed for bouquets, wreaths, and large decorations rather than a small detachable bow. This floral-bow example illustrates the different construction, while Good Housekeeping provides examples of larger wired and multi-loop approaches.
Layered bows can also combine several ribbons or use twine to secure the center. Michaels MakerPlace’s layered-bow project is a variation, not a replacement for the four-step classic bow in this tutorial.
Independent reader supportYour contribution helps us test, update, and keep practical guides available for everyone.Frequently asked questions
How much ribbon do I need for a medium bow?
Start with about 15 inches for a medium classic bow made from approximately 1-inch-wide ribbon. Beginners may prefer 15–20 inches so they can make larger loops and trim the tails afterward. Wider ribbon, longer tails, and larger loops require more.
What ribbon is easiest for beginners?
Grosgrain is easy to grip and usually gives a crisp result. Double-faced ribbon is also beginner-friendly because both sides look finished. Very slippery satin can work, but it takes more care to keep the knot from shifting.
Can you make this bow with satin ribbon?
Yes. Satin produces a smooth, polished bow, but single-faced satin can reveal its dull underside when it twists. Keep the finished side outward while forming the loops, or choose double-faced satin.
How do I keep both sides of one-sided ribbon facing outward?
Begin with the finished side up, keep the ribbon flat through each loop, and make any center rotation deliberately rather than allowing the strip to twist. If the orientation is still difficult to control, use double-faced ribbon.
How do I make the loops even?
Form the loops to approximately the same size before tying, leave the knot loose during the first pull, and compare both loops before tightening completely. If one is larger, loosen the center and slide the ribbon through instead of pulling harder.
How do I stop ribbon from fraying?
Cut with sharp scissors and finish the ends with a diagonal cut or V-notch. For suitable synthetic ribbon, a tested heat-sealing method can help; for natural or delicate ribbon, use a compatible fabric sealant instead. Never assume an open flame is safe for unknown or wired ribbon.
Best Value

- 【Double Face Continuous Ivory Satin Ribbon】Ivory satin ribbon with a silky texture and continuous double face ribbon design. Width: 1-1/2 inch, Length: 50 yards per roll with a plastic spool and dust-proof wrap for easy storage and use
- 【True Ivory Color】The ivory satin ribbon matches the color shown in the main image. Machine washable and colorfast. The ribbon will not fade when used for wedding invitations, gift wrapping or DIY projects.
- 【Ivory Ribbon for Gift Wrapping】This continuous ivory ribbon is perfect for gift wrapping, wedding invitations, dress sashes, bridal bouquets, sewing, corset lacing, dancer wands, hair bows, party decorations and handmade craft projects.
- 【Well Made】Made of high-quality polyester with a smooth, silky surface and wrinkle-resistant finish. The ribbon comes on a spool with a protective plastic wrap to keep it clean and ready to use.
- 【Reusable & Practical】The continuous 50-yard ribbon allows you to cut the length you need with minimal waste. Due to different monitor settings, slight color variations may occur.
How do I attach a finished bow to a package?
Tie the package ribbon separately, or attach this detachable bow with double-sided tape, a small amount of suitable glue, narrow ribbon, or wire. Measure ribbon around the package before cutting; the 15-inch amount applies to the bow itself, not the ribbon needed to wrap the box.
Can I make this bow without wire?
Yes. The classic two-loop bow needs only ribbon and scissors. Wire, a pipe cleaner, or a chenille stem is mainly helpful for large multi-loop bows or for attaching a bow securely to a wreath, basket, arrangement, or sign.
About the four-step method
The exact-title tutorial currently accessible through AOL was published on June 11, 2015 and attributes the material to Better Homes & Gardens. Its 15-inch starting measurement and four-part sequence are useful for this classic bow, but the page should be treated as an older syndicated tutorial rather than presented as newly updated. Larger wired, florist, and package bows use different measurements and construction methods.
Frequently Asked Questions
How much ribbon do I need for a bow?
For a medium classic bow, start with about 15 inches of approximately 1-inch-wide ribbon. A beginner-friendly range is 15–20 inches; use more for wider ribbon, larger loops, or longer tails.
What ribbon is easiest for beginners?
Grosgrain is easy to grip and holds a crisp shape. Double-faced ribbon is also forgiving because both sides look finished if the ribbon rotates while you tie.
Can I make a bow with satin ribbon?
Yes. Satin creates a polished finish, but single-faced satin can show its dull underside when twisted. Keep the finished side outward or choose double-faced satin.
How do I keep a one-sided ribbon from twisting?
Start with the finished side facing up, keep the ribbon flat while forming the loops, and make any center rotation deliberately. If the orientation remains difficult, use double-faced ribbon.
How do I make both loops the same size?
Make the loops approximately equal before tying, keep the center knot loose while adjusting, and compare the loops before the final tightening. Loosen the knot slightly if one side needs resizing.
How do I stop ribbon ends from fraying?
Use sharp scissors and finish the ends with a diagonal cut or V-notch. A suitable synthetic ribbon may be heat sealed after testing scrap, but natural, delicate, and wired ribbons require more caution.
How do I attach a detachable bow to a package or decoration?
Use narrow ribbon, floral wire, a pipe cleaner, chenille stem, double-sided tape, or a suitable adhesive depending on the project. Test adhesives on painted or finished surfaces first.
Can I make this bow without wire?
Yes. The classic two-loop bow is made with only ribbon and scissors. Wire is mainly useful for large decorative bows or for attaching a bow securely to a wreath, basket, arrangement, or sign.
Do these 3 things before closing this tab:
1Repair Windows errors before they cause bigger problems2Scan for outdated or missing drivers - takes under a minute3Clear out junk files and repair common Windows errorsThe Bottom Line
For a classic two-loop ribbon bow, begin with 15–20 inches of ribbon, keep the loops equal, tie the center like a shoelace, and trim only after the bow is secure. Use double-faced ribbon or grosgrain for the easiest first attempt, and save wired, multi-loop construction for large wreath and floral bows.
Quick Recap

Product prices and availability are accurate as of the date/time indicated and are subject to change. Any price and availability information displayed on Amazon at the time of purchase will apply.




