Quick wins for a faster PC:
Repair Windows errors before they cause bigger problemsFix Now →Fix the driver behind crashes, sound loss and screen glitchesFind Drivers →Clear out junk files and repair common Windows errorsFree Scan →
ThatPainter is reader-supported. When you buy through links on our site, we may earn an affiliate commission. Learn More
No paper airplane can fly forever without power: gravity and drag eventually bring every glide to an end. But careful folds, small trim adjustments and repeatable tests can help you make one glide longer and straighter. Here’s a practical way to build and tune a paper airplane without mistaking a lucky throw for a better design.
What “forever” means for a paper airplane
For an unpowered paper airplane, “forever” is a playful goal, not a realistic outcome. The official records are measured in seconds for duration and metres for distance—two different achievements. Guinness World Records reports a longest paper-aircraft flight of 31.2 seconds, achieved by a team in Kunshan, Jiangsu, China, on 11 February 2026 (Guinness World Records). Its separate farthest-flight result is 98.43 metres, achieved in Shanghai on 28 December 2025; distance does not tell you how long the plane stayed aloft (Guinness World Records).
Those records are not a beginner recipe. The available paper-airplane studies describe experimental performance tests, flow visualisation and force measurements, not a universally proven fold or paper grade for a home-built glider (paper-airplane aerodynamics study). Treat the steps below as a method for making and tuning your own design, not a guarantee of a record flight.
Recommended Free Tools
Fold a simple, balanced airplane
What you need
- One ordinary sheet of letter-size printer or copy paper. The available sources do not establish a best brand or weight.
- A flat surface for folding.
- A large indoor space, away from fans and open windows.
Make a basic dart
- Place the sheet lengthwise on the table and fold it in half down the long axis. Crease sharply, then open it; the centre crease is your alignment guide.
- Fold the two upper corners inward so their edges meet the centre crease, forming a point at the top.
- Fold each new sloping edge inward to the centre crease once more to make a long, narrow nose.
- Fold the airplane in half along the original centre crease, with the folded layers on the outside.
- Fold one wing down, aligning its top edge with the bottom edge of the body. Turn the plane over and make the second wing match.
- Open the wings so they sit evenly. Check that both sides are alike and the nose and wing tips have not been bent out of line.
These are practical construction steps, not a tested record design. Fold on a flat surface and align corresponding edges carefully: an accidental difference between the wings can make the plane turn when you want it to glide straight.
#1 Best Overall
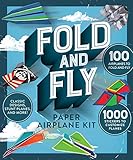
- Airplanes UFOs Space Shuttles Spaceships
Launch for a smooth glide
For flight time, aim for a controlled glide rather than the hardest possible throw. Hold the airplane near its centre, point it forward and release it smoothly. Use the same launch height, location and motion for each test. There is no established optimal launch angle or beginner flight time in the cited sources, so avoid treating a particular number as a target.
Test indoors in a spacious area where air currents are less likely to interfere. Keep people and fragile objects clear of the flight path. If you move outside, even a light or changing breeze can make it hard to tell whether a fold adjustment helped.
Rank #2
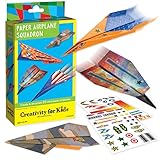
- TAKE FLIGHT WITH PAPER PLANES: Launch into fun with this interactive paper airplane kit, perfect for kids who love hands-on activities Fold, decorate, and fly 20 colorful mini planes while learning the basics of aerodynamics and design
- ALL-IN-ONE ACTIVITY KIT INCLUDES: This complete kit comes with 20 sheets of patterned paper, 2 unique airplane styles, step-by-step instructions, sticker sheets for decorating, and a storage box to keep your fleet ready for takeoff
- LEARNING THROUGH CREATIVITY: Designed for kids ages 6+, this screen-free activity supports fine motor skills, spatial reasoning, and problem-solving while inspiring imagination through custom designs and flying challenges
- MESS-FREE FUN AT HOME OR ON THE GO: Non-toxic materials and simple setup make this the perfect party activity or boredom buster. Everything stores neatly in the box for easy cleanup—just fold, decorate, and soar
- CREATED BY THE EXPERTS IN CREATIVE PLAY: Founded in 1976 in Cleveland, Ohio, Creativity for Kids has proudly designed crafts for kids that encourage imagination and build confidence
Trim the airplane in small steps
After a few launches, watch the plane’s path before changing anything. Adjust the rear edges of both wings gently and evenly, making only a small change at a time:
What’s actually slowing this PC down?
Pick the symptom - the matching free tool is one click away.
- If it dives: bend the rear edges slightly upward, then test again.
- If it stalls and drops: reduce any upward bend. A less forceful launch may also help distinguish a trim problem from a throwing problem.
- If it turns or spins: check that the wings are even and the centre fold is straight. Make a tiny correction to the side that appears out of line, then retest.
These are troubleshooting suggestions, not guaranteed fixes. Aerospace researcher Dr Yicheng Sun’s design work, described by Cranfield University in 2022, considered modifications to improve stability and prevent spinning; that account is an example of design iteration, not a controlled ranking of beginner folds (Cranfield University).
Rank #3
Test one change at a time
Testing and modifying a design is also the approach used in the Civil Aviation Authority’s paper-aircraft educational challenge (CAA paper-aircraft challenge). To learn what works for your airplane, change only one thing between test rounds—for example, adjust the wing trim but keep the paper and launch the same.
- Choose one design, fold it carefully and make several launches under the same conditions.
- Record flight time and what the airplane did: straight glide, turn, dive or stall. Use a phone timer if helpful.
- Make one small change, such as a slight trim adjustment, and repeat the launches with the same paper and launch motion.
- Compare the overall pattern across attempts, not just the single longest flight. A lucky throw is not proof that a change improved the design.
Keep separate notes for duration and distance. If the goal is a longer glide, a plane that travels farther in one fast throw has not necessarily stayed in the air longer.
Quick Recap
Best Value

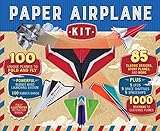
- A step-by-step guide that shows you exactly how to build amazing paper airplanes
- This kit includes 40 sheets of flight-tested ready-to-fold paper printed on both sides in a variety of colorful patterns
Rank #4
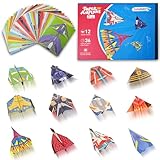
- 12 CLASSIC DESIGNS – Includes step-by-step instructions for 12 exciting airplane models, from easy flyers to advanced stunt planes, perfect for beginners and pros alike.
- 36 COLORFUL ORIGAMI SHEETS – Pre-printed paper with vivid patterns makes folding more fun, durable, and flight-friendly compared to regular paper.
- LEARN & PLAY STEM TOY – Combines creativity, hands-on skills, and aerodynamics, encouraging kids to explore science while having fun with friends and family.
- PERFECT FOR KIDS AGES 5-12 – Designed for boys and girls to enjoy solo or group play; a great activity for classrooms, parties, and family game nights.
- IDEAL GIFT CHOICE – A unique and educational airplane kit, perfect as birthday gifts, stocking stuffers, holiday presents, or rewards for curious little pilots.

Product prices and availability are accurate as of the date/time indicated and are subject to change. Any price and availability information displayed on Amazon at the time of purchase will apply.




