Outdated Drivers Are Slowing You Down
What’s actually slowing this PC down?
Pick the symptom - the matching free tool is one click away.
One free scan finds every outdated or missing driver and matches the right update for your exact hardware.Free scan · exact hardware match
Windows Errors? Fix Them Before They Spread
Repair common Windows errors and clear accumulated junk for a smoother, more stable PC - no reinstall needed.Free scan · no reinstall
ThatPainter is reader-supported. When you buy through links on our site, we may earn an affiliate commission. Learn More
DIY paper cherry blossom branches can be made three ways: twist a paper lunch bag into a small tree and add tissue-paper blossoms; wire dimensional crepe-paper flowers onto a real twig; or build a reinforced branch for a large backdrop. Choose the scale first, then match the paper, wire, adhesive and support to that choice. The lunch-bag version is the quickest and least specialized, while wired crepe-paper flowers give each blossom a more sculpted shape.
Choose the branch style before buying materials
Your finished display will be easier to build if you decide whether you want a standing tree, a twig arrangement or a large installation. These are different constructions, not merely different decorations.
The Tool Desk
Outbyte Driver Updater FREEFix the driver behind crashes, sound loss and screen glitchesFind Drivers →Outbyte PC Repair FREERepair Windows errors before they cause bigger problemsFix Now →As an Amazon Associate I earn from qualifying purchases.
| Approach | Best for | Flowers | Branch support | Materials and skill |
|---|---|---|---|---|
| Paper-bag tree | Tabletop or shelf display | Layered tissue-paper clusters | Twisted paper lunch bag | Common supplies; easiest entry point |
| Wired twig branch | A natural-looking vase arrangement | Individually shaped crepe-paper blossoms | Dried twig or constructed wire branch | Floral wire, tape and wire cutters; moderate shaping |
| Bundled or backdrop branch | Large wall, event or photo display | Groups of dimensional flowers and leaves | Heavy wire, wrapped structure and a stand | More planning for stability, transport and storage |
Tissue paper is entirely suitable for the simple project. Crepe paper is the better choice when you want petals that cup, twist and hold a three-dimensional profile. Do not buy floral wire for the lunch-bag tree unless you are deliberately adding a separate wired-flower layer.
Materials for each size
Simple paper-bag tree
- One paper lunch bag
- Pink and white tissue paper
- Glue
- Scissors
The Smithsonian American Art Museum’s accessible project, published March 26, 2020, uses this short list. Its web instructions describe tissue-paper squares of about 1 to 2 inches. A separate PDF from the same project gives a different approximate size, so treat 1 to 2 inches as one workable version rather than a universal measurement.
#1 Best Overall

- PREMIUM MATERIAL: The faux silk artificial cherry flowers are crafted with an iron wire inside the stem for durability. Manipulate and reshape the stem to achieve your desired appearance.
- SIZE & PACKAGE : The artificial cherry blossoms are approximately 34.45 inches long, and each package includes 6 packs of faux flowers.
- DESIGN: Decorating your surroundings with artificial cherry blossoms can revitalize the ambiance. Unlike fresh flowers, they require less maintenance and are not affected by wilting. Their durability makes them more suitable for people interested in engaging in DIY activities.
- MULTI-PURPOSE: The artificial cherry blossom branch is an ideal option for both indoor and outdoor decoration. Not only does it make a perfect addition to birthdays, anniversaries, and Valentine's Day, but it also adds joy to your everyday life.
- ATTENTION: Due to long term transportation, the faux blossoms may fall off. Nevertheless, the artificial branches are meticulously handmade and can be effortlessly reattached if they become detached.
Dimensional flowers on a twig
- White or light-pink crepe paper
- Light-green crepe paper for leaves
- Yellow tissue paper for a fringed center
- Thin floral wire
- White and brown florist tape
- Glue
- Scissors and wire cutters
- An optional dried twig
A workshop-style supply list also specifies 24-gauge paper-covered floral wire, craft glue and a hot-glue gun. The hot glue is useful where a flower or branch needs a firm mechanical connection, but it is not necessary for the paper-bag method.
Recommended Free Tools
Large branch or backdrop
- 16-gauge floral wire for the main structure
- Foil to build out branch thickness
- Tape and brown crepe paper for wrapping
- Removable stem pockets if you want flowers to come off for storage
- A PVC stand or another engineered base
- Crepe paper flowers and leaves
This list follows Sara Kim’s January 19, 2025 large-format tutorial. The heavier wire, stand and removable construction are specific to a backdrop; they are unnecessary for a small vase branch.
Method 1: make a standing cherry-blossom tree from a paper lunch bag
1. Prepare the bag
- Fold the top, open portion of the lunch bag flat enough to cut safely.
- Cut several strips into the open end. Leave the closed bottom section intact so it can become the base of the trunk.
- Open the bag and stand it on its closed base. Spread the cut strips around the top so you can see the future branch pattern.
Vary the strip widths and lengths slightly. Perfectly identical strips make the tree look manufactured; modest variation creates a more convincing branching rhythm.
2. Twist the trunk and branches
- Grip the middle of the bag and twist it to form a central trunk.
- Separate neighboring strips into pairs or small groups.
- Twist each pair or group together to create branches, leaving some strips as short twigs and others as longer limbs.
- Adjust the spread while the paper is still flexible. A broad, uneven canopy gives you more places to attach blossoms than a tight bundle.
Make the trunk thickest near the base and let it taper toward the branch ends. If a strip tears, trim the loose edge and twist the neighboring strip into the gap rather than rebuilding the whole tree.
3. Form tissue-paper blossoms
- Cut small squares from pink, white or a mixture of both tissue papers. Squares around 1 to 2 inches are the size described in the museum’s web version.
- Layer a few squares. The layers do not need to line up perfectly.
- Apply a small amount of glue between the layers or at the center, depending on how much separation you want.
- Fold the layered piece into a point or a loose crumpled bud.
- Glue the pointed end to a branch tip or along a thin branch.
Use mostly pale blossoms with occasional pink clusters for depth. Keep some branch visible: completely covering the paper structure makes the tree look like a solid pink mass.
Rank #2

- PREMIUM MATERIAL: The faux silk artificial cherry flowers are crafted with an iron wire inside the stem for durability. Manipulate and reshape the stem to achieve your desired appearance.
- SIZE & PACKAGE : The artificial cherry blossoms are approximately 34.45 inches long, and each package includes 6 packs of faux flowers.
- DESIGN: Decorating your surroundings with artificial cherry blossoms can revitalize the ambiance. Unlike fresh flowers, they require less maintenance and are not affected by wilting. Their durability makes them more suitable for people interested in engaging in DIY activities.
- MULTI-PURPOSE: The artificial cherry blossom branch is an ideal option for both indoor and outdoor decoration. Not only does it make a perfect addition to birthdays, anniversaries, and Valentine's Day, but it also adds joy to your everyday life.
- ATTENTION: Due to long term transportation, the faux blossoms may fall off. Nevertheless, the artificial branches are meticulously handmade and can be effortlessly reattached if they become detached.
4. Balance the canopy
Place blossoms at branch ends first, then fill a few interior gaps. Turn the tree as you work so the front, sides and back receive attention. If the paper bag is top-heavy, widen the bottom folds or set the tree in a stable container; do not add wire simply to solve a base problem that can be fixed by the paper form.
Method 2: shape individual crepe-paper blossoms on wire
1. Cut and orient the petals
Cut five petal shapes from white or light-pink crepe paper. Follow the paper grain direction recommended by your crepe-paper sheet or template so the petals stretch in the intended direction. The petals do not need to match exactly; slight differences make the flower more organic.
2. Cup each petal
- Hold a petal between your thumbs and forefingers.
- Gently stretch the center to create a shallow cup.
- Curve the top edge and twist the narrow base slightly.
- Repeat for all five petals, changing the curvature enough to avoid a stamped-out appearance.
Crepe paper can split if pulled sharply across the grain. Use several light stretches instead of one forceful tug. The Tinkery’s instructions note that shaping takes practice; an uneven edge is preferable to a torn petal.
3. Build the center and stem
- Cut a strip of yellow tissue paper and fringe one long edge.
- Wrap the uncut edge around the tip of a thin floral wire and secure it with glue.
- Fluff the fringe to create the flower’s center.
- Place the five petals around the center, overlapping their bases.
- Glue or tightly wrap the bases to the wire.
Wrap the connection with white florist tape first if you want the flower base to disappear into a pale blossom, then continue down the stem as needed. Brown florist tape is useful where the stem meets a twig.
Do these 3 things before closing this tab:
1Scan for outdated or missing drivers - takes under a minute2Clear out junk files and repair common Windows errors3Fix the driver behind crashes, sound loss and screen glitches4. Add leaves and conceal the wire
Cut simple leaf shapes from light-green crepe paper. Pinch or crease a center vein and attach each leaf to a wired stem. Stretch brown florist tape as you wrap: the tension activates the tape’s adhesion and produces a slimmer, cleaner stem than wrapping it loosely.
Rank #3

- Cherry Blossom Branches For Spring Elegance: Immerse your home in the beauty of spring with these exquisite artificial cherry blossom branches. Crafted from high-quality soft silk, each petal boasts a naturally curled shape and delicate, translucent appearance, bringing a lifelike sense of elegance and serene ambiance to any space. Perfect for ushering in the spring season.
- Premium Silk Material & Adjustable Design: Experience the realistic touch of premium silk flowers, meticulously assembled for durability. The flexible wired stems allow you to easily bend and shape each branch to your liking, creating custom arrangements that fit your vase and aesthetic perfectly.
- Generous Pack & Ideal Size: Get abundant value with a set of 6 branches, each approximately 16 inches tall. This versatile size is ideal for creating charming displays in tabletop vases, crafting DIY projects like wreaths and garlands, or adding a spring touch to shelves and desks.
- Versatile Springtime Decor: Celebrate spring and beyond! These blossoms are perfect for seasonal home decor (living room, kitchen, office), special occasions (weddings, Valentine‘s Day, Mother’s Day), and enhancing spaces like hotels or parties. Let them inspire your spring DIY crafts and festive arrangements.
- Easy Setup & Satisfaction Tip: Rest assured, your blossoms will arrive beautifully. If any flower heads detach during shipping—a common occurrence with delicate handmade items—they can be effortlessly reattached without glue. Simply pick up and insert them back for a flawless, full look.
5. Attach flowers to a twig
- Lay the dried twig on a work surface and test several flower positions before gluing anything.
- Bend each wire stem so flowers point in different directions rather than facing the same plane.
- Wrap the stem and twig together with brown florist tape.
- Add a small amount of craft glue or hot glue at a stubborn joint if the tape alone does not hold.
- Trim excess wire with wire cutters and cover any sharp end.
A real dried twig supplies irregular texture and a natural taper. If no twig is available, bundle several wired stems around a thicker wire and wrap the bundle with brown crepe paper to create an artificial branch.
Method 3: build a larger branch or backdrop
Large displays need a load-bearing plan before flowers are made. Sara Kim’s backdrop method uses 16-gauge floral wire for the principal branches, foil to increase their diameter, tape to lock the shape and brown crepe paper as the visible bark layer. A PVC stand supports the finished structure, while removable stem pockets make the flowers easier to transport and store.
Construct the armature
- Decide the final height, width and footprint of the display before cutting wire.
- Shape the 16-gauge wire into a main trunk and major limbs.
- Wrap foil around sections that need more volume, tapering toward the tips.
- Tape the foil in place and wrap the completed form in brown crepe paper.
- Test the stand with the empty branch before adding flowers.
Install flowers in groups
House & Garden’s March 2, 2023 tutorial, adapted from Sophie Longhurst’s Crafting Authentic Paper Flowers, groups four to six flowers and attaches bunches alternately along a main branch. Alternating bunches prevents one side from becoming visually heavy. Add leaves between groups rather than placing every leaf directly under a flower.
Free tools Windows power users keep installed
One-click scans. No signup required.
How to arrange blossoms so the branch looks natural
- Vary density. Keep some tips sparse and let a few clusters become focal points.
- Change direction. Bend wired flowers upward, outward and slightly toward the viewer.
- Use color gradually. Mix white and pink rather than dividing the branch into separate color zones.
- Respect the branch line. Blossoms should follow the direction of a twig, not float in isolated rows.
- Leave negative space. Open areas reveal the trunk and make the canopy easier to read.
Troubleshooting common problems
The paper-bag trunk collapses
Untwist the center slightly, spread the base folds and reduce the number of blossoms at the highest tips. A container can stabilize the base, but adding heavy materials to the upper branches will make the imbalance worse.
Petals look flat
Re-cup the crepe paper by stretching the center and curling the top edge. Tissue paper clusters will remain softer and less sculpted; switch to crepe paper if a dimensional flower is the goal.
Rank #4
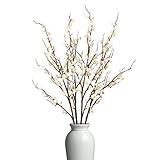
- Silk Flowers Material: This cherry blossom branches is made of silk with purely manual process.Artificial plum blossom are made of Silk and plastic, long stems artificial flowers for tall vase,with real touch feeling.spring artificial flowers for decoration
- Cherry Blossom Branches SIZE: The size of this faux flowers is 37" in length, and flower diameter is about 0.9",51 flowers and 4 branches. The tall floral stems can be used in tall vases for floor,almost like real plum blossoms put before. The plastic flowers are sold in sets, each with 4 stems(Vase not included)
- Faux Flowers Design: The flexible single fake cherry long stem is suitable for flower arrangement, making bouquets Silk material is thin and transparent, but it is very strong. Each petals are naturally curled and each silk flower is perfect present, the hand feel keeps the softness and of the silk
- Easy To Use: Silk Flowers with Stems are very popular in flower arrangement supplies. Will not appear flower leaf abscission phenomenon. Great for making your own gorgeous spring decoration, floral decor, home decor indoor
- Silk Flowers for Home Decor Indoor : This Fake Flowers are great for indoor or outdoor spring decoration,birthdays, Anniversaries, Valentine's Day or Any everyday decoration you like
Wire shows at the flower base
Overlap the petal bases farther around the fringed center, then stretch florist tape while wrapping. Brown tape should stop where the branch becomes visibly brown; white tape can remain under pale petals.
The arrangement feels too symmetrical
Move a few flowers before gluing. Shorten selected stems, rotate several blossoms away from the viewer and create unequal gaps between clusters.
A large branch leans
Remove the flowers and test the armature alone. Reinforce the main wire, add foil and tape where the trunk is too thin, and correct the stand before reinstalling the removable stems.
Display, storage and safety
Keep finished paper branches away from open flames, heaters and damp locations. Hot glue and wire cutters require adult supervision for children. Cover every trimmed wire end, especially on arrangements placed at hand or eye level.
For storage, remove wired flowers from pockets or twig attachments when possible, wrap them loosely in tissue paper and store them in a rigid box. Do not compress crepe petals under heavy objects. The simple paper-bag tree stores best when blossoms are attached after the twisted bag has been flattened; if the blossoms are already glued on, use a box tall enough to avoid crushing the canopy.
Which method should you choose?
| If you want… | Choose… | Reason |
|---|---|---|
| A quick craft using supplies already at home | Paper-bag tree | It needs only a lunch bag, tissue paper, glue and scissors. |
| Individual blossoms with cupped petals | Wired crepe-paper flowers | Each flower can be shaped, rotated and repositioned. |
| A natural base and vase arrangement | Wired flowers on a dried twig | The twig supplies authentic branching texture. |
| A wall-sized installation | Reinforced backdrop branch | Heavy wire, wrapping and a stand provide the required support. |
Start with the paper-bag version if you are teaching a group or making a temporary decoration. Move to crepe paper and wire when petal shape, repositioning and realistic stems matter more than speed. Reserve the reinforced backdrop construction for displays that genuinely need its extra structure, transport planning and storage system.
Quick Recap

Product prices and availability are accurate as of the date/time indicated and are subject to change. Any price and availability information displayed on Amazon at the time of purchase will apply.

