Windows Errors? Fix Them Before They Spread
What’s actually slowing this PC down?
Pick the symptom - the matching free tool is one click away.
Outbyte PC Repair · freeRepair common Windows errors and clear accumulated junk for a smoother, more stable PC - no reinstall needed.
Fix My PC Now →ThatPainter is reader-supported. When you buy through links on our site, we may earn an affiliate commission. Learn More
Minecraft pixel art is a picture built from colored blocks on a wall or flat ground. For a reliable first project, choose a simple, high-contrast image, reduce it to a small grid, assign each pixel a block color, mark a flat canvas, and place the blocks row by row. Start at 16×16 or 32×32, then step back frequently: pixel art must read clearly from viewing distance, not just up close.
What you need before building
- A reference image: Use a tightly cropped logo, icon, character face or other subject with strong outlines and mostly flat colors. Photographs and soft gradients are difficult to represent with Minecraft blocks.
- A grid size: Your width and height determine both detail and the number of blocks.
- A palette: Select the closest practical block colors rather than trying to reproduce every shade in the reference.
- A canvas: Clear a flat wall or ground area and mark its outside dimensions. Add guide lines for larger designs.
- Materials or a placement tool: Gather the complete list in Survival, or use Creative mode, commands, a schematic or code-assisted placement when speed matters.
Choose a grid that matches your project
Every grid cell becomes one visible block in a straightforward wall or ground mural. The figures below are from Minecraft Image Converter’s 2025 guide and count the cells in a square design.


| Design | Cells/blocks | Best use | Practical implication |
|---|---|---|---|
| 16×16 | 256 | First icons, faces and symbols | Fast to count and easy to correct, but fine features disappear. |
| 32×32 | 1,024 | Most beginner murals | Adds recognizable detail without an extreme material haul. |
| 64×64 | 4,096 | Detailed wall pieces | Needs careful row guides and substantial preparation. |
| 128×128 | 16,384 | Large murals or a single full map-sized layout | Counting, placement time and resource storage become major constraints. |
If the subject is unreadable at your chosen size, enlarge the grid or simplify the silhouette. Adding scattered colors rarely fixes an unclear design.
The Tool Desk
Outbyte Driver Updater FREEScan for outdated or missing drivers - takes under a minuteDriver Scan →Outbyte PC Repair FREERepair Windows errors before they cause bigger problemsFix Now →Manual construction: a dependable workflow
1. Simplify the reference
Crop away empty space, reduce the subject to a clear silhouette and keep only colors that communicate its shape. Preserve a dark outline when the source image has one; it helps separate neighboring regions.
#1 Best Overall
2. Convert the image into a cell plan
Overlay a square grid on the reference, number rows and columns, and record the color of each cell. For a 16×16 design, that means 256 decisions; a 32×32 design requires 1,024. A printed grid, spreadsheet or image editor can prevent losing your place.
3. Match colors to blocks
Wool provides a basic 16-color range, concrete gives brighter and more saturated colors, and terracotta produces a more muted appearance. Stained glass is another option when translucency suits the design. Use one material consistently for each chosen color so the surface does not acquire accidental texture.
4. Mark the canvas
Build on a flat wall or ground plane. Mark the four outer edges, then add temporary horizontal and vertical guides for a large mural. Confirm the orientation before placing permanent blocks; reversing the reference halfway through is difficult to repair.
5. Place one row at a time
Start at the top-left cell of your plan and complete each row before moving down. Check the row against the reference, remove temporary guides when they are no longer needed, and keep a written count of each material as you work.
Rank #3

- AUTHENTIC MINECRAFT: Officially licensed Minecraft coloring book featuring iconic characters, blocks, and scenes from the popular game
- CREATIVE CONTENT: 80 pages of pixel art designs and activities that bring the Minecraft world to life through coloring
- PIXEL ART FOCUS: Detailed pixel-style illustrations that stay true to the game's distinctive blocky aesthetic
- EDUCATIONAL VALUE: With a variety of coloring pages and activities, this book helps develop fine motor skills and creativity.
- JUMBO FORMAT: Large-format pages provide plenty of space for coloring and creative expression
6. Judge it from a distance
Walk back regularly or view the build from the intended presentation point. If the image fails to read, strengthen the outline, increase contrast, simplify a small feature or enlarge the whole grid. Do not rely on close-up accuracy alone.
Using a converter instead of placing every block
An image-to-block converter can reduce repetitive work. The 2025 Minecraft Image Converter guide describes a workflow of uploading an image, selecting dimensions, adjusting dithering, inspecting a 3D preview, and exporting a blueprint, generated commands or a .schematic for WorldEdit.
Rank #4
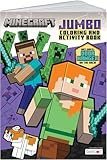
- AUTHENTIC MINECRAFT: Officially licensed Minecraft coloring book featuring iconic characters, blocks, and scenes from the popular game
- CREATIVE CONTENT: 80 pages of pixel art designs and activities that bring the Minecraft world to life through coloring
- PIXEL ART FOCUS: Detailed pixel-style illustrations that stay true to the game's distinctive blocky aesthetic
- EDUCATIONAL VALUE: With a variety of coloring pages and activities, this book helps develop fine motor skills and creativity.
- JUMBO FORMAT: Large-format pages provide plenty of space for coloring and creative expression
- Size: Set the output dimensions deliberately; a larger output multiplies both blocks and correction work.
- Dithering: It can create smoother-looking transitions by mixing nearby colors, but the result may look noisy when viewed close up. Turn it down or off for clean logos and icons.
- Preview: Inspect the three-dimensional preview for orientation, missing colors and unwanted depth before placing anything.
- Output: A blueprint is useful for manual building, commands suit Creative mode, and a schematic is appropriate when you already use WorldEdit. Verify that the exported format works with your edition and tool setup.
Automation is fastest in Creative mode, while manual placement gives the most direct control and remains practical for small Survival builds.
Free tools Windows power users keep installed
One-click scans. No signup required.
Drawing pixel art with Microsoft MakeCode
Microsoft’s official MakeCode tutorial provides a Pixel Art extension for code-driven construction. A MakeCode extension is a custom set of blocks that extends the blocks available in the Toolbox.
- Open MakeCode for Minecraft and create or open a project.
- Add the Pixel Art extension from the Extensions area.
- Place the
pixelArt:draw imageblock in your program. - Edit the image with the extension’s palette and drawing tools.
- Set the drawing position with coordinates, then run the program in the target world.
Do not move your player until the code has finished running: MakeCode’s tutorial warns that the block position is relative to the player’s position. This approach is repeatable and convenient for testing variations, but it requires a compatible MakeCode environment and careful coordinate setup.
Independent reader supportYour contribution helps us test, update, and keep practical guides available for everyone.Pixel art versus map art
Ordinary pixel art is a physical arrangement of blocks on a wall or ground and is viewed directly in the world. Map art is laid out in a suitable area, captured by a crafted map item, and then displayed as that map in an item frame or map wall. The Minecraft Wiki tutorial describes this map-based workflow.
| Feature | World pixel art | Map art |
|---|---|---|
| What you build | Blocks arranged on a wall or ground | A block layout designed to be recorded by a map |
| How viewers see it | Directly in the 3D world | On a map item, often in an item frame |
| Common scale example | Any practical mural size | One 128×128 map area contains 16,384 cells; larger works can stitch multiple maps |
| Best reason to choose it | Large physical displays and unrestricted shapes | Portable map displays and multi-map murals |
Choose map art only when the final display is meant to be a map. A wall mural does not automatically become map art just because it uses a pixel grid.
Choosing an approach
| Approach | Time | Resource cost | Control and correction | Portability |
|---|---|---|---|---|
| Manual Survival | Slowest | Must gather and replace materials | Highest hands-on control; corrections are local | Build remains in the world |
| Manual Creative | Moderate | Minimal | High control with easy replacement | Build remains in the world |
| Converter commands or schematic | Fastest for large images | Depends on palette and tool | Preview first; correcting an incorrect export can be broad | Blueprints and schematics can be reused where supported |
| MakeCode Pixel Art | Fast after the program is prepared | Low in Creative-compatible setups | Repeatable and scriptable; coordinates must be correct | Code can reproduce the design in compatible worlds |
Troubleshooting unreadable builds
- The subject looks muddy: Remove intermediate shades, increase contrast and restore a clear outline.
- Rows drift out of alignment: Recheck the outer dimensions and add numbered guide lines before continuing.
- The result is too noisy: Reduce dithering and use larger flat-color regions.
- Small features vanish: Move to a larger grid or redesign the feature as a stronger shape rather than adding isolated pixels.
- Automation places the image in the wrong spot: Check the player’s position, coordinate origin and edition/tool compatibility before running commands or MakeCode.
- You run out of materials in Survival: Stop after the current row, compare the remaining plan with your inventory, and collect the full palette before resuming.
A practical first project
For a first build, use a 16×16 or 32×32 icon with two to six flat colors. Prepare a numbered grid, choose wool or concrete according to whether you want muted or vivid colors, mark the canvas, and complete the design row by row. Once the silhouette reads clearly from a distance, move to larger murals, automated placement or a map-based display.
Quick Recap

Product prices and availability are accurate as of the date/time indicated and are subject to change. Any price and availability information displayed on Amazon at the time of purchase will apply.




