PC Slower Than It Used to Be?
A free scan shows the junk files, broken settings and background clutter dragging Windows down - then fixes them in one click.Free scan · Windows 10 & 11
Outdated Drivers Are Slowing You Down
One free scan finds every outdated or missing driver and matches the right update for your exact hardware.Free scan · exact hardware match
ThatPainter is reader-supported. When you buy through links on our site, we may earn an affiliate commission. Learn More
You can make polished curtains with decorative trim without a sewing machine by using iron-on hemming adhesive. The reliable sequence is: decide the finished dimensions, prepare the panels, create the hem and header with the correct adhesive, bond the trim in short sections, then let every fused area cool before hanging. This method works especially well for updating ready-made curtains, and the same edge-finishing approach can be used on fabric panels made from scratch.
What you need for no-sew curtains with trim
Gather everything before cutting. The featured tutorial uses Heat n Bond, an iron and ironing board, sharp fabric scissors, a measuring tape, decorative trim, and optional heading tape with hooks or rings. For a curtain header, the tutorial author recommends heavyweight iron-on tape after finding that a lighter strength was not suitable for that job.
As an Amazon Associate I earn from qualifying purchases.
- Existing curtain panels or fabric for new panels
- Heavyweight iron-on hemming tape for the header and hems, selected for your fabric
- Decorative trim long enough for the edges you intend to cover
- Sharp fabric scissors
- Measuring tape, ruler, or straightedge
- Iron and ironing board
- Optional heading tape, pleating hooks, curtain rings, or another compatible hanging system
- A clean scrap of the curtain fabric for testing
Do not assume that every fusible product behaves the same way. IKEA’s SY iron-on curtain strip uses a damp cloth and a pressing action until the fabric is dry, while 3M Scotch Permanent Fabric Tape is a pressure-sensitive product with different fabric restrictions and says not to iron after application. Read the package directions for the exact adhesive you bought, and follow the curtain fabric’s care label.
Plan the finished curtain before you cut
Measure the window, rod or rail, and each panel. Decide the finished length, total width, heading style, and the exact edge where the trim will sit. Planning first prevents the two most expensive mistakes: cutting a panel too short and bonding trim to the wrong side.
#1 Best Overall

- 【Quantity & Packaging Notice】 2 Rolls Included in 1 Pack: Contains 1 roll of 1/4" x 49ft and 1 roll of 1/2" x 49ft (Total 98FT). Note: Both rolls are securely packed together in a single package—please check the inner layer if you think any roll is missing. Specifically designed for clothing repair, folding, and crafting. Whether used for temporary or daily repairs, these sizes ensure efficient and convenient use.
- No Ironing & No Sewing Required: Please do NOT use an iron. This tape works by simply peeling and pressing—no heat or sewing is needed. Just cut the desired length, press it firmly onto clean fabric, and peel off the back film for an instant, easy repair.
- No-sew Solutions for Fabric DIY: Our fabric bonding tape is a hemming tape used for temporary and repeated adhesion and fixation of fabrics. Whether it's sewing curtains, making Halloween costumes or other fabric DIYs, there's no need for sewing. This fabric repair tape is of high quality and suitable for various uses
- Optimized for Light to Medium-Weight Fabrics: Best for items that won't be machine washed, this fabric tape delivers a reliable hold for everyday adjustments and creative projects. Optimized for light to medium-weight fabrics such as cotton, polyester, and lace. Provides a discreet and secure hold when applied to clean, dry surfaces with firm pressure. Not recommended for leather or heavy denim
- Strong Adhesion: Our double sided fabric tape is made with professional grade oil-based adhesive, which is more adhesive than water-based adhesive. Suitable for temporarily gluing clothing in any environment, or even DIY projects such as gift wrapping and card making, it provides reliable support whenever and wherever you need it
Choose the finished length
Measure from the point where the curtain will hang to the intended bottom edge. Decide whether the hem should stop at the sill, below the sill, or near the floor. Mark the finished line on the wrong side of the fabric, then add enough fabric for the hem and adhesive. B&Q’s general curtain guide uses a 5-inch (12.7 cm) length allowance for hemming. That is an example recommendation, not a universal requirement; the allowance depends on your fabric, the hem style, and the adhesive instructions.
Calculate panel width
For a pencil-pleat approach, B&Q suggests fabric width around twice the window space. Treat that as a starting example rather than a formula for every heading. A flat panel, tab-top curtain, gathered heading, or pair of stationary side panels can require a different fullness. If you are modifying ready-made curtains, preserve their existing width unless you are deliberately reshaping them.
Decide where the trim belongs
Trim can run down the leading edge, across the bottom, around all four sides, or along the edges that meet in the center. For a pair of curtains, stand the panels as they will hang and mark the room-facing or center-facing edges before applying adhesive. The featured tutorial places trim on the meeting edges and checks left/right orientation first.
Check pattern direction
If you are making panels from fabric, confirm that stripes, motifs, or a one-way print will run correctly. Lay both panels out before cutting. A trim design can also have a visible “up” direction, so place the roll beside the panel and check its orientation before cutting.
Rank #2

- REMOVABLE DOUBLE-SIDED FABRIC TAPE: 1 roll of Scotch Removable Double-Sided Fabric Tape offers adhesive that holds fabric securely yet is easy to reposition
- SKIN AND FABRIC FRIENDLY: This double sided tape is safe on skin
- IDEAL FOR DIY FABRIC CRAFT PROJECTS: Whether hemming curtains, DIYing costumes, creating felt banners, or adhering temporary patches, this double sided tape does it all without commitment
- GREAT TEMPORARY HOLD ON MOST FABRICS: Removable double sided tape dispenses the perfect length to hold the fabric in place; just cut, place, stick and use
- NO SEWING OR IRONING NEEDED: This temporary no-sew hemming tape is perfect for quick fabric fixes and adjustments
Prepare existing panels or cut new ones
Updating ready-made curtains
- Lay each panel flat with the wrong side facing up.
- Remove old trim, tabs, or a heading component only if it interferes with the new design. Work slowly so you do not enlarge holes or pull the weave.
- Measure from the intended hanging point to the finished bottom line.
- Mark the cut line and leave the fabric allowance required for your chosen hem and adhesive.
- Cut excess fabric with sharp scissors, keeping the cut as straight as possible.
Making panels from fabric
Cut two panels with the planned width, length allowance, and pattern direction. Before applying adhesive, square the fabric by checking that the side edges and bottom edge meet at right angles. Press out major creases so the adhesive will contact a flat surface.
Prepare the heading
If you are changing the hanging style, measure heading tape to the panel width and cut it to match. The tutorial bonds the header tape to the back of the panel, then uses pleating hooks and rings to hang the finished curtains. Confirm that your heading tape, hooks, and rings are designed to work together before bonding anything permanently.
Test the adhesive before committing
Cut a small hidden scrap from the same fabric, or use a concealed area near a hem. Test the adhesive with the fabric, trim, iron temperature, pressing time, and any required cloth or moisture specified on the package. Check the bond only after it has cooled.
- Follow the fabric care label for the maximum safe heat.
- Use the adhesive’s stated pressing time and pressure rather than copying a setting from another product.
- Look for shine, scorching, color change, adhesive bleed-through, or a stiff patch.
- Flex the cooled test area gently to see whether the layers stay attached.
The tutorial uses medium heat for a few seconds when attaching its header, but that is a step from that project, not a universal iron setting. IKEA’s instructions say to let the fused area cool before checking and suggest placing two strips side by side for heavier fabrics. Apply that advice only when it matches the product you are using.
Rank #3
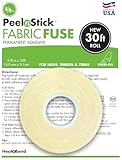
- INSTANT, HASSLE-FREE HEMMING THAT LASTS – Skip the sewing and ironing! This fabric tape for hemming gives you fast, reliable results so you can fix hems and finish projects with confidence and ease.
- DOUBLE-SIDED, PRESS-ON FABRIC ADHESIVE – Designed specifically for fabric, this permanent fabric tape offers a lasting bond with just pressure with no sewing or heat required.
- NO-SEW, NO-IRON APPLICATION – Simply peel, stick, and press, this fabric hemming tape requires no tools, ironing, or stitching.
- WASHABLE AND LONG-LASTING – This peel and stick fabric fuse tape holds through washes and daily wear, keeping your hems and fabric projects intact.
- VERSATILE FOR CRAFTS AND REPAIRS – Ideal for fabric, felt, ribbon, trims, hems, and more, this hem tape is perfect for both quick repairs and creative projects.
Make the hems and finish the header
Bond a straight hem
- Place the panel wrong side up and fold the fabric along the marked finished line.
- Position the iron-on hemming tape inside the fold so it will not extend beyond the edge.
- Press according to the adhesive package directions. Keep the iron moving or hold it in place only for the stated time.
- Work in manageable sections, keeping the fold aligned as you progress.
- Allow the hem to cool completely, then inspect the bond before moving the panel.
If the tape is visible at the edge, the fold is too shallow or the adhesive is too close to the cut edge. Recheck the test sample and product directions rather than adding more heat automatically.
The Tool Desk
Outbyte Driver Updater FREEScan for outdated or missing drivers - takes under a minuteDriver Scan →Outbyte PC Repair FREERepair Windows errors before they cause bigger problemsFix Now →Attach heading tape without sewing
- Place the heading tape on the back of the curtain panel and align its top and side edges.
- Apply the recommended adhesive between the panel and the tape, following the package’s liner-removal instructions.
- Press the first section at the specified temperature and duration.
- Move along the panel in short sections, keeping the tape straight and avoiding bubbles or folds.
- Let the entire header cool before inserting hooks or rings.
The featured tutorial recommends heavyweight tape for its header because the author had initially purchased the wrong strength. Match the adhesive to the weight of both layers and to the manufacturer’s stated use; a tape suitable for a light hem may not support a heading that carries the curtain’s weight.
Apply the decorative trim
Measure and cut the trim
Measure the exact panel edge to be decorated. Cut the trim and adhesive to matching lengths, adding only the allowance specified by the trim or adhesive instructions. Lay the pieces beside the curtain and confirm that the pattern direction is correct.
Bond trim to one panel edge
- Place the panel flat with the correct face up or down, depending on the adhesive instructions and the trim’s construction.
- Position the adhesive at the intended edge without allowing it to protrude.
- Peel away only enough liner to begin the first section.
- Align the trim carefully, checking its distance from the edge.
- Press in short sections, keeping the trim straight and smoothing it before each press.
- Continue until the full edge is bonded, then leave it undisturbed while it cools.
For a pair of panels, repeat the orientation check before starting the second one. Hold both panels together as they will meet at the rod or rail. This catches a reversed motif or trim placed on the outside edge before it is permanently fused.
Rank #4

- EASY PEEL AND STICK ADHESIVE: No sew VELCRO Brand fabric tape for clothes requires no sewing, ironing or gluing; used as hem tape for pants This sticky back cloth tape bonds to most fabrics
- CUT, PRESS AND SET: This bulk roll of fabric VELCRO Brand sticky tape for clothes is the perfect no sew hemming tape ; create custom strips with adhesive for fabric by cutting roll to length
- HEMMING TAPE FOR DRESSES: Fabric tape for hemming can also be used to hem pants without sewing, fabric adhesive VELCRO Brand snap tape is perfect for your wardrobe
- PERFECT FOR DOG, BABY OR DOLL CLOTHES: Hook and loop fabric adhesive tape is the perfect non iron tape for all clothing needs, cut to length adhesive strips for fabric
- PERMANENT BOND: A strong sticky back fastener bonds to mend curtains or hem pants or dresses; ideal for costumes, adding embellishments to cloth , arts and crafts and adding closures like snaps or zippers
Trim corners and ends
At a corner, stop before the turn and decide whether the trim should overlap, meet cleanly, or continue around the corner according to its design. Make small, controlled cuts rather than one large cut. At the final end, secure the trim only after confirming that the visible pattern lands where you want it.
Free tools Windows power users keep installed
One-click scans. No signup required.
Choose an adhesive approach deliberately
| Approach | Application method | Compatibility and cautions | Best use in this project |
|---|---|---|---|
| Iron-on hemming tape or fusible web | Heat bonds the adhesive between fabric layers; some products require a pressing cloth or damp cloth. | Follow the package and fabric care label. IKEA’s SY instructions call for pressing with a damp cloth, cooling before inspection, and two strips side by side for heavier fabric. | Hems, curtain headers, and trim when the product is rated for the fabric weight and heat. |
| Heat n Bond heavyweight tape | Iron-on bonding in sections after positioning the tape. | The featured tutorial specifically recommends heavyweight strength for its header. Confirm the exact package instructions for your version. | The tutorial’s curtain header and other applications that need a stronger fusible than a light hem tape. |
| 3M Scotch Permanent Fabric Tape | Pressure-sensitive tape; it is applied without treating it as an iron-on product. | 3M recommends a small-area test, lists compatible fabrics, excludes silk and other delicate fabrics, and says not to iron after application except under limited, tested conditions. | A separate no-sew option only when its restrictions and the fabric’s care label permit it; do not substitute it blindly for iron-on tape. |
There is no controlled long-term comparison here between adhesive-bonded trim and sewn trim. Bond strength, wash performance, and appearance depend on the fabric, trim, adhesive, heat, pressure, and care routine. Avoid promising that one method will last as long as stitching in every room or laundry situation.
Independent reader supportYour contribution helps us test, update, and keep practical guides available for everyone.Hang the finished curtains
- After the header has cooled, insert pleating hooks or attach the compatible rings.
- Lift the panel onto the rod or rail and check that the heading supports the weight without pulling away.
- Confirm that the decorative edges face the intended direction and that both panels meet evenly.
- Adjust the folds by hand and allow the fabric to settle before making final placement decisions.
The tutorial recommends a high-and-wide installation for its particular look. That is a styling choice, not a universal requirement. Place the rod or rail where it works with your wall, window casing, hardware, and desired amount of coverage.
Cooling, inspection, and repairs
Do not judge a fused seam while it is still warm. Let it cool flat, then inspect the entire length for lifting, gaps, wrinkles, or adhesive showing through. If a small section is loose, follow the product’s reactivation instructions. IKEA notes that a loose bond after washing can be ironed back in place using its stated method; other products may prohibit ironing after application, so never transfer that fix to a different tape.
Best Value

- CREATE CLEAN, PROFESSIONAL HEMS WITHOUT SEWING – Whether you're tailoring pants, adjusting curtains, or finishing a dress, this hem tape iron on design offers a quick, no-sew solution that saves time and delivers lasting results. Perfect for anyone seeking a stress-free hemming method with a polished finish.
- SUPER WEIGHT BOND FOR HEAVIER FABRICS – Designed specifically for thicker materials like denim, wool, suede, corduroy, and heavy cotton, this hemming tape for curtains ensures a strong and secure hold that won’t come undone with wear or washing.
- IRON-ON, DOUBLE-SIDED ADHESIVE – Similar to sewing tape, this product bonds two layers of fabric together with heat, eliminating the need for needle and thread.
- EASY TO USE – Just place the tape between fabric layers and press with an iron. The hem tape for pants requires no sewing, pinning, or extra tools required.
- VERSATILE APPLICATION – Ideal for hemming garments like pants, skirts, and dresses, as well as home décor items like curtains, pillowcases, and fabric organizers.
If the trim lifts at the edge
- Check whether the adhesive was cut too narrow or positioned partly outside the bonding area.
- Confirm that the fabric and trim were clean and flat.
- Re-test the product on a scrap before re-pressing the curtain.
- Use the package’s pressing time and temperature; extra heat can damage fabric without improving the bond.
If the trim is crooked
- Stop as soon as the alignment drifts instead of pressing the mistake farther along.
- For a still-warm section, follow the adhesive instructions for repositioning; some products cannot be safely lifted and reused.
- For a cooled, fully bonded section, treat removal as a repair project and test first because pulling can distort the fabric.
If the fabric scorches or shines
Stop heating immediately, let the area cool, and inspect the hidden test sample. A damaged area may not be reversible. Lower heat is not automatically safe if the adhesive requires a higher temperature; the correct solution may be a different adhesive or a fabric unsuitable for this method.
Optional extension: add blackout lining
Blackout lining is a separate project from adding decorative trim. Martha Stewart’s no-sew method attaches lining along the top hem of existing curtains with iron-on adhesive and emphasizes testing, fabric-weight differences, and the resulting level of light blocking. If you add lining, test the combined weight and the top attachment before decorating the front panels. A heavier lined curtain may require a different heading adhesive or stronger hardware than the unlined panel.
Care and realistic expectations
- Use the finished curtain’s care label and the adhesive manufacturer’s care instructions together.
- Do not wash or handle the panel aggressively until every bonded area has cooled and set as directed.
- Inspect the header and trim after the first cleaning rather than assuming washability.
- Keep an offcut or test sample so you can identify the adhesive and fabric combination if a repair is needed.
- For heavy curtains, wide trim, or a lined panel, verify that the adhesive is rated for the combined load before installation.
The result can look tailored without stitching, but adhesive is not a universal substitute for sewing. The most dependable outcome comes from accurate measuring, a product matched to the fabric and application, careful alignment, and testing before the visible panel is bonded.
Quick Recap

Product prices and availability are accurate as of the date/time indicated and are subject to change. Any price and availability information displayed on Amazon at the time of purchase will apply.

