Crashes, No Sound, or Screen Glitches?
The Tool Desk
Outbyte PC Repair FREERepair Windows errors before they cause bigger problemsFix Now →Outbyte Driver Updater FREEScan for outdated or missing drivers - takes under a minuteDriver Scan →Random freezes, missing sound and display glitches usually trace back to one bad driver. Find and replace yours safely.
Find the Right Drivers →Free scan · under a minute
As an Amazon Associate I earn from qualifying purchases.
ThatPainter is reader-supported. When you buy through links on our site, we may earn an affiliate commission. Learn More
What’s actually slowing this PC down?
Pick the symptom - the matching free tool is one click away.
You can make pottery without a wheel: choose clay that matches your firing studio, shape a small piece by hand or on a wheel, let it dry completely, then bisque fire, glaze, and fire it again. For most beginners, a community studio is the practical starting point because it can confirm which clay and glaze are compatible with its kiln.
#1 Best Overall

- All-in-One Starter Kit: Everything you need to get started—upon receiving your Alldeer pottery kit, you'll find a complete set including a pottery wheel machine, power adapter, 8 plastic shaping tools, 2 paint brushes, 3 blocks of air-dry clay, 12 paints, 8 wooden clay tools, a sponge, a needle tool, a metal scraper, a color palette, an apron, and a user manual
- Simple Control 0–300 RPM Speed: the kit lets young creators take full command of speed and direction—easily switching between clockwise and counterclockwise rotation, perfect for both left- and right-handed users, and enabling precise shaping from any angle
- For Young Creators' Success: this mini pottery wheel features a beginner-friendly 6-inch (15 cm) metal turntable with a textured surface for stable clay grip, helping them shape their first bowls, pots, and imaginative clay projects right at home
- More Fun, Less Mess: The splash tray helps contain clay and water, while its removable design makes cleanup easier after every creative session.
- Shape, Paint and Feel Proud: Children can follow their ideas from soft clay to a colorful finished creation they will be excited to display or share.
1. Choose a small project, clay, and firing route
Start with a pinch bowl, coil vessel, or simple slab form. Choose the technique to suit the shape: hand-building clay benefits from grog or chamotte, while throwing clay needs to be plastic and sturdy. Purdue Extension recommends low-fire pottery clay for hand-built pots and stoneware for throwing. Before buying clay, ask the studio what bodies and firing cones it accepts. Pyrometric cones describe heat work and serve as shorthand for compatible clays, glazes, and firings; see AMACO’s cone guide.
A studio may also provide tools, instruction, glazes, and kiln access. For a first project, confirm the studio’s rules before forming anything; using an unapproved clay can make the piece unsuitable for its firing schedule.
2. Prepare and wedge the clay
Cut off only the amount you need and keep the rest sealed in plastic. Wedge the clay by pressing and folding it repeatedly to make it more workable and help remove air pockets. Air trapped in clay can contribute to cracking during drying or bubbling during firing. AMACO’s beginner guidance on wedging recommends wedging before forming to compress the clay and remove air pockets.
Do these 3 things before closing this tab:
1Repair Windows errors before they cause bigger problems2Scan for outdated or missing drivers - takes under a minute3Clear out junk files and repair common Windows errorsRank #2
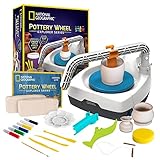
- EVERYTHING YOU NEED - Create your own decorative air dry pottery with 2 pounds of air dry clay, 3 arm attachments, 3 sculpting tools, 6 paint colors, palette, brush, apron, and much more included!
- INTEGRATED ARM TOOLS MAKE POTTERY EASY – Perfect for right- and left-handed potters, this pottery wheel is specially designed for beginners of all ages, with innovative arm tools to assist in centering, opening, and shaping clay.
- 2-SPEED ELECTRIC MOTOR - Our pottery wheel for beginners has a plug-in motor that provides steady power & rotation against downward pressure, with 2 speeds for different parts of the pottery-making process.
- KID-FRIENDLY INSTRUCTIONS - The detailed Instructions include video lessons and helpful hints to start kids off right, while the illustrated Learning Guide teaches the science and history of pottery.
- AWARD-WINNING PRODUCTS - Blue Marble, winner of the Toy Association's prestigious Toy of the Year Award, proudly develops products that foster education, imagination, and creativity, with a U.S. support team to ensure a stellar experience!
3. Form the piece by hand or on a wheel
Hand-building requires little more than your hands and a few simple tools. Pick the method that suits your form:
- Pinch: Press a thumb into a ball of clay, then pinch and rotate it to open and shape the walls.
- Coil: Roll clay into coils and stack them to build a vessel.
- Slab: Roll clay into flat sheets, cut shapes, and join them to create a form.
For any joined sections, roughen both surfaces and use slip made from the same clay body. On a wheel, center the clay first, open the center to form the interior and base, pull up the walls, shape the vessel, and finish the rim. Wheel throwing takes practice; trim the base when the piece has firmed to leather-hard consistency. Aalto University’s guides to pottery methods and throwing describe these approaches.
4. Refine the greenware and attach details
Greenware is shaped clay that has not yet been fired. Smooth the inside and outside, compress the rim, and attach handles or decorations by scoring the joining surfaces and applying slip. Purdue Extension describes slip as a clay-and-water mixture about as thick as a milkshake and recommends scoring before joining.
Rank #3
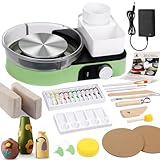
- 【All-In-One Kit】This pottery wheel kit for beginners and adults is fully equipped with 2.2lb of air-dry clay, a comprehensive set of 5 carving tools, a cutting wire, and a sponge. The package includes a detachable water basin and an detailed instruction, providing everything you need for a seamless start to your pottery journey.
- 【Lightweight and Compact Design】Crafted for convenience, this mini pottery wheel features a compact 14.4" x 10" x 3.9" body. It offers ample storage for all components, including two bowls for water and mud, along with a 1m DC cable, making it easy to store on a shelf as a piece of art.
- 【Easy to Clean】Maintain a tidy workspace with a 10" detachable water tray that solves the problem of mud splashing, ensuring the pottery wheel remains pristine and easy to clean after each use.
- 【Functional and Versatile】Enjoy a spacious 6-inch metal turntable designed to robust performance and adjustable speeds for different parts of the pottery-making process, accommodating both small and large-scale creative projects.
- 【Universal Compatibility】Experience user-friendly features with two-button control for dual rotation directions and low noise output at 60db, ideal for both quiet home use and vibrant studio environments.
For hand-built walls, aim for roughly 1/4 to 3/4 inch where possible. Purdue cautions that very thin work tends to crack, while thicker areas can retain moisture and fail to dry sufficiently before firing.
Quick wins for a faster PC:
Fix the driver behind crashes, sound loss and screen glitchesFind Drivers →Clear out junk files and repair common Windows errorsFree Scan →Scan for outdated or missing drivers - takes under a minuteDriver Scan →5. Dry slowly until the clay is bone-dry
Set the piece on a porous board and cover it lightly with plastic, paper, or cloth so moisture escapes evenly. Rapid or uneven drying can cause cracks. Large sculptures may take weeks to dry, depending on humidity, according to Aalto University’s drying guidance. Check a resting piece regularly and do not fire it while damp. Keep leftover clay sealed in a plastic bag.
Clay shrinks as it dries and fires, so account for that when planning dimensions. Aalto University reports firing shrinkage of about 14–16% for porcelain and about 13% for stoneware; the figures are specific to those clay types, and the page does not state a publication year. See its shrinkage guidance.
Rank #4
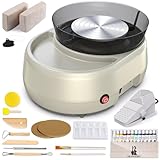
- Complete pottery wheel for kids, teens and adults: Including a full set of sculpting essentials like 2x6" Bats, 1 charging cable, 2 clay blocks, 5 sculpting tools, 2 paintbrushes, 1 palette, 1 Container, 1 Bowl, 12 vibrant paints, 1 sponge and 1 sponge stick, perfect for beginners.
- Beginner-Friendly: Our pottery wheel kit is specifically designed with beginners in mind. Providing detailed instructions and keep it simple but functional. A great starter kit for people who would love to give a try to pottery at home!
- Customizable Speed Function: Personalize your clay molding experience. Our pottery wheel provides an adjustable speed feature, adept at accommodating various artistic styles, techniques, and proficiency levels.
- Portable & Removable Basin: The pottery wheel operates quietly at a noise level of 60db and features a strong, sturdy 6" metal plate. The removable basin allows for easy cleaning, making this the perfect mini pottery wheel for various creative environments, from home to school.
- Perfect Gift Idea: Whether you want to gift the set itself or create personalized crafts as presents, our pottery wheel set is an excellent choice. It comes in a ready-to-gift package box, making it an ideal gift for kids or anyone who loves crafting. Perfect for Christmas birthdays, holidays, and special occasions, this set will spark joy and creativity for recipients of all ages. Let's share the happiness out!
6. Bisque fire, glaze, and fire again
A common studio sequence is an initial biscuit, or bisque, firing; glazing; and a second, glaze firing. The Western Australian Museum’s ceramic process guide gives a typical biscuit range of 900–1100 °C and describes higher firing around 1100–1300 °C. Those ranges are not a substitute for the specific cone required by your clay and glaze. Check the studio’s firing schedule and product labels rather than choosing a temperature by range alone.
Glaze is a thin glass layer fused to the ware during firing. It is usually applied to bisque-fired pottery before the glaze firing. The Princeton University Art Museum’s process overview describes the practical sequence: fire to bisque, glaze, then fire again.
Outdated Drivers Are Slowing You Down
One free scan finds every outdated or missing driver and matches the right update for your exact hardware.Free scan · exact hardware matchPC Slower Than It Used to Be?
A free scan shows the junk files, broken settings and background clutter dragging Windows down - then fixes them in one click.Free scan · Windows 10 & 117. Glaze carefully and check how the finished piece can be used
Before glazing, remove dust and wash your hands. The Princeton University Art Museum recommends applying two to three brush coats, changing stroke direction between coats, and applying lighter colors before darker ones. Leave the foot—the base that rests on the kiln shelf—unglazed so it does not fuse to the shelf. Follow the studio’s food-safety guidance before using pottery for food or drink: a decorative glaze being suitable for a project does not by itself establish that the finished ware is suitable for food contact.
Best Value
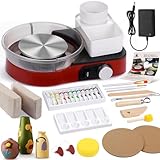
- 【All-In-One Kit】This pottery wheel kit for beginners and adults is fully equipped with 2.2lb of air-dry clay, a comprehensive set of 5 carving tools, a cutting wire, and a sponge. The package includes a detachable water basin and an detailed instruction, providing everything you need for a seamless start to your pottery journey.
- 【Lightweight and Compact Design】Crafted for convenience, this mini pottery wheel features a compact 14.4" x 10" x 3.9" body. It offers ample storage for all components, including two bowls for water and mud, along with a 1m DC cable, making it easy to store on a shelf as a piece of art.
- 【Easy to Clean】Maintain a tidy workspace with a 10" detachable water tray that solves the problem of mud splashing, ensuring the pottery wheel remains pristine and easy to clean after each use.
- 【Functional and Versatile】Enjoy a spacious 6-inch metal turntable designed to robust performance and adjustable speeds for different parts of the pottery-making process, accommodating both small and large-scale creative projects.
- 【Universal Compatibility】Experience user-friendly features with two-button control for dual rotation directions and low noise output at 60db, ideal for both quiet home use and vibrant studio environments.
Which beginner pottery method should you choose?
| Choice | Best suited to | What to consider |
|---|---|---|
| Hand-building | Pinch, coil, and slab forms | Needs less equipment; the form is shaped by hand. |
| Wheel throwing | Rotational forms such as bowls and vessels | Requires practice centering clay and pulling walls; Purdue Extension recommends stoneware for throwing. |
| Low-fire clay | Many hand-built projects | Confirm the studio accepts the clay and that its firing range matches the glaze. |
| Stoneware clay | Throwing projects, per Purdue Extension’s recommendation | Confirm the kiln’s accepted firing range before purchasing. |
Studio firing or a home kiln?
A community studio or kiln-hire service is usually the more practical route for a beginner: it can supply or approve clay, provide firing, and may offer instruction. Home firing requires a correctly installed and ventilated kiln, compliance with the manufacturer’s directions and local safety requirements, and qualified instruction before operation. The Princeton University Art Museum gives two to four weeks as the duration of each firing in its described process; this is an example, not a universal studio turnaround time.
Pictures to include with the seven steps
To make the process clear visually, pair each numbered step with a photograph: choosing the clay beside the studio’s firing guidance; wedging a clay lump; shaping a pinch, coil, slab, or wheel-thrown form; scoring and slipping a handle joint; a piece drying under a light cover; bisque-fired ware beside glaze materials; and a finished piece showing its unglazed foot. Label the images so readers can tell which stage they show.
Quick Recap

Product prices and availability are accurate as of the date/time indicated and are subject to change. Any price and availability information displayed on Amazon at the time of purchase will apply.
Recommended Free Tools




