Do these 3 things before closing this tab:
Free tools Windows power users keep installed
One-click scans. No signup required.
1Scan for outdated or missing drivers - takes under a minute2Clear out junk files and repair common Windows errors3Fix the driver behind crashes, sound loss and screen glitches
ThatPainter is reader-supported. When you buy through links on our site, we may earn an affiliate commission. Learn More
Yes—you can update a bathroom sink and vanity countertop with a DIY coating, but they are two different painting jobs. A sink basin needs a refinishing product whose label names the basin material and wet-use application. A vanity top needs a countertop system designed for that surface. The products, preparation, application conditions and cure schedules are not interchangeable.
The finish succeeds or fails mostly during preparation and curing. Identify the material, remove contamination and old caulk, test adhesion where required, ventilate as directed and keep water off the coating for the complete cure period—not merely until it feels dry.
As an Amazon Associate I earn from qualifying purchases.
The Tool Desk
Outbyte Driver Updater FREEScan for outdated or missing drivers - takes under a minuteDriver Scan →Outbyte PC Repair FREERepair Windows errors before they cause bigger problemsFix Now →Can you paint a bathroom sink and countertop?
You can paint both as a DIY update when the coating is approved for the actual material and the surface is sound. Treat the basin and counter as separate surfaces even when they are molded as one vanity unit. A product marketed for countertops should not automatically be brushed into a sink, and a tub-and-tile refinishing kit is not automatically suitable for a laminate or wood vanity top.
Before buying anything, determine whether you have a separate drop-in or undermount sink, an integrated sink-and-countertop, or a counter-only surface. Then identify the material: porcelain, ceramic, fiberglass, acrylic, cast iron, steel, laminate, melamine, tile or wood may require different systems. Read the current package label, technical sheet and safety data sheet for the exact product and material. Manufacturer examples below illustrate the distinction; they are not a universal compatibility list.
#1 Best Overall

- Transform the look of outdated countertops with a faux marble kit
- Easy 3-step application uses ultra white base coat, gray veining paint, and satin top coat
- Countertop coating kit covers 75-100 sq. ft. per kit; ready for full use after 24 hours
- No stripping, sanding, or priming required for a complete countertop refresh
- Satin sheen offers maximum wear and stain resistance with Life Tested protection
Choose the coating by surface, not by the word “bathroom”
| Surface | Example system | Formulation and listed materials | Preparation or use limits | Cure or use timing |
|---|---|---|---|---|
| Sink basin | Homax Tough as Tile Brush-On | One-part, high-gloss finish. The product page lists fiberglass, porcelain, glazed tile, laminate, china and acrylic. | Kit includes coating, brush, gloves, steel wool and prep cleaner. The 21-ounce size is stated to cover one standard tub or two bathroom sinks. | Manufacturer lists 48 hours before returning the refinished surface to use. |
| Sink or tub | Rust-Oleum Specialty Tub & Tile Refinishing Kit | Two-part epoxy acrylic for ceramic tile, porcelain, fiberglass, acrylic, cast iron and steel tubs and sinks. | Excludes galvanized steel and flexible plastic. Instructions include hardware and caulk removal, repair, cleaning, drying, wet sanding and ventilation. | Use the product’s label schedule; do not substitute a countertop cure time. |
| Vanity countertop | Rust-Oleum HOME Countertop Coating | Base-coat-plus-topcoat system listed for laminate, ceramic tile, porcelain tile, melamine, wood and other countertop surfaces. | Not intended as a food-preparation surface. Clean, rinse, dry completely, remove caulk and perform the specified adhesion test. | Light use after 24 hours, heavier items after 72 hours and full cure after seven days, according to the manufacturer. |
These systems differ in chemistry, tools, sanding requirements and water resistance. Do not mix a basin coating with a countertop topcoat or assume that one kit’s gloves, thinner or cleanup method applies to another.
Inspect the existing sink and countertop first
Check the basin
Look for cracks, loose material, rust, failing glaze, movement around the drain and leaks beneath the sink. A coating can change color and texture, but it will not make a leaking drain or flexible substrate structurally sound. Confirm that the basin material appears on the chosen product’s label. Galvanized steel and flexible plastic, for example, are specifically excluded by the Rust-Oleum tub-and-tile product cited above.
Check the vanity top
Find areas swollen by water, delaminated laminate, loose tile, soft wood or movement at a seam. Resolve those conditions with a compatible repair before coating, or replace the top if the substrate is failing. On an integrated unit, plan a clean mask line so the basin product and countertop system stop where each manufacturer intends.
Decide whether painting is sensible
- Proceed when the substrate is rigid, dry, cleanable and repairable with methods named in the instructions.
- Stop and reassess when water damage, movement, active leaks or widespread delamination is present.
- Do not use a coating to hide an unsafe plumbing connection or a basin that cannot drain correctly.
How to paint a bathroom sink basin
1. Remove hardware and old caulk
Turn off water if you need to disconnect the faucet or drain. Remove hardware when the instructions call for it; otherwise mask it carefully. Cut out old silicone or other caulk rather than painting over it. Residual caulk is a common path for peeling at the rim.
2. Clean, rinse and dry completely
Use the cleaner specified by the kit, paying attention to the drain flange, overflow, corners and the underside of the rim. Rinse when the instructions require rinsing, then allow the basin to dry completely. Trapped water or cleaner residue can interfere with bonding.
Rank #2
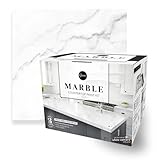
- Giani Countertop Paint is a simple, three-step application that will transform Formica, laminate, Corian, ceramic tile, butcher block, cultured marble, and traditional granite in a single weekend.
- Each kit contains all necessary tools and covers 35 square feet of surface, which is the average amount of countertop area in a kitchen.
- The updated Giani Marble Kit comes with a NEW extra-durable, high-gloss Epoxy Resin Topcoat that finishes and protects the application against the everyday use of your countertops.
- Giani Countertop Paint is safe for interior use, very low odor, and zero VOC. The specialized primer hides existing discoloration, burns, stains, and minor scratches, while the mineral colors create the characteristics of marbled quartz
- AVAILABLE AND IMPROVED! Giani Marble now includes our brand new Giani Epoxy Resin Topcoat for an even more durable and glossy finish. Stain and water-resistant and as tough as engineered quartz, this second generation of our countertop paint kit will help you remake your kitchen into the space you’ve always dreamed of.
3. Repair only with a compatible method
Fill chips or cracks only with a repair material the coating instructions identify as compatible. Sand or smooth the repair after it has cured. Do not improvise a flexible filler on a rigid basin unless the product documentation permits it.
Do these 3 things before closing this tab:
1Fix the driver behind crashes, sound loss and screen glitches2Clear out junk files and repair common Windows errors3Scan for outdated or missing drivers - takes under a minute4. Scuff or wet-sand as directed
Follow the sink kit’s specified abrasive and method. Some systems use steel wool or wet sanding; others specify a different surface profile. Countertop adhesion-test directions are not a substitute for sink preparation directions. Remove sanding residue and let the surface dry again.
5. Mask the work area and protect plumbing
Mask the wall, faucet openings, drain, overflow and countertop transition. Keep coating out of the drain opening and avoid creating a sharp ridge where water can sit. Have the manufacturer-specified brush or applicator ready before mixing or opening the coating.
6. Apply the basin product in its stated conditions
Apply the number of coats, recoat window and film thickness stated on the label. The Homax example is a one-part brush-on finish; the Rust-Oleum example is a two-part epoxy acrylic, so its mixing and working time are different. Do not extend either product with an unapproved thinner or add a generic clear coat.
7. Leave the basin unused through full cure
Keep water, cleaners, toiletries and dropped tools away until the sink product reaches the cure time in the table above. Reinstall hardware and renew caulk only when the coating is ready for those operations according to the instructions.
Quick wins for a faster PC:
Repair Windows errors before they cause bigger problemsFix Now →Scan for outdated or missing drivers - takes under a minuteDriver Scan →Clear out junk files and repair common Windows errorsFree Scan →Rank #3

- Transform the look of outdated countertops with a faux marble kit
- Easy 3-step application uses ultra white base coat, gray veining paint, and satin top coat
- Countertop coating kit covers 75-100 sq. ft. per kit; ready for full use after 24 hours
- No stripping, sanding, or priming required for a complete countertop refresh
- Satin sheen offers maximum wear and stain resistance with Life Tested protection
How to paint a bathroom vanity countertop
1. Empty, disconnect and remove caulk
Remove toiletries and, when practical, disconnect or mask the faucet. Cut away old caulk at the backsplash, wall and sink seam. Painting over a silicone bead can leave an unbonded edge that lifts when water reaches it.
2. Clean, rinse and dry
Clean the entire top, backsplash ledge and front edge with the preparation product specified by the coating system. Rinse if directed and allow complete drying. Pay special attention to soap film, hair products, waxes and polish near the faucet and backsplash.
3. Perform the required adhesion test
For Rust-Oleum HOME, prepare a 3-by-3-inch inconspicuous area. Apply the base coat, let it dry for 12 hours, score an X through the coating, press duct tape over the X and pull the tape off quickly. If more than 10 percent of the coating comes away, sand the countertop with 60–80-grit abrasive before coating the full surface. Repeat preparation and testing if the result remains poor; do not simply add another coat over a failed bond.
4. Mask the sink and surrounding room
Mask the basin, faucet, backsplash, walls, cabinet faces and floor. On an integrated sink, keep the countertop coating out of the basin and leave the transition defined by the product instructions. Remove dust before opening the base coat.
Windows Errors? Fix Them Before They Spread
Repair common Windows errors and clear accumulated junk for a smoother, more stable PC - no reinstall needed.Free scan · no reinstallOutdated Drivers Are Slowing You Down
One free scan finds every outdated or missing driver and matches the right update for your exact hardware.Free scan · exact hardware match5. Apply base coat and topcoat as one system
Use only the components specified for the countertop kit. Observe the stated recoat window, spread rate and ventilation requirements. Keep a wet edge where the instructions call for one, but do not overwork material that has begun to set. The countertop system is not a food-preparation surface, even after it has fully cured.
Rank #4
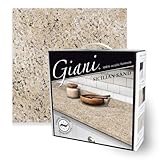
- 3 simple steps that will transform Formica, laminate, Corian, ceramic tile, butcher block, cultured marble, and traditional granite in a single weekend.
- Authentic granite finish offered in 5 contemporary colors, that cover 35 sq. ft. or 16 running ft. of 24 in. wide countertops.
- 100% Acrylic formula - Low odor, low VOC, water-based, durable, high-gloss, food safe topcoat that lasts for years.
- Simple sponge on and roll on application that is customizable to the look of your space. Step by step detailed instructions.
- All Giani Paints and Coatings are 100% Manufactured and Packaged in the USA.
6. Protect the new finish while it cures
Do not place toiletries, appliances or mats on the surface until the applicable waiting period has elapsed. Keep splashes off the counter and basin seam, and do not reinstall caulk early. Full chemical cure takes longer than a surface that feels dry.
Temperature, humidity and ventilation requirements
Application conditions affect leveling, adhesion and cure. Rust-Oleum HOME specifies 50–90°F (10–32°C) and relative humidity below 85 percent. Other products may specify different limits, so use the narrowest range stated by your chosen system. Delay the project if the room is outside those limits or if condensation is forming.
Ventilate exactly as the label and safety data sheet require. Keep occupants, children and pets out of the room during application and until the product permits re-entry. Avoid open flames and ignition sources where the product documentation warns against them. Protective equipment is product-specific; do not assume that a generic respirator is adequate without checking the safety data sheet.
Why stripping agents require special caution
An OSHA and NIOSH hazard alert from January 2013 reported: “The Occupational Safety and Health Administration (OSHA) and the National Institute for Occupational Safety and Health (NIOSH)-supported Fatality Assessment and Control Evaluation (FACE) Program have identified at least 14 worker deaths since 2000 related to bathtub refinishing with stripping agents containing methylene chloride.” The warning concerns methylene-chloride stripping agents, especially in small, poorly ventilated bathrooms. It is not a finding that every waterborne or epoxy coating kit has the same hazard. Check whether a stripper is included or separately used, and follow the exact label, safety data sheet and local disposal rules.
Independent reader supportYour contribution helps us test, update, and keep practical guides available for everyone.Cure time: dry to touch is not ready for water
| Project | Earliest stated use | Full-cure guidance | What to keep away |
|---|---|---|---|
| Homax Tough as Tile brush-on sink finish | Not stated separately from cure | 48 hours before returning the refinished surface to use. | Water, cleaners, hardware installation and normal sink use until the stated period ends. |
| Rust-Oleum HOME countertop system | Light countertop use after 24 hours | Seven days to full cure; heavier items can be replaced after 72 hours. | Standing water, heavy appliances, toiletries and caulk until each waiting period is met. |
If the label for your specific product gives a longer period than these examples, use the longer period. Cool temperatures, high humidity, thick application and poor ventilation can slow curing.
Best Value

- Luxurious Aesthetic: Emulates the high-end look of white quartz with a glassy sheen, ideal for adding a touch of elegance to both traditional and contemporary spaces.
- Easy Transformation: A simple three-step process designed to revitalize Formica, laminate, Corian, butcher block, cultured marble, and traditional granite countertops in just one weekend.
- Comprehensive Kit: Comes with all necessary components, including primer, epoxy resin, rollers, brushes, and more, sufficient to cover up to 35 square feet of countertop space.
- Safe and Low Odor: Formulated for safe indoor use with very low odor and zero VOCs, ensuring a comfortable and eco-friendly application process.
- Durable and Protective Finish: Includes a high-gloss, crystal clear Epoxy Resin Topcoat that not only enhances the finish but also provides long-lasting protection against daily wear and tear.
Troubleshooting common failures
Peeling at the drain or backsplash
Usually indicates contamination, unremoved caulk, inadequate scuffing or moisture trapped under the coating. Stop exposing the area to water, remove loose material, correct the preparation defect and follow the product’s repair and recoating instructions. Do not feather a loose edge and assume it is fixed without addressing the cause.
Soft, tacky or fingerprinted finish
Do not use the surface. Verify temperature, humidity, mix ratio, film thickness and ventilation against the label. Give the coating the full cure window; if it remains soft afterward, contact the manufacturer rather than applying another product over it.
Runs, lap marks or visible brush lines
These can result from overworking, applying too much material or coating outside the stated spread rate. Let the system cure, then sand or recoat only as the manufacturer permits. Avoid adding an unapproved clear coat to disguise texture.
Adhesion-test failure on the countertop
If more than 10 percent lifts in the specified tape test, sand with 60–80 grit as directed, remove all dust and repeat the test. A failed test is a preparation signal, not permission to proceed.
Water reaches an uncoated seam
Dry the area and inspect for lifting. Re-caulk only after the coating is fully ready and with a sealant compatible with the painted system. If the substrate has swollen or moved, repair that problem before cosmetic touch-up.
What durability can you reasonably expect?
The manufacturer pages establish intended surfaces, application methods and cure requirements, but they do not provide an independent comparative wear ranking or a dependable years-of-service figure for these coatings. Treat the finish as a maintenance-sensitive renovation, not as an assured equivalent to a new porcelain, stone or solid-surface top. Follow the product’s cleaning instructions, avoid exposing an uncured film to water and inspect seams periodically.
Keep the product container, batch information and instructions after the project. They are useful if you need a compatible repair, replacement caulk or manufacturer guidance later. If the surface is repeatedly exposed to standing water, harsh chemicals or substrate movement, expect the coating to require earlier repair than a stable, properly prepared surface.
Quick Recap
A practical pre-start checklist
- Separate the basin decision from the countertop decision.
- Confirm each material and condition against the current product label.
- Buy the complete system, including any required base coat, topcoat, cleaner, abrasives and protective equipment.
- Remove hardware and old caulk where instructed.
- Clean, rinse when directed and dry completely.
- Repair chips, cracks, leaks and loose substrate before coating.
- Complete the countertop adhesion test when required.
- Check temperature, humidity, ventilation and ignition-source warnings.
- Plan a no-use period that covers the full cure, not just dry-to-touch time.
- Keep the safety data sheet available and dispose of contaminated materials as directed.

Product prices and availability are accurate as of the date/time indicated and are subject to change. Any price and availability information displayed on Amazon at the time of purchase will apply.

