Recommended Free Tools
ThatPainter is reader-supported. When you buy through links on our site, we may earn an affiliate commission. Learn More
You can paint a bathtub successfully, but not with ordinary wall paint. Bathtub painting is a refinishing job: choose a coating labeled for your tub’s material, complete every preparation step required by that product, ventilate while applying it, and keep water off the finish for the entire cure period. The workflow below follows the published directions for one tub-and-tile epoxy kit; other coatings can require different products, surface preparation, mixing, coats, and cure times.
As an Amazon Associate I earn from qualifying purchases.
What “painting” a bathtub actually involves
A bathtub coating has to bond to a smooth, frequently wet surface and tolerate cleaning. That is why a purpose-made tub-and-tile coating is required. Interior wall paint, trim paint, and general-purpose enamel are not substitutes for a product whose label specifically permits bathtub use.
What’s actually slowing this PC down?
Pick the symptom - the matching free tool is one click away.
Think of the project as surface refinishing rather than decorating. The visible color is only the final stage. Adhesion depends on removing old caulk and contamination, mechanically dulling the existing finish, removing every sanding residue, and following the coating maker’s mixing and application limits. Skipping one of those steps can leave defects that become obvious only after the tub is wet.
#1 Best Overall

- TUB & TILE REFINISHING KIT: Renews ceramic tile, porcelain, fiberglass, acrylic, cast iron, and steel tubs and sinks without costly replacement.
- TWO-PART EPOXY ACRYLIC: Combine the base and activator to create a durable coating with excellent adhesion and color retention.
- IDEAL FOR HIGH-MOISTURE AREAS: Provides a durable, washable finish designed to refresh worn bathroom surfaces.
- SMOOTH, EVEN APPLICATION: Apply with a fine-bristle brush or 1/4-inch short-nap roller; use two coats for a uniform, porcelain-like appearance.
- DRY & RECOAT TIME: Dries to the touch in 1 hour, can be recoated after at least 1 hour, and must cure for 3 days before water exposure.
Choose the right project: full refinishing or a small touch-up
First decide whether you are coating the entire tub or repairing a limited defect. The two jobs use different products and have different preparation and waiting requirements.
| Approach | Use it for | Surface compatibility | Preparation and application | Water exposure |
|---|---|---|---|---|
| Full-surface refinishing kit | A complete color or finish change, or widespread wear | The cited kit lists ceramic, porcelain, fiberglass, cast iron, steel, and certain acrylic surfaces. Confirm the current label for your exact tub. | Remove caulk, clean, wet-sand the entire surface with the specified #400/#600 paper, remove residue, wipe with a tack cloth, then mix and apply as directed. | The cited kit requires three days before water; cooler temperatures can require longer. |
| Localized touch-up paint | Individual chips, scratches, dents, or small defects | Use only on the compatible surfaces named on that touch-up product’s label. | Prepare only the damaged area as directed by the touch-up product. It is not a substitute for a complete refinishing system. | The cited touch-up directions say to wait 24 hours before water. |
Neither set of directions establishes a performance ranking or a service-life guarantee. Select by the condition of your tub, the material listed on the label, and the time you can keep the bathroom dry.
Confirm compatibility before buying anything
Identify the tub material
Look for installation paperwork, the manufacturer’s documentation, or an inconspicuous area where the construction is visible. A coating that accepts porcelain may not accept every acrylic formulation. The product page for the cited refinishing kit names ceramic, porcelain, fiberglass, cast iron, steel, and certain acrylic surfaces; “acrylic” by itself is not enough information. Read the current package label and technical directions for the exact surface.
Free tools Windows power users keep installed
One-click scans. No signup required.
Inspect the existing finish
Check for loose coating, widespread cracking, active leaks, or damage that extends beyond a cosmetic surface defect. A refinishing coating cannot correct a plumbing leak or replace missing substrate. If you cannot establish what the existing surface is, pause and obtain that information rather than guessing.
Plan an uninterrupted dry period
Do not start on a day when someone must shower in the tub during the cure window. Arrange another bathroom, tell household members not to use the fixture, and keep condensation and cleaning water away from the work. The label’s cure period controls even if the surface feels dry sooner.
Rank #2
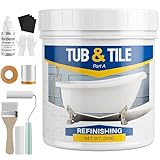
- 【Complete Tub and Tile Refinishing Solution】 Our all-inclusive tub paint for bathtub offers everything necessary for a seamless renovation. Whether you're a DIY hobbyist or a professional, this kit simplifies the process with user-friendly tools and clear instructions, making it ideal for both residential and commercial spaces.
- 【Effortless Cleanup for Tile Paint】 Our bathtub paint white is designed for hassle-free cleanup. Say goodbye to harsh! Our water-based formula allows for easy rinsing, and any accidental spills of bathroom tile paint can be quickly addressed with water.
- 【Low Odor for Comfortable Painting】 Transform your space without the overwhelming smell! Our paint for bathtub is formulated with low odor and low VOCs, making it perfect for indoor projects. Enjoy your freshly painted bathroom or kitchen sooner with minimal ventilation.
- 【Long-Lasting Durability with Sink Paint】 Achieve a stunning and durable finish with sink paint. Made with high-quality acrylic resin, our tile paint resists chipping, peeling, and flaking. Perfect for high-moisture areas, it’s ideal for shower tile paint applications, ensuring a beautiful and long-lasting surface.
- 【Easy to Use and Versatile Application】Simply mix the hardener with the bathtub paint kit thoroughly, then apply to the desired area. It dries within 24-48 hours, with optimal curing achieved in seven days. After seven days, it can withstand prolonged immersion. This versatile bathtub refinishing kit works on various surfaces including bathtubs, sinks, countertops, and floors, suitable for both indoor and outdoor use.
Tools, materials, and protective measures
Gather everything before mixing the coating. For the cited full-refinishing workflow, that means:
- A bathtub coating specifically labeled for the tub material.
- Caulk-removal tools and replacement bathroom caulk for after the coating has cured.
- The cleaner specified by the coating instructions.
- #400/#600 wet/dry sandpaper, because the cited kit calls for those grits across the whole surface.
- Clean water and cloths for removing sanding residue, plus a tack cloth for the final dust pickup.
- Application tools and protective equipment listed on the current product label.
- Plastic sheeting and tape to protect nearby walls and floors.
- Openable windows or fans that can move contaminated air outdoors without blowing dust into the wet finish.
Do not replace the specified abrasive with a coarser or finer grit merely because it is available. The grit, cleaner, applicator, mixing ratio, and recoat instructions belong to the coating system you purchased.
Recommended Free Tools
Lead safety in homes built before 1978
Sanding an old tub surround or previously painted bathroom can disturb lead-based paint. The U.S. Environmental Protection Agency’s lead-safe renovation guidance, updated in March 2026, advises treating renovation, repair, and painting in pre-1978 homes as a potential lead-dust activity until the risk is addressed.
Homeowners doing work in their own home are generally outside the EPA’s Renovation, Repair and Painting rule, but the agency identifies exceptions, including work in a rental property or by a house flipper. Contractors working for compensation in covered pre-1978 homes and child-occupied facilities are subject to the rule. Check the current EPA requirements for your situation and jurisdiction.
If lead may be present, the safest option is a lead-safe certified contractor. For informed do-it-yourself work, EPA’s precautions include containing the area with plastic and tape, using wet methods and wet-dry sandpaper to limit dust, cleaning with disposable wipes, and using a HEPA vacuum. Do not dry-sand old coatings or track contaminated dust through the home. Ventilation for coating fumes does not replace lead-dust containment.
Rank #3

- TUB CAST ROLL ON PREP IS THE PROJECT: Tub Cast Roll On delivers best results when surfaces are meticulously prepared. All caulk and silicone residue must be removed, followed by thorough cleaning, sanding/deglossing, and final wipe per instructions. Scan the QR code and follow the full video walkthrough for consistent results
- PRIMER + TOP COAT SYSTEM BRIGHT WHITE GLOSS: This kit includes a dedicated primer and glossy top coat designed to restore worn, stained, or discolored tubs. When applied correctly, it cures to a hard, bright white finish on porcelain, fiberglass, and cast iron surfaces
- COVERAGE MATTERS STANDARD TUB KIT: This Tub Cast Roll On kit is sized for one standard bathtub. Tub + surround, fiberglass shower stalls, or larger surfaces often require two kits or more. Proper coverage planning helps avoid thin coats, missed areas, and rushed application
- INTENTIONAL FILL LEVEL DESIGNED FOR MIXING: This product is intentionally not filled to the top of the container. The extra space allows for proper mixing within the provided vessel, helping ensure a smooth, consistent blend while reducing spills, splashing, and mess during preparation
- APPLICATION CONDITIONS AFFECT FINISH: Temperature and humidity directly impact leveling and cure. Apply only within recommended conditions and avoid overly warm rooms, which can cause the product to set too quickly. Use thin, even rolling passes and avoid overworking once the coating begins to set
Step-by-step: full bathtub refinishing
1. Read the complete label and set the work window
Read the package directions from beginning to end before opening either component. Confirm that the tub material is listed, note the required temperature and humidity range, identify the protective equipment, and calculate when the tub can be returned to service. Product instructions override this example if they differ.
The Tool Desk
Outbyte Driver Updater FREEScan for outdated or missing drivers - takes under a minuteDriver Scan →Outbyte PC Repair FREEClear out junk files and repair common Windows errorsFree Scan →2. Remove old caulk
Cut and lift out all existing caulk where the tub meets the wall, surround, floor, or fixtures. Coating over silicone or a remaining caulk film creates a weak boundary and can leave a visible ridge. Collect the removed material instead of washing it into the drain.
3. Clean the complete surface
Use the cleaner specified by the kit and work across the entire tub, including corners, the drain area, the overflow cover, and the upper rim. Soap film, body oils, mineral deposits, and polishing residue can prevent the coating from wetting the surface. Rinse or wipe exactly as the label directs, then allow the surface to reach the condition required for sanding.
4. Wet-sand every area that will be coated
The cited kit instructions call for #400/#600 wet/dry sandpaper over the whole surface. Sand methodically from the rim through the basin and into corners so no glossy islands remain. Keep the paper and surface wet as directed; wet sanding reduces airborne dust and helps the abrasive cut evenly. Do not stop after sanding only the visibly damaged spots when you are applying a full-surface system.
5. Remove sanding residue
Rinse or wipe away the slurry and loose particles using the method specified by the product. Inspect under strong light and feel for gritty areas. Any residue left behind can become a lump, fisheye, or adhesion problem in the wet coating.
Rank #4

- 【TUB & TILE REFINISHING KIT】 Our tub and tile paint boasts an advanced acrylic formula designed for durability and longevity. The high-quality acrylic resin ensures a strong, resistant finish that combats flaking and wear, providing a lasting transformation for your tiles. This tub and tile paint is engineered to deliver professional-looking results.
- 【Low Odor】 Breathe easy while renovating! Our water-based bathtub paint minimizes harsh fumes and volatile organic compounds (VOCs), making it safe for indoor use in bathrooms, kitchens, and living spaces, ideal for homes with children, pets, or allergy sufferers. This bathtub refinishing kit is designed for a more comfortable DIY experience.
- 【Effortless Cleanup】 Our tub and tile paint can be cleaned up in seconds! Accidental drips or spills? Just wipe with water. No solvents, scrubbers, or specialized cleaners needed. This feature saves time, reduces mess, and eliminates exposure to toxic chemicals during and after application.
- 【Wide Coverage】 Maximize efficiency with a 16.5oz bottle covering 25–30 sq.ft. per coat (2 or more coats recommended for dark tiles). Remove tape & enjoy your tub after 24–36 hours (once dry to the touch). Fully cured in 7 days. (No scrubbing or heavy cleaning for 7 days.) This tub and tile refinishing kit helps you achieve smooth, even coverage with less effort.
- 【Versatile Application】 Choose from 5 colors: white, black, light/dark gray, and vanilla white to complement your space. Our semi-gloss tile paint is suitable for bathtubs, sinks, countertops, floors, backsplashes, etc., adding sophistication, complementing both modern and traditional decor. Whether you need tub paint, bathtub paint, or a complete bathtub refinishing kit, this product is a versatile choice for your renovation.
6. Make the final tack-cloth pass
When the surface is clean and at the label’s required dryness, wipe the complete area with a tack cloth. Use a fresh section as it loads with dust, and avoid touching the prepared surface with bare hands afterward. Keep the room free of sweeping, drilling, and other dust-producing work.
7. Establish the application conditions
The cited kit specifies 50–90°F (10–32°C) and humidity below 85 percent. Use a thermometer and, if necessary, a hygrometer rather than estimating. Open windows or use fans for ventilation, while positioning airflow so it carries fumes out and does not blow debris onto the wet coating. Follow the label for respirator, gloves, eye protection, and other personal protective equipment.
8. Mix the two components exactly as directed
For the cited epoxy kit, add Part A to Part B and mix thoroughly. Do not change the order, ratio, or mixing time. Once combined, that kit’s instructions allow six hours for application; the usable time for another product may be different. Mix only when the surface, tools, ventilation, and disposal plan are ready.
9. Apply within the stated working time
Apply the mixed coating with the tool and technique specified on the label. Work in an organized sequence that keeps a wet edge and avoids repeatedly brushing areas that have begun to set. Do not improvise extra thinner, tint, or a second coat unless the current instructions specifically permit it. Keep the coating off unprepared caulk lines and adjacent surfaces protected by your sheeting.
What’s actually slowing this PC down?
Pick the symptom - the matching free tool is one click away.
10. Protect the finish through cure
Leave the bathroom ventilated and undisturbed. For the cited full-refinishing kit, the published requirement is three days before water exposure, with additional time potentially needed in cooler conditions. Do not test the finish with a splash, reinstall caulk early, or allow condensation to run over it. Use the exact cure period on your product label when it differs from this example.
Best Value

- SAVE THOUSANDS VS. REPLACEMENT – Refinish a worn, stained, or scratched bathtub, tile, sink, or shower in a weekend for a fraction of the cost of a new tub — a professional-grade DIY finish with no contractor required.
- BUILT-IN NON-SLIP SAFETY – Includes a slip-resistant additive that mixes into the coating to reduce slips in wet tubs and showers, adding safety without sacrificing the smooth, high-gloss look.
- WORKS ON MULTIPLE SURFACES – Bonds to porcelain, ceramic tile, fiberglass, acrylic, and cast iron. Great for bathtubs, showers, sinks, and countertops; covers one standard tub or up to 60 sq. ft. On hard, glossy surfaces (tile, porcelain, ceramic, cast iron), etch first with Bathworks EZ-Etch for a stronger bond — not needed on acrylic or fiberglass.
- DURABLE HIGH-GLOSS FINISH – Cures to a hard, factory-like white shine that resists chips, stains, soap scum, and fading, restoring a like-new surface that wipes clean easily.
- PAINT MATERIALS ONLY, MADE IN USA – Includes 21 fl oz coating, hardener, liquid primer, non-slip additive, mixing container, and instructions. Applicator tools and prep supplies sold separately.
How to handle chips, scratches, and dents
A small, isolated defect does not automatically justify coating the entire tub. A separate tub-and-tile touch-up paint is intended for chips, scratches, dents, and similar localized defects on the compatible surfaces listed by its manufacturer.
Clean and prepare only as that touch-up product directs, keep the repair confined to the damaged area, and feather or build the material only within the label’s instructions. The cited touch-up directions require 24 hours before water exposure. That shorter waiting period applies to the touch-up product, not to a full refinishing kit.
Application conditions that commonly decide the result
- Temperature: The cited kit’s range is 50–90°F (10–32°C). Below that range, curing can slow; above it, working time can shorten.
- Humidity: The cited limit is below 85 percent. High humidity can extend drying and cure behavior, so do not assume a bathroom fan alone makes a damp room suitable.
- Ventilation: Open windows or use fans as the instructions require. Exhaust air outdoors where possible, and keep children, pets, and unprotected occupants away from the work area.
- Dust control: Finish sanding and cleanup before mixing. Once coating is open, avoid activities that put particles into the air.
- Timing: Mixing starts the product’s usable working period. Have the prepared surface and application tools ready before combining components.
Troubleshooting: symptoms, likely causes, and response
| Symptom | What it often indicates | What to do |
|---|---|---|
| Peeling or lifting at an edge | Remaining caulk, contamination, an unsanded glossy area, or water exposure before cure | Stop using the area, let it dry, document the defect, and consult the coating maker’s repair instructions. Do not simply paint over a loose edge. |
| Dust bumps or gritty texture | Residue remained after sanding, or debris landed in the wet film | Allow the coating to cure as directed before attempting any sanding or repair. Follow the product’s repair procedure rather than adding an unapproved layer. |
| Runs or uneven sheen | Too much material in one pass, working back into partially set coating, or unsuitable temperature | Leave it undisturbed through cure and ask the manufacturer how to level and recoat that product. |
| Soft or tacky surface after the stated period | Cool conditions, high humidity, incorrect mixing, or insufficient ventilation | Continue to keep water off the surface, improve safe ventilation, and contact the manufacturer with the batch and conditions. Do not use the tub while it remains soft. |
| Visible fisheyes or craters | Oil, silicone, polish, or another contaminant remained on the substrate | Do not chase the defects with a brush. After full cure, use only the documented preparation and recoating method for that product. |
After the coating has cured
Reinstall or renew caulk only after the coating maker’s complete cure period has elapsed. Use a bathroom sealant compatible with the tub and surrounding materials, and keep the caulk joint neat so water cannot sit behind the refinished edge.
Clean with the methods recommended for the coating. Avoid abrasive pads, aggressive solvents, and tools that can scratch or cut the film unless the manufacturer specifically approves them. A refinished surface is not a license to ignore leaks: repair plumbing and failed joints promptly so water does not remain trapped beneath the coating.
A practical go/no-go checklist
- The tub material is identified and listed on the current coating label.
- You have chosen a full refinishing kit or a localized touch-up product for the actual size of the damage.
- Old caulk, dirt, oils, and mineral deposits can be removed completely.
- The specified abrasive is available; for the cited kit, that is #400/#600 wet/dry sandpaper.
- You can maintain the label’s temperature and humidity limits.
- Windows, fans, protective equipment, and dust containment are ready.
- You can keep everyone out of the bathroom for the entire cure period.
- If the home predates 1978, you have addressed possible lead-based paint before sanding.
If any answer is no, postpone the coating rather than compromising preparation or safety. A bathtub can be painted, but the finish is only as reliable as the compatibility check, surface preparation, application conditions, and uninterrupted cure that support it.
Quick Recap

Product prices and availability are accurate as of the date/time indicated and are subject to change. Any price and availability information displayed on Amazon at the time of purchase will apply.

