Free tools Windows power users keep installed
One-click scans. No signup required.
ThatPainter is reader-supported. When you buy through links on our site, we may earn an affiliate commission. Learn More
The makeover’s defining move was a wall-mounted garden built from a painted plywood board, interlocking 45-degree split battens and custom open-bottom boxes. The boxes hold small potted plants while allowing water to drain, turning an underused courtyard wall into an industrial-style focal point.
As an Amazon Associate I earn from qualifying purchases.
This guide follows the project described by Better Homes & Gardens Australia on 10 December 2021, while identifying the decisions you must make for your own wall, pots, plants and rental agreement. The supplied dimensions are the project’s specifications, not a universal cutting list.
What changed in the courtyard
Before the work, Adam and Melissa’s courtyard in an apartment converted from a former chocolate factory was described as underused and lacking lustre. The update did not depend on rebuilding the whole space. Instead, it concentrated attention on a single vertical installation and supported it with additional planting and coordinated planters.
#1 Best Overall

- Innovative Space-saving Design: maximize your gardening potential with our stackable wall planter system; Each piece measures 9.45" x 5.71" x 5.51" and features two pockets, The overall dimensions are 47.5"x33"x5.5" offering ample growth space for a variety of plants; Nice for Fence Balcony Wall Decor, these vertical wall planters change limited spaces into gardens effortlessly
- Breathable Material for Healthy Growth: crafted from pp material, our garden self-watering wall-mounted planter ensures stability and breathability; Resistant to uv and corrosion, this watering stackable vertical planter promotes robust plant health while minimizing maintenance challenges, making it perfect for both indoor and outdoor use
- Efficient Water and Soil Separation: our vertical stackable watering wall planters feature an ingenious water-soil separation design; Protect root rot and overwatering issues through a cotton rope system that draws water selectively, safeguarding your plants; Enjoy hassle-free gardening with this smart vertical wall planter
- User-friendly Drainage System: with a thoughtfully designed drainage system, these stackable vertical wall planters avoid water overflow, keeping walls clean; The seamless stacking prevents mess, ensuring your living or garden areas remain pristine without the need for special waterproof installations
- Versatile Installation Options: customize your garden layout with flexible installation methods; This is nice for creating green walls in homes or shops, turning indoor environments into natural oxygen bars; It provides the optimal solution for your home or shop renovation, or even for remodeling old walls; Our planters can be screwed onto the wall and stacked, allowing for adjustments based on the type of wall surface
The finished look combines black-painted timber, exposed-style construction and an eclectic collection of small pots. The wall garden supplies height where a courtyard may have limited floor area. Concrete or metal tubs and planters reinforce the hard, angular character of the setting, while plants soften it.
The central construction is deliberately modular. A plywood backing board carries battens. Matching battens are cut with 45-degree edges so the pieces interlock. Custom boxes hang from the battens, and internal strips catch the rims of the pots. Because the boxes have no bases, water can leave beneath each pot instead of collecting inside a closed wooden container.
Project specifications and supply list
The original article lists the following materials and equipment. Buy the plants before finalising the boxes: their actual pots determine the internal dimensions.
What’s actually slowing this PC down?
Pick the symptom - the matching free tool is one click away.
| Category | Item | Specification in the project |
|---|---|---|
| Sheet material | Marine plywood | Two sheets, each 2400 × 1200 × 18 mm |
| Backing | Plywood backing board | 1800 × 1200 mm |
| Mounting timber | Split battens | Twelve pieces, each 60 × 1800 mm |
| Finish | Exterior paint | Black |
| Planting | Small potted plants | A variety of succulents in the source project |
| Box construction | Box sides, ends and internal support strips | Sizes customised to the pots |
| Adhesive | PVA glue | For box assembly |
| Fixings | Galvanised screws | 30 mm and 50 mm screws, plus 75 mm batten screws |
| Tools | Cutting and drilling equipment | Circular saw, drill and 8 mm masonry drill bit |
| Wall hardware | Plugs | Blue wall plugs |
| Painting equipment | Brushes, rollers or other painting equipment | Use equipment suitable for the selected exterior paint |
The list is a record of this project rather than a tested bill of materials for every courtyard. Wall construction, pot sizes and the amount of timber you can obtain may require a different cut plan or fixing choice.
Plan the pots before cutting the boxes
Set out the plants and pots first. Measure the outside width and depth of each pot, then use those measurements to determine the corresponding box size. The source specifically advises buying the plants before customising the boxes because the boxes are built to suit the pots.
Allow the pot rim to sit on the internal support strips. The box is not a conventional planter with a floor: its open bottom is part of the design. The side and end pieces contain the pot, while the strips inside support its rim. Do not close the base merely to make the box look more conventional; doing so changes the drainage arrangement described in the project.
Rank #2

- Self-watering system means you can often go weeks without watering plants
- Real plants improve health, focus & creativity without taking floor space
- Durable plastic build with modern matte finish looks great in any space
- Only a small nail required for installation - no big holes or wall damage
- Designed by a plant lover for fellow plant lovers
Make a simple layout on the 1800 × 1200 mm backing board before fixing anything. Mark the horizontal levels for the battens and check that the projected box positions leave room to lift pots into place. An arrangement that looks balanced on paper may become difficult to plant if one box blocks access to another.
Free tools Windows power users keep installed
One-click scans. No signup required.
Build the painted backing and interlocking battens
1. Prepaint the plywood components
Paint the marine plywood components before assembly, as the article recommends. Prepainting gives you access to edges and faces that may be partly hidden once battens and boxes are attached. Use the specified black exterior paint and let the painted parts dry according to the paint maker’s instructions.
Keep the cut edges available for a later touch-up. The source calls for repainting cut edges and screw heads after construction, so prepainting is not the only painting stage.
2. Cut the split battens
Cut the split battens with a 45-degree edge. Each interlocking pair needs complementary faces: one piece is fixed to the backing or wall and the matching piece is fixed to the mating component. Work slowly with the circular saw and keep hands clear of the blade path.
The supplied project uses twelve 60 × 1800 mm battens. How many are used on the board, on the wall and for box supports depends on the final layout, so do not assume every courtyard needs the same allocation.
Quick wins for a faster PC:
Fix the driver behind crashes, sound loss and screen glitchesFind Drivers →Clear out junk files and repair common Windows errorsFree Scan →Scan for outdated or missing drivers - takes under a minuteDriver Scan →3. Fix battens to the backing board
Position the board battens on the painted 1800 × 1200 mm backing board and screw them in place. The 30 mm and 50 mm galvanised screws are among the listed fixings; select the length that suits the timber thickness at each joint without allowing a point to protrude.
Rank #3
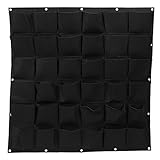
- 【36 Pocket Vertical Garden】Features 36 individual planting pockets, allowing you to grow herbs, flowers, succulents, strawberries, vegetables, and other plants while maximizing vertical space.
- 【Large Growing Area】Measures 39.4 x 39.4 inches, providing ample room for multiple plants. Ideal for balconies, patios, fences, walls, gardens, and other indoor or outdoor spaces.
- 【Breathable Felt Material】Made from durable, eco-friendly felt fabric that retains moisture while allowing excess water to drain, promoting healthy root growth and helping plants thrive.
- 【Easy Installation】Equipped with reinforced grommets for convenient hanging. Easily mount on fences, walls, railings, or other vertical surfaces using zip ties, hooks, nails, or screws.
- 【Indoor & Outdoor Use】Suitable for creating vertical gardens in homes, apartments, patios, balconies, greenhouses, and outdoor living areas. A practical solution for gardeners with limited space.
Keep the battens straight and parallel. Their alignment controls whether the hanging boxes seat evenly later. Check each piece before tightening the screws, because a small error at the board can be repeated across every box position.
4. Prepare the wall battens
The wall portion uses the matching interlocking battens. The stated method is to drill the wall, insert blue wall plugs and fasten the battens with 75 mm galvanised batten screws. Mark the positions from the board layout so the two sets of angled faces meet when the backing board is lifted into place.
The article presents the approach as renter-friendly, but drilling is still a permanent change to many walls. Confirm that your lease allows drilled fixings, identify the wall construction and ensure the chosen plugs and screws are appropriate before drilling. The project instructions do not establish suitability for every masonry, rendered, plasterboard or other wall type.
Windows Errors? Fix Them Before They Spread
Repair common Windows errors and clear accumulated junk for a smoother, more stable PC - no reinstall needed.Free scan · no reinstallCrashes, No Sound, or Screen Glitches?
Random freezes, missing sound and display glitches usually trace back to one bad driver. Find and replace yours safely.Free scan · under a minuteMake the open-bottom hanging boxes
1. Cut sides and ends to each pot
Cut the box sides and ends to the dimensions established from the pots. There is no single box size in the source because the containers are customised. Label each set of pieces with its intended pot so a close-fitting box does not get mixed up with a larger one.
2. Add the rim supports
Install internal strips positioned to support the pot rim. Test the pot in the unfinished box before gluing and screwing: it should sit securely on the strips while remaining removable for planting or repositioning.
3. Assemble without a base
Use PVA glue and the listed 30 mm or 50 mm galvanised screws to join the sides, ends and support strips. The boxes are assembled without bases. That open underside is what permits drainage from the pots and keeps the timber box from becoming a sealed trough.
Rank #4
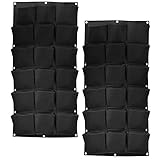
- PREMIUM MATERIAL - The main component of these wall hanging plant bags is felt, which can maintain sufficient moisture, drainage and ventilation at the same time. Its back lining adopts a waterproof design, effectively protecting the wall from being wet or dirty.
- EASY TO INSTALL - The pockets vertical wall garden is designed with fixing holes around it. You can easily fix it on the wall, door and fence with nails, straps, ropes or iron wires. Place the soil and seeds in multiple pockets to show a whole plant wall.
- MULTIPLE POCKETS - Hanging growth bags vertical wall garden has multiple pockets, which can meet your various planting needs. All kinds of plants and flowers can be planted on the same wall. Let the wall decoration of your residence be unique and make the environment full of nature.
- WIDELY APPLICABLE - Vertical grow bags hanging can grow plants, flowers, vegetables, succulents and other products. At the same time, it can be used to decorate the walls of various places, such as home, indoor or outdoor walls, offices, gardens, balconies, yards, etc.
- HASSLE-FREE SHOPPING - Once you purchase our hanging vertical felt grow bags, you are entitled to a 30 day worry-free refund. Or if you have any questions or doubts about the product, please feel free to email us. We will get back to you as soon as possible.
Wipe away squeezed-out glue before it dries, and keep the box square while the adhesive cures. A twisted box will not sit cleanly on its batten and can put uneven pressure on the pot rim.
Recommended Free Tools
Paint, mount and load the wall garden
Touch up after assembly
Once the boxes and battens are assembled, paint exposed cut edges and screw heads as directed in the source. Touching up at this stage covers newly exposed timber and gives the installation a consistent black finish. The article does not specify a number of coats, drying time or a maintenance interval, so follow the instructions for the exterior paint you choose.
Secure the backing board
With the wall battens plugged and screwed, lift the backing board into position and engage its angled battens with the wall-mounted counterparts. Use enough help to control the board safely; the listed sheet dimensions make it a substantial component to handle. Confirm that the interlocking pieces are fully seated before releasing the board.
Hang the boxes and place the pots
Fit each box onto its supporting batten, then place the corresponding pot inside. Work from the layout you checked earlier, and verify that every box is supported before adding a plant. Because the boxes are open below, check that the pot sits on the internal strips rather than resting on an unintended edge.
Independent reader supportYour contribution helps us test, update, and keep practical guides available for everyone.Choose plants and planters for the industrial look
The source project uses an eclectic range of small potted succulents in the wall boxes. For additional courtyard planting, it suggests bamboo, sword plants and a dragon’s blood tree because of their hard, sharp leaves. It also recommends concrete or metal tubs and planters to echo the courtyard’s angles.
Those are styling suggestions, not universal horticultural instructions. The article provides no climate zone, light exposure, watering schedule or confirmation that these plants suit every site. Check the light, temperature, wind and plant-care requirements where you live, and choose species that can remain in the pot sizes your wall can safely support.
Best Value

- 【NICE MATERIAL】 The vertical hanging planter bag is made of thicken felt, which is breathable and keeps the soil ventilated. And the excess water will drain out automatically. With reinforced sewing, it has good bearing capacity and is not easy to be cracked.
- 【36 POCKET STYLES】 This hanging flower pot bag comes with 36 pockets. Each pocket measures 6.1 x 6.1 inches. The overall size is 39.4 x 39.4 inches. This is extremely spacious and can hold up to 36 small pots at the same time.
- 【EASY TO USE】 The vertical garden wall planter pockets are designed with multiple eyelets around the edge, allowing you to use nails, string, wire, or hooks to secure it to the wall. It can also be hung on fence, balcony, patio door and other places that can provide support.
- 【MULTIPLE USES】 These hanging wall planter pockets work well with a variety of small miniature plants. You can put small pots in them, or just fill them with soil before planting the plants. If it is an artificial plant, you can put it in directly without applying anything.
Keep the wall display and floor planters visually related without making every container identical. Repeating the black backing and introducing concrete or metal elsewhere can connect the pieces, while varied foliage preserves the eclectic quality of the original makeover.
Adapt the design without losing its essential details
- Different wall: keep the board-and-batten concept, but reassess the plug and screw system for the actual wall material. The supplied method is drilled, plugged and screwed; it is not a no-hole mounting system.
- Different pots: measure first and redraw the box cut list. The pot dimensions, not a preset online plan, determine the box sizes.
- Less floor space: use the vertical board as the main planting feature and limit additional tubs to locations that do not obstruct access.
- More exposed timber: complete the specified black exterior-paint touch-ups on cut edges and screw heads rather than leaving fresh cuts uncoated.
- Rental uncertainty: obtain written permission before drilling. If permission is not available, the original construction method cannot simply be treated as removable.
Common problems and practical checks
The pot does not sit on the supports
Recheck the pot’s rim width and the position of the internal strips. The boxes were intended to be customised, so a support placed for a different pot may need to be moved before final assembly.
The battens do not interlock
Inspect the 45-degree cuts and the orientation of each mating piece. A reversed angle or a board-mounted batten fixed at the wrong level can prevent the backing board from seating on the wall.
Water remains inside a box
Confirm that the box has no accidental base and that the pot is not blocked against a solid surface below. The open-bottom construction is the drainage path specified by the project.
The wall fixing feels uncertain
Stop before loading the boxes. Recheck the wall construction, plug placement and screw engagement, and obtain appropriate local advice if the wall cannot safely receive the listed drilled fixing. The source does not verify the method for every wall type or load.
The finish looks patchy
Allow the paint to dry as directed, then touch up cut edges and screw heads. Prepainting and post-assembly touch-ups are separate stages in the project, not alternatives.
Painting decisions that define the result
Black exterior paint is more than a colour choice in this makeover: it visually unifies the plywood, battens and boxes and supports the industrial styling. Painting before assembly makes broad faces easier to cover; painting after assembly deals with the cuts and fixings created during construction.
Use the paint manufacturer’s preparation and drying directions, especially where the installation will experience outdoor moisture or strong sun. The project names marine plywood and exterior paint, but it does not claim that those materials eliminate weathering, guarantee a service life or remove the need to inspect the finish.
What to check before you start
- Have the pots and plants on hand before cutting box parts.
- Confirm the backing-board layout and the number of boxes you intend to hang.
- Check that you have a circular saw, drill, 8 mm masonry bit, paint equipment, glue and the listed screws and plugs.
- Identify the wall construction and secure permission for drilled fixings where you rent.
- Plan safe handling for the large plywood board and verify that every box is supported before adding a plant.
- Choose plants and planter materials appropriate to your site rather than assuming the suggested species suit every climate.
Built this way, the makeover remains recognisable: a black plywood feature, interlocking battens, custom open-bottom boxes and a deliberately mixed planting scheme. The details that must change are the ones tied to your wall and your pots.
Quick Recap

Product prices and availability are accurate as of the date/time indicated and are subject to change. Any price and availability information displayed on Amazon at the time of purchase will apply.

