PC Slower Than It Used to Be?
What’s actually slowing this PC down?
Pick the symptom - the matching free tool is one click away.
Outbyte PC Repair · freeA free scan shows the junk files, broken settings and background clutter dragging Windows down - then fixes them in one click.
Run a Free PC Scan →ThatPainter is reader-supported. When you buy through links on our site, we may earn an affiliate commission. Learn More
Yes—you can refresh many bathroom tiles, tubs, and sinks without removing them, but only when the coating is labeled for that exact substrate and level of water exposure. Dry decorative wall tile is the easiest case. Shower walls, tubs, sinks, and floors face more moisture, abrasion, or standing water, so they require a compatible refinishing product, meticulous preparation, controlled application conditions, and the full cure time before use. Painting will not correct leaks, failing waterproofing, loose tile, or structural damage.
Start by identifying the surface and its exposure
“Bathroom tile” can mean several very different substrates. Before buying paint, determine exactly what you will coat and how often it gets wet or walked on. Product labels are written for specific materials; a coating suitable for a glazed wall may fail on a floor or inside a constantly wet shower.
As an Amazon Associate I earn from qualifying purchases.
Outdated Drivers Are Slowing You Down
One free scan finds every outdated or missing driver and matches the right update for your exact hardware.Free scan · exact hardware matchWindows Errors? Fix Them Before They Spread
Repair common Windows errors and clear accumulated junk for a smoother, more stable PC - no reinstall needed.Free scan · no reinstall| Surface | Typical exposure | What to verify before painting |
|---|---|---|
| Dry decorative ceramic wall tile | Occasional splashes, little abrasion | Use a bonding-primer-and-interior-paint system or a coating labeled for ceramic tile. |
| Shower or tub surround tile | Frequent water and humidity | Choose a product expressly rated for that tile and wet location; follow its ventilation and cure limits. |
| Tub or sink | Water, cleaners, impact, and abrasion | Use a tub-and-tile refinishing product that lists the actual substrate, such as porcelain, fiberglass, acrylic, cast iron, or steel. |
| Bathroom floor tile | Foot traffic, abrasion, spills, and sometimes standing water | Do not assume ordinary wall-tile paint is suitable. Use only a product whose label specifically allows floors and the expected traffic. |
Sherwin-Williams advises that tile paint performs best away from frequent moisture and heavy traffic and warns that flooring wears more severely. A product that works on a dry backsplash is not automatically appropriate for a shower floor or the inside of a tub.
Choose a coating route that matches the job
The main options are a two-part tub-and-tile kit, a tub-and-tile aerosol, a primer-plus-paint system for dry decorative tile, and a dedicated coating such as HOMAX Tough as Tile. These are different formulations and application methods, not interchangeable names for the same product. There is no independent, controlled durability test in the available manufacturer material, so compare compatibility and instructions rather than treating any route as universally longest-lasting.
#1 Best Overall

- TUB & TILE REFINISHING KIT: Renews ceramic tile, porcelain, fiberglass, acrylic, cast iron, and steel tubs and sinks without costly replacement.
- TWO-PART EPOXY ACRYLIC: Combine the base and activator to create a durable coating with excellent adhesion and color retention.
- IDEAL FOR HIGH-MOISTURE AREAS: Provides a durable, washable finish designed to refresh worn bathroom surfaces.
- SMOOTH, EVEN APPLICATION: Apply with a fine-bristle brush or 1/4-inch short-nap roller; use two coats for a uniform, porcelain-like appearance.
- DRY & RECOAT TIME: Dries to the touch in 1 hour, can be recoated after at least 1 hour, and must cure for 3 days before water exposure.
| Route | Best fit | Application and conditions | Important limits |
|---|---|---|---|
| Two-part tub-and-tile refinishing kit | Compatible tubs, sinks, and listed tile | Detailed cleaning, caulk removal, sanding with 400/600-grit wet/dry paper, mixing, two coats at least one hour apart, and three days before water exposure. Rust-Oleum’s instructions specify 50–90°F, humidity below 85%, and ventilation. | The listed kit covers ceramic tile, porcelain, fiberglass, acrylic, cast iron, and steel tubs and sinks. It excludes galvanized steel, flexible plastic, extreme-heat areas, constant high-humidity environments, and continuous immersion. |
| Tub-and-tile aerosol | Labeled tile, sink, and tub surfaces that are not metal | Ventilate, mask carefully, and apply two or three light coats. The instructions specify humidity below 80% and full cure in three days. | Not for metal surfaces. Aerosol directions are product-specific; do not substitute kit temperatures, coat thickness, or recoat timing. |
| Primer plus interior paint | Dry decorative ceramic wall tile | Clean, sand away sheen, test the primer, apply a bonding primer, then compatible interior acrylic paint. | Sherwin-Williams cautions against floors and locations exposed to frequent moisture. This route is not a tub-refinishing system. |
| HOMAX Tough as Tile | Porcelain, glazed ceramic tile, and fiberglass | Available in brush-on and spray-on forms. PPG’s general guide says curing takes 48 hours, while the package controls the exact conditions and timing. | Use only on the substrates and in the exposure conditions stated on the current package. |
Buy by substrate first, then by finish and color. A glossy white finish can make a small room look brighter, but appearance cannot compensate for an incompatible coating.
Gather materials and plan the downtime
Have every preparation and safety item ready before opening the coating. A typical project may require:
The Tool Desk
Outbyte Driver Updater FREEFix the driver behind crashes, sound loss and screen glitchesFind Drivers →Outbyte PC Repair FREERepair Windows errors before they cause bigger problemsFix Now →- The selected coating, its required hardener or activator, and the current package instructions
- Nonabrasive and manufacturer-approved cleaners for soap film, grease, mineral deposits, and mildew
- A compatible repair compound for chips, cracks, or damaged grout edges
- 400- and 600-grit wet/dry sandpaper when the product specifies it, or the abrasive recommended on the label
- Abrasive pads, tack cloth, or a vacuum for residue removal as directed
- Masking tape, plastic or paper sheeting, and drop cloths
- The specified brush, short-nap roller, or spray equipment
- Gloves, eye protection, and respiratory protection if required by the label or safety data
- Ventilation equipment that safely moves fumes outdoors without creating a hazard
Plan for the room to be unavailable through preparation, application, and cure. For the Rust-Oleum kit and aerosol described above, water exposure is delayed for three days. HOMAX’s general guide states 48 hours, but its package instructions govern. Do not schedule a shower, bath, or sink use before the selected product’s full cure.
Inspect and repair before you coat
Check for failures paint cannot solve
Look for loose or hollow-sounding tile, movement, cracked backing, persistent dampness, leaks, soft drywall, failed grout, and peeling previous coatings. Resolve plumbing and waterproofing problems first. A new film can hide a defect temporarily while moisture continues behind it.
Rank #2

- 【TUB & TILE REFINISHING KIT】 Our tub and tile paint boasts an advanced acrylic formula designed for durability and longevity. The high-quality acrylic resin ensures a strong, resistant finish that combats flaking and wear, providing a lasting transformation for your tiles. This tub and tile paint is engineered to deliver professional-looking results.
- 【Low Odor】 Breathe easy while renovating! Our water-based bathtub paint minimizes harsh fumes and volatile organic compounds (VOCs), making it safe for indoor use in bathrooms, kitchens, and living spaces, ideal for homes with children, pets, or allergy sufferers. This bathtub refinishing kit is designed for a more comfortable DIY experience.
- 【Effortless Cleanup】 Our tub and tile paint can be cleaned up in seconds! Accidental drips or spills? Just wipe with water. No solvents, scrubbers, or specialized cleaners needed. This feature saves time, reduces mess, and eliminates exposure to toxic chemicals during and after application.
- 【Wide Coverage】 Maximize efficiency with a 16.5oz bottle covering 25–30 sq.ft. per coat (2 or more coats recommended for dark tiles). Remove tape & enjoy your tub after 24–36 hours (once dry to the touch). Fully cured in 7 days. (No scrubbing or heavy cleaning for 7 days.) This tub and tile refinishing kit helps you achieve smooth, even coverage with less effort.
- 【Versatile Application】 Choose from 5 colors: white, black, light/dark gray, and vanilla white to complement your space. Our semi-gloss tile paint is suitable for bathtubs, sinks, countertops, floors, backsplashes, etc., adding sophistication, complementing both modern and traditional decor. Whether you need tub paint, bathtub paint, or a complete bathtub refinishing kit, this product is a versatile choice for your renovation.
Remove hardware and caulk where required
Take off soap dishes, drain covers, handles, escutcheons, and other removable hardware when the product directions call for it. Scrape away silicone and other caulk from joints that must be coated. Leaving a flexible bead under a rigid coating can cause poor adhesion and an obvious edge. Keep a record or photograph of hardware positions so reinstallation is straightforward.
Repair chips and cracks
Fill damaged areas with a repair compound compatible with the substrate and selected coating. Let repairs harden fully, then smooth them flush. Do not use paint to bridge movement joints or conceal active cracks; those joints need an appropriate flexible sealant after coating, if the product directs you to recaulk.
Prepare the surface thoroughly
Preparation determines whether the coating bonds. Manufacturer guides repeatedly emphasize that it is not a quick wipe-down.
- Remove contamination. Clean mildew, soap film, body oils, grease, hard-water deposits, and cleaner residue using the selected product’s approved method. Work into grout lines, corners, around drains, and behind fixtures.
- Rinse away cleaner. Residue can interfere with adhesion or react with the coating. Rinse as directed and remove all standing water.
- Dry completely. Use towels and ventilation, then allow hidden joints and porous grout to dry. Painting over trapped moisture risks blistering and adhesion failure.
- Abrade glossy surfaces. Sherwin-Williams says sanding is required to remove ceramic-tile sheen. Rust-Oleum’s kit specifies 400/600-grit wet/dry sandpaper. Follow the selected product’s grit and wet-or-dry instruction rather than substituting a different abrasive.
- Remove sanding residue. Rinse, vacuum, wipe with a tack cloth, or use the method on the label. Dust left behind becomes a weak layer under the finish.
- Mask adjacent areas. Protect walls, trim, faucets, drains, floors, and ventilation grilles. Press tape edges firmly, especially along grout lines and corners.
Do not skip cleaning because the tile looks visually clean. Clear residues and invisible oils are common reasons a coating peels at edges and high-touch areas.
Rank #3
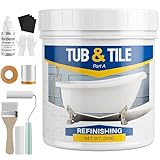
- 【Complete Tub and Tile Refinishing Solution】 Our all-inclusive tub paint for bathtub offers everything necessary for a seamless renovation. Whether you're a DIY hobbyist or a professional, this kit simplifies the process with user-friendly tools and clear instructions, making it ideal for both residential and commercial spaces.
- 【Effortless Cleanup for Tile Paint】 Our bathtub paint white is designed for hassle-free cleanup. Say goodbye to harsh! Our water-based formula allows for easy rinsing, and any accidental spills of bathroom tile paint can be quickly addressed with water.
- 【Low Odor for Comfortable Painting】 Transform your space without the overwhelming smell! Our paint for bathtub is formulated with low odor and low VOCs, making it perfect for indoor projects. Enjoy your freshly painted bathroom or kitchen sooner with minimal ventilation.
- 【Long-Lasting Durability with Sink Paint】 Achieve a stunning and durable finish with sink paint. Made with high-quality acrylic resin, our tile paint resists chipping, peeling, and flaking. Perfect for high-moisture areas, it’s ideal for shower tile paint applications, ensuring a beautiful and long-lasting surface.
- 【Easy to Use and Versatile Application】Simply mix the hardener with the bathtub paint kit thoroughly, then apply to the desired area. It dries within 24-48 hours, with optimal curing achieved in seven days. After seven days, it can withstand prolonged immersion. This versatile bathtub refinishing kit works on various surfaces including bathtubs, sinks, countertops, and floors, suitable for both indoor and outdoor use.
Control temperature, humidity, and ventilation
Use the conditions printed for your exact format. Rust-Oleum’s two-part kit specifies 50–90°F and humidity below 85%; its aerosol specifies humidity below 80%. Those are product-specific limits, not universal rules for every bathroom coating. If the room is colder, hotter, or more humid than allowed, postpone the work rather than guessing.
Provide continuous ventilation while mixing, spraying, and curing, while preventing dust, hair, and insects from landing on the wet finish. Keep aerosol away from open flame and ignition sources. Close or isolate adjacent rooms as practical, and keep children and pets out until the label permits re-entry. Never mix components in a poorly ventilated bathroom or combine products from different systems.
Do these 3 things before closing this tab:
1Clear out junk files and repair common Windows errors2Scan for outdated or missing drivers - takes under a minute3Repair Windows errors before they cause bigger problemsApply a two-part tub-and-tile kit
This route is intended for substrates listed by the kit, including the Rust-Oleum formulation described in its instructions: ceramic tile, porcelain, fiberglass, acrylic, cast iron, and steel tubs and sinks. It is not intended for galvanized steel, flexible plastic, extreme-heat areas, constant high humidity, or continuous immersion.
- Confirm the label. Verify the exact substrate, exposure, temperature, humidity, ventilation, and pot-life requirements before opening either component.
- Measure and mix exactly. Combine the base and activator in the specified ratio and for the stated time. An incorrect ratio can leave the film soft or uncured. Do not add thinner or another product unless the instructions explicitly allow it.
- Apply the first coat. Use the recommended brush or short-nap roller and maintain a consistent, thin film. Avoid overworking the coating, runs, and heavy buildup in corners.
- Observe the recoat interval. The kit instructions call for at least one hour between coats. The actual interval can vary with room conditions, so use the package directions for the product in hand.
- Apply the second coat. Cover evenly without flooding drains, seams, or hardware openings. Remove masking at the stage specified by the label so it does not tear a curing edge.
- Protect the cure. Keep the surface dry and undisturbed for the full three-day period specified for this kit before exposing it to water.
- Re-caulk and reinstall. After the coating has cured, apply compatible caulk where directed, allow that sealant to cure, and reinstall hardware without scratching the new finish.
Apply a tub-and-tile aerosol
An aerosol can be useful for a labeled tile, sink, or tub surface when overspray can be contained safely. The cited aerosol instructions exclude metal surfaces, require ventilation, specify humidity below 80%, and call for two or three light coats followed by three days to full cure.
Rank #4

- 【TUB & TILE REFINISHING KIT】 Our tub and tile paint boasts an advanced acrylic formula designed for durability and longevity. The high-quality acrylic resin ensures a strong, resistant finish that combats flaking and wear, providing a lasting transformation for your tiles. This tub and tile paint is engineered to deliver professional-looking results.
- 【Low Odor】 Breathe easy while renovating! Our water-based bathtub paint minimizes harsh fumes and volatile organic compounds (VOCs), making it safe for indoor use in bathrooms, kitchens, and living spaces, ideal for homes with children, pets, or allergy sufferers. This bathtub refinishing kit is designed for a more comfortable DIY experience.
- 【Effortless Cleanup】 Our tub and tile paint can be cleaned up in seconds! Accidental drips or spills? Just wipe with water. No solvents, scrubbers, or specialized cleaners needed. This feature saves time, reduces mess, and eliminates exposure to toxic chemicals during and after application.
- 【Wide Coverage】 Generous 33 oz capacity covers an area of 50-55 sq ft, perfect for medium to large renovation projects. per coat (2 or more coats recommended for dark tiles). Remove tape & enjoy your tub after 24–36 hours (once dry to the touch). Fully cured in 7 days. (No scrubbing or heavy cleaning for 7 days.) This tub and tile refinishing paint helps you achieve smooth, even coverage with less effort.
- 【Versatile Application】 Choose from 3 colors: white, light gray, and black to complement your space. Our semi-gloss tile paint is suitable for bathtubs, sinks, countertops, floors, backsplashes, etc., adding sophistication, complementing both modern and traditional decor. Whether you need tub paint, bathtub paint, or a complete bathtub refinishing paint , this product is a versatile choice for your renovation.Note: The tub paint is suitable for tiles, wood, glass, ceramics, acrylic, and marble. Not suitable for artificial marble, metal, powdery or peeling substrates. Cast iron tubs (iron alloys with porcelain enamel) can be painted; regular iron tubs cannot.
- Mask everything outside the target area, including faucets, drains, mirrors, nearby walls, and floor surfaces.
- Shake and condition the can exactly as directed. Test the spray pattern on protected material.
- Hold the can at the stated distance and apply a light, even pass. Heavy wet coats are more likely to sag, trap solvent, or cure slowly.
- Allow the label’s flash or recoat interval, then apply the second and, if needed, third light coat.
- Maintain ventilation and keep all ignition sources away during spraying and curing.
- Leave the surface untouched and dry for the full three-day cure specified by the aerosol instructions.
Do not transfer the two-part kit’s temperature, humidity, sanding, or coat instructions to an aerosol. The formats have separate directions.
Independent reader supportYour contribution helps us test, update, and keep practical guides available for everyone.Use primer and interior paint only for suitable dry tile
For a dry decorative ceramic wall, Sherwin-Williams recommends cleaning, sanding away the sheen, testing the primer, applying a bonding primer, and finishing with compatible interior acrylic paint such as an appropriate Emerald Interior Acrylic Latex system. This is a wall-paint approach, not a substitute for a tub or shower refinishing product.
The Tool Desk
Outbyte Driver Updater FREEFix the driver behind crashes, sound loss and screen glitchesFind Drivers →Outbyte PC Repair FREEClear out junk files and repair common Windows errorsFree Scan →- Clean and rinse the tile and grout, then let them dry completely.
- Sand enough to remove the glossy sheen without gouging the tile or damaging grout.
- Test the bonding primer in an inconspicuous area and allow it to dry as directed. Check adhesion before proceeding.
- Prime the prepared tile with an even coat, keeping paint out of movement joints and hardware openings.
- Apply the compatible interior acrylic topcoat in the label’s number of coats and recoat window.
- Keep the wall away from frequent splashes until the paint system has fully cured according to its label.
Because this route is cautioned against floors and frequently wet locations, select a dedicated tub-and-tile coating instead when the surface receives regular shower spray or standing water.
Finish the joints and return the fixtures
Once the coating has reached its stated cure, inspect corners, seams, drain edges, and hardware openings under bright light. Remove any masking residue with the least aggressive method allowed by the product instructions. Re-caulk only with a sealant compatible with the coating and the joint’s movement and moisture requirements. Allow the caulk to cure before water exposure even if the paint itself is already cured.
Best Value

- TUB & TILE REFINISHING KIT: Renews ceramic tile, porcelain, fiberglass, acrylic, cast iron, and steel tubs and sinks without costly replacement.
- TWO-PART EPOXY ACRYLIC: Combine the base and activator to create a durable coating with excellent adhesion and color retention.
- IDEAL FOR HIGH-MOISTURE AREAS: Provides a durable, washable finish designed to refresh worn bathroom surfaces.
- SMOOTH, EVEN APPLICATION: Apply with a fine-bristle brush or 1/4-inch short-nap roller; use two coats for a uniform, porcelain-like appearance.
- DRY & RECOAT TIME: Dries to the touch in 1 hour, can be recoated after at least 1 hour, and must cure for 3 days before water exposure.
Reinstall fixtures carefully. Tighten fasteners enough to hold them, but avoid scraping or compressing the new film. If a fixture gasket must seal against the surface, follow the fixture manufacturer’s replacement and torque guidance rather than relying on paint as a gasket.
Common failure modes and fixes
| Symptom | Likely cause | What to do |
|---|---|---|
| Peeling at edges or grout lines | Cleaner, grease, mildew, dust, silicone, or moisture remained beneath the coating. | Stop exposing the area to water, remove loose material, identify and correct the contamination or leak, then reprepare and recoat according to the product system. |
| Soft or tacky finish after the stated cure | Incorrect mix ratio, excessive film thickness, low temperature, high humidity, or insufficient ventilation. | Do not use the surface. Check the label and manufacturer support for the specific product; do not apply another coat over an uncured film. |
| Runs, curtains, or heavy spray texture | Coat was applied too heavily or the aerosol was held too close. | Allow the product to reach the label’s recoat stage, then level or sand only as the instructions permit before applying a light, even coat. |
| Blisters or bubbles | Moisture, trapped cleaner, or solvent escape under a thick coat. | Find the moisture source, let the substrate dry, remove failed coating, and repeat the full preparation sequence. |
| Color or sheen variation | Uneven coverage, inconsistent mixing, or touch-ups applied outside the recoat window. | Use the product’s repair procedure; random spot painting often remains visible. |
| Damage on a floor | A wall-rated coating was exposed to foot traffic or abrasion it was not designed to withstand. | Remove failed material and use only a floor-rated system whose label covers the substrate and traffic conditions. |
Maintenance after the bathroom is back in service
- Respect the complete cure, including any separate caulk cure, before bathing, showering, or washing the sink.
- Clean with the mildest method allowed by the coating label; avoid abrasive pads and unapproved solvents.
- Repair leaking faucets, failed caulk, and damaged grout promptly so water does not remain behind the finish.
- Use bath mats and furniture pads where appropriate, but do not trap moisture against a newly coated floor or wall.
- Inspect high-wear edges and frequently splashed areas periodically. Address small failures using the same product system and preparation method rather than layering unrelated paints.
Decision checklist
- Have you identified the exact substrate: dry wall tile, wet-area tile, tub, sink, or floor?
- Does the current product label name that substrate and the expected water or traffic exposure?
- Are leaks, loose tile, failed waterproofing, cracks, and damp backing repaired?
- Have mildew, soap film, grease, mineral deposits, old caulk, and dust been removed?
- Was the glossy surface abraded with the specified method?
- Can you maintain the product’s temperature, humidity, ventilation, and ignition-control requirements?
- Can the room remain unused for the complete coating and caulk cure?
If any answer is no, postpone painting or choose a different repair. A careful preparation day is less costly than coating a contaminated or unsuitable surface.
Recommended Free Tools
What this approach can—and cannot—deliver
Repainting can change color and make sound, properly prepared tile or fixtures look newer without demolition. It is most predictable on dry decorative wall tile and on tubs, sinks, and tile specifically listed by a refinishing product. Wet, high-traffic, constantly immersed, or unlisted surfaces carry greater risk, and ordinary wall paint should not be treated as a waterproofing system.
Manufacturers provide application limits and cure times, but the reviewed instructions do not establish a single service-life number for real bathrooms. Longevity depends on substrate, preparation, water exposure, cleaning, impact, and whether the coating was used within its label limits. Follow the current package directions for the exact product and stop if the surface condition falls outside them.
Quick Recap

Product prices and availability are accurate as of the date/time indicated and are subject to change. Any price and availability information displayed on Amazon at the time of purchase will apply.

