PC Slower Than It Used to Be?
Do these 3 things before closing this tab:
1Repair Windows errors before they cause bigger problems2Fix the driver behind crashes, sound loss and screen glitches3Clear out junk files and repair common Windows errorsOutbyte PC Repair · freeA free scan shows the junk files, broken settings and background clutter dragging Windows down - then fixes them in one click.
Run a Free PC Scan →ThatPainter is reader-supported. When you buy through links on our site, we may earn an affiliate commission. Learn More
To cut a board into equal-width strips on a table saw, establish one straight reference edge, set and lock the rip fence for the required strip width, and feed the board parallel to that fence for every pass. Measure a test strip before committing the whole board. Keep the blade guard and spreader or riving knife installed as designed, support the board and offcut, and use a push stick when your hands would approach the blade. A ripping block can make repeated cuts easier to set up; for very thin stock, a bandsaw may be the safer or more suitable choice.
Choose the method before setting the fence
“Equal width” is a dimensioning goal, not a guarantee that one setup suits every board. The board’s thickness and length, the strip width, the saw’s capacity, the amount of support available, and your experience all affect the safest method. OSHA notes that kickback occurs more often during ripping than crosscutting, so a repeatable setup and controlled feed matter as much as the measurement.
As an Amazon Associate I earn from qualifying purchases.
Free tools Windows power users keep installed
One-click scans. No signup required.
| Method | Best fit | What establishes repeatability | Important limits |
|---|---|---|---|
| Table-saw rip fence | Boards that can be supported securely and are wide enough to handle safely | A locked fence and a consistent reference edge | Requires careful support, parallel feeding, and safe handling of the narrowing workpiece |
| Ripping block or jig | Several strips that must match without repeated fence adjustments | A calibrated block or jig used with the fence in one fixed position | The jig must suit the specific saw and stock; it never replaces the guard, spreader, riving knife, or push devices |
| Bandsaw | Some thin-strip and veneer work, where the table-saw setup is unsuitable | The fence or guide on the bandsaw and a controlled feed | Results depend on blade choice, drift control, resaw capacity, and the particular workpiece |
There is no universal jig dimension or fence setting for every machine. Use the saw manufacturer’s instructions for guard and riving-knife configuration, and treat published thin-strip techniques as specific to the stock and setup they describe.
Define the finished width and account for the cut
Decide what dimension you are measuring
Write down whether the target is the width of each finished strip, the distance between cut lines, or a rough dimension that will be planed later. A board loses material at each kerf, and the blade’s kerf is not necessarily centered the same way in every fence setup. Do not assume that dividing the board’s marked width by the number of strips will produce that dimension automatically.
#1 Best Overall
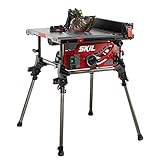
- RACK AND PINION FENCE RAILS - Ensures fence stays parallel to blade for fast smooth, and accurate cuts
- INTEGRATED FOLDING STAND - Legs quickly fold in to provide portability and convenient storage
- PARALLEL BLADE ALIGNMENT - Available micro-adjustment of blade so that it is parallel to rip fence and miter slot
- 4x4 CUTTING CAPACITY - Cuts material up to 4x4 at 90 degrees
- 2-47° BEVEL CAPACITY - Cuts between 2 positive stops at 0 and 45 degrees with quick release lever
Make a test cut when accuracy matters
Use a piece of scrap with a similar thickness and species. Set the fence, make one cut, and measure the resulting strip with the tool you will use for the project. If the result is off, correct the fence setting before cutting the project board. This simple check catches errors from an uneven reference edge, a misread scale, or a different blade than the one used when the saw was last calibrated.
Mark a cutting plan
For a board that will yield several strips, note the order of the cuts and which edge will remain the reference edge. Keep the same face and edge against the fence whenever the setup allows. If a cut would leave a narrow piece between the fence and blade, plan to finish that piece with an appropriate push device or choose another method rather than reaching toward the blade.
The Tool Desk
Outbyte PC Repair FREERepair Windows errors before they cause bigger problemsFix Now →Outbyte Driver Updater FREEFix the driver behind crashes, sound loss and screen glitchesFind Drivers →Rank #2
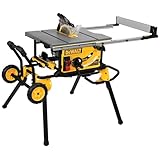
- Rack & Pinion Telescoping Fence System Make fence adjustments fast, smooth and accurate
- Patented material support, can be used for narrow rip cuts.
- 32-1/2" rip capacity easily cuts a variety of larger shelving and trim materials
- Onboard storage system provides easy access to the Blade Guard Assembly, fence, riving knife, miter gauge, wrenches, push stick, and cord wrap when not in use.
- Rolling stand designed for easy set up and breakdown with excellent stability of the portable table saw. Telescoping fence rails retract to create a small, portable package. Flip over ripping fence allows for narrow rip cuts
Prepare the board and saw
Create a straight reference edge
The fence can only repeat a width if the edge riding against it is straight enough to remain in contact. Joint or otherwise straighten one long edge, or use a suitable straight-edge method before ripping. The sources do not prescribe one board-preparation procedure, so regard this as practical setup advice: a bowed, twisted, or irregular edge can steer the board into the blade even when the fence is locked.
Inspect the stock
- Reject or isolate blanks with knots, cracks, or other defects that could open during the cut.
- Check that the board lies flat enough to maintain contact with the table and fence.
- Remove loose debris that could change the board’s path.
- For thin-strip work, pay particular attention to defects that bisect the edge; a published table-saw thin-strip technique cautions against blanks with such knots or cracks because they can shatter and contribute to kickback.
Set up the machine
- Install the correct blade and verify that it is sharp, clean, and properly maintained.
- Keep the blade guard and the spreader or riving knife in the configuration specified for the saw. A spreader helps prevent the kerf from closing on the blade.
- Confirm that the fence locks firmly and remains parallel to the blade through its full travel.
- Arrange infeed and outfeed support so the board, cut ends, scrap, and finished strips cannot sag or twist as they leave the table.
- Stand to the side of the blade’s path, not directly behind the board.
- Have a push stick or push block ready before starting the saw. OSHA’s instruction is explicit: “Use a push stick for small pieces of wood and for pushing stock past the blade.”
Basic table-saw procedure
- Disconnect power while setting up. With the saw off, check the blade height, guard, spreader or riving knife, fence, and support stands. Make sure the intended offcut has a clear path and will not be trapped between the blade and another object.
- Place the reference edge against the fence. Orient the board so the straight edge tracks the fence for the entire cut. Keep the board flat on the table; do not force a bowed section down with your hand near the blade.
- Set the fence to the target width. Measure from the appropriate fence face to the blade using your normal shop method, then lock the fence. If the measurement is critical, confirm it with the scrap test rather than relying only on the saw’s scale.
- Start the saw and establish a steady feed. Stand to the side, allow the blade to reach speed, and guide the board forward without pushing it sideways into the fence. Your job is to maintain forward motion and contact with the fence, not to steer the board into the blade.
- Keep hands out of the cut line. As the board approaches the blade and your hand position becomes unsafe, transfer the pushing force to a push stick or push block. Use the device to carry the stock past the blade and, where required by the saw design, beyond the rear of the blade.
- Support both pieces. Prevent the long board, the strip, and the remaining stock from dropping, twisting, or swinging when the cut opens. Do not grab a falling offcut beside the blade.
- Switch off and wait for the blade to stop. Clear pieces only after the blade has completely stopped. Never reach over or behind a coasting blade to retrieve stock.
- Repeat without changing the calibrated fence. For successive strips, return the appropriate board edge to the same reference position and use the same feed and support arrangement. If the remaining piece becomes too narrow or unstable to control, stop and change methods rather than improvising a hand position.
After the first few cuts, measure more than one strip. If widths drift, stop the operation and find the cause—often a reference edge that is not straight, a fence that is not parallel or locked, or stock that is twisting under pressure.
Rank #3

- POWERFUL AND PRECISE: This 10-inch single bevel compound miter saw features a 15-Amp motor delivering high power for effortless cuts. The power saw generates a no-load speed up to 5,000 RPM, ensuring precise cuts for all your woodworking projects.
- USER-FRIENDLY DESIGN: The miter saw includes an improved miter scale and controls for accurate adjustments. Its large table saw 10 inch provides better material support, and the vice clamping system secures the workpiece for precision and safety.
- LIGHTWEIGHT AND PORTABLE: Weighing only 24 lbs, this second generation power saw is easy to maneuver and transport to any job site. The compact design allows for easy storage and increased portability without sacrificing power or performance.
- VERSATILE CUTTING CAPABILITIES: With a 0-52° miter angle range left and right and an adjustable bevel range of 0-45° left, this compound miter saw offers flexibility. Adjustable bevel stops ensure precision cuts for various woodworking applications.
- GO FOR THE METABO HPT EXPERIENCE: This durable miter saw comes with the Metabo HPT 5-year warranty. Choose our durable Japanese-engineered power tools to carry out all your professional-grade work, get more at the Metabo HPT store.
Using a ripping block for repeated strips
A ripping block is a purpose-built spacer or jig intended to make repeated widths without moving the fence for every strip. WOOD Magazine describes setting the fence in relation to the block, then repeating the cuts with the fence in the same position. The exact shape and attachment depend on the saw and the stock, so use a documented plan that matches your equipment rather than copying a dimension blindly.
Calibrate the block
- Build or select a block that is rigid, flat, and compatible with the fence and guard arrangement.
- Use scrap of the same thickness as the project stock.
- Set the fence and block according to the jig plan, then make a test strip.
- Measure the test strip and adjust the block or fence before cutting the project material.
Operate the jig without defeating safety features
The block should help locate the stock; it should not require removing the guard, spreading device, or riving knife. Keep the board supported and feed it parallel to the fence. If the jig places your hands closer to the blade than the basic procedure would, add a push device or abandon that setup. A repeatable dimension is not worth a compromised hand position.
Quick wins for a faster PC:
Scan for outdated or missing drivers - takes under a minuteDriver Scan →Repair Windows errors before they cause bigger problemsFix Now →Rank #4

- Site-Pro Modular Guarding System allows for tool-free adjustments of the guarding
- 24.5 in. of rip capacity for ripping 4x8 plywood or OSB sheets
- Rack & pinion telescoping fence rails make fence adjustments fast, smooth, and accurate
- Compact size for easy transportation and storage
- Metal roll cage base for jobsite durability
Thin strips, veneers, and narrow offcuts
Thin stock behaves differently from a normal ripping operation. It can flex into the blade, pinch the kerf, or break along a defect. A woodworking technique source cautions against using its described thin-strip methods below 1/4 inch and against blanks with knots or cracks that bisect the edge. That is a limit for that particular technique, not a universal threshold for every saw, blade, jig, or material.
For veneer-like or otherwise very thin pieces, consider whether a bandsaw is more appropriate for your board and equipment. A bandsaw may reduce the need to hold a fragile strip between a table-saw blade and fence, but it still demands a straight reference edge, suitable support, and controlled feed. Do not switch machines assuming that the alternative is automatically safe; verify its capacity and follow its operating instructions.
Best Value

- 2-1/2-INCH MAX. DEPTH OF CUT - Corded table saw delivers up to 2-1/2-inch maximum cutting depth at 0 degrees to cut up to 3x material in a single pass
- RACK AND PINION FENCE RAILS - For quick fence adjustments; system ensures fence stays parallel to blade for fast, smooth, accurate cuts
- EXPANSIVE RIP CAPACITY - Table saw delivers 24.5-inch blade right and 12-inch blade left rip capacity to easily rip down sheets of plywood and other sheet materials
- POWERFUL 15A MOTOR - Power for a range of applications like ripping down sheets of plywood, cross-cutting 2x4s for framing, cutting dado joints, and more
- COMPACT SIZE - Portable for easy transportation and storage
If a table-saw cut leaves a strip too narrow to hold securely, stop before the final pass. Re-plan the sequence so the wider, more stable piece is the workpiece, or use a method designed for thin stock. Never finish a narrow rip by placing fingers beside the blade or by trapping the offcut against the fence.
Kickback prevention and response
OSHA defines kickback as stock being caught by the blade and thrown toward the operator, and notes that it happens more often during ripping than crosscutting. The common causes in this operation are a closing kerf, a board that twists away from the fence, a blade that catches a loose piece, or an unsupported board that pivots as it exits.
Windows Errors? Fix Them Before They Spread
Repair common Windows errors and clear accumulated junk for a smoother, more stable PC - no reinstall needed.Free scan · no reinstallCrashes, No Sound, or Screen Glitches?
Random freezes, missing sound and display glitches usually trace back to one bad driver. Find and replace yours safely.Free scan · under a minute- Keep the stock moving parallel to the fence and do not force a bowed section against it at the blade.
- Use a spreader or riving knife to help keep the kerf open.
- Maintain functioning safeguards and a properly maintained blade.
- Stand out of line with the blade.
- Keep hands out of the cut line and use a push stick for small pieces or for pushing stock past the blade.
- Provide support for the board, cut ends, scrap, and finished material.
If the board binds, stalls, smokes, or begins to twist, stop feeding it. Turn off the saw and wait for the blade to stop before investigating. Do not pull a pinched board backward while the blade is turning; that movement can release stored force unpredictably.
Troubleshooting unequal strips
| Symptom | Likely source | Corrective action |
|---|---|---|
| Every strip is the same wrong width | Fence measurement, scale reading, or kerf assumption is wrong | Recheck the fence-to-blade setting and make a measured scrap cut before continuing. |
| Widths change from one pass to the next | Reference edge is irregular, or the board is not held parallel to the fence | Re-establish a straight edge, keep the same reference edge, and use a steady feed. |
| Board pinches or burns | Kerf is closing, blade is poorly maintained, or the board is twisting | Stop, inspect the blade and spreader or riving knife, improve support, and correct alignment before restarting. |
| Offcut falls or swings at the exit | Insufficient outfeed or side support | Add support for the cut end and scrap; do not catch the piece beside the blade. |
| Final strip is too narrow to control | The cut sequence has left an unsafe workpiece | Stop the table-saw operation and use a push device, a different sequence, a ripping jig, or a bandsaw suited to the stock. |
| Thin strip shatters | Stock is below the technique’s stated limit or contains a defect | Do not reuse that setup blindly; inspect the blank, observe the 1/4-inch caution for the cited technique, and choose a method appropriate to the material. |
Final accuracy and safety checklist
- One edge is straight enough to serve as a reliable reference.
- The target is defined as a finished strip width, and a scrap cut has confirmed the setting where precision matters.
- The fence is locked and parallel; it is not being adjusted casually between passes.
- The blade, guard, spreader or riving knife, and support equipment are installed and functioning as designed.
- The board and offcut have support through the full cut.
- Your stance is to the side of the blade, with a push stick or block ready before the cut starts.
- No hand will enter the cut line, and no narrow or defective piece will be forced through an unsuitable setup.
When these conditions cannot be met, equal-width strips are not a suitable table-saw task in that configuration. Change the support, jig, sequence, or machine before proceeding.
Quick Recap

Product prices and availability are accurate as of the date/time indicated and are subject to change. Any price and availability information displayed on Amazon at the time of purchase will apply.

