The Tool Desk
Outbyte PC Repair FREEClear out junk files and repair common Windows errorsFree Scan →Outbyte Driver Updater FREEScan for outdated or missing drivers - takes under a minuteDriver Scan →
ThatPainter is reader-supported. When you buy through links on our site, we may earn an affiliate commission. Learn More
A partial seam lets you join pieces around a quilt-block center without sewing a conventional inset seam. Stitch the first piece to the center only partway, attach the remaining pieces in the pattern’s order, then fold the first piece into place and sew the rest of its seam.
What a partial seam does
The first seam is deliberately left open. That opening gives you room to attach the next pieces around the center; once they are in place, you fold the first piece back over the block and finish its seam. A center surrounded by pieces that seem to pinwheel around it can be a clue that this method may work, as Jinny Beyer Studio explains. The block pattern determines whether it is appropriate and in what order to sew.
Prepare the block pieces
- Use the pattern’s cutting list and seam allowance. Tutorial examples use different dimensions, so do not treat one example’s measurements as universal.
- Arrange the center and surrounding pieces in their intended positions. Label or number them if the sewing order is not obvious.
- Identify which piece is attached first and where its partial seam begins and ends. The pattern’s directions take precedence over a generic half-seam estimate.
Sew the partial seam, then add the surrounding pieces
- Place the first surrounding piece and center right sides together, aligning the edges specified by the pattern.
- Sew only part of the seam. Depending on the pattern, you may begin near the center or stop short of the far end. Leave enough of the first piece free to move out of the way and join the later pieces; there is no universal stopping distance.
- Press or finger-press as directed by the pattern. Different tutorials handle this differently: Annie’s Attic describes finger-pressing the center away from the first piece, while Jinny Beyer Studio’s instructions say to finger-press open. Choose the direction that suits the block’s seam intersections when the pattern leaves it to you.
- Sew the remaining surrounding pieces to the growing unit in the specified order. When a later seam would cross the loose first piece, fold that piece aside so it is not caught in the stitching.
- After the other pieces are attached, fold the first piece back over the block. Align its open raw edge with the corresponding edges of the unit, then stitch the unsewn portion of the original seam.
Check the block before finishing
- The partial seam is still open until the surrounding pieces are attached and the first piece is folded back.
- The first piece stays clear of seams that do not belong to it.
- Before completing the seam, the first piece’s raw edge aligns with the block edges as specified by the pattern.
Why dimensions and pressing vary
Fresh Lemons Quilts illustrates the method with a 4½-inch center square and four rectangles cut 1¼ by 5¼ inches; those are the cutting dimensions for that example, not general instructions. Follow the cutting list, seam allowance, sewing order, and pressing directions for your own block. If the pattern does not specify a pressing direction, pick one that allows the seam intersections to lie neatly.
Quick Recap
Best Value

- 【Workmanship Aspect】: 1/4 inch presser foot made of high-quality plastic, own bright color, can be applied for a long tim
- 【FITS WHAT】: fits most of household low shank snap-on Singer* (Some Singers Require Low Shank Adaptor), Brother, Babylock, Janome, Kenmore and so on sewing machine
- 【Applicable Size】: Sewing machines have different sizes!!! Please know the width of the bar (6mm/0.236inch )on the presser feet before buying
- 【1/4 INCH QUILTING PRESSER FOOT】: the 1/4 inch quilting / patchwork sewing presser foot makes you easier to get seams to line up perfectly. The clear design is to improve visibility and accuracy
- 【PACKAGE】: 2 style of 1/4 inch sewing machine presser foot, fits all your need. Simple and practical design, and easy to use
Rank #4

- ✅ PRECISION SEWING: Achieve perfectly aligned 1/4” seam allowances by using the metal guide along the fabric edge — ideal for professional-quality stitching every time.
- ✅ RED MARKINGS FOR ACCURACY: Start and finish exactly 1/4” from the fabric edge with the red markings on the foot — ensuring consistency and clean stitch lines.
- ✅ PERFECT FOR QUILTING & PATCHWORK: Designed for quilters and sewing enthusiasts who need precise seam alignment for quilt blocks, patchwork, and topstitching.
- ✅ MULTIPLE SEAM GUIDES: Built-in horizontal markings support 1/4", 3/8", and 1/2" seam allowances for accurate pivoting and versatile sewing.
- ✅ COMPATIBLE WITH SINGER MACHINES: Fits most SINGER sewing machines (see compatibility chart for models). A must-have accessory for beginners and experienced sewists alike.
Rank #3

- You will get:1pc 1/4 inch Snap on Foot and 6pcs sewing clips.It is made of stainless steel, own bright color, not easy to rust, can be applied for a long time.
- This Quarter Inch Foot is for Patchwork, Quilting, and Piecing.With reference markings on three sides, this sewing foot provides visibility and accuracy to get precise stitching and professional-looking results.
- The Edge Guide on foot is easy to sew a perfect 1/4 inch seam every time. Place the edge of the fabric against the guide while you sew.
- The single-hole foot design prevents fabric sinking, ensuring smooth and consistent fabric feeding.Flat bottom ensures the material make good contact with the feed dogs.
- The sewing machine foot works well on most types of fabric.Suitable for most household low shank sewing machines such as Singer, Brother, Janome, Kenmore and so on.
Rank #2
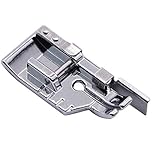
- High Quality 1/4" Quilting / Patchwork Sewing Foot, Attached to the Quilting Foot is an Edge Guide to Help You Make a Perfect 1/4" Seam
- This is a must when doing a lot of sewing with quarter inch seams. Especially in quilting, without this foot you may find it difficult to get seams to line up perfectly.
- Accurate reference marking on 3 sides of foot for visibility and accuracy
- Single hole foot prevents fabrics from sinking into feed dogs,For all 7mm feed dog machines
- Fits All Low Shank Snap-On Singer* (Some Singers Require Low Shank Adaptor), Brother, Babylock, Euro-Pro, Janome, Kenmore, White, Juki, New Home, Simplicity, Necchi and Elna Sewing Machines
#1 Best Overall
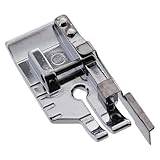
- Use this foot when pivoting, topstitching, or for 1/4" seams.
- Reference markings on the side of the foot for visibility and accuracy.
- Flat bottom ensures that the material will make good contact with the feed dogs.
- Guide on foot makes it easy to obtain a 1/4" seam allowance. Place the edge of the fabric against the guide while you sew.
- This 1/4 inch snap-on foot is compatible with most low shank machines (adapter may be required).

Product prices and availability are accurate as of the date/time indicated and are subject to change. Any price and availability information displayed on Amazon at the time of purchase will apply.
Independent reader supportYour contribution helps us test, update, and keep practical guides available for everyone.



