Outdated Drivers Are Slowing You Down
Outbyte Driver Updater · freeOne free scan finds every outdated or missing driver and matches the right update for your exact hardware.
Scan My Drivers Free →ThatPainter is reader-supported. When you buy through links on our site, we may earn an affiliate commission. Learn More
To upholster a dining-room bench, build the seat as four layers—plywood, foam, batting, and fabric—then fasten the batting and fabric underneath the panel. The reliable sequence is to cut foam to the panel, bond it with foam-safe adhesive, wrap and smooth the batting, anchor fabric at the centers of opposing sides, staple toward the corners while checking the top for wrinkles, and hide the staple line with trim if you want a finished underside. The dimensions and staple sizes in the worked example below are project choices, not universal requirements.
What this project produces
You will end with a padded seat panel that can be set on a dining bench base. The visible top is fabric over a smooth batting layer and resilient foam; the plywood remains hidden below. The underside carries the staples and trimmed fabric edge. A narrow trim can conceal that fastening line, while individual nailheads can add a separate decorative detail. The complete upholstery order is:
As an Amazon Associate I earn from qualifying purchases.
Recommended Free Tools
- Plywood seat panel for the rigid foundation.
- Upholstery foam for cushioning.
- Polyester batting to soften transitions and prevent the fabric from telegraphing foam edges.
- Upholstery fabric as the wear surface.
The finished tutorial from Addicted 2 Decorating demonstrates this method on a 3/4-inch plywood panel with 2-inch foam. Treat those measurements as that bench’s specification. A different frame, desired comfort, or available foam may call for another thickness or panel construction.
Materials and tools
| Item | Purpose | Selection notes |
|---|---|---|
| Plywood seat panel | Rigid base for every upholstery layer | The worked example uses 3/4-inch plywood; size and thickness should suit your bench and support requirements. |
| Upholstery foam | Provides the cushion | The example uses 2-inch foam. Buy a piece at least as large as the panel, then cut it to the panel dimensions. |
| Polyester batting | Smooths the foam-to-fabric transition and rounds the edges | Choose high-loft batting if you want the soft, padded transition shown in the tutorial. |
| Upholstery fabric | Visible, cleanable outer layer | Cut a piece large enough to cover the top, travel down all sides, and leave a working margin underneath for stapling. |
| Foam-safe spray adhesive | Holds foam to plywood before wrapping | Use an adhesive labeled for your foam and follow its application and cure directions. |
| Staple gun and compatible staples | Fastens batting and fabric to the underside | The tutorial reports a narrow-crown stapler with 1/2-inch staples. Other guides use different hardware; match the staple type and length to your stapler and panel. |
| Foam-cutting tool | Trims foam cleanly | An electric knife is the tool used in the worked example; another foam-rated cutter can work if it produces a square edge. |
| Sharp utility blade or fabric shears | Removes excess fabric and batting | A fresh, sharp blade helps you trim close to the underside without snagging the cover. |
| Optional twill tape or comparable trim | Covers the staple line and raw lower edge | Use after the upholstery is secure. |
| Optional individual nailheads | Adds a decorative border | They are an accent, not a structural fastener. |
The materials and basic tool sequence are also shown in the Fiskars bench tutorial, Osborne Wood Products guide, and Kreg Tool storage-bench plan. Those references illustrate variations rather than a single mandatory hardware list.
#1 Best Overall
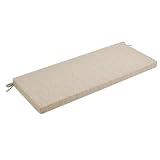
- [Suitable Size For Most Bench] Fits in spaces designed for rectangle bench seat cushion up to 59 inches(150cm) L x 16 inches(41cm) W x 1.5 inches(4cm) H. The indoor bench cushion is suitable for many styles of benches, such as outdoor benches, dining benches, patio benches, garden benches, indoor benches, or any other benches to provide extra comfort.
- [Double Non-Slip Design] We designed Four straps to help the bench pad cushion be better fixed on the bench, and the cushion’s base is equipped with high-quality real silicone anti-slip padding, to ensure that your bench seat pad won't move unexpectedly, ensuring safety for both the environment and users. In daily use, there is no need to re-adjust the wooden bench indoor cushions, bringing both convenience and comfort to your bench immediately!
- [Superior Comfort] The rectangle bench seat lounge cushion is made of Outer--high quality polyester fabric, Inner--high quality sponge, which can protect your furniture from stains, daily wear, scratch, and other accidental. This metal bench cushion with good ergonomic support force decreasing pressure on the coccyx and relief you from pain of sciatica, herniated discs, tailbone injuries, etc.
- [Machine Washable Cover] We designed a long zipper for the rectangle bench seat cushion, just open the zipper to take out the sponge and put the cushion cover needs to be clean in the washing machine. Machine wash with laundry bag and cold, do not bleach, do not iron, just tumble dry with no heat and your seat cushions will look as good as new.
- [High Quality] Our industrial bench cushion are made of high-quality thick sponge, which can provide enough support to make you sit more comfortable. You don't have to worry about the quality of the bench pads indoor. And the cushion cover have no peculiar smell, dirt-resistant and wear-resistant , no pilling on the surface, precise sewing and reliable quality. We look forward to your purchase!
Before cutting: measure the panel and plan the wrap
Record the finished seat size
Measure the plywood panel’s length and width at several points and use the smallest reading if an edge is slightly out of square. Check that the panel fits the bench opening or base before adding upholstery. Foam should finish flush with the panel edges in this method; batting and fabric are the layers that turn underneath.
Allow fabric for the underside
Lay the panel on the fabric and confirm that the cloth reaches over the top, down every side, and far enough underneath to hold a staple without landing on the very edge. Keep the pattern direction in mind before cutting. If the cloth has stripes, checks, or a one-way design, center it on the seat now rather than trying to correct alignment after stapling.
Quick wins for a faster PC:
Scan for outdated or missing drivers - takes under a minuteDriver Scan →Repair Windows errors before they cause bigger problemsFix Now →Choose thickness and fastening as a system
Foam thickness changes the finished seat height and the amount of fabric needed around the edge. Staple length must also account for the plywood thickness, the compressed fabric and batting, and the reach of the stapler. Do not copy a staple size simply because it appears in another project; test a staple on scrap or an inconspicuous area and verify that it holds without piercing the visible top.
Rank #2
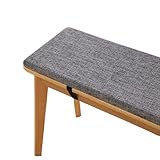
- SUITABLE FOR LARGE BENCH CUSHIONS:Suitable for 2-seater, 3-seater and 4-seater benches. for sofas, terraces, floors, camping, metal, beaches, gardens, patios, balconies, etc., benches or ottomans, swings or windows. The seating surface allows for complete relaxation.
- COMFORTABLE AND WEAR-RESISTANT FABRIC: the cushion is made of linen fabric and high-density foam padding, which is thick, soft and has good resilience. 3cm thick high elasticity foam provides excellent support, allowing you to sit and lie down for long periods of time to keep you comfortable, while adding decorative beauty to your home, kitchen and garden
- ANTI-SLIP PATIO CUSHION WITH STRAP : There are anti-slip particles on the bottom and bench cushion is designed with adjustable straps on the both side, these click close straps keep your cushions exactly where you want them and also ensure that they look great on your furniture.
- EASY TO CLEAN AND MAINTAIN: The cushion is equipped with a removable zip design, and the cover can be easily removed and washed to keep it clean and hygienic. Whether for daily use or outdoor environment, it is easy to take care of.
- VACUUM PACKAGING:The patio bench pad cushions due vacuum packaging, there is an error within +-0.5 inches. When receiving the cushion, need to open the packaging to tap and shake, and lay flat for 48 hours to restore the original size, or use an iron iron to eliminate wrinkles quickly.
Prepare a safe, workable station
- Work on a clean, level surface large enough to turn the panel without dragging the fabric.
- Put the plywood on supports so the underside remains accessible while you staple.
- Keep the fabric’s right side protected from dust, oil, and stray staples.
- When spraying adhesive, ventilate the area as the project author advises and follow the selected product’s label for airflow, application distance, and drying time.
- Wear eye protection while cutting foam or driving staples, and keep hands clear of the stapler nose and knife path.
Step 1: Cut the foam to the plywood
- Place the foam on a flat surface and set the plywood panel on top as a template, or transfer the panel’s length and width to the foam with a clear mark.
- Check the marks on all four sides. A square cut keeps the edge even and prevents a lump that fabric must disguise later.
- Cut slowly with an electric knife or another suitable foam cutter. Keep the blade vertical so the foam edge remains perpendicular to the top.
- Set the cut foam on the panel and inspect the perimeter. Trim high spots now; once adhesive is applied, repositioning becomes difficult.
The target project cuts its cushion to the seat dimensions before bonding it. The Fiskars instructions and Osborne guide likewise treat the panel as the foam-sizing reference.
Step 2: Attach the foam to the panel
- Brush or vacuum dust from the plywood and make sure the foam and wood are dry.
- Apply a spray adhesive rated for the foam, using the coverage and open time specified on its label. The worked example uses spray adhesive on the plywood.
- Lower the foam onto the panel carefully, starting at one edge and easing it down to avoid trapping a fold or shifting the alignment.
- Press across the surface so the adhesive makes contact, then allow it to set for the product’s stated time before moving to the next layer.
Spray adhesive odor is a real reason to improve ventilation, not a signal to substitute an untested glue. Some adhesives can attack foam; the label’s compatibility statement controls this step.
Step 3: Wrap and secure the batting
- Center the batting over the foam, leaving enough material on every side to pass the panel edge and reach the underside.
- Smooth the top with your hands. Remove wrinkles before fastening because a crease trapped under fabric will remain visible.
- Turn or tilt the panel and pull the batting around one side. Secure it on the underside near the lower edge, keeping the pull firm but not so tight that the foam edge becomes sharply pinched.
- Work around the panel, alternating sides so the loft stays even. At corners, make neat relief folds or trim away bulk rather than stacking a thick wad.
- Trim the excess batting close to the lower edge after it is held securely. The visible top should be continuous and smooth; the underside only needs a clean, stable wrap.
The tutorial secures the batting around the plywood with hot glue and trims it at the lower edge. A staple-based approach is also used in bench guides; whichever fastening your construction allows, keep the top wrinkle-free and reserve the underside for attachment.
Rank #3
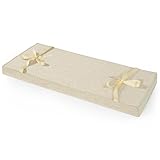
- Excellent Fabrics: Bench Cushion is made of new Polyurethane Foam and linen cover, with Good Rebound Effect,relaxing your hips; Bench cushion is mainly suitable for indoor furniture, not waterproof, try not to place it outside to avoid soaking it
- Lace-Up Design: Bench cushion comes with 4 ties keep bench cushion securely fastened to your patio furniture; If you don't need the ties, you can also choose to subtract them with scissors or other tools to match the use of your furniture;Please note that the bench seat cushion itself is not non-slip
- Versatile Design: Double stitching ensures strength under pressure, while piping adds bench cushion a sophisticated look; Internal seams designed to provide strength and longevity in the most demanding seams; The box stitch construction is both modern and classic, provides long-lasting shape retention and excellent cushion texture; The Bench cushions set comes in a solid color design and is perfect for decorating indoor furniture
- Versatile: Our bench pads are designed to fit most furniture;These bench pads come in square or rectangular shapes and are available in a variety of sizes; Bench cushion size fits most indoor bench/chair, rocking chair, dining room chair
- Note: 1.Due to differences in computer monitors, there may be a slight color difference between the actual product and your screen; 2.We compress the package for shipment; The cushions need some time to expand and will recover to its original shape after a while
Step 4: Position the fabric and establish even tension
Find the center of each side
Place the fabric face down on a clean surface and set the padded panel face down on it. Align the pattern before you make a permanent fastener. Pull the fabric over one long-side center and place a staple underneath, then do the same at the opposite long-side center. Repeat at the centers of the two short sides. This opposing-center sequence, recommended in the Osborne bench guide, distributes tension instead of pulling the cover toward one corner.
Work from the centers toward the corners
- After the four center anchors are in place, add staples a short distance to one side of a center point.
- Move to the opposite side and match the tension before adding its next staple.
- Continue alternating sides, checking the fabric on top after every few staples.
- Stop and remove a staple if a wrinkle appears. Pulling harder at the next point usually transfers the wrinkle rather than fixing it.
Keep the fabric taut enough to lie flat, but do not stretch it so aggressively that the weave distorts or the pattern leans. The goal is a smooth top with a consistent edge, not maximum force.
Step 5: Staple the cover and finish the underside
- Use the staple gun square to the plywood underside and drive fasteners near the lower edge where the trim can later cover them.
- Continue from each side’s center toward its corners, rotating the panel as needed. Leave the corner folds until the straight runs are even.
- At a corner, pull the fabric straight down, make a controlled fold that keeps bulk off the visible top, and staple the fold underneath. Trim away excess layers that would create a lump.
- Inspect the top from several angles. If it is smooth and the fabric alignment is acceptable, add any remaining staples needed for a secure, evenly spaced edge.
- Cut away loose fabric and batting below the staple line with a sharp utility blade, taking care not to cut the cover above the fasteners.
The target author reports using 1/2-inch staples in a narrow-crown stapler. That is a description of her setup, not a universal specification. Your stapler’s instructions and the panel’s construction determine the compatible staple format.
Rank #4

- 【Suitable Size for Most Chairs】Fits in spaces designed for rectangle bench seat cushions up to 42" x 16" x 4".Bench cushion is perfect for indoors or outdoors as, outdoor swing cushions, reading nook cushions, porch swing cushions, piano bench cushions and bay window seat cushions .We've got cushions in differeent colours, which are the most common and classic shades around. So, you can pick the perfect one in no time at all. Patio pads are a great way to decorate a beautiful home.
- 【Breathable Surface And Non-slip Bottom】Our outdoor chair cushion is the perfect way to relax. It is made of polyester fabric that is breathable, durable and skin-friendly.Otherwise, the bottom of the outdoor cushion is non-slip fabric, so it won't move around on your chair.
- 【High-quality Shredded Sponge】The patio cushions are filled with excellent shredded foam, which offers great support and cushioning.It can provide even support and reduce pressure on your lower back, coccyx and hips. Unlike other cushions with recycled polyester fillings, our bench cushion is designed to keep its shape for a long time.
- 【Excellent Details】The tufted design stops the outdoor seat cushions fill from moving around or bunching up, and the string ties keep the cushion attached to the furniture firmly. The piping and stitching design technology makes the cushion look better and is better suited to garden furniture, as well as being more durable.
- 【Package and Note】This vacuum-packed bench seat cushion expands to its full shape in 24-48 hours. Machine-washable for easy cleaning, or simply wipe stains with a damp cloth for daily care. Breathable fabric keeps you comfortable—just note it's not waterproof, avoid using it in rainy.
Step 6: Hide the staple edge and add decoration
Apply trim
Once the fabric is secure and trimmed, attach twill tape or another narrow trim over the staple line and raw edge. Keep the trim level as you work around the seat; it turns a utility underside into a deliberate finish. The worked project uses twill tape for this purpose.
The Tool Desk
Outbyte PC Repair FREEClear out junk files and repair common Windows errorsFree Scan →Outbyte Driver Updater FREEScan for outdated or missing drivers - takes under a minuteDriver Scan →Add nailheads only as an accent
Individual decorative nailheads can be placed along the edge after the trim is stable. Mark a consistent spacing, start at a visually important point, and check that each head sits straight. Nailheads are decorative and should not replace the staples that hold the fabric.
Independent reader supportYour contribution helps us test, update, and keep practical guides available for everyone.Fixed seat or removable cushion?
| Attachment choice | How it works | When it helps | Trade-offs |
|---|---|---|---|
| Fixed upholstery | Foam is bonded to the panel; batting and fabric are wrapped and stapled underneath, with optional trim over the edge. | Best match for the finished tutorial and for a seat that should stay in place. | Removing the cover later means taking out staples and replacing the finish. |
| Removable seat | A heavy-duty hook-and-loop fastener is placed between the cushion/panel assembly and the wood bench base. | Useful when you want to lift the upholstered panel for cleaning, storage, or a future fabric change. | The attachment method differs from the stapled tutorial, and the fastener must be positioned so the seat remains aligned during use. |
The removable approach is described in the Fiskars tutorial with heavy-duty Velcro between the cushion and wood panel. Decide on removability before trimming the underside, because the base-side attachment needs clear, accessible surfaces.
Best Value

- SIZE & PACKAGING: downluxe bench pillow cushion features a tufted design and measures 36"W x 14"D x 4"H. Please note: Due to long-term vacuum packaging during shipping, the cushion may appear smaller at first but will expand to its full size
- PREMIUM MATERIALS: The cover of the piano bench cushion is made from soft, breathable and comfortable microfiber polyester. The filling consists of 80% high-density foam and 20% polyester, offering added support for your back and tailbone
- STAY IN PLACE: The non-slip silicone bottom helps keep the cushion for bench securely in place and prevents from sliding. You won't need to adjust the bench cushion 36 inch many times and just concentrate on enjoying your life
- MULTIPLE OCCASIONS: This stylish and textured long bench cushion adds a nice touch to any room and works in many spots—like an entryway storage bench, window seat, piano bench, or cozy nook. It's a great choice for hardwood or metal-surfaced benches
- EASY CARE: The feature of the high-density foam bench pad cushion is durable and long-lasting. It is not only practical but also easy to clean, just wipe the bench cushion indoor lightly with a damp cloth and wait to dry
Choosing project-specific dimensions and hardware
| Decision | Worked example | How to adapt it |
|---|---|---|
| Plywood thickness | 3/4 inch | Use a panel that is adequately supported by your bench and accepts your chosen staples without breakthrough. |
| Foam thickness | 2 inches | Choose for the seat height and comfort you need; recheck fabric allowance whenever thickness changes. |
| Staple size | 1/2-inch staples | Match the stapler, staple crown, and combined material thickness. Test before covering the whole edge. |
| Stapler style | Narrow-crown stapler | Use the style your staples are designed for and that can reach the underside comfortably. |
| Batting fastening | Hot glue around the underside | Staples or another compatible method may be used when appropriate for your materials; keep the top smooth. |
These values belong to one completed bench, while the other project plans show that upholstery setups vary. Treat fit, support, foam compatibility, and staple penetration as the controlling checks.
Troubleshooting common upholstery problems
| Symptom | Likely point of failure | Correction |
|---|---|---|
| Wrinkle across the top | Fabric was anchored out of sequence or tension changed between sides. | Remove the nearest staples, smooth from the center outward, re-anchor opposing sides, and continue in small alternating sections. |
| Pattern drifts toward one corner | The cover was not centered before the first staples. | Pull the staples from the affected side, realign the fabric on the panel, and restart with center anchors. |
| Bulky corner | Too many layers of fabric or batting were folded under one point. | Open the corner, trim excess on the underside, refold with a single controlled pleat, and staple again. |
| Foam edge shows through | Batting is thin, shifted, or wrinkled; the foam may also be cut unevenly. | Check the foam edge before covering, smooth the batting, and keep its loft continuous over the transition. |
| Staple will not seat or breaks through | Staple type, length, crown, or gun does not suit the assembly. | Stop and test a compatible staple on scrap or an underside area. Do not compensate by forcing the gun. |
| Fabric tears at the underside | Fasteners are too close to the raw edge or tension is excessive. | Release the local staples, leave a wider fabric margin, and pull only enough to remove wrinkles. |
| Adhesive fails to hold foam | Surface was dusty, the product was incompatible, or its application/cure directions were not followed. | Remove loose material, clean and dry the surfaces, and use a foam-rated adhesive according to its label. |
Final inspection checklist
- The foam is flush with the plywood perimeter and firmly attached.
- The batting has no top-side wrinkles, exposed foam edges, or bulky corners.
- The fabric pattern is centered and the visible surface lies flat from every viewing angle.
- Staples are seated in the underside, with no sharp point protruding where the bench or hands could contact it.
- Excess fabric is trimmed cleanly below the fastening line.
- Trim, if used, covers the staples continuously and sits level around the panel.
- Nailheads, if used, are evenly placed and purely decorative.
- The completed panel fits the bench base before anyone sits on it.
Method in one sentence
Cut and bond the foam, smooth batting over it, center and cross-anchor the fabric, staple toward the corners while correcting wrinkles immediately, then trim and cover the underside edge. That sequence preserves the clean top shown in the finished project while leaving you free to change foam dimensions, staple hardware, or seat attachment for your own bench.
Quick Recap

Product prices and availability are accurate as of the date/time indicated and are subject to change. Any price and availability information displayed on Amazon at the time of purchase will apply.

